CHAPTER 17
Esthetically Driven Prosthetic Management of Osteoperiosteal Flaps
Depth is hidden on the surface.
—Hugo Von Hofmansthal
Restoration of the deficient maxillary anterior esthetic zone with osteoperiosteal flaps, especially the sandwich osteotomy and book flap, requires esthetically driven prosthetic management.1–3
Although a number of techniques are used to rehabilitate severe maxillary defects, many fail to replace teeth esthetically.4–6 Catastrophic esthetic failures often result when available anatomic limitations are accepted.7 The desire to eliminate these all too frequent unsatisfactory outcomes led to the development of the interpositional bone graft for the anterior maxilla.8,9
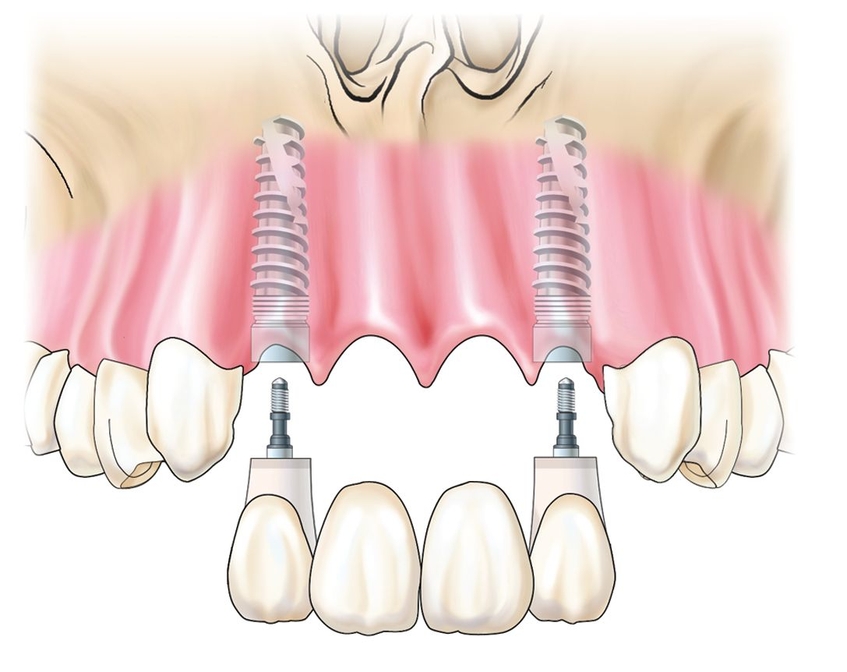
The most common presenting condition in the partially edentulous maxilla is moderate alveolar atrophy (Fig 17-1a). The most predictable esthetic grafting method for treating moderate alveolar deficiency is the osteoperiosteal flap, that is, the sandwich osteotomy bone graft, used for 4- to 7-mm vertical deficiencies, and the book flap, used for 2- to 5-mm horizontal deficiencies.10,11 The choice of which procedure to use and how far the osteoperiosteal flap is to be moved is not a surgical decision but is directed by the prosthodontist as he or she determines and targets the required augmentation for the surgeon based on the esthetic control cast (see chapter 18).
The predictability of long-term soft tissue levels is directly related to the stability of the osseous foundation. Soft tissue augmentation alone may achieve height but leads to the presence of deep gingival sulci. Flat-platform implants used in flat osseous sites are acceptable for that type of anatomic configuration, but the anterior maxilla is typically thin, even knife edged, which may force the surgeon to place implants too deeply. Therefore, to avoid biologic and prosthetic complications, the grafting scheme must provide sufficient osseous width and height if standard implants are to be placed.
 Treatment Planning
The partially edentulous patient presents with flat or even reverse alveolar architecture, having lost scalloped hard and soft tissue anatomy in which to integrate standard-platform implants. Implant placement 2 to 3 mm below the facial free gingival margin in a vertically deficient alveolar process requires that bone be moved by osteotomy so that scalloped emergence form becomes achievable. This is accomplished by deliberate overaugmentation to allow excess bone to be sculpted back to a scalloped conformation. Implants that are placed too deeply lead to excessive probing depths while implants that are placed too superficially without scalloping have no emergence esthetics, so overgrafting is key to esthetic success.
Perhaps the most esthetically challenging restoration is the maxillary central incisor–lateral incisor edentulous site. The challenge facing the prosthodontist is to recreate an esthetic restoration for adjacent implant-supported crowns. This is nearly impossible without overcorrection during augmentation procedures.9
Although consideration should be given to the use of one-piece implants, which theoretically result in less “die-back” of interimplant bone, adequate implant insertion torque cannot always be achieved in bone graft settings to allow immediate provisional restoration.10 Because the implant restoration should follow a scalloped architecture as much as possible, the use of conventional implant platforms adds to the challenge. The use of sterile biocompatible abutments placed on the day of surgery, never to be disconnected,11 helps to maintain hard and soft tissue levels when one-piece implants12 or scalloped implants13 cannot be placed.
Given the difficulty of providing immediate loading in augmentation sites, the focus must instead be on the prosthetic procedures used to assist the surgeon in determining the target for optimal augmentation, subsequent implant positioning, and follow-up soft tissue procedures. The prosthodontist, through the use of the esthetic control cast, establishes provisional prostheses and templates that the surgeon uses at the time of augmentation, implant placement, and uncovering. Optimally, a provisional restoration is placed at the time of implant placement whenever immediate loading is possible (Fig 17-1b).
With vertical distraction of a maxillary anterior segment, the sandwich and book flap interpositional grafts provide alveolar augmentation in such excess that the site must be back-cut or the provisional cannot be placed (see chapter 18). This retrofitting process, more than any other procedure, establishes esthetic gingivoalveolar emergence.
 Laboratory Planning
The restorative protocol begins with a thorough smile analysis that helps to define interrelated deficient elements. 7,13–17 Casts are mounted on a semiadjustable articulator, and then a diagnostic wax-up is fabricated (Fig 17-1c; also see chapter 18). An intraoral mock-up appointment follows to fine tune the tooth shape and arrangement. The accepted tooth replacement then dictates the free gingival margin for future restoration and, by inference, implant platform level.
Anatomic implant placement for each implant site is created presurgically on the cast (Fig 17-1d). The coronal aspect of the teeth to be replaced is carved first, by following the desired free gingival border buccally, lingually, and interproximally. Ovate pontic sites are then created by carving an ideal soft tissue sulcus; typically, this means limiting the depth of the sulcus to 2 to 3 mm from the free gingival border. Implant position precisely dictates the quantity of osseous augmentation desired. Once completely modified, this cast will be used to fabricate the surgical template, which provides a target for this optimal bone level, and to fabricate the provisional restorations prior to surgery.
 Implant Template
The surgical template for implant placement is fabricated from mounted casts.18–20 A cast-based guide is used in deference to computerized technology.21 Implant analogs can now be safely positioned within their respective sites (Fig 17-1e). Care is taken to allow at least 2.0 mm from the facial limit of the implant to the desired facial aspect of the soft tissues, 1.5 to 2.0 mm from implant to tooth, and 3.0 to 4.0 mm between adjacent implants. This series of mathematic calculations can easily be used to assist in the decision-making process regarding implant diameters.
The implant analogs can be secured using rapid-setting plaster, acrylic resin, bis-acryl, or even rigid elastomeric impression material, typically by creating a visual access at the opposite side of the cast in an apical direction. The implants can be moved and set in a better position as many times as necessary. The objective is for this cast to create a true blueprint of the desired result. Care is taken to block out any and all voids around the implant analogs to prevent acrylic resin from flowing into undesirable undercuts later.
Guided components include the abutment template, the guided sleeve, and the pin screw. The guided sleeve will be incorporated within the surgical template, and the surgical burs (tissue punch, osteotomy, thread formers, and implant mounts) will be inserted through the sleeve according to the selected guided protocol. The pin screw secures all guided components to the implant analog. The guided components are positioned on their respective implant analogs (Figs 17-1f and 17-1g). After polymerization of the template, the abutment template and pin are removed, and the template is contoured and polished (Fig 17-1h). Great care must be taken not to alter the guided sleeves. The coronal aspect of the sleeves (which are kept free of the acrylic resin material used to fabricate the template because the pin components are covering them protectively) is the surface on which the calibrated surgical burs will stop. The prefabricated sleeves must remain intact.
Case 1: Edentulous osteoperiosteal flap

Fig 17-1a The maxillary right central and lateral incisors are missing, and the alveolar ridge is moderately deficient. Orthodontic treatment will be completed after final minor tooth movement.
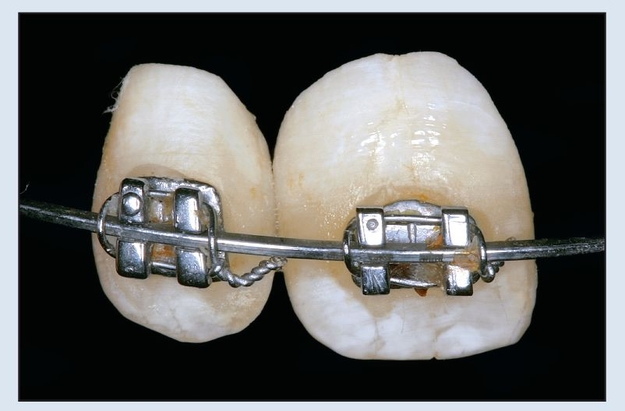
Fig 17-1b Denture teeth are used for provisional tooth replacement. Orthodontic brackets are bonded to the facial aspect.
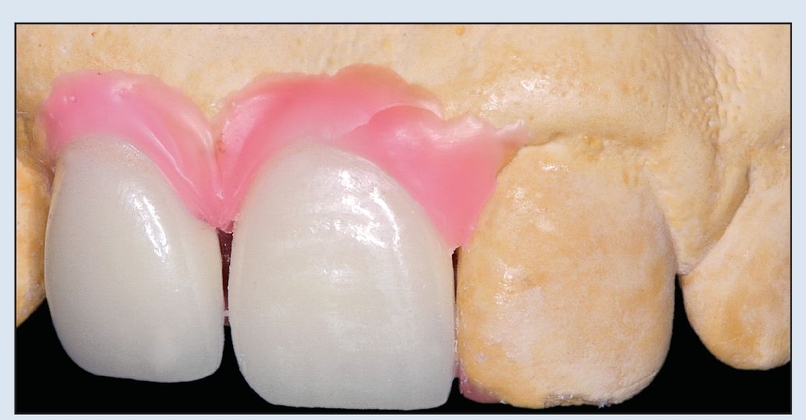
Fig 17-1c In the anatomically and esthetically correct diagnostic waxup, pink is used to recreate missing soft tissues, and denture teeth or tooth-colored wax are used to replace coronal tooth structure. This esthetic control cast is duplicated to create a solid cast of the proposed reconstruction.
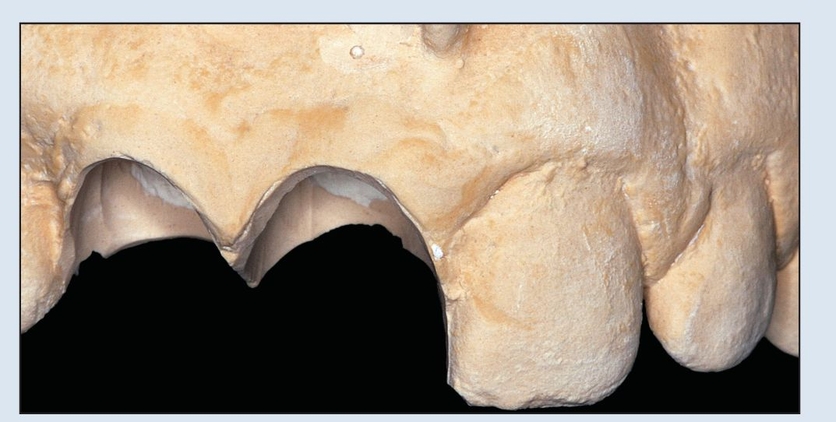
Fig 17-1d During laboratory surgery on the cast, a marginal sulcus depth of 3 mm is determined; this in turn dictates the coronal aspect.
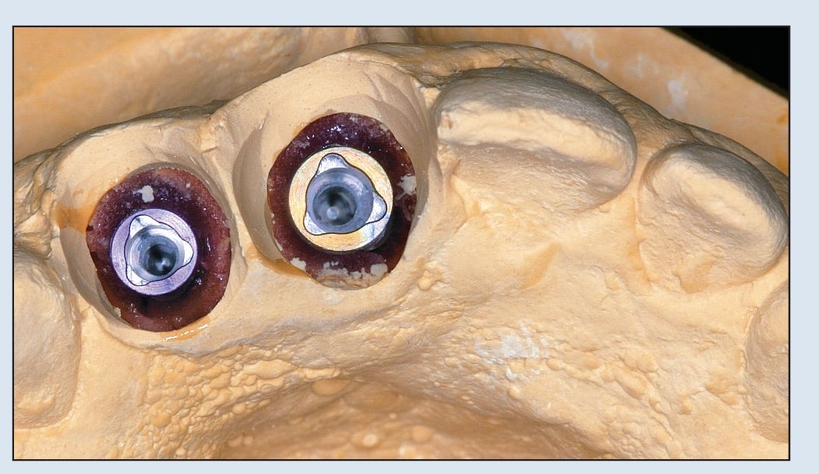
Fig 17-1e Once the ovate pontics are carved, virtual osteotomies are performed at each desired implant site, and implant analogs are positioned within their respective sites.
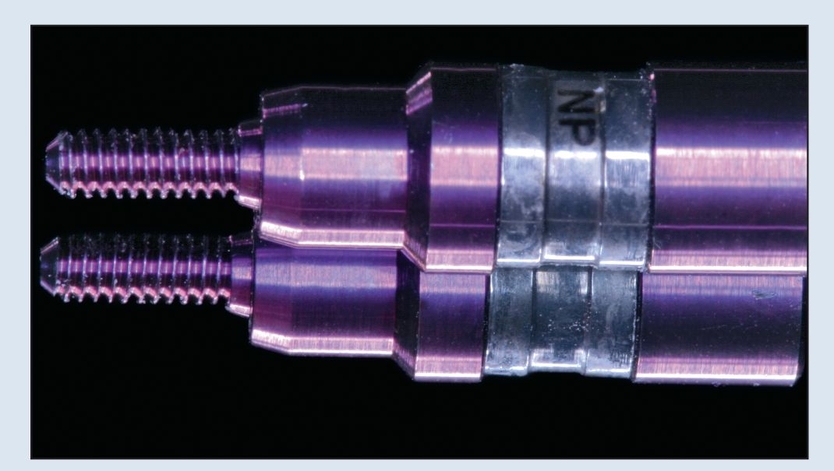
Fig 17-1f Pin screws are part of the pin component, securing all guided components onto the implant analog; they are color coded to match the desired implant diameter.
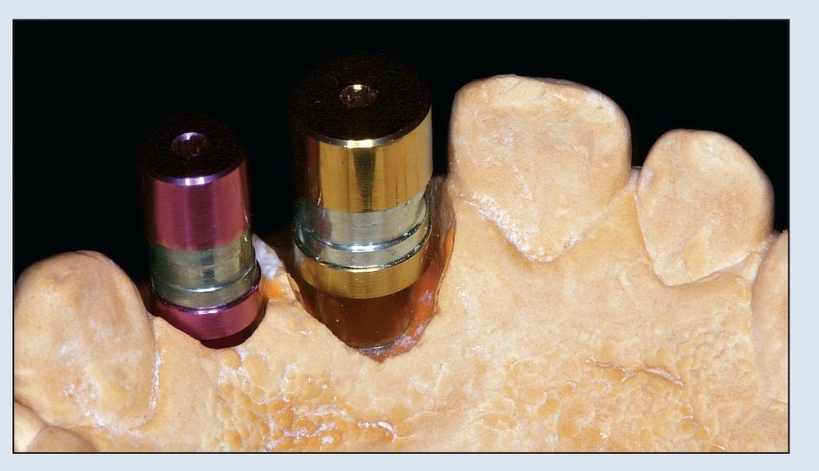
Fig 17-1g Guided components are in position on their respective implant analogs. A plastic material of choice will be applied to the incisal and occlusal surfaces of the adjacent teeth as well as on and around each of the guided sleeves.

Stay updated, free dental videos. Join our Telegram channel
VIDEdental - Online dental courses


