Simulates craze lines
Decreases value or brightness
Simulates craze lines
Simulates enamel hypocalcifications; white spots
Masks yellow spots
Enhances vitality
Masks blue tetracycline stains
Yellow and yellow-brown
Yellow and yellow-brown shades are most often used in the cervical third of the crown (Fig. 4-1). Sometimes they are used along proximal surfaces to create the illusion of narrowness (see Chapter 2).
They can also be used to simulate craze lines. Because yellow is the complementary color of violet, it is effective in neutralizing and masking blue-gray tetracycline stains (see Chapter 2). Yellow can also be used in combination with white to mask brown tetracycline stains.
Blue, gray, or violet
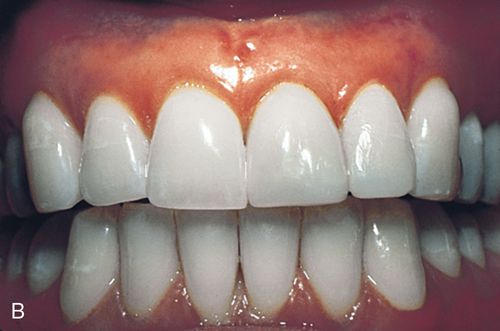
Blue, gray, or violet shades are used on the incisal third of the tooth to simulate translucency (compare Fig. 4-2). They can also be used to reduce value (brightness).
White
White is used to increase the value (brightness) of any color modifier. It can be effectively used to simulate craze lines and enamel hypocalcifications (Fig. 4-3) and to mask yellow stains (Fig. 4-4).
Red or pink
Red or pink simulates gingival tones, enhances vitality, and can neutralize blue tetracycline stains (see Chapter 2).
Class III and class IV restorations
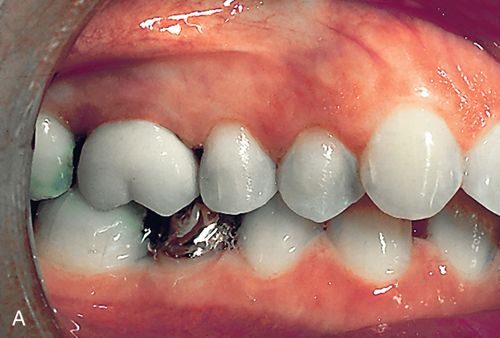
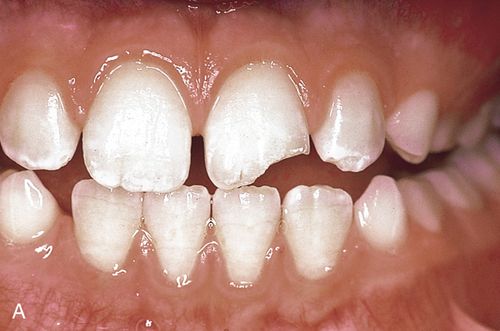
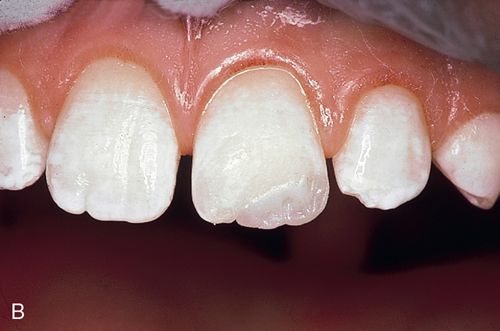
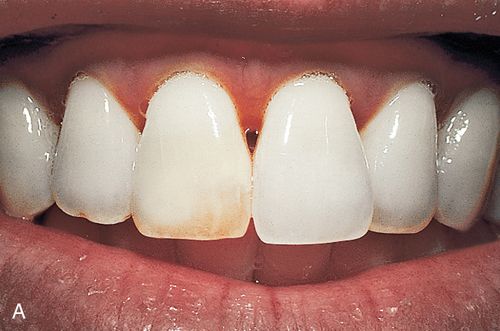
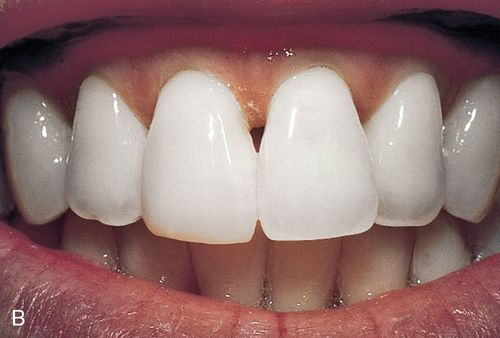
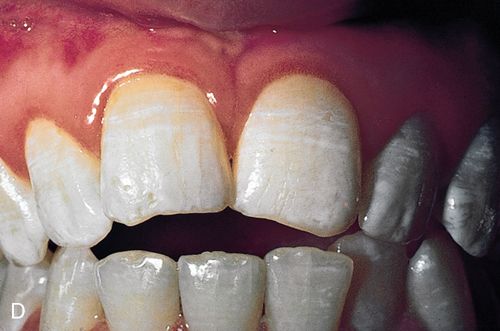
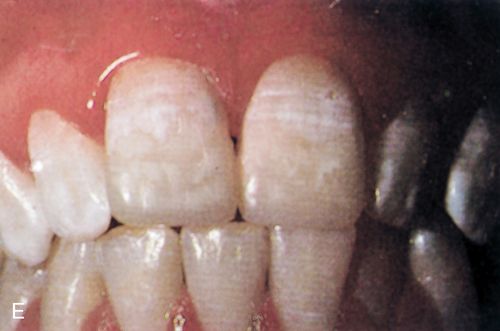
Truly “invisible” Class III and Class IV restorations are possible only through proper cavity preparation in conjunction with proper color matching (Fig. 4-5). Blending the color of the restorative resin into the color of the tooth is essential. Color modifiers are indispensable in fine tuning the definitive color.
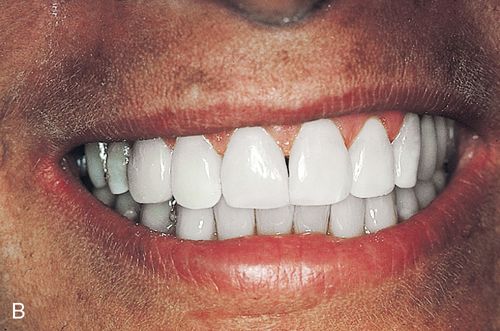
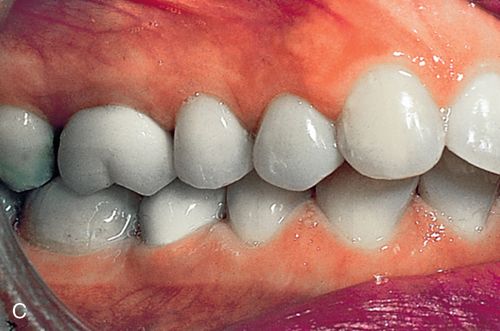
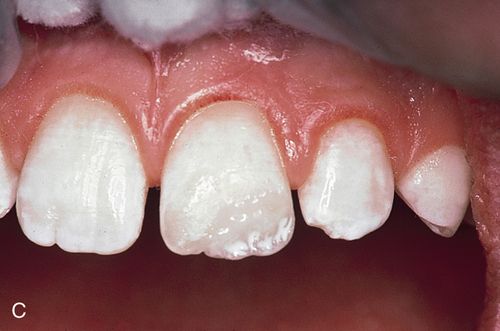
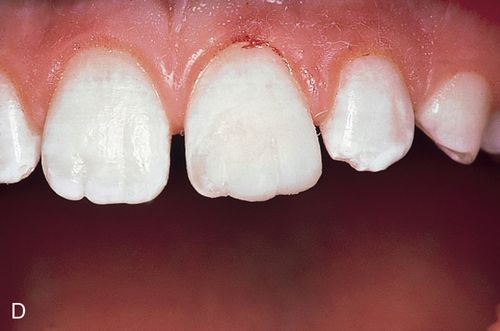
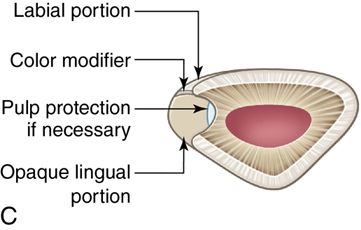
In Class III or Class IV cavity preparations involving a through-and-through loss of both the facial and lingual enamel, the definitive restoration can exhibit undesirable “shine-through” (Fig. 4-5 C).
This shine-through occurs because the missing lingual tooth structure is replaced by a composite resin that is more translucent than the original dentin. The result is a visible outline of the restoration. Shine-through can be prevented by careful cavity preparation, the judicious use of color modifiers and opaquers, and a “sandwich” of various types of composite resins.
Armamentarium.
• Standard Composite Resin Restoration dental setup
• Wooden or plastic wedge (optional)
• Assorted round carbide dental burs
• Flame-shaped, tapered, and ovoid coarse diamonds for cavity preparations.
• Bonding agent of choice (see Chapter 3)
• Composite resin placement instruments (e.g., 8A, Hu-Friedy Mfg. Co., LLC; #8, Brasseler USA; IPC-I, Premier Dental Products, Inc.; Goldstein Series 1-4 and mini 1 and 3, Hu-Friedy Mfg. Co.)
• Hybrid composite resin of choice (see Chapter 5)
• Microfilled composite resin of choice (see Chapter 5)
• Diamond finishing burs (e.g., ET-9-Carbide – Diamond and ET-OSI ovoid carbide burs; Brasseler USA OR Carbide Flame H246-009 – Premier Dental Products)
• For microfilled composite resins, low-speed, water-cooled diamond burs are best for trimming and finishing. For small-particle hybrid composite resins, high-speed tungsten carbide burs and low-speed, water-cooled diamond burs are recommended.
• 12-fluted carbide finishing burs (e.g., ET-9-Carbide and ET-OSI ovoid carbide burs; Brasseler USA OR 2015153 (Fine) – Premier Dental Products)
• Finishing and polishing disks (e.g., Sof-Lex, 3M ESPE; Super Snaps, Shofu Dental Corp.; or Flexi-Discs, Cosmedent, Inc.)
• Finishing and polishing strips
• Metal backed (e.g., Compo Strips, Premier Dental Products, Inc.) or plastic backed (e.g., Soft Lex, 3M ESPE; Flexi Strips, Cosmedent, Inc.; Jiffy diamond strips, Brassler USA)
• Polishing Kit (EP200 Esthetic Polishing Kit, Brasseler USA)
• Rubber wheels, cups, and points containing abrasives
• Medium-grit rubber wheels for prepolishing (e.g., Burlew, Jelenko), or complete systems (e.g., CompoMaster/ CompoMaster Coarse Polishers, Shofu Dental Corp.; OR Astropol , Ivoclar Vivadent; ET Illustra Composite Polishers, Brasseler USA; Venus Supra Polishing System Heraeus Kulzer Inc., USA; Top Finisher System, Cosmedent, Inc.; Enhance Finishing System L.D. Caulk Co.
• Composite resin polishing paste (containing aluminum oxide)
• Dry felt wheel (Felt Wheel Keystone, Inc.)
• Padded discs (e.g., Flexi Buffs, Cosmedent, Inc.)
Clinical technique.
1. Administer anesthetic (optional).
2. Cleanse the tooth and neighboring teeth with pumice.
3. Determine the appropriate shade while the teeth are wet with saliva.
4. Isolate the lesion with a rubber dam.
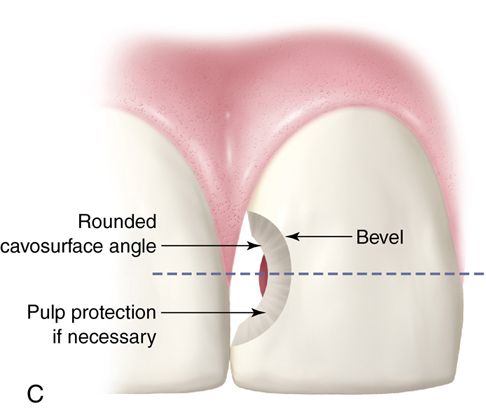
5. Prepare the cavity in a conventional manner (Fig. 4-6 A).
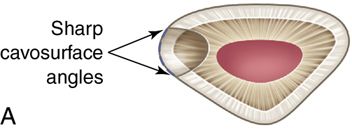
6. Round the cavosurface angle and place a long bevel to create an invisible transition from resin to tooth (Fig. 4-6 B).
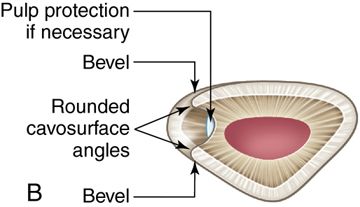
7. Place a pulp protection as necessary. Place dentin-bonding agent according to the manufacturer’s instructions.
8. To prevent “shine-through,” place a more opaque hybrid composite resin in the lingual portion of the preparation.
9. Build up the resin to the level of the original dentoenamel junction.
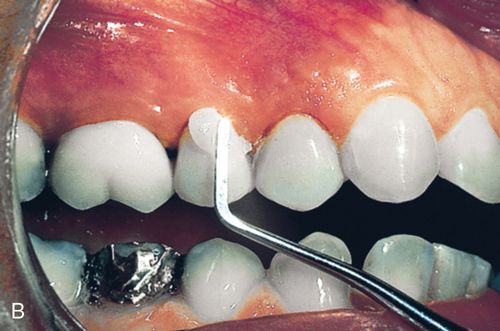
10. If necessary, place custom tinting resins over this layer and blend the background color of the resin with the color of the tooth (Fig. 4-6 C).
11. To complete the restoration, fill the remaining facial portion with a translucent microfilled composite resin.
13. Prepolish the restoration with rubber wheels or cups.
14. Smooth with a microfine diamond in a low-speed handpiece with water cooling.
Diastema closures
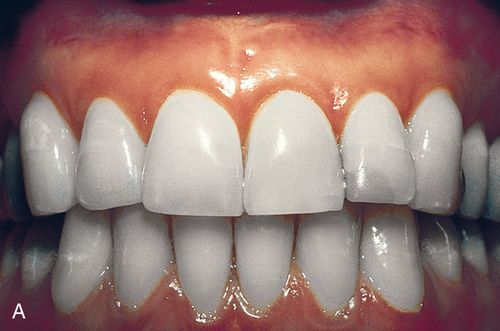
A microfilled composite resin is the material of choice for diastema closure because of its excellent polishability and enamel-like luster (Figs. 4-7 A and B). If the diastema is very large, the lingual surface of the composite resin could be subjected to high functional stress in patients with heavy centric contacts. In these situations, the dentist may elect to use a hybrid composite resin for the entire restoration or a hybrid on the lingual portion overlaid on the facial surface with a microfilled composite resin. Shine-through is usually not a problem in diastema closure because of the labiolingual thickness of the add-on composite resin in the body area of the clinical crown. In many situations some translucency is desirable because the composite resin thins out at the incisal edge. If shine-through is a problem, follow the procedure described for the Class III and Class IV restorations.
Stay updated, free dental videos. Join our Telegram channel
VIDEdental - Online dental courses


