Fig. 6.1
The Frog appliance with trenching on the palatal side of the Nance button to allow insertion past the TSADs
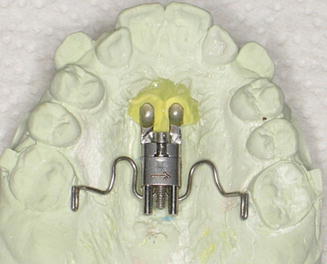
Fig. 6.2
The Nance button version of the Frog using Triad gel
6.2 Fabrication of the TSAD-Supported Frog with OrthoEasy Abutments
The “Skeletal Frog” was introduced in 2011 [7]. There are some modifications necessary when using OrthoEasy abutments to attach to the TSAD anchors. First of all, the TSADs are placed slightly farther apart (but still near the midline) to allow placement of the abutments without interference. If the TSADs are too close together, it becomes necessary to modify the abutments so they can be in place simultaneously. Also, the TSADs should be as parallel as possible for easier insertion of the finished appliance. After the bands are cemented and the TSADs are in place, the abutments are placed on the TSADs. A light coating of petroleum jelly inside the abutments will prevent them from slipping off the TSADs before taking the impression. The abutments should come off with the impression as it is removed from the mouth. Analog TSADs are placed in the abutments that are now in the impression. The analogs and abutments are secured in the impression using a small amount of sticky wax. Care should be used when pouring the stone model to prevent the abutments and analog TSADs from dislodging from the impression. After the model has hardened, the abutments are removed from the impression and placed on the analogs. The body of the appliance is then positioned on the model and soldered to the abutments. The spring is adjusted as described earlier and the appliance is ready to deliver to the patient (Fig. 6.3). An advantage of the OrthoEasy abutments is the elimination of accumulating plaque and debris from under the acrylic Nance button [7].
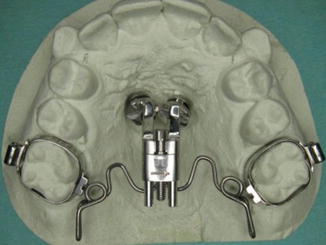

Fig. 6.3
The “Skeletal Frog” using OrthoEasy abutments (Photo courtesy of Dr. Bjorn Ludwig)
6.3 Appliance Delivery
Delivering the appliance is relatively simple. The Nance button Frog appliance is tried in initially to be certain that the appliance will seat properly over the TSADs. If the appliance does not insert and seat smoothly, the “trenching” on the palatal surface may require modification. Once the appliance is in place, the Nance button can be lifted slightly off the palate with a scaler or explorer. A small amount of light-cured acrylic gel is placed over the TSADs, and the Nance button is then held in place over the TSADs using light pressure. Any excess acrylic can be wiped off with a cotton roll before light curing the appliance to fix it in place. The appliance is now ready for activation (Fig. 6.4).
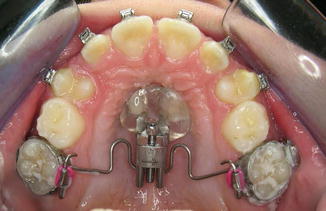

Fig. 6.4
The Triad gel version delivered and ready to be activated
The OrthoEasy Frog appliance is also tried in to be certain that it seats properly. Depending on how parallel the TSADs are, it may be necessary to adjust the heads of the TSADs to allow parallel insertion of the abutments. When the appliance is ready for insertion, a small amount of self-curing composite is placed inside the abutments and placed over the TSADs. Any excess should be removed immediately. Once the composite is fully cured, the appliance is ready for activation (Fig. 6.5).
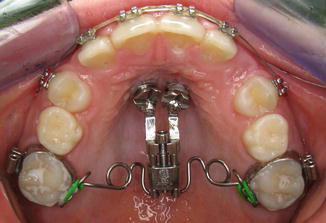

Fig. 6.5
The “Skeletal Frog” delivered and ready for activation (Photo courtesy of Dr. Bjorn Ludwig)
6.4 Activating the Appliance
A laser-etched marking on the head of the activation screw aids the clinician in confirming activation (Fig. 6.6). Each 360° turn of the screw provides 0.4 mm of activation. Typical activation is 3 turns (1.2 mm) per month or 5 turns (2 mm) per 2 months. If desired, the spring can be removed and adjusted.
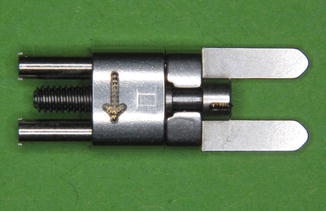

Fig. 6.6
Laser etching on the head of the screw is used to confirm activation. The laser etched arrow indicates the proper direction of activation (Photo courtesy of Dr. Bjorn Ludwig)
6.5 Case Selection
Stay updated, free dental videos. Join our Telegram channel

VIDEdental - Online dental courses


