
Careful Appliance Removal, Then Retention Will Improve Stability
A specific retention plan that incorporates sound retainer design, a reasonable time sequence, and resolution of the third molars will improve the chances for long-term stability.
Appliance Removal
The long-anticipated day finally arrives—the day the appliances are removed. It is a day of celebration. This appointment can be a positive, memorable occasion for all concerned.
First, the brackets are removed with direct bond remover pliers (Fig 19-1), and bands are removed with posterior band removal pliers (Fig 19-2) (Hu-Friedy). The use of special magnifying eyeglasses during debonding procedures is strongly recommended (Fig 19-3). These magnifying loupes enlarge the area and enable the practitioner to better perform the necessary tasks, and they provide eye protection. They can also be used to great advantage (regardless of age) when brackets are bonded and when interproximal enamel reduction is performed.
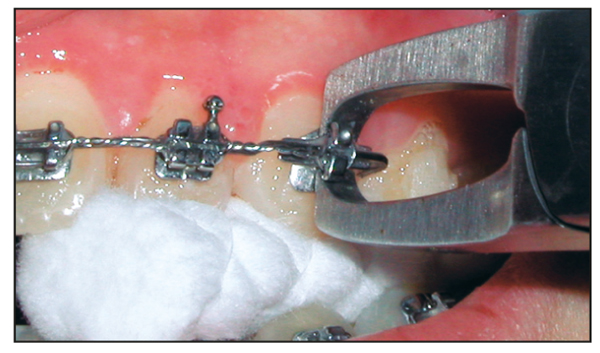
Fig 19-1 Removal of brackets with direct bond remover pliers. Gently squeeze pliers until the bracket “snaps” off the tooth. Note that the archwire remains engaged during this procedure.
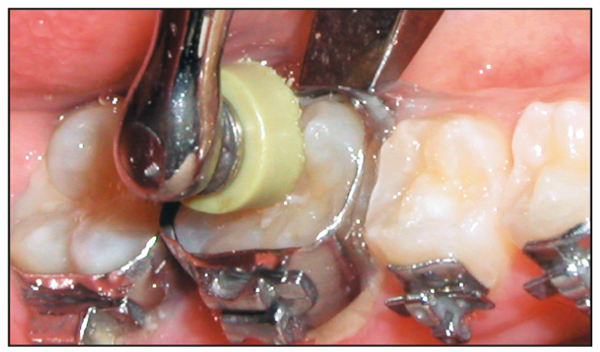
Fig 19-2 Removal of bands with posterior band removal pliers. Loosen first from the buccal surface, then complete the removal (if necessary) from the lingual.
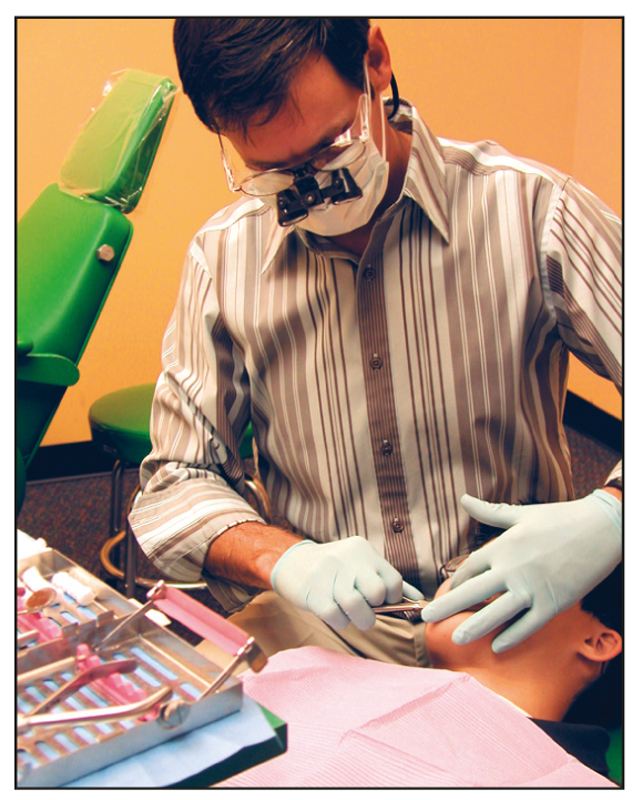
Fig 19-3 Use of optic loupes during debonding procedures. Magnifying loupes are strongly recommended during the removal of excess adhesive and stain from the labial surface of the enamel.
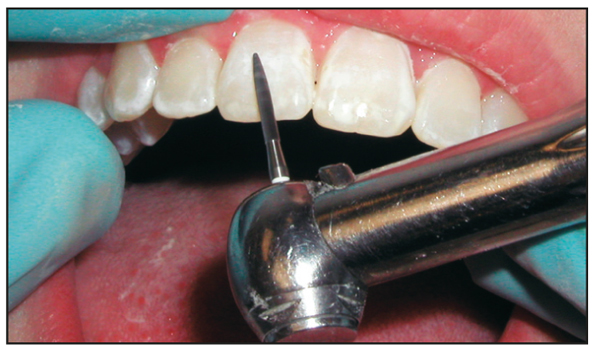
After the brackets are removed, the excess adhesive is removed with a multifluted carbide finishing bur in a high-speed handpiece (Fig 19-4). Polishing cups are then used to remove any stain and to polish the enamel Fig 19-5).
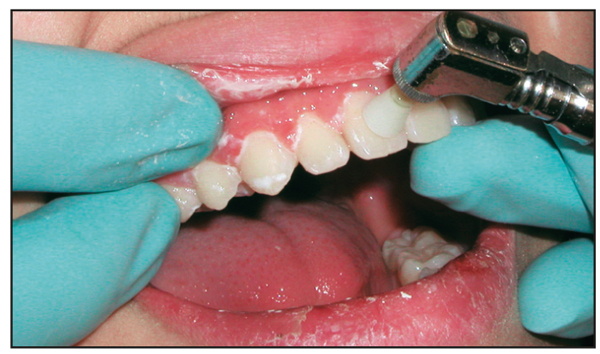
A diamond bur is used to provide some artistic recontouring and to align the uneven incisal edges of the anterior incisors. The diamond is also used to even the lingual surfaces of the mandibular six anterior teeth in preparation for the bonded canine-to-canine (3 × 3) retainer (Fig 19-6). This technique is also helpful in reducing bonding failure.
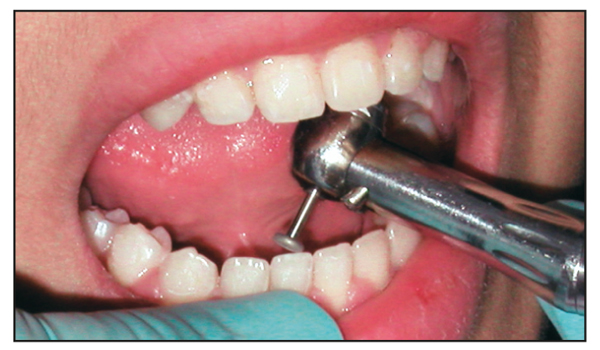
Fig 19-6 Use of a diamond bur to roughen the lingual surfaces of the mandibular anterior teeth in preparation for the fixed retainer.
Posttreatment Review
Before the patient is dismissed, the parents are asked to come in to discuss the patient’s treatment results. A comparison is made between the original study casts and photographs and the current results. This is a special occasion to celebrate the completion of active treatment.
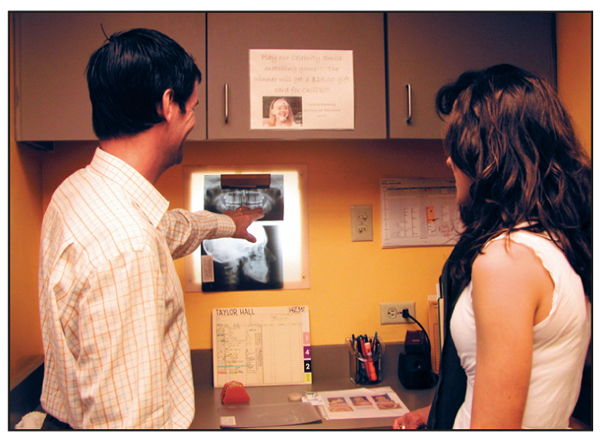
The posttreatment panoramic radiograph is used to evaluate and discuss the third molars (Fig 19-7). When the third molar issue is addressed at the end of active treatment, unnecessary parental concerns can be eliminated. At this time, any frustrations encountered by the doctor and patient during treatment are forgotten. The clinician emphasizes that the important fact is that doctor, patient, parents, and staff have all succeeded.
Appropriate congratulations are then bestowed by the doctor on the patient and parents. Special recognition is given to the “unsung heroes,” the parents who paid for treatment, car-pooled, fussed, and otherwise saw to it that the patient followed the rules. The patient is reminded of this by the orthodontist. Often, patients or parents will start crying. It is a very emotional time for everyone.
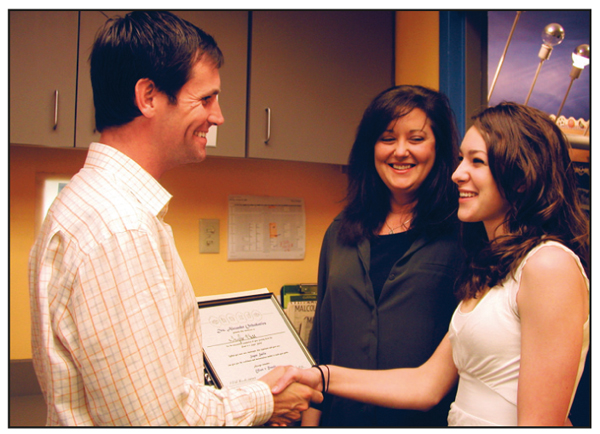
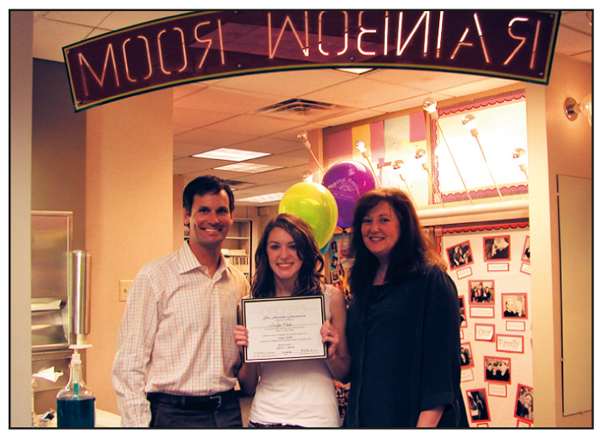
The patient then receives a “Super Smile Award,” which is an orthodontic diploma (Fig 19-8). The orthodontist states, “On behalf of the entire staff, it gives us great pleasure to inform you that you’ve graduated from braces. Just so you never forget this wonderful experience, here is your graduation diploma.” This diploma contains the words, “The end of the road and a new beginning for [patient’s name inserted].”
The text also reminds the patient that he or she has crossed the finish line as a winner. The patient and parents are then brought to the main operatory where they are given balloons, candy, and bubble gum. A photograph is then taken for the patient’s scrapbook (Fig 19-9), and a duplicate photo is placed on the bulletin board for other patients to admire.
Retention
As the name implies, the purpose of retention is to “retain” the teeth in their finalized positions. Over the years, many retainer designs and retention techniques have emerged as the profession attempts to discover the ideal retainer. Actually, there is no one design that is perfect for all patients. A retainer for the mixed dentition may differ from one for the permanent dentition. Some patients, for special reasons, may need permanently bonded retainers. Some special cases may require a positioner.
In our office, the vacuum-formed invisible retainer is used only as a provisional appliance. This design is fast and inexpensive to produce. The major problem with this approach is that, when the teeth shift slightly, the retainer will no longer fit. The retainer may cause so much discomfort when the patient places it in the mouth that the patient will stop wearing it. Also, this type of retainer is less durable. The material can wear, chip, and crack.
In years past, I have used positioners in specific cases where I wanted to achieve a result closer to ideal or sometimes for open bite patients. These positioners are worn for approximately 3 months before regular retainers are delivered.
Chapter 14 of The Alexander Discipline1 describes the basic concepts still used today for retention. The goal of retention is to design a retainer that will hold the teeth in approximately the same position that they occupied at the end of treatment, while allowing them to “settle” into their own physiologically balanced positions.
Principle 18 discussed the phenomenon of “driftodontics.” This is the uninhibited, mesiodistal self-movement of teeth into extraction spaces. Similarly, when all appliances are removed from the teeth, there will be “vertical” driftodontics. If unencumbered, maxillary and mandibular teeth will move vertically until they reach contact with each other. This settling-in effect will give the patient a more ideal posterior occlusion.
No matter how precise the bracket placement or the use of finishing elastics, occlusal forces will continue to move the teeth into more physiologic positions if the retainer design allows this to happen. Retainer wires that cross the occlusion will prevent the teeth from settling, so this retainer design should be avoided (Fig 19-10).
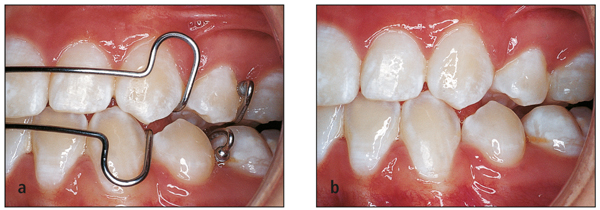
Fig 19-10 (a) Retainer design showing wires crossing over the occlusal surfaces. (b) When the retainer is removed, note the spacing caused by the retainer wires. When the teeth settle in, the retainer will no longer fit.
Maxillary retainers
Stay updated, free dental videos. Join our Telegram channel
VIDEdental - Online dental courses


