
Figure 7 The clasp patterns are next placed into position. They are first coated with tacky liquid on the tissue surface and are then adapted to the tooth. The tip of the clasp is always adapted first.
Figure 8 The clasp arm is placed in position.
Figure 9 The excess clasp pattern is removed with a warm spatula.
Figure 10 The clasp patterns have all been placed on the investment cast. The finish line between the abutments on the right side is produced by freehand waxing. An excess of inlay wax is placed in the area and is carved to proper contour. The finish line is placed with a sharp instrument as is shown in this illustration.
Figure 11 The finish line and plastic retention have been completed on the right side. Note the proximity of the bar clasp to the plastic retention on the left side.
Figure 12 The clasp patterns are joined and the occlusal rests are formed with blue inlay wax. With experience, you will learn the correct temperature at which the wax must be used. If the wax is too hot, it will flow over the surface of the cast. When this occurs, the excess must be removed without marring the cast.
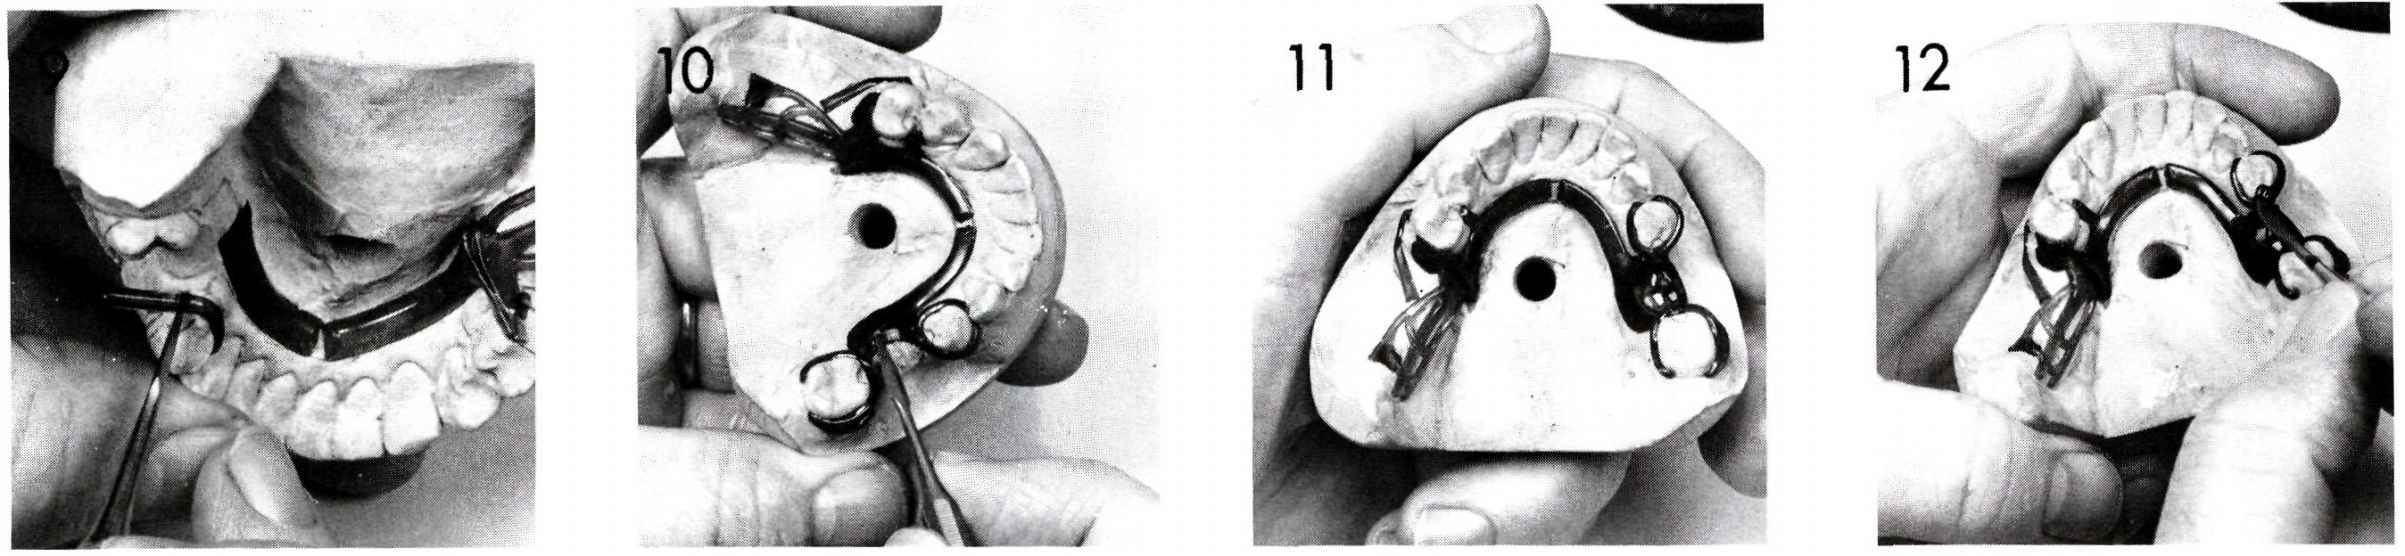
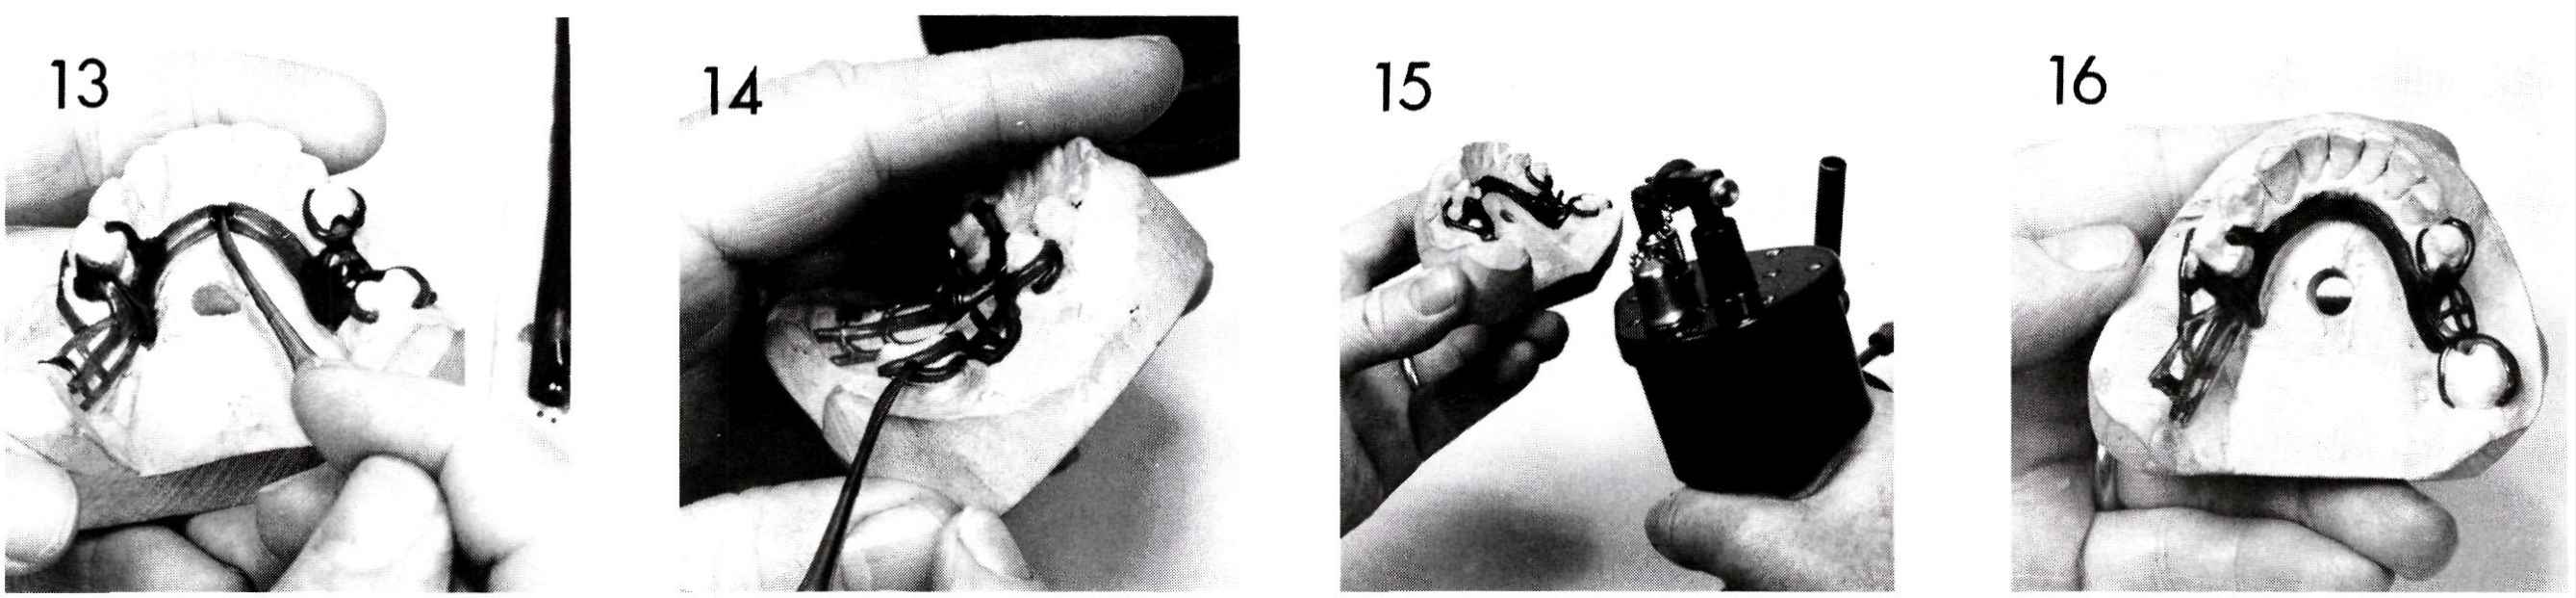
Figure 13 The areas between the lingual bar patterns are joined with blue inlay wax. Note that a stick of inlay wax has been attached to the tongue blade. This method keeps the inlay wax at hand and keeps it clean.
Figure 14 The joints between the clasp arms on the reverse action clasp are joined similarly. Note that the reverse action clasp has been formed by using two separate clasp patterns. It is impossible to make this clasp properly by attempting to bend one clasp pattern on itself.
Figure 15 The completed wax pattern is flamed lightly with a Hanau torch to smooth the wax. This flaming is light and fleeting; otherwise, the surface of the plastic patterns will melt. Excessive flaming also causes the inlay wax to flow over the surface of the cast. After flaming, finish lines made in inlay wax may need to be redefined.
Figure 16 The completed mandibular partial denture pattern. It may be necessary to seal the edges of the lingual bar pattern to the cast. This is particularly true in the area of the internal finish line.
Stay updated, free dental videos. Join our Telegram channel
VIDEdental - Online dental courses


