
Figure 5 The wax is flowed into position with a warm spatula after the wax has been dripped onto the denture base.
Figure 6 An alternate method of placing wax on the denture base is to soften the entire stick of baseplate wax and to mold this into place with your fingers. Some people believe that this method causes less distortion than the “drip-on” method.
Figure 7 This drawing illustrates the addition of wax to the denture base. The objective of either the “drip-on” or “press-on” method is to add a sufficient bulk of wax to the denture base which can then be carved to the proper contours.
Figure 8 These cross-sections illustrate the proper shape of a denture base. The objective is to reproduce natural contours and to aid retention. The cross-sections are arranged in the same order as indicated on the casts in the upper left line drawings.
The anterior portion of the maxillary denture base replaces tissue lost through resorption (Figure 8, t). This portion of the denture base is not heavy unless there has been extensive bone loss. Excessive thickness or “plumpers,” usually indicates improper placement of the anterior teeth. “Plumpers” are indicated in some instances such as paralysis of the lip resulting from disease or surgery.
The maxillary denture is shaped so that the borders are rounded. The wax is contoured so that the width of the borders as recorded in the impression is preserved in the denture (Figures 8, u, v).
The contours of the mandibular denture aid in its retention. In the anterior region (Figure 8, w), the facial surface is relatively straight. The lingual surface slopes to the lingual border and is relatively straight.
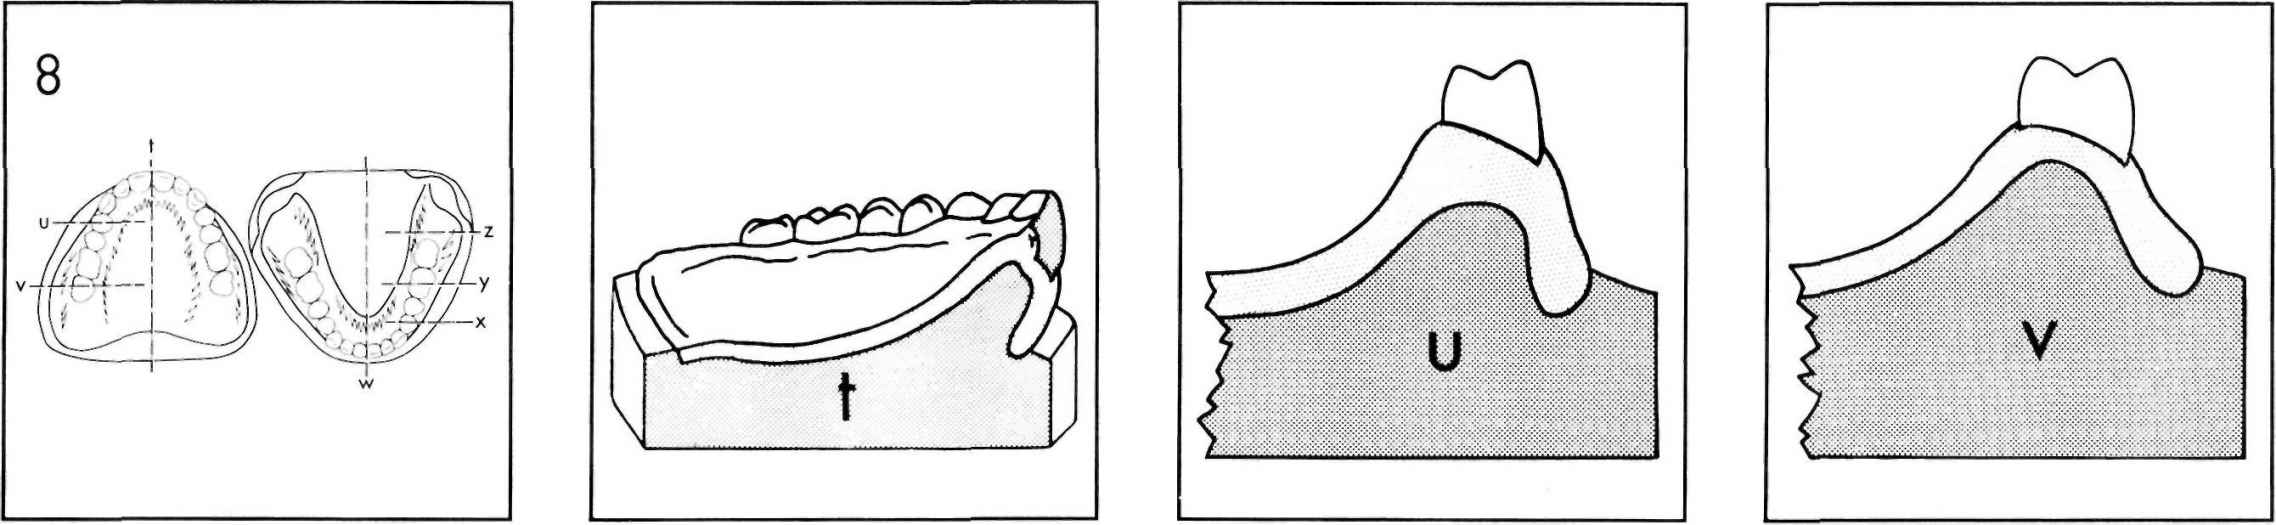
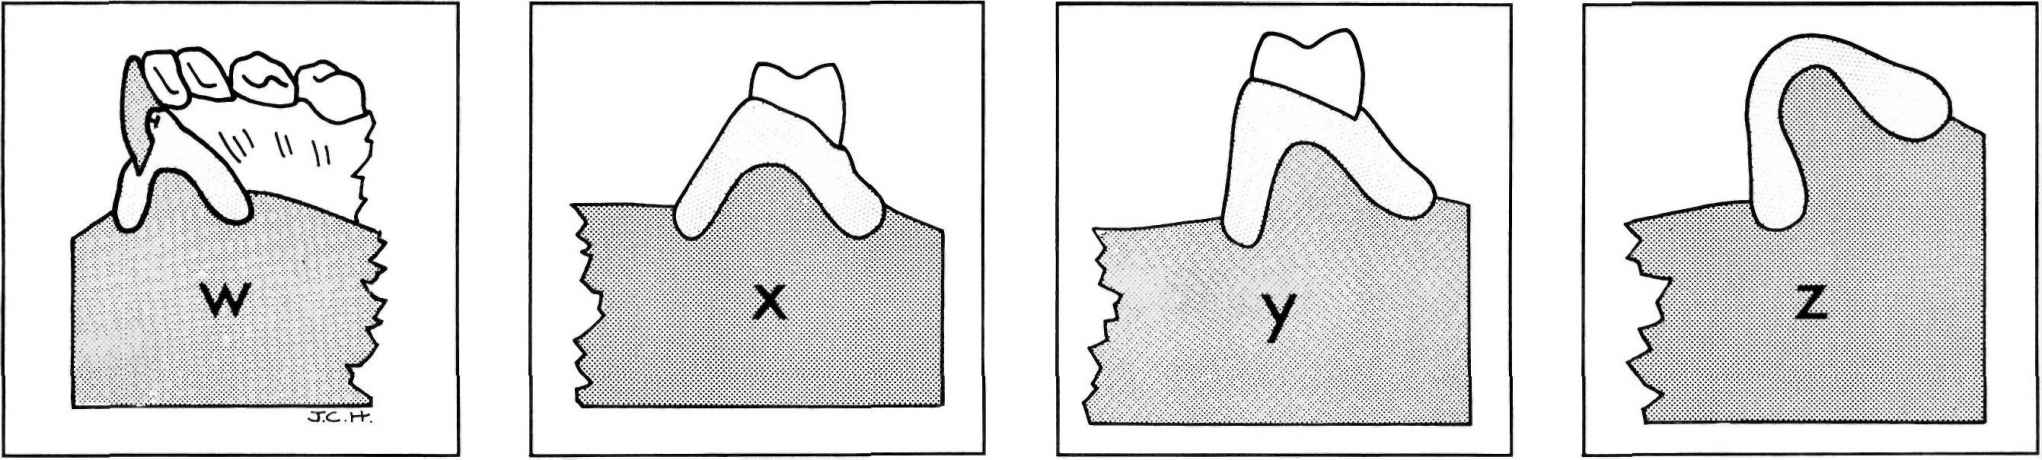
In the posterior region, the facial surface faces upward and outward. This contour allows the buccinator muscle to lie against the denture (Figures 8, x, y, z). The lingual surface in the premolar and molar region is a straight surface from the gingival cuff to the lingual border (Figures 8, x, y). (A concave surface in this area provides a space for the tongue to “catch” and lift the denture unintentionally.)
The lingual surface posterior to the second molar dips into the retro-mylohyoid region and faces downward and inward. This area is contoured so that it dips under the base of the tongue and is thinned so that it does not interfere with normal tongue movements (Figure 8, z).
STEPS TO BE FOLLOWED IN CONTOURING WAX DENTURE BASES
Figure 9 A sharp instrument, such as a Roach carver, is used to cut the wax back around the teeth. The wax is cut back to the cervical line on the artificial tooth, or, if gingival recession is to be simulated, a little beyond the cervical line. Failure to cut the wax to the cervical line will result in the teeth appearing too short and will also result in having the teeth fall out of the flask when the wax is eliminated after flasking.
Figure 10 This illustrates the proper angle at which the instrument must be held when carving the wax to the cervical line. Holding the instrument in this position will prevent a “ditch” being formed around the tooth. It will also maintain the proper convex contours of the interdental papillae. Define the gingival line on the entire arch before proceeding.
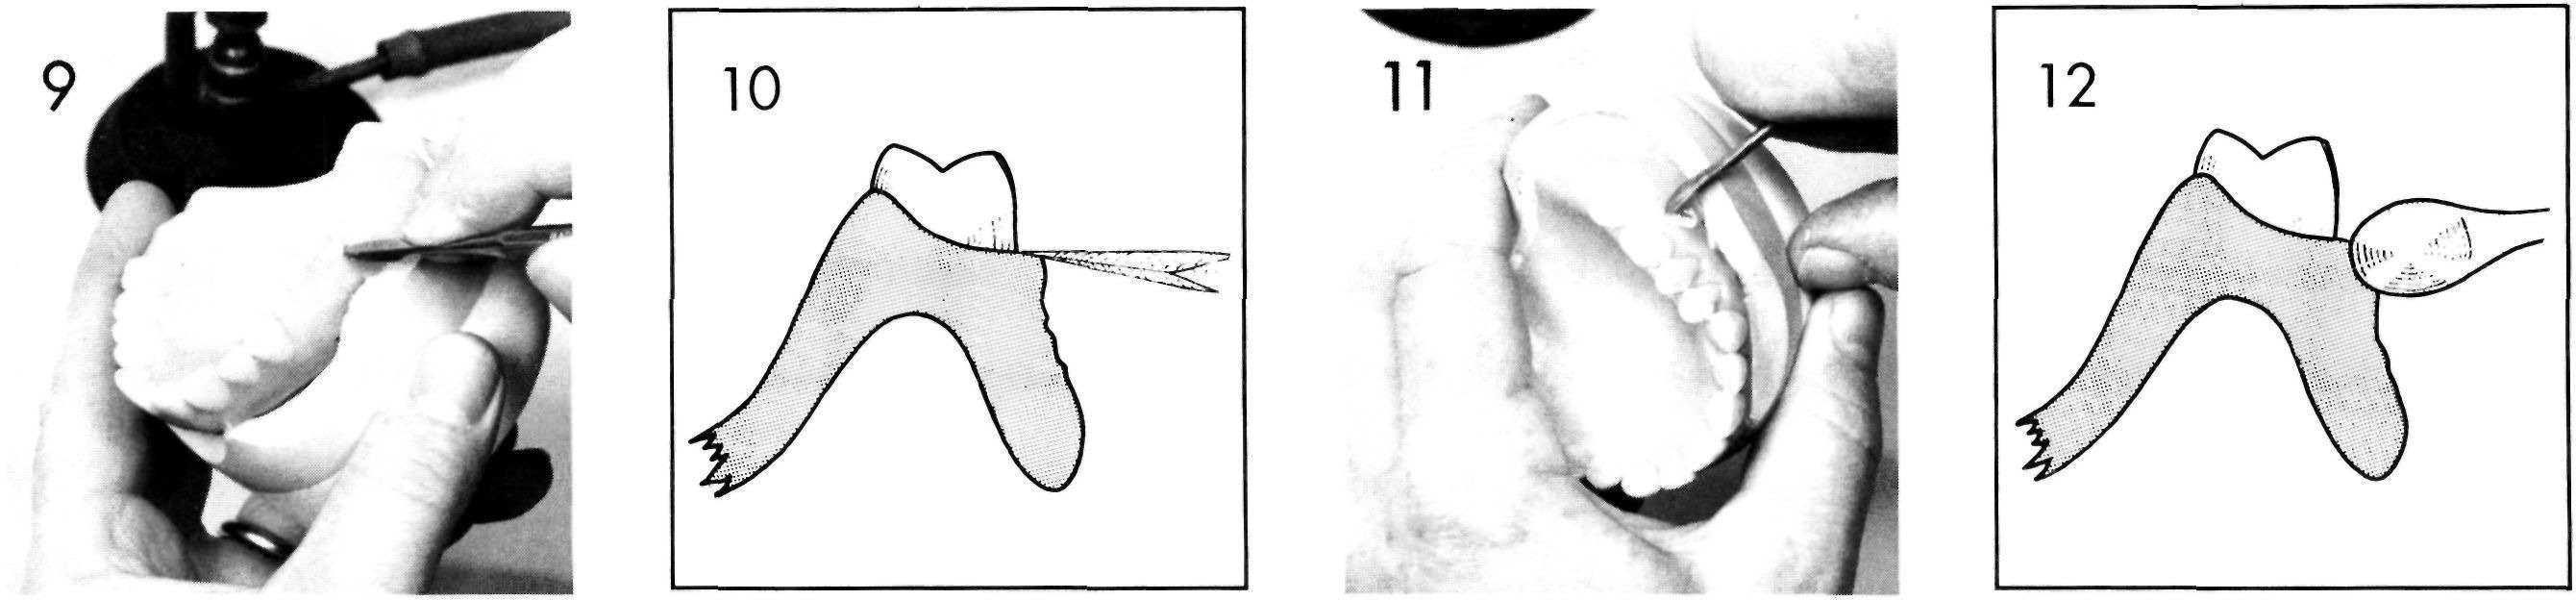
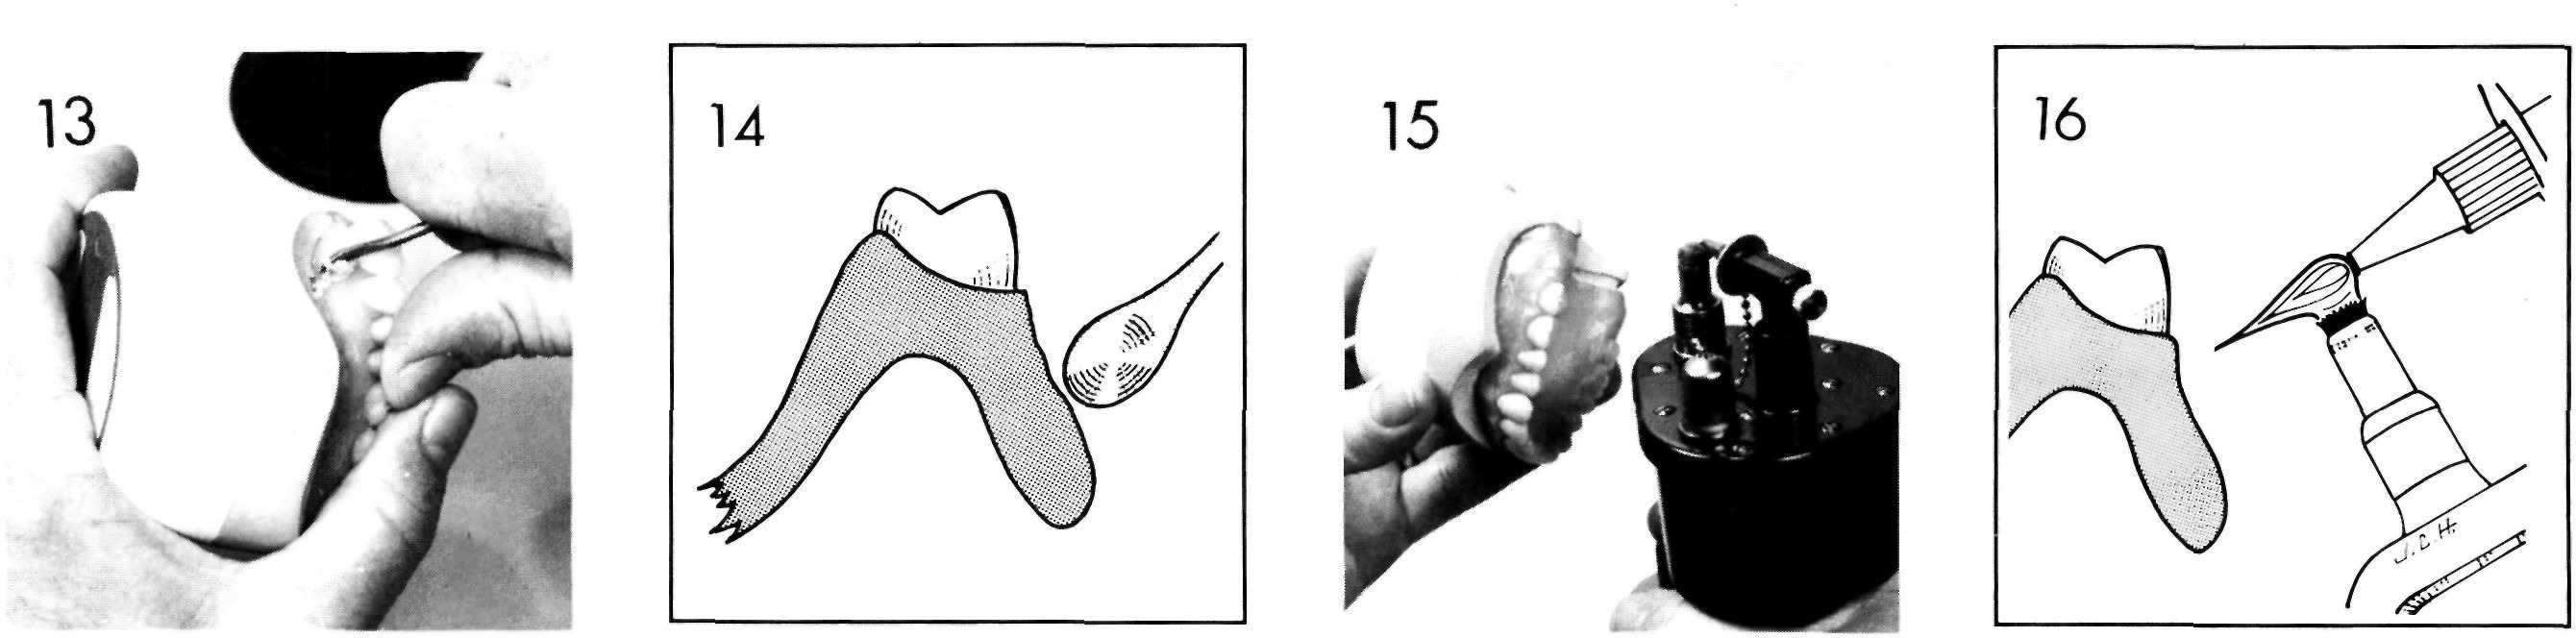
Figures 11 and 12 A Kingsley scraper, or other suitable instrument, is then used to reduce the ledge formed around the tooth in the previous step to a width of one to one-and-one-half millimeters. The narrow ledge carved around the teeth extends around the entire dental arch. The combination of proper instrument angulation (Figure 9) and narrowing of the ledge produces interdental papillae of the proper contour.
Figures 13 and 14
Stay updated, free dental videos. Join our Telegram channel
VIDEdental - Online dental courses


