
Most dentists use a surgical template when removing teeth at the time of insertion of immediate dentures. This is a clear resin device which enables a dentist to be sure that no spicules of bone remain which might interfere with the insertion of the immediate denture. The surgical template may be made as shown in Figures 39 through 45, or with a pressure or vacuum forming machine. (Section 15)
Figure 1 Preliminary impressions are made with alginate impression material and the preliminary casts are poured in the usual manner.
Figure 2 The tray is outlined on the preliminary cast and a thickness of baseplate wax is adapted to the cast so that the wax is 1 to 2 millimeters short of the anticipated tray outline. The wax is removed from the incisal edges of the remaining teeth and is cut so that it is about 4 millimeters short of the posterior border of the anticipated tray outline.
Figure 3 The tray material is prepared and adapted in the same manner as for a complete denture impression tray. The immediate denture impression tray is shown after it has been removed from the cast and the borders trimmed to the predetermined outline.
Figure 4 Some dentists will wish to have all of the wax within the tray removed before it is delivered. Others will want to have only the wax in the area of the remaining teeth removed. When this is done, the tray may be seated accurately in the patient’s mouth in order to check the borders. Before the impression is made, the wax spacer will be removed to provide room for the alginate impression material.
Figure 5 Holes are drilled in the tray with a number 6 or 8 round bur. These holes should be spaced approximately ![]() inch apart over the entire tray. These holes are not necessary if an adhesive is used to retain the elastic impression material.
inch apart over the entire tray. These holes are not necessary if an adhesive is used to retain the elastic impression material.
Figures 6 and 7 The tray is now ready to be delivered to the dentist. The dentist will check the tray in the mouth and then remove the remaining wax spacer before making the final impression.
Figure 8 This cross section shows a tray with the facial flange improperly contoured. A tray such as this will produce an impression which is overextended in the facial vestibule.
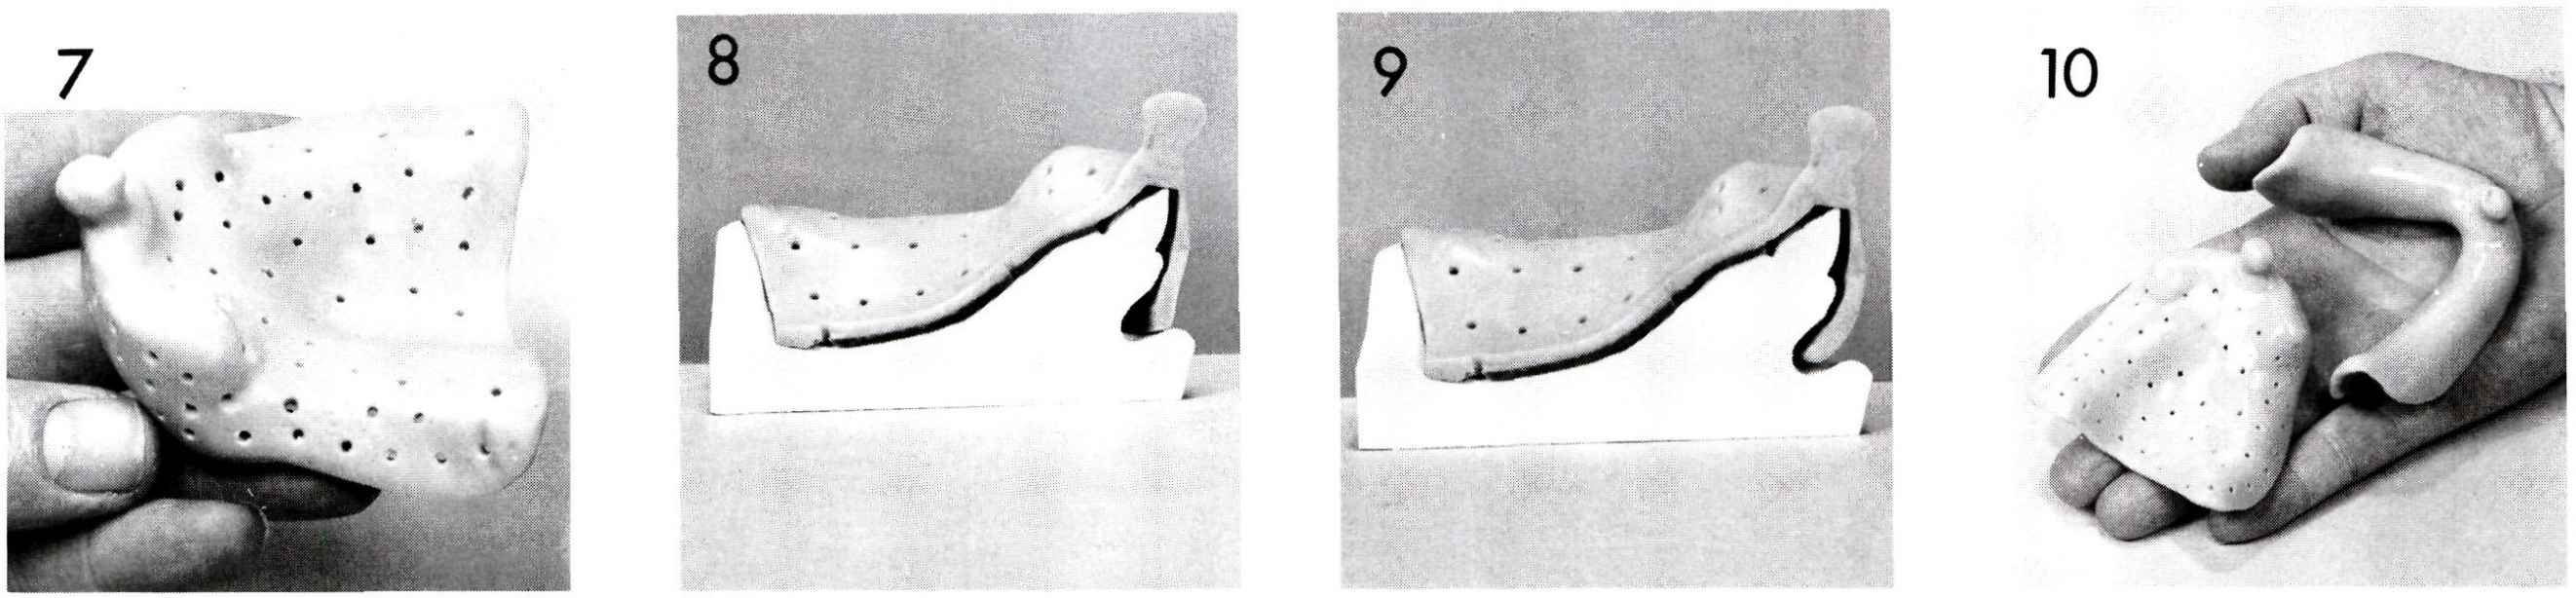
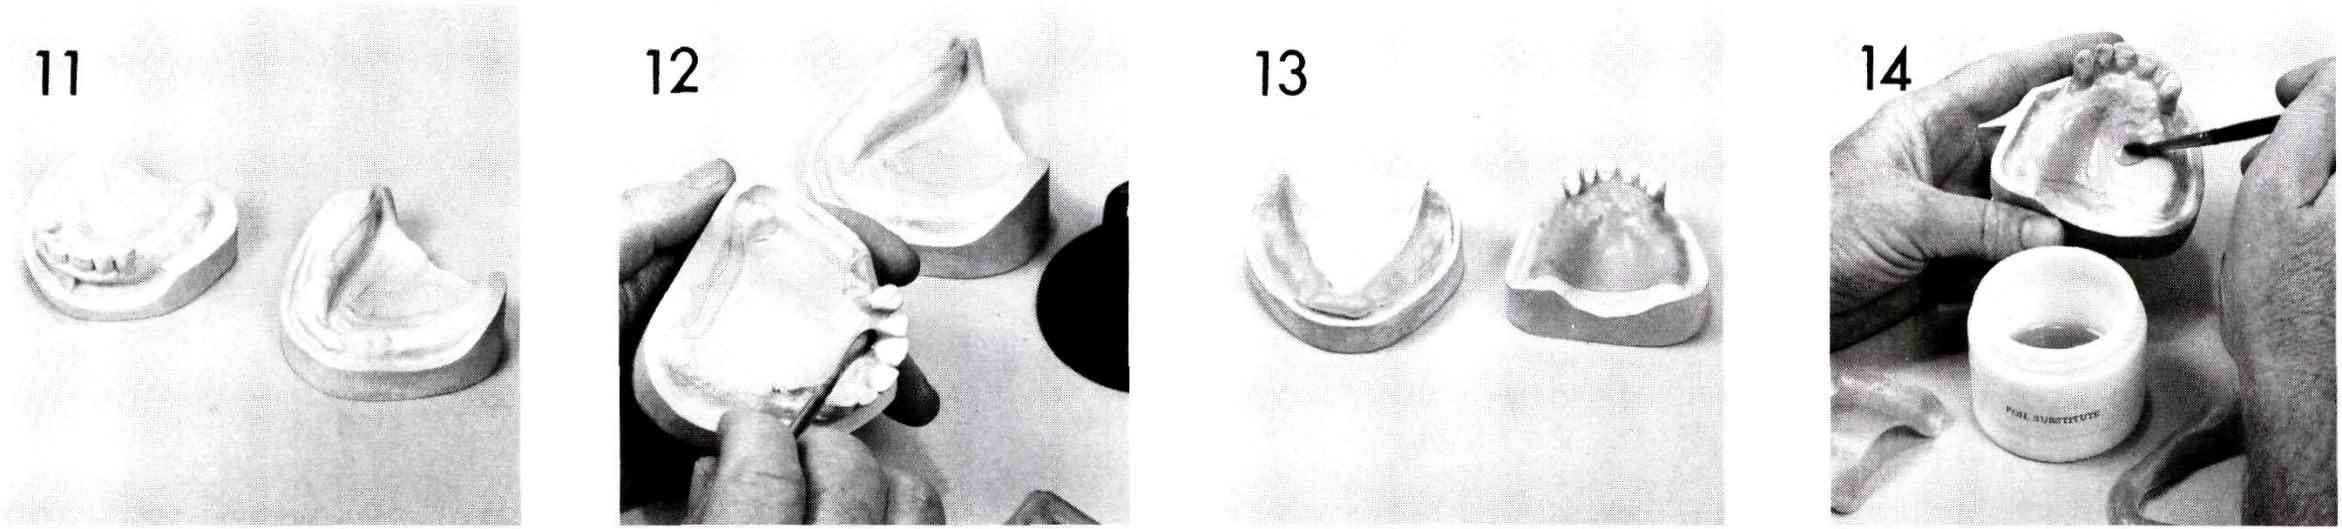
Figure 9 This tray is properly contoured. The anterior border of the tray and the wax spacer are adapted to the facial surface of the teeth and alveolar process. There is enough space in the facial vestibule to permit the impression tray to be seated in the mouth without injuring any soft tissue.
Note that the anterior part of the tray rests against the incisal edges of remaining natural teeth. This and the posterior border (which rests against the palate) form stops which allow the dentist to seat the tray accurately in the mouth.
Figure 10 The completed maxillary and mandibular trays are ready for delivery to the dentist. A conventional mandibular impression will be made. An elastic impression material is used for the maxillary impression.
Figure 11 The master casts.
Figure 12
Stay updated, free dental videos. Join our Telegram channel
VIDEdental - Online dental courses


