Fig 3.2 (A) The implant fixture comes in a sterile vial which is covered further in a non-sterile packaging which shows all the details of the implant like its make, diameter, length, batch no, expiry, company name, etc. (B) The inner sterile vial contains implant fixture, its mount, and cover screw.
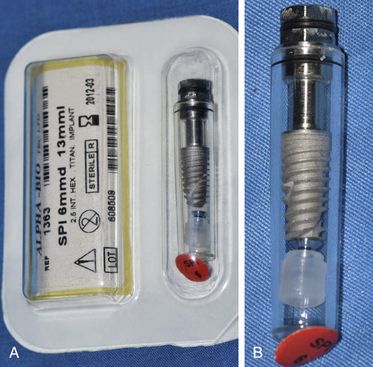
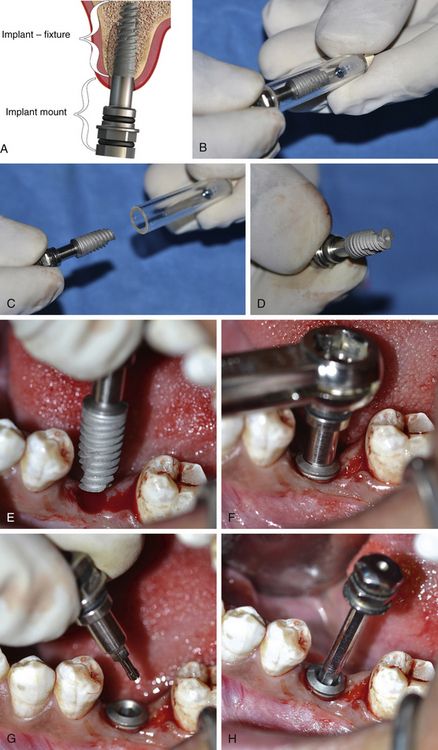
Fig 3.4 (A–H) Implant fixture surface being highly sterile should not be touched with gloved hand or any instrument, to avoid surface contamination. Thus an implant mount is used to carry the implant from its vial to the prepared osteotomy. This mount can be fitted to the ratchet and used to place the implant into the prepared osteotomy. Once the implant gets adequately engaged in the osteotomy, the mount can be removed and the implant can be further screwed in, using a long implant driver.
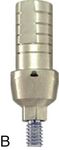
Fig 3.5 A few manufacturers do not provide the implant mount with the implant, but an implant driver from the surgical kit, connected to hand piece, is used to carry the implant from its sterile vial to the prepared osteotomy.
(Courtesy: Dentium implants, Seoul, Korea)
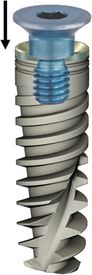
Fig 3.6 The cover screw usually comes with the implant fixture in its sterile vial, and is used to cover the implant connection during its submerged healing period.
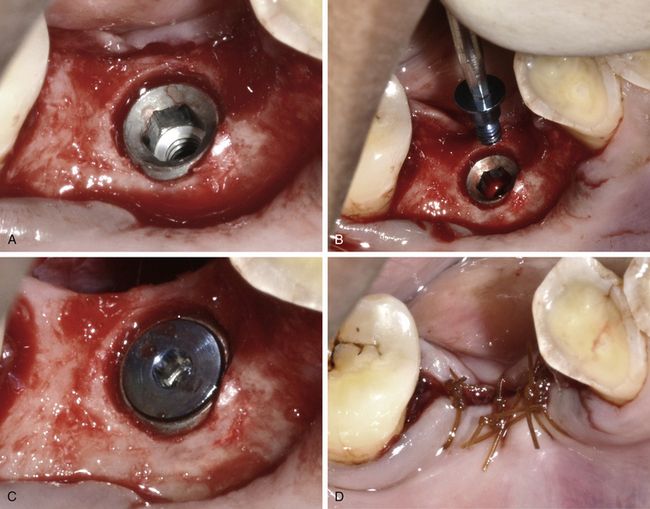
Fig 3.7 (A–D) Once the implant is completely seated in the prepared osteotomy, its connection is covered with the cover screw to prevent any soft tissue ingression in the connection. The cover screw is used in the submerged healing protocol, and therefore the flap is sutured back to cover it.
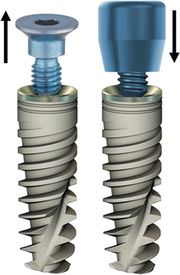
Fig 3.8 The cover screw is replaced with long healing abutment/gingival former to form a healthy entry to the implant through the soft tissue.
(Courtesy: Alpha-Bio Implant Systems, Israel)
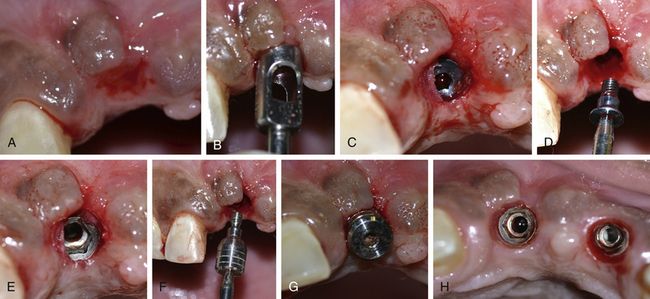
Fig 3.9 (A–H) In the two-stage (submerged healing) implant healing protocol, the implant is uncovered with incision or using a soft tissue punch, after it get osseointegrated with the bone and the cover screw is replaced with a gingival former. The gingival former is left in place for a minimum for 2 to 3 weeks to achieve a healed soft tissue around the implant platform.
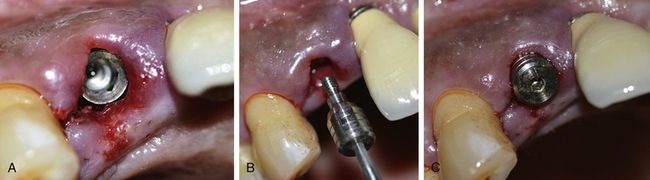
Fig 3.10 (A–C) In the one-stage (non-submerged) implant healing protocol; the gingival former is inserted over the implant immediately after implant insertion.
Fig 3.11 Once soft tissue gets healed, the gingival former is removed and an impression abutment is inserted to make the impression.
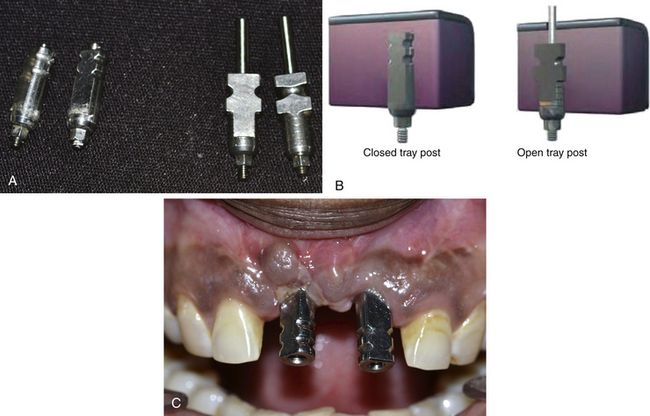
Fig 3.12 (A and B) Closed tray impression posts (left) with shallow retention grooves and short connection screw and open tray impression posts (right) with deep retention grooves and long fixation screws. (C) Closed tray posts connected to implants in the mouth before making impression.
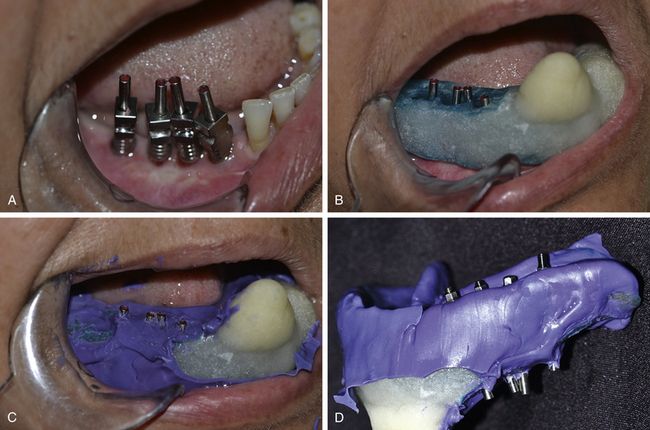
Fig 3.13 (A) Open tray posts inserted to the implants, (B and C) the long connection screws of the posts are emerging out of the impression tray. (D) The connection screws should be unscrewed before removing impression from the implant so that the post comes out embedded in the impression.
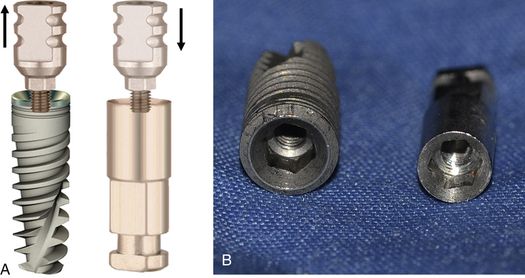
Fig 3.14 (A and B) Impression post is removed from the mouth and assembled with the implant analogue which has different body; but the connection is exactly similar to the implant.
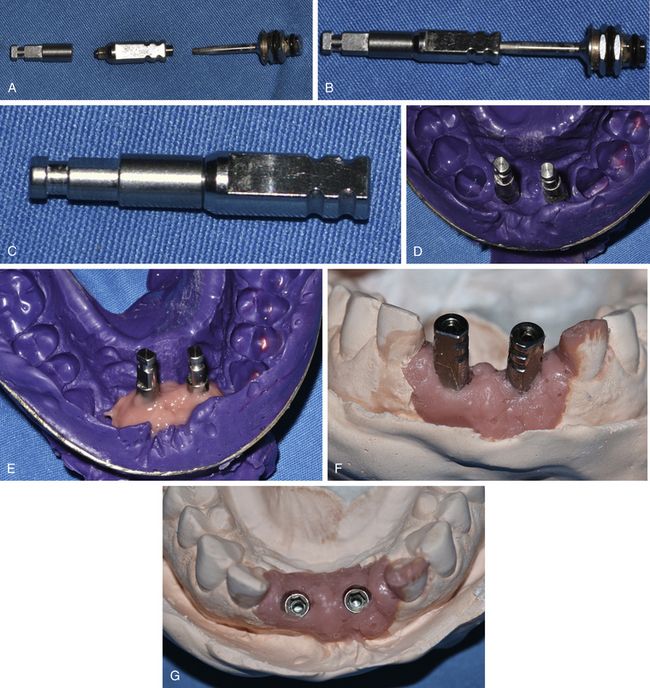
Fig 3.15 (A–G) The post is assembled with the implant analogue and seated into the impression with the same orientation as in the mouth. The impression is first poured with soft tissue replicating material (Gi-Mask) followed by dental stone. The impression post removed from the cast and final abutment of choice is inserted.

Fig 3.16 (A and B) An appropriate final abutment in inserted to the analogue at the working cast and the prosthesis is fabricated onto it. (C–E) The gingival former is removed from the implant and the final abutment is transferred from the cast to the implant, with the same orientation. (F) The prosthesis is fixed onto it.
Various types of abutments are used in implantology depending on the kind of prosthesis, the dentist has planned to deliver to the patient (< ?xml:namespace prefix = "mbp" />

Fig 3.17 Various types of abutments used in implantology for different kinds of implant prostheses.
(Courtesy: Alpha-Bio implant system, Israel)
In a simplified manner, abutments can be classified according to their use.
1. Abutments for ball retained overdentures: used to retain ball retained overdentures (
2. Abutments for cement-retained fixed prosthesis:
3. Plastic/castable abutments for screw-retained fixed prosthesis: These abutments are used to fabricate screw-retained prostheses as they can be cast to make a metal framework that can directly be fixed to the implant. Plastic abutments can be available with or without titanium base. These can be available as straight plastic abutments or angled plastic abutments (
4. Abutments for abutment level screw-retained fixed prosthesis or bar retained overdentures: These titanium abutments, also called ‘abutment for screw’ are first screwed onto the implants and used to fabricate screw-retained detachable hybrid prostheses and to fabricate the bar framework for the bar-retained dentures (
5. Engaging and non-engaging abutments:
6. UCLA abutment: The UCLA abutment is a castable abutment. It is offered with a machined gold alloy base or in a fully castable version. It may be used for single- or multiunit screw or cement-retained restorations. It may correct angles up to 30° when cast as a customized abutment (
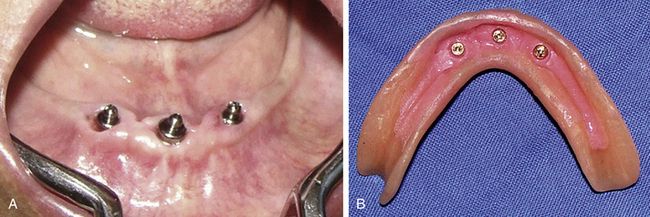
Fig 3.18 (A) Ball abutments are screwed over the implants in the patient’s mouth. (B) Metal housings (caps) in the denture. When the overdenture is seated in the mouth, these metal housings get locked over the ball abutments and thus provide adequate retention of the denture.
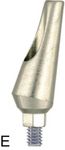
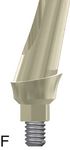
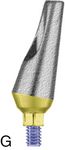
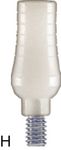
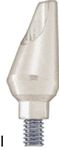
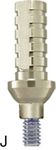
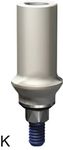
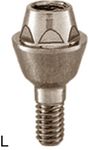

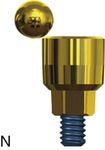
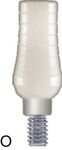
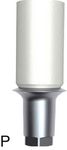
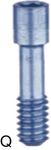
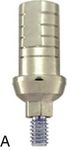
Fig 3.19 Different kinds of abutments and connection screw. (A) Straight abutment with short gingival collar. (B) Straight abutment with long gingival collar for deep seated implants. (C) Straight abutment with long gold-hued gingival collar to avoid see-through of the black metal collar through thin marginal soft tissues. (D) Long straight abutment for long crown height. (E) Angled abutment to correct angulation problem of the implant prosthesis. (F) Anatomical (aesthetic collar) abutment for maxillary anterior implant. (G) Angled abutment with gold-hued aesthetic collar. (H and I) Plastic (castable) abutments (straight and angled) for screw-retained prosthesis. (J) Temporary abutment to immediately temporize the implant. (K) Zirconium abutment for the metal free zirconium prosthesis. (L) TCT abutment for abutment level, screw-retained, fixed prosthesis or bar-retained dentures. (M) Ball abutment for ball retained overdenture (metal cap – above). (N) Angled ball abutment for overdenture to correct angulation problem. (O) Non-engaging abutment. (P) UCLA abutment. (Q) Connection screw.
(Courtesy: Alpha-Bio implant system, Israel)

Connection screw. This screw is used to connect any abutment or screw-retained prosthesis to the implant fixture. It comes with all kinds of abutments in the same packaging (
7. Multiunit abutment: This special abutment is used to correct extreme angulation. It is first connected to the implant with the help of a connection screw and then other prosthetic components of choice can be screwed on top of it. It is available in 17° and 30° angulations. This abutment is widely being used in ‘All on 4’ and ‘All on 6’ techniques (

Fig 3.20 (A) Multiunit abutment connected to the implant fixture. (B) TCT abutment is fixed over the multiunit abutment. (C) To deliver a screw-retained prosthesis (all on 4) to the patient.
(Courtesy: Alpha-Bio implant system, Israel)
Stay updated, free dental videos. Join our Telegram channel
VIDEdental - Online dental courses


