Figure 3 The partial denture framework is placed on the cast and wax is flowed through the plastic retention of the framework to stabilize the framework while the teeth are being set.
Figure 4 The first molar is set into position. The gingival side of the tooth may need to be reduced but should be “hollow-ground” to preserve the facial surface. The tooth should be set a little high in occlusion so that the occlusal surface may be altered to better interdigitate with the opposing teeth. If it is necessary to contour the tooth around the minor connector, a piece of articulating paper is inserted between the tooth and minor connector and the tooth is wiggled slightly. The marks on the tooth are then reduced. This procedure is repeated until the tooth is adapted to the minor connector.
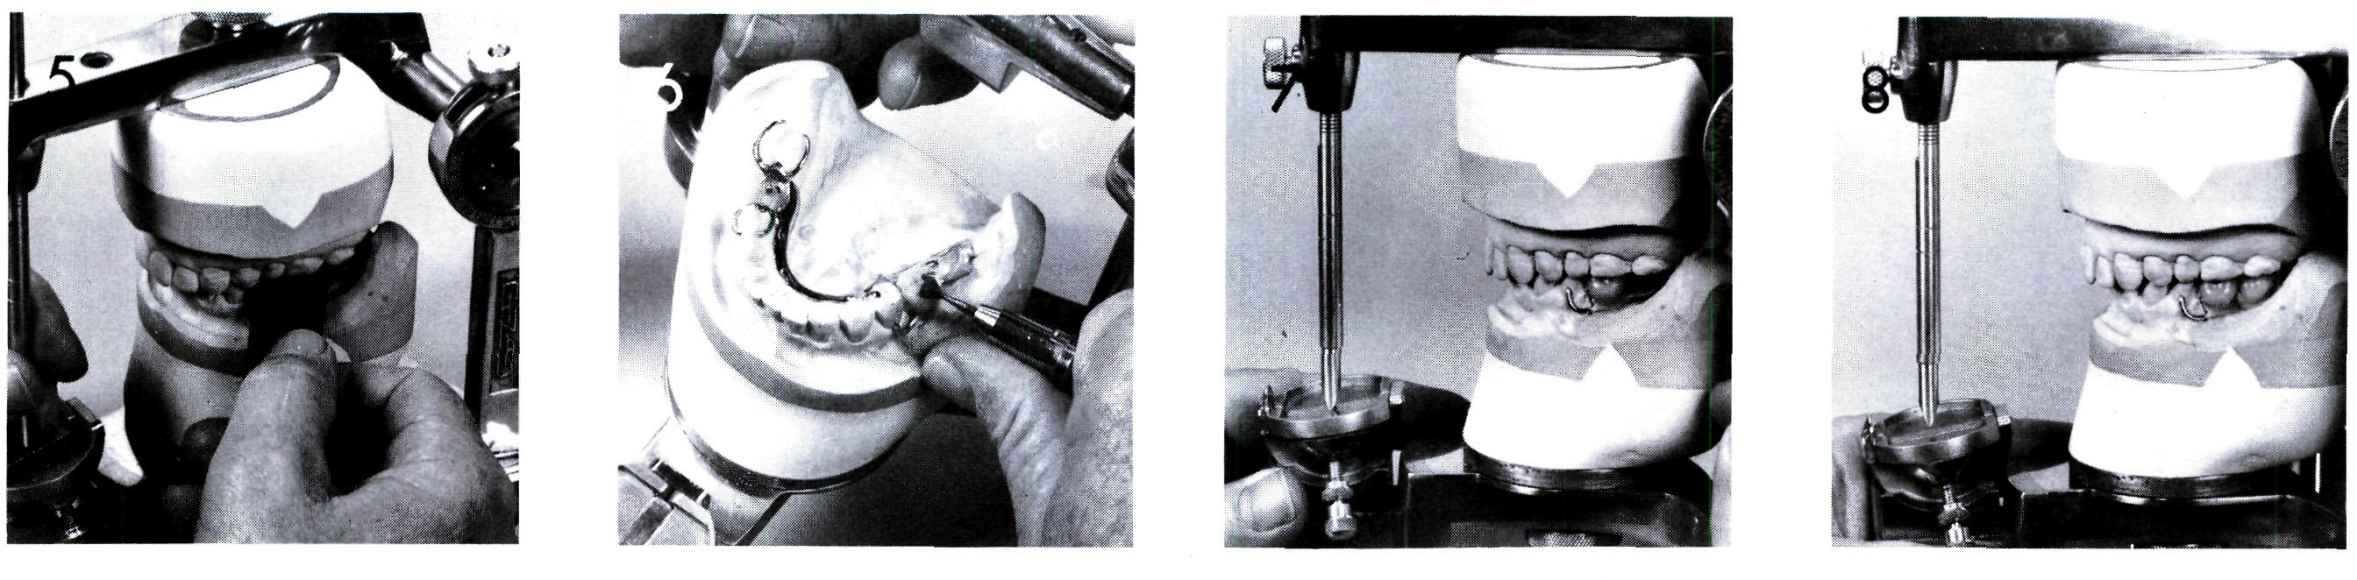
Figure 5 The occlusion is checked with articulating paper.
Figure 6 The occlusal surface is altered by reducing the areas marked by the articulating paper.
Figure 7 The occlusion has been refined by occlusal alteration. Note that the incisal pin now touches the incisal guide table.
Figure 8 The second molar is set in similar fashion. The tooth is “high in occlusion” as evidenced by the incisal pin not touching the incisal guide table.
Stay updated, free dental videos. Join our Telegram channel
VIDEdental - Online dental courses


