Chapter 6
Shade Taking, Provisional Crowns, Impressions and Cementation
Aim
The aim of this chapter is to describe how to take a shade, make provisional restorations, record impressions and to explain the value of taking interocclusal records.
Objective
After this chapter the reader will understand the importance of these critical stages in making crowns.
Introduction
Shade taking can be one of the more demanding aspects of providing crowns. Optimum results may be achieved by involving the technician in this important process. The role of the provisional restoration, in addition to covering, protecting and maintaining the position of the prepared tooth between appointments, is to assess the design, shape and occlusal relationship of the planned restoration. The term “temporary” infers that the life span of the restoration is short, but this may not be the case in complicated treatments. Therefore, the preferred term is provisional. The recording of impressions is a critical stage in making crowns as the information is used by the technician to make the restoration. Inadequate impressions are of no value and result in poor clinical results. Collaboration between dentist and technician is critical to clinical success. Cementation is the final stage in making crowns. Choosing the right cement is important in securing a long-lasting restoration. The luting process should never be rushed; it requires careful attention to detail.
Shade Taking
Following tooth assessment and diagnostic tests the first stage in the provision for a crown should be shade taking. This critical stage is commonly left to last by which time the tooth and adjacent teeth have dehydrated and become lighter. Ideally, the shade should be taken at the outset to reduce the risk of error.
The first requirement is to use natural light to take the shade. When this is not possible, a variety of shade taking lights may be used. If natural light is available, the patient should be taken to the window to record the shade. Using either technique, take short quick looks at the tooth rather than long stares. Longer views of the tooth bleach the retina and reduce the reliability of shade taking. Using a mirror, get agreement from the patient and record the agreed shade in the notes and on the prescription card. If individual characteristics such as speckles, incisal translucency, gingival staining are present, indicate these on the record (Fig 6-1).
Fig 6-1 The laboratory sheet should include instructions to the technician on the shape, colour and the presence of features including translucency, speckles and surface characteristics.
If possible, provide a photograph or digital image of the tooth for the technician. Be careful in the use of incisal translucency, which tends to be present in young people. Incisal translucency in the older patient can appear unnatural.
A variety of shade guides are available. The most commonly used is the Vita Classic (Fig 6-2). This guide comprises A, B, C and D shade tabs, reflecting different hues. Each group is subdivided into chroma (saturation of colour). When using the guide the most common shades are A2 (younger patients), A3 (middle-aged patients) and A3.5 (older patients). Whilst this is not prescriptive, it is worth rechecking the shade if the chosen shade is markedly different. Other guides are arranged according to value (blackness/whiteness) and subdivided according to hue. Whichever shade guide is used, it is important to ensure that it is compatible with the materials used by the technician.
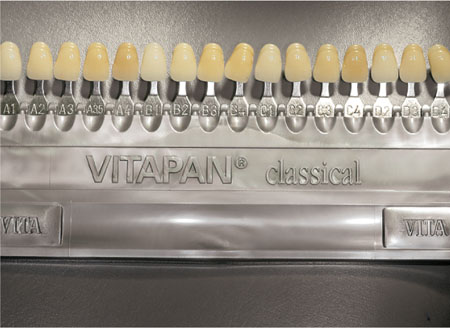
Fig 6-2 Vita Classic shade guide.
Provisional Crown
The use of acrylic crowns, made directly at the chair-side, has been superseded by resin composite crowns which are stronger and more likely to survive in the mouth. A role remains for acrylic provisional restorations, but this continues to diminish with time. The durability of acrylic provisional crowns can be improved if they are made in the laboratory. The advantage of long-term laboratory made acrylic crowns is that they are more resistant to stains, better contoured and accurately fit the preparation (Fig 6-3). Chair-side resin composite crowns offer similar advantages without laboratory costs.
Fig 6-3 There remains a role for long-term, provisional acrylic crowns. Where custom-made they resist stains better than chair-side resin provisional crowns.
A common mistake is to make the provisional restoration after taking the impression. The advantage of making the provisional restoration before taking the impression is that the preparation can be assessed for adequate reduction and undercuts. It is also useful for time management, in particular if the impression stage is prolonged. With the provisional restoration made, the appointment can be quickly completed. Whereas if the provisional restoration has not been made, the temptation is to hurry this stage often to the detriment of the clinical outcome.
Matrices
Single Units
Wax matrix
This is perhaps one of the simplest and most cost-effective ways of producing a matrix. The method uses softened pink wax moulded around the tooth and allowed to cool and harden. The main advantage of using wax is that alterations to the shape of the crown can be easily achieved (Fig 6-4).
Fig 6-4 Wax matrix, together with the provisional crown.
Silicone matrix
A stiff putty is used to obtain an impression of the tooth (Fig 6-5a,b). Once the preparation is completed the matrix is filled with the provisional material and re-inserted into the mouth. After setting, excess material is removed and the fit of the provisional crown is checked and adjusted accordingly. One major problem with this technique is that changes to the dimensions of the provisional crown are difficult. Rather than attempting to change the silicone impression, it is easier to add composite, without bonding, to the tooth before forming the silicone matrix. The main advantage of using a silicone matrix is that it is dimensionally stable and can be stored between appointments.

Fig 6-5a A silicone matrix used to make a single provisional crown.
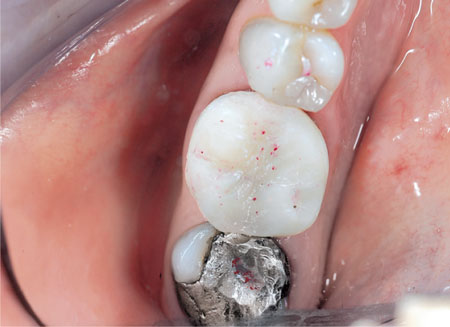
Fig 6-5b The provisional crown formed using the silicone matrix.
Alginate matrix
An alginate matrix requires the use of an impression tray. The difficulty is that changes to the impression are difficult, as the material is friable. In addition, alginate is not dimensionally stable. Despite these inadequacies this technique is commonly used in clinical practice.
Preformed crowns
Before the introduction of resin materials, the use of polycarbonate preformed crowns was common (Fig 6-6). They now have limited use and are expensive. The difficulty lies in the inadequacy of the fit of these crowns around the preparation and the need for extensive adjustment, including the need to modify the internal surface with acrylic to adapt them to the preparation. The occlusion is more difficult to adjust.
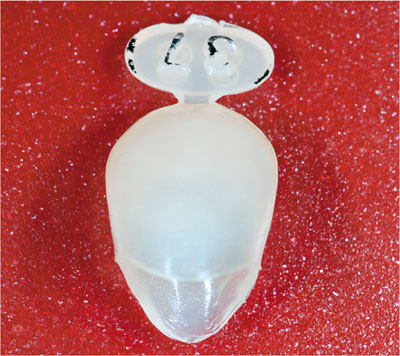
Fig 6-6 A preformed polycarbonate crown.
Other techniques
Occasionally, provisional crowns are lost and there is no matrix. In these circumstances ribbon wax can be adapted to the tooth and an impression taken using either silicone or modellers’ wax (Fig 6-7). After adjustments the provisional crown can be formed and fitted. Another way to make a provisional crown is to reline a crown being replaced with cold cure acrylic (Trim, Bosworth) (Fig 6-8).
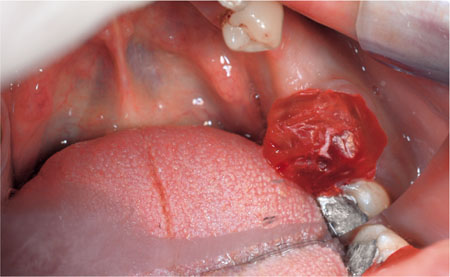
Fig 6-7 Ribbon wax is formed around a prepared tooth from which a temporary crown has been lost.
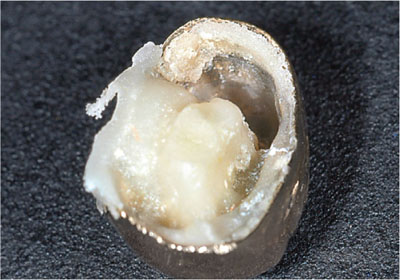
Fig 6-8 An existing crown is used to make a provisional crown. Cold cure acrylic is added to the fit surface of the crown to improve the fit.
Multiple Units
In cases in which the shape and size of teeth are to be changed it is important to use a diagnostic wax-up. This gives the patient some understanding of the intended restorations and simplifies the construction of the provisional restorations. The provisional restorations allow the patient to adapt to the shape of the restorations. A diagnostic wax-up (Fig 6-9) can be made from tooth-coloured wax or different coloured waxes. The advantage of using tooth-coloured wax is that it is more realistic for the patient. If the case is especially demanding, alternative mock-ups should be prepared for the patient. This is important when the shape of teeth is being substantially altered to improve appearance. The patient can then select the most pleasing tooth form. Additionally, the provisional restorations can be adjusted to refine the final appearance.
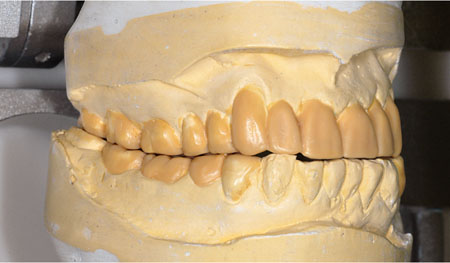
Fig 6-9 Diagnostic wax-up made in tooth-coloured wax provides the patient with an opportunity to better understand and comment on the proposed restorations.
Once the diagnostic wax-up has been agreed with the patient, a matrix can be made either in silicone putty or by making a vacuum-formed splint (Fig 6-10 and Fig 6-11) on a replica cast. A silicone impression of the diagnostic wax-up is a simpler, more effective means of producing a matrix.
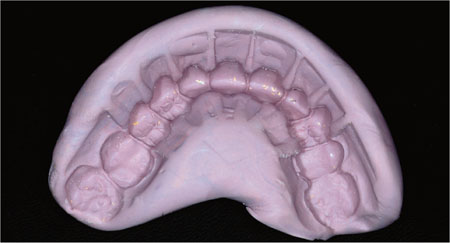
Fig 6-10 A silicone impression taken of the diagnostic wax-up is used to make chair-side provisional crowns.
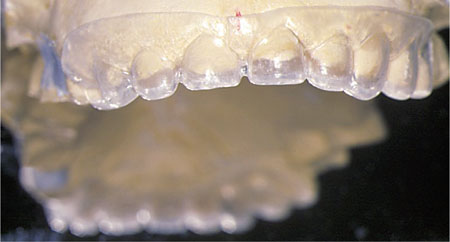
Fig 6-11 Instead of a silicone matrix, the diagnostic cast is replicated and a vacuum-formed matrix is obtained. This matrix is loaded with composite provisional crown material (bis-acryl resin) to obtain good quality, aesthetically pleasing provisional crowns.
Cementing of the Provisional Restorations
The ideal provisional crown cement needs to be a hard cement capable of clinical service over several months, yet simple to remove. For this reason adhesive cements should not be used. Eugenol containing products have the advantage of being adherent without being difficult to remove. A theoretical disadvantage is that the eugenol may subsequently react with a composite luting cement, but this has not been found to be clinically important, provided the cement is completely removed and the preparation thoroughly cleaned and washed. The occlusion should be carefully checked before the provisional crown is cemented. Small deficiencies in the provisional crown can be made good with either more temporary crown and bridge material or a light cured composite.
Tissue Control
For supragingival preparations there is no need for gingival retraction. Provided adequate moisture control can be obtained the need for retraction cord is reduced. Tissues adjacent to subgingival preparations can be managed with ExpaSyl (Kerr UK, Fig 6-12a,b). This material contains aluminium chloride and kaolin. It is gently applied along the gingival margin with an applicator. This material controls bleeding and retracts the tissues. The material is applied at an angle of 45° into the gingival crevice, left in place for about two minutes and then removed by washing. After drying the impression is recorded. The advantage of this product is that it controls bleeding and provides gingival retraction. Another recent innovation is “Magic Foam Cord” (Coltène />
Stay updated, free dental videos. Join our Telegram channel
VIDEdental - Online dental courses


