Aesthetic Restorative Dentistry for the Adolescent
Fundamentals of Material Selection
The choice of materials is an important consideration when optimizing dental aesthetics. The clinical success of composite resin restorations depends on adhesive systems that provide durable bonding of composite resin to dentin and enamel, effectively sealing restoration margins and preventing postoperative sensitivity and microleakage.1–3
In order to achieve this, a contemporary adhesive system should be used (Figure 39-1). Most of these systems work by demineralizing the dentin-enamel surface with an acid, which is usually either 37% phosphoric or the acid incorporated into the adhesive. If a separate etching acid is used, a primer resin is applied that facilitates the penetration of an adhesive resin into the demineralized dentin and enamel to form a hybridized layer of resin/tooth2,4 as shown in Figure 39-2. The bonding procedure is often simplified with a single-bottle primer/adhesive. These agents combine the primer resin with the adhesive resin into a single component (bottle).5,6
The choice of composite resin for aesthetic restorations can be confusing because a variety of products are available with slightly different physical properties.7,8 Basically, the three types of composite resins that can be used are microfilled (those with filler particles averaging 0.04 µm in diameter), hybrid (a blend of different particle sizes, including submicrometer [0.04 µm] and small particle [0.2 to 3 µm]), and nanofilled, containing nanoparticles and clusters as fillers. The particle size difference between microfilled, hybrid, and nanofilled resin composites is readily apparent under magnification (Figure 39-3). Currently, most dental manufacturers are producing microhybrid composite resins with an average particle size of less than 1 µm and nanofilled, which are made of SiO2, silane-coated SiO2, and ZrO2 with a range of 20 to 75 nm. Nanofilled resins have physical properties superior to those of microfills but slightly inferior to hybrids.9
The polymerization of light-activated composite resins is accomplished by using an intense blue light with a peak wavelength of approximately 450-470 nm, which corresponds to the absorption peak of camphoroquinone (CQ), the most popular photoinitiator.10,11 A typical light-curing polymerization unit uses light-emitting diodes (LEDs) to efficiently produce blue light12 (Figure 39-4, A), although the traditional gun-style units that contain a halogen bulb and cooling fan are still available (see Figure 39-4, B). No matter what light is used, light intensity should be periodically checked (via a radiometer) so that a minimal output of 350 mW/cm2 can be maintained. Several modern light-curing units incorporate light meter devices into their bases, so separate radiometers are not needed (Figure 39-5).
Eye protection is important when using the curing lights because direct viewing of the light is detrimental to vision.13 Amber filters, which block the intense blue component of the light, are commercially available and can be hand held or worn as eyeglasses (Figure 39-6). In the absence of specific protective devices, one should avoid looking directly at the light.
Fundamentals of Clinical Technique
It is extremely important to maintain an uncontaminated field during the insertion of composite resins. The most reliable way to control moisture is through the use of a well-adapted rubber dam. If not using a rubber dam, one should place cotton rolls and 2 × 2 inch gauze sponges over the tongue to prevent moisture contamination. Another approach to maintaining a dry field is to use a commercially available lip and cheek retractor (Figure 39-7). This plastic device, when used with gauze sponges, provides excellent access and good field control.
The use of a base or liner to protect pulp tissue in deep preparations is generally believed to be beneficial. Many believe that a glass ionomer liner should be used in deep areas of a cavity preparation that is thought to be within 0.5 to 1.0 mm of pulpal tissue (Figure 39-8). The liner provides chemical adherence to tooth structure and slow release of fluoride.
After etching (15 seconds of etch and 5 to 10 seconds of rinse), an appropriate dentin-enamel bonding agent should be placed with a vigorous rubbing action.14 Next, the photopolymerized composite resin should be inserted in layers no thicker than 2.0 mm, using at least 40 seconds of light exposure per layer. Thin layers and adequate time for light exposure help ensure maximal polymerization and minimize marginal gaps caused by shrinkage.15 Maximal polymerization provides optimal strength and color stability for the restoration. It is important to cover the light-curing composite resin on the mixing pad so that room light does not initiate the polymerization process. In addition, it may be necessary to reduce the intensity of the operating light.
Stay updated, free dental videos. Join our Telegram channel

VIDEdental - Online dental courses


 Outline
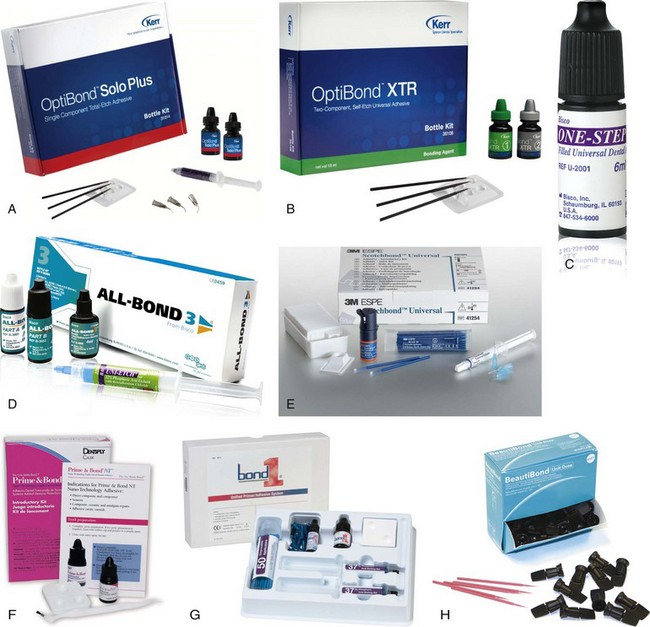
 FIGURE 39-1
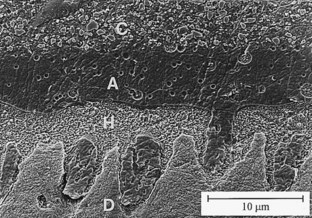
 FIGURE 39-2
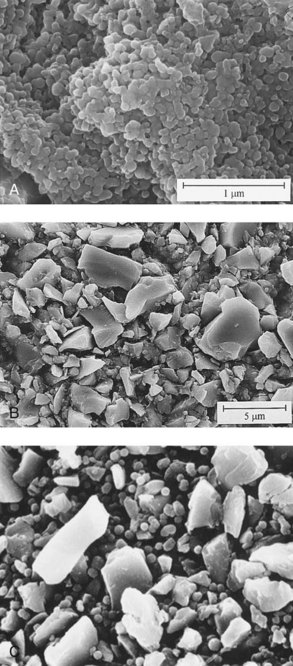
 FIGURE 39-3
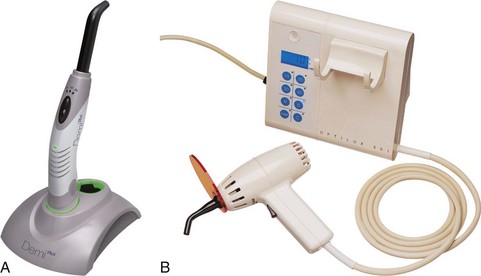
 FIGURE 39-4
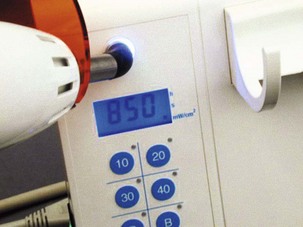
 FIGURE 39-5
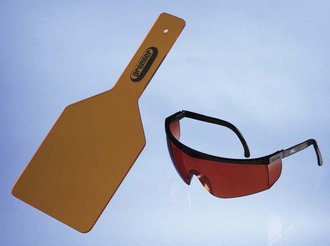
 FIGURE 39-6
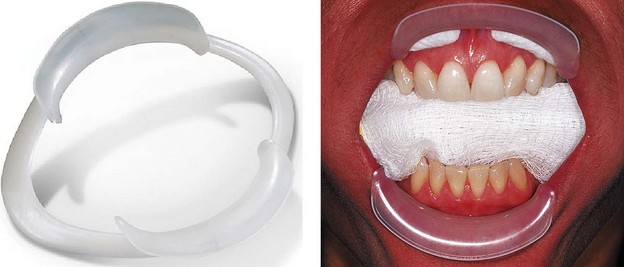
 FIGURE 39-7
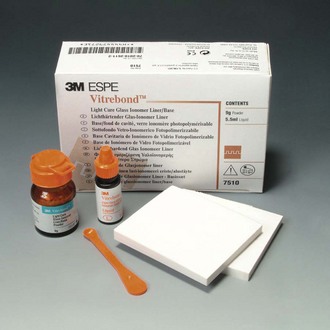
 FIGURE 39-8