30 EVALUATION, CHARACTERIZATION, AND GLAZING
EVALUATION
Interim Restoration and Luting Agent
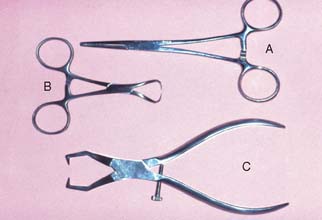
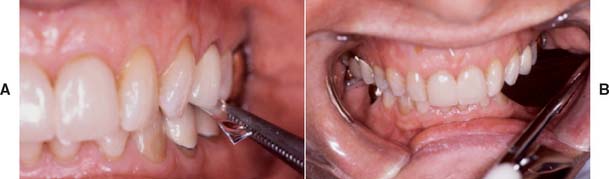
The interim restoration is removed by gently positioning hemostats or a Backhaus towel clamp on the buccal and lingual surfaces and rocking it gently in a buccolingual direction to break the seal of the interim luting agent. Special band removers (Fig. 30-1) may also be used. Most of the luting agent or interim cement adheres to the interim restoration when it is taken out of the mouth. Any remaining cement should be loosened from the prepared tooth surface with an explorer, followed by careful application of a water-pumice mixture* in a prophylaxis cup. Slow speed and relatively light pressure are essential. Polishing the preparation is undesirable because it may lessen retention. The preparations are rinsed with water and air spray, and after drying, the area is inspected. All residual luting agent must have been removed, because even a very small particle of interim cement can prevent a casting from seating completely.
Proximal Contacts
The location, size, and tightness of a restoration’s proximal contacts should resemble those of the natural teeth. Typically, textbooks refer to contacts that allow unwaxed floss to “snap” through “relatively easily.” Although this is not a very scientific definition, the use of floss is a convenient method for comparing the contacts with other contacts between adjacent teeth in the arch. If the floss does not pass, the contact is excessively tight; if it goes through too easily, food impaction may result (Fig. 30-2). The use of shim stock (thin Mylar film) is probably a more reliable indicator of proximal contact. The ideal contact should allow for positional stability of the abutments and adjacent teeth, as well as easy maintenance of the supporting structures. Most patients give reliable information as to a tight proximal contact when asked whether they “feel as though they have a seed between their teeth,” provided that a local anesthetic has not been administered. A deficient contact is easily overlooked but invariably results in discomfort as food becomes impacted.
Excessive tightness
All-metal restorations
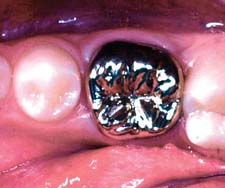
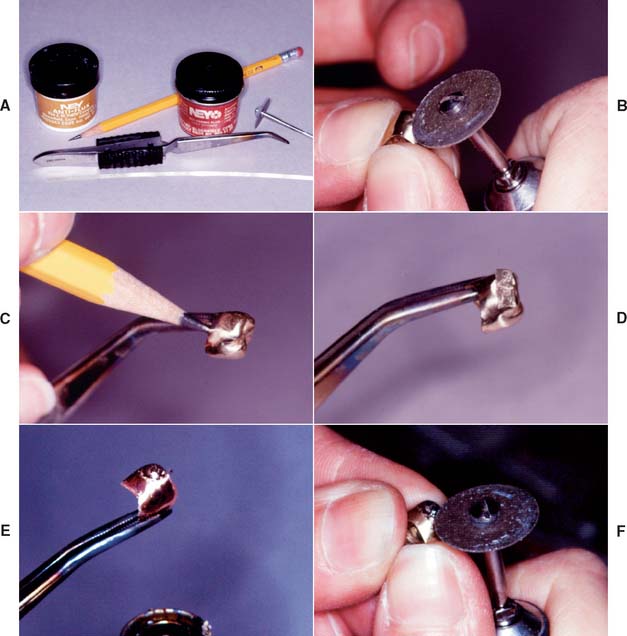
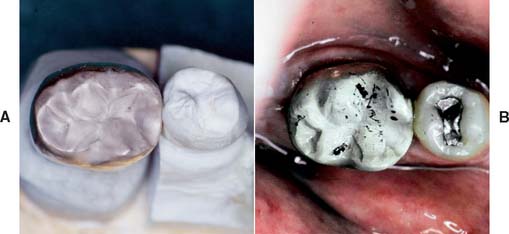
If a tight contact prevents the seating of an all-metal restoration, adjustments are readily made with a rubber wheel. The satin finish produced helps identify where binding occurs, because a shiny spot (Fig. 30-3) appears where adjustment is necessary.

Porcelain restorations
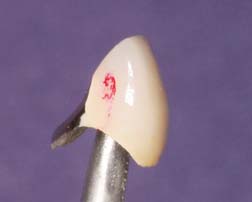
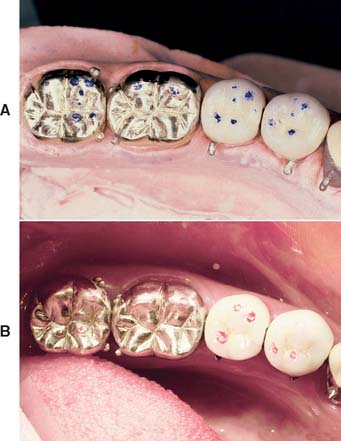
A tight proximal contact in unglazed porcelain is easily adjusted with a cylindrical stone. The area of contact (Fig. 30-4) can be identified with red pencil or thin marking tape.
After glazing, a slight change in the contact may be observed because of the pyroplastic surface flow that occurs during firing. If adjustment of a glazed restoration is needed, it can be repolished with diamond-impregnated silicone points, pumice, or diamond-polishing paste.
Deficiency
All-metal restorations
A gold casting with a deficient proximal contact can usually be corrected by soldering (Fig. 30-5). The procedure is simple and can be performed in the dental office in a matter of minutes. However, soldering a proximal contact should not be routinely necessary. After soldering, the restoration requires repolishing.
Step-by-step procedure
Porcelain restorations
A deficient proximal contact in porcelain requires additional firing. At the bisque stage, this is time consuming, but adding additional porcelain is not a problem. However, if a restoration has been completely finished, glazed, and characterized at the time the deficient contact is discovered, a lower fusing “add-on” or correction porcelain can be used to solve the problem (Fig. 30-6).
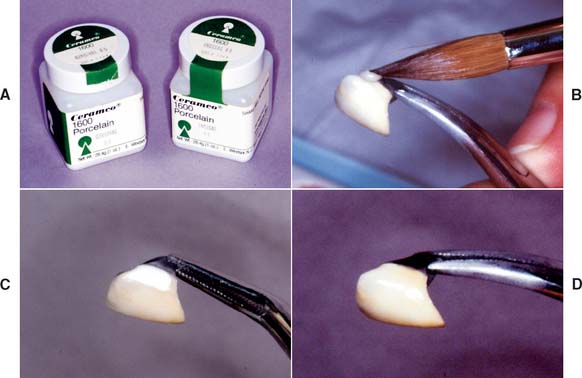
These correction porcelains are a mixture of body porcelain and overglaze with additional modifiers to produce a maturation temperature as low as 850° C (1562° F). Minor corrections can thus be made with little risk of dimensional change in any other part of the restoration. Major corrections should be made by performing an additional firing with the conventional body and incisal powders, although there are limits to the number of times a restoration can be fired if devitrification is to be avoided (see Fig. 24-36B).
Margin Integrity
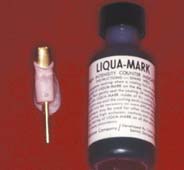
Several techniques have been used to detect where a casting binds against an occlusal or axial wall, including disclosing waxes, a suspension of rouge in turpentine or acetic acid, air abrasion to form a matte finish surface, powdered sprays, water-soluble marking agents (Fig. 30-7), and special elastomeric detection pastes. However, none has proved to be entirely satisfactory. Most techniques are rather messy and time consuming and should not be needed on a routine basis.
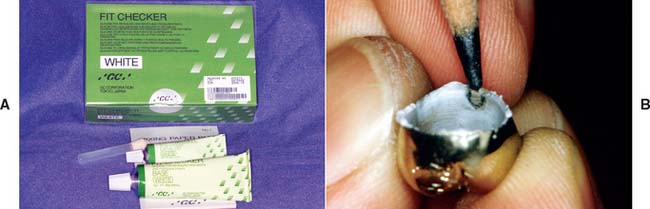
Nevertheless, elastomeric paste (Fig. 30-8) has some advantages. The material is similar to a silicone impression material and is obtained as a two-paste system. Its viscosity is similar to that of the final luting agents, and so it can be used not only to identify unwanted internal contacts but also to assess adequate marginal fit. The degree of clinically acceptable marginal opening (i.e., the discrepancy unlikely to have an adverse effect on the prognosis) is hard to define. Margin integrity has been the subject of many laboratory and clinical evaluations. Obviously, to limit dissolution of the luting agent, the thickness of the cement film at the margins should be kept minimal. Through careful technique, a marginal gap width of less than 30 μm can be obtained consistently.1,2
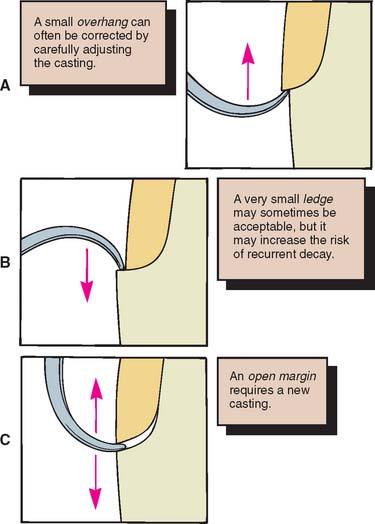
Assessment
Figure 30-9 illustrates some of the possibilities that may be encountered in verifying margin integrity. The presence of a small ledge does not necessarily mean that the restoration must be remade. It may merely require additional finishing where accessibility allows.
Finishing
Supragingival margins are generally finished with the casting seated on the tooth. White stones and cuttle disks rotating from restoration to tooth structure should result in a suitably finished margin (Fig. 30-10), which, if the casting is properly adapted, is virtually undetectable with the tip of a sharp explorer.3
Accessible margins can also be burnished during the cementation procedure before initial setting of the cement.4 However, the less accessible proximal margins are the critical ones in terms of prognosis. They are the most common site of recurring caries and periodontal disease, and they can neither be evaluated readily nor finished easily. It has also been demonstrated5,6 that correcting a poorly fitting cast restoration with finishing procedures is not possible.
Stability
The restoration should then be assessed for stability on the prepared tooth. It should not rock or rotate when force is applied. Any degree of instability is likely to cause failure during function. If instability is caused by a small positive nodule, this can usually be corrected; however, if it is caused by distortion, a new casting is necessary.
Occlusion
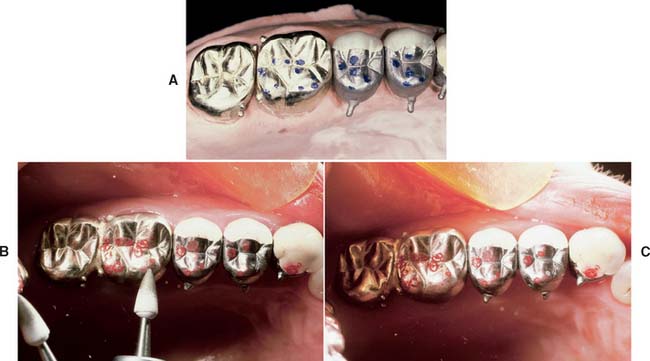
After the restoration has been seated and the margin integrity and stability are acceptable, the occlusal contact with the opposing teeth is carefully checked. The criteria for these relationships, both static and dynamic, have been discussed in Chapters 4 and 18. Any undesirable eccentric contacts as well as centric interferences must be identified. Minor adjustment of eccentric contacts may be needed if a semiadjustable (as opposed to a fully adjustable) articulator is used.
Evaluation and adjustment
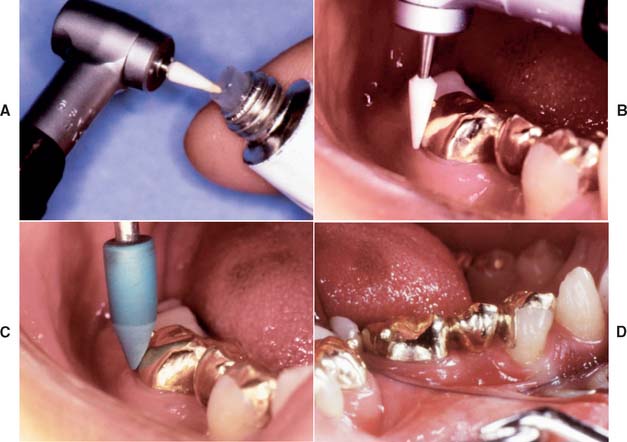
Step-by-step procedure (Fig. 30-11)
An alternative technique requires the use of an airborne particle abrasion unit with aluminum oxide (Fig. 30-13). A matte finish is obtained on the occlusal surfaces of the casting in question, and the patient is asked to close. Where shiny marks appear, an adjustment is made. This technique, however, presents the following disadvantages:
Gross occlusal adjustment involving dental porcelain is better done in the bisque stage, because interferences are more easily marked on a bisque surface than on glazed porcelain. Minor adjustments are needed after glazing because of the pyroplastic flow of the porcelain.7 After adjustment, the porcelain can be polished with silicone wheels or diamond-polishing paste.
Remount
If there is a need for significant occlusal adjustment, a remount procedure8 may be recommended. It is typically used when extensive restorative dentistry has been performed, and it serves to convey the relationships of the restorations and teeth to the dental laboratory (Fig. 30-14). Detailed adjustments can then be made in an organized manner. Any inaccuracy (e.g., slight tooth movement, previous mounting discrepancies, or small dimensional change inherent with the indirect process) can be compensated for relatively easily, thus reducing the amount of chair time needed for precementation adjustment.
Stay updated, free dental videos. Join our Telegram channel
VIDEdental - Online dental courses


