29 FINISHING THE CAST RESTORATION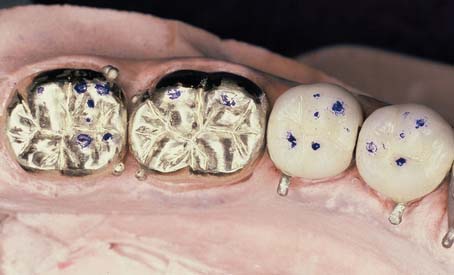
A cast metal restoration is not ready for evaluation and cementation merely because it has been stripped of its investment. The unpolished surface is relatively rough, and a series of finishing procedures are needed to produce highly polished axial surfaces. Such surfaces limit the accumulation1,2 and retention3 of plaque and facilitate maintenance of health of the supporting periodontal tissues. The sprue needs to be removed, and the area of its attachment needs to be recontoured. Any nodules or other minor irregularities remaining on the cast surface must be eliminated.
Metal finishing for metal-ceramic restorations is similar to that for cast metal. The discussion in this chapter is applicable to both restoration types. In practice, the final polishing of metal-ceramic restorations is not done until after characterization and glazing (see Chapter 30).
OBJECTIVES AND PROCEDURES
The objectives and procedures for finishing are different for each part of the cast restoration. The following discussion is sequentially divided into corresponding phases; each is identified as a zone (Fig. 29-1).
Zone 1: Internal Margin
Objective
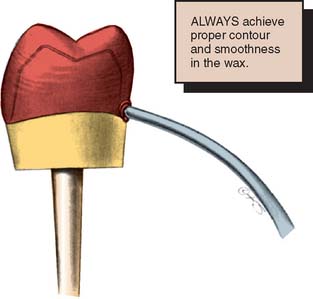
To minimize any dissolution of the luting agent, a 1-mm-wide band of metal must be obtained that is closely adapted to the tooth surface.4 A defect within this zone can significantly reduce a restoration’s longevity. Good adaptation is obtained by carefully reflowing the wax pattern (Fig. 29-2). With careful standardization of technique, the dentist can achieve predictable and consistent results.
Procedure
If a defect occurs in the marginal area, the restoration must be remade. This may require an additional patient visit to make the new impression. Defects can be prevented or minimized by paying particular attention to reflowing the margins of the wax pattern and through careful investing (see Chapter 22).
Even small nodules can prevent a casting from seating completely. Careful examination under ample magnification helps identify interferences. Small nodules, if far enough away from the margin itself, can be removed under a binocular microscope with exceptionally cautious use of very small rotary instruments (e.g., a No. ¼ round bur). However, great care is needed to avoid damage to the margin and annoying remakes.
Zone 2: Internal Surface (Intaglio)
Procedure
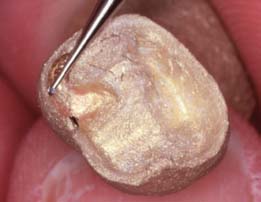
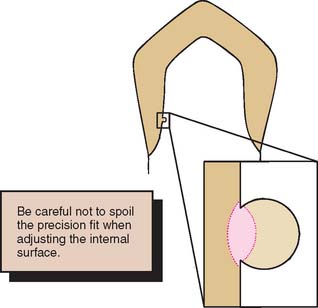
Under normal circumstances, a casting’s internal surface does not require finishing. It should, however, be examined for nodules (Fig. 29-3) before the restoration is seated on the die. Nodules can be removed with a small round carbide bur, which can be time consuming because it may need to be repeated several times. If the internal surface needs to be adjusted more than occasionally, the investing procedure should be reexamined for flaws.
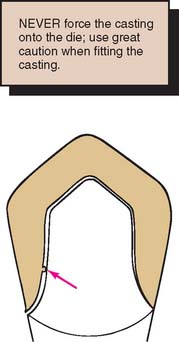
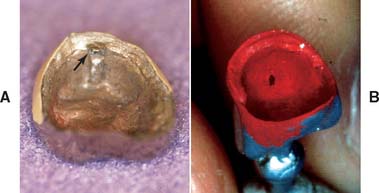
Even a very small nodule can result in significant increase of the marginal gap width (Fig. 29-4). A binocular microscope is especially helpful in identifying nodules. High-quality loupes can also be used. Great care should be exercised when seating a casting on its die. Any significant force will abrade or chip the die so that the casting will seat on the die but will not seat fully on the prepared tooth. Overlooking this at the cementation appointment will result in a restoration with open margins and a poor prognosis. If a casting does not seat, a nodule may have been overlooked and may have scratched the die, or a little stone may have been picked up in the process. Close examination of the internal surface of the casting or the axial walls of the die (Fig. 29-5) will reveal this. Corrective action is often relatively simple, and the casting may be acceptable. Care must be taken not to seat a faulty casting repeatedly, thereby abrading the die. After a die has been abraded by a casting, it should not be used for rewaxing a restoration. If rewaxing is necessary, a new impression is required.
When a nodule is removed from the internal aspect of a casting, deliberately removing a slightly greater amount of alloy in the area is recommended. Once the casting has been adjusted, determining the exact location of the nodule is no longer possible. Therefore, the nodule should be removed entirely in one step, rather than through sequential relief of the internal surface (Fig. 29-6).
Marking agents
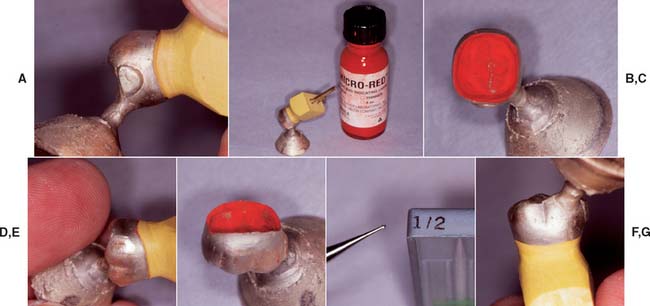
Several agents are commercially available to facilitate identification of the seating interference between the casting and the die. These include water-soluble dies (e.g., Liqua-Mark*), solvent-based dies (e.g., AccuFilm IV†), and powdered sprays (e.g., Occlude‡). A suspension of rouge in turpentine or an elastomeric detection paste (e.g., Fit Checker, Fit Checker II§) can also be used as an alternative.5,6 These agents should be applied as a thin film to the internal surface of the casting. High magnification of the casting after seating reveals initial contact for grinding (Fig. 29-7). Regardless of the method used, the internal surface of the casting should always be thoroughly cleaned before the luting procedure (see Chapter 31).
Zone 3: The Sprue
Zone 4: Proximal Contacts
Procedure
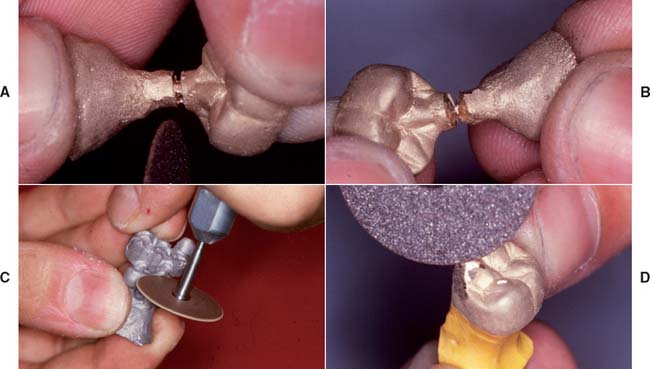
Special care is needed to prevent the finishing procedures from producing an overreduced and, consequently, inadequate proximal contact. Although this can be corrected with solder (see p. 889), it is a time-consuming and unnecessary procedure.
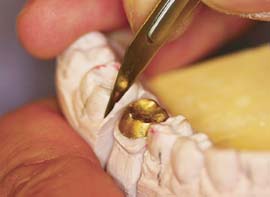
A slightly excessive contact, however, may be corrected easily during clinical evaluation. The proximal contacts on the stone cast can be minimally relieved by careful scraping with a scalpel (Fig. 29-9). The casting is then adjusted until it just seats. When adjacent castings are made, they should not be simultaneously adjusted to seat on the definitive cast. Under these circumstances, the proximal contacts should be left slightly too tight in the dental laboratory. For such multiple castings, clinical evaluation is done sequentially and on an individual basis. Adjustments are made for each casting independently.
When proximal contacts are adjusted, placing a thin Mylar articulating film between a/>
Stay updated, free dental videos. Join our Telegram channel

VIDEdental - Online dental courses


