Chapter 2 Clinical manipulation of materials
Learning Objectives
From this chapter, the reader will:
• Understand the importance of achieving a favourable environment for material manipulation
• Understand the factors which influence shade taking
• Appreciate the benefits and shortcomings of light polymerization as a means of controlled setting
• Understand the need for good preventive maintenance for dental hardware.
Introduction
There are a number of direct clinical placement factors which the clinician must be mindful of when working intraorally. The manufacturers can only do so much and it is incumbent on the dentist to use dental materials as instructed to ensure maximal success. This chapter will discuss the factors relating to clinical manipulation of dental materials.
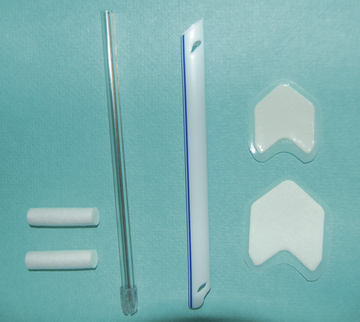
It is well accepted that unless the moisture control is carefully controlled, the clinical behaviour of the restoration and its longevity may be significantly compromised. Poor moisture control is a major cause of adhesive bonding failure and also leads to decreased mechanical properties of the material. There are many methods of moisture control, namely cotton wool rolls, dry guards, high volume aspiration, use of saliva ejectors (Figure 2.1) and some clinicians have even advocated the use of systemic medications to reduce salivary flow. This latter approach is not recommended because there can be systemic side effects which are undesirable. The most effective and predictable method of moisture control, however, is rubber dam (Figure 2.2).
The many advantages of this technique will be readily found in operative dentistry textbooks but from a material’s perspective, it can provide the closest conditions to an ‘ideal’ environment for material placement. Its use will allow the clinician to control the operating field more precisely and with respect to humidity and moisture control. It also greatly improves the dentist’s access when placing the material. The different types of rubber dam and other materials used in connection with it are discussed in Chapter 13.
Shade Taking
Resin composites: hydrophobic materials consisting of an inert glass and a polymerizable resin.
Ceramic: an inorganic, non-metallic solid prepared by the action of heat and subsequent cooling.
Matching like with like
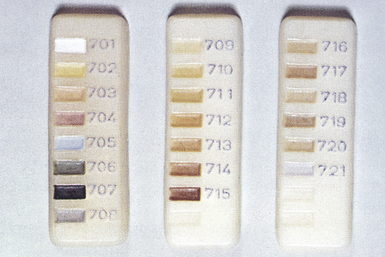
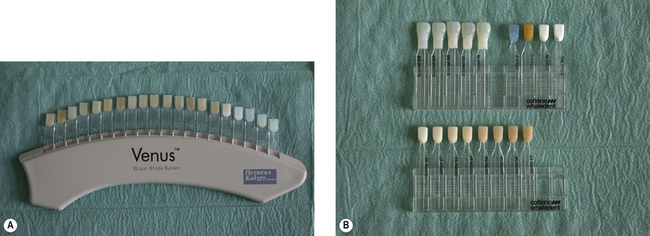
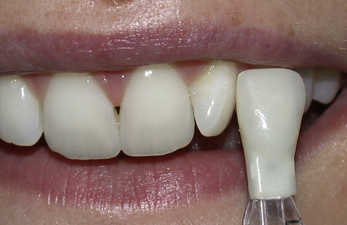
One of the most commonly used shade guides is the Vita Shade Guide (Figure 2.3), which is used to shade match for ceramics. Unfortunately, the tabs of the shade guide are made of a bulk of material whereas the crown is usually in much thinner sections, altering translucency and shade substantially. It is also possible to get small tabs of the various stains that are available to characterize the ceramic (Figure 2.4).
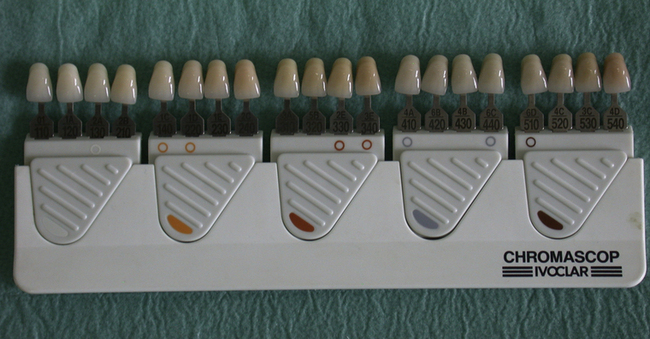
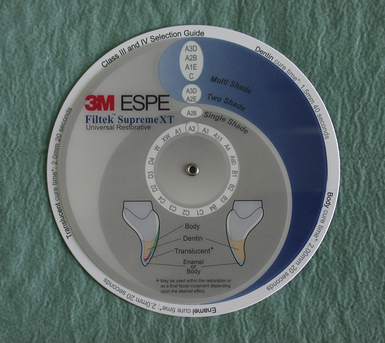
Some shade guides are designed such that a dentist can select both a shade for ceramic and acrylic when crowns and dentures are being provided for the same patient as the shades for the two materials correspond (Figure 2.5). Several manufacturers have recommended using the Vita Shade Guide to shade match for the resin-based composites, and a form of recipe wheel (Figure 2.6) guides the dentist in using the shades in the kit.
To reduce the risk of error, some manufacturers have produced shade guides which are made of the same resin-based composite that is in the kit. This has the benefit that similar types of material are being matched. There is a greater chance that a good shade match will be achieved. Figure 2.7 illustrates two shade guides. One is a simple tab system composed of the resin composite in the kit and the other involves inserting a core of the ‘dentine’ shade in the shell of ‘enamel’. If a small drop of glycerine (or water) is placed to remove the air barrier between the two shade tabs, the dentist can see the final shade result with some certainty.
![]() Shade taking (using Miris 2, Coltène Whaledent)
Shade taking (using Miris 2, Coltène Whaledent)
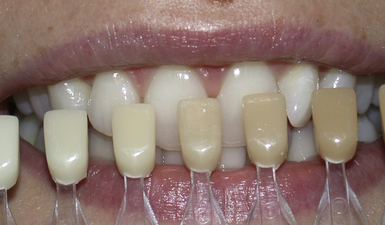
1. Take the dentine shade by matching it with the cervical region of the tooth. This area has the most dentine and less enamel (Figure 2.8).
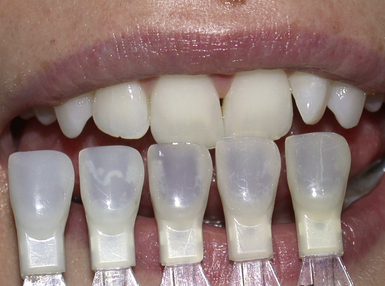
2. Select the enamel shade by comparing it with the incisal edge. This region has most enamel and less dentine (Figure 2.9).
3. Put the two pieces together with a drop of glycerine between them (Figure 2.10).
![]()
• Women have better eyesight for colour perception as they have more cones (colour-sensitive cells) in their retinas. It is therefore advisable for male dentists to ask a female colleague to take the shade or to at least verify it!
• The purest light is the northern light at noon and so if possible take the patient to a (north facing) window to take shade in natural light. A shade should never be taken under the operating light or in non-colour-corrected artificial lighting. It is also advisable to have neutral colours for the surroundings and ensure that a red background is avoided.
• Eyes tire quickly and therefore it is advisable to take a shade at the start of the appointment so that the best result may be obtained.
![]()
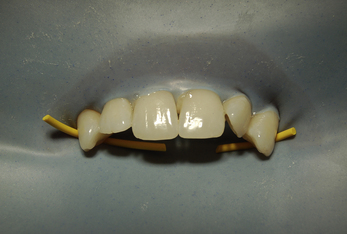
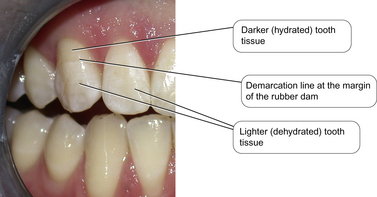
The shade should always be taken prior to the application of rubber dam. As rubber dam provides such an effective method of isolation so the teeth pushed through the dam will dehydrate quite quickly. Dehydrated teeth appear white and chalky. If the shade assessment was made at this point, then the final composite would be too light after the teeth have rehydrated after rubber dam removal. Figure 2.11 illustrates this phenomenon. This patient has had rubber dam placed to restore 11 and 21 after trauma. The dam was anchored on 13, so the incisal two-thirds was through the dam and the cervical third was in the mouth. Note the obvious demarcation between these parts of the tooth.
New digital technology for shade taking
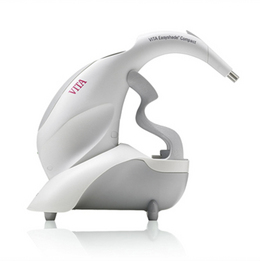
Digital technology is now available to take the shade to increase the accuracy of the prescription with the intention of decreasing remakes. Bespoke digital shade analysis systems are commercially available which calculate the shade. This information is then corrected to ensure that the true tooth colour is sent to the dental laboratory. This analysed data can then be used by the technician to accurately reproduce the shade of the tooth in ceramic. An example of the type of device available is shown in Figure 2.12. The guide is positioned over a number of points on the tooth surface and the results are mapped.
Light Polymerization
Advantages and disadvantages of light curing
Light curing offers a number of advantages:
• The material has an extended working time so it can be manipulated for a long time without setting. This means that the unset material may be sculpted into a form without time pressure. This is particularly useful if complex aesthetic restorations are being provided. Only when the dentist is happy with the desired shape is the light applied and the material set. This is known as a command set.
• It delivers a more consistent means of polymerization as a more even distribution of the chemicals within the paste can be obtained because the blending of the paste is optimized by the manufacturer in the factory.
• The amount and concentration of amine required in the material can be lowered. A tertiary amine is one of the essential components in the (chemical or light) curing process. Unfortunately the presence of any residual amine after curing leads to darkening and yellowing of the set material with time. Restorations in the anterior sextants of the mouth which are subsequently exposed to sunlight are particularly affected, which is clearly not desirable. As the bulk of the amine is used up during the light-curing polymerization process, a decrease in the amount and concentration of amine reduces colour change and enhances colour stability.
• There is a saving in clinic time as there is no need to wait for a chemical reaction to go to completion before moving on to the next stage of the operative procedure, such as finishing and polishing.
• The quality of cure is improved. The level of conversion of the monomeric component to the polymer varies with the method of initiation of the reaction. The level of conversion is lower for two paste (chemical cured) materials compared to light activated materials. Most light activated materials convert between 50% and 70% monomer to polymer. However, this still leaves some unconverted monomer, which can lead to leaching out of material in the long term and degradation of the restoration with time. Conversion of up to 95–97% of the monomer can be achieved in the laboratory. This increases the mechanical properties but makes the set material more brittle. To achieve this optimum conversion, heat, light and pressure are required and this can only be achieved extraorally.
Stay updated, free dental videos. Join our Telegram channel

VIDEdental - Online dental courses


