CHAPTER 19 Stage III checks
The inspection interval in Stage III is approximately 2 months. As the entire torquing and tip correcting process is essentially built-in, and self-limits automatically, progress and maintenance checks are normally all that is required; it is unusual for an archwire to require removal, except for running repairs or possibly upgrading a deep tunnel auxiliary.
At each check visit, the following should be observed:
Absolute need to provide extra space
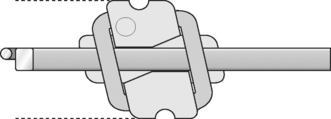
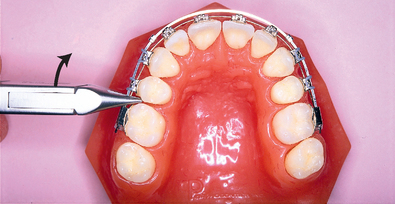
The method used is very much the same as described under ‘cinchbacks’ in the last chapter. First, the four incisors should be released from the archwire by removing the modules. The tapered tips of a light wire plier should then be inserted in the contact mesial to the molar band, grasping the archwire immediately mesial to the buccal tube, before gently rotating the handles forward (Fig. 19.5). Only about half a millimetre of wire will need to be fed through from each side. This needs to be observed carefully. The easiest way to do this is to watch the crimpable hook; the slightest forward movement will be sufficient. The elastomeric modules can then be replaced, which will gather the incisors fractionally forward. During the early part of the third stage, and particularly in extraction cases, it is common to have to repeat this simple process at later visits.
Stay updated, free dental videos. Join our Telegram channel
VIDEdental - Online dental courses


