Figure 1 The fractured denture. Mid-line fractures such as this usually are due to poor fit or occlusal problems. If this is true, repairing the denture will alleviate the symptoms, but will not cure the cause. The dentist may have the denture repaired and then reline it to assure a better fit, or remount it to improve the occlusion. Mid-line fractures are often seen on a single maxillary denture against a natural mandibular dentition.
Figure 2 The two halves are assembled.
Figure 3 Sticky wax is applied to the fracture line to maintain the two pieces in correct apposition. Note that a second person is helping in this procedure. It is often necessary to have a helper when joining the pieces.
Cyanoacrylate glue may be used in lieu of sticky wax and reinforcing burs. (See section on cyanoacrylate cements at the end of this Section.)
Figure 4 The denture is reinforced by attaching one or more old burs to the occlusal surfaces of the teeth. A steel bur is better than a wooden stick for this purpose as a wooden stick may warp and cause distortion.
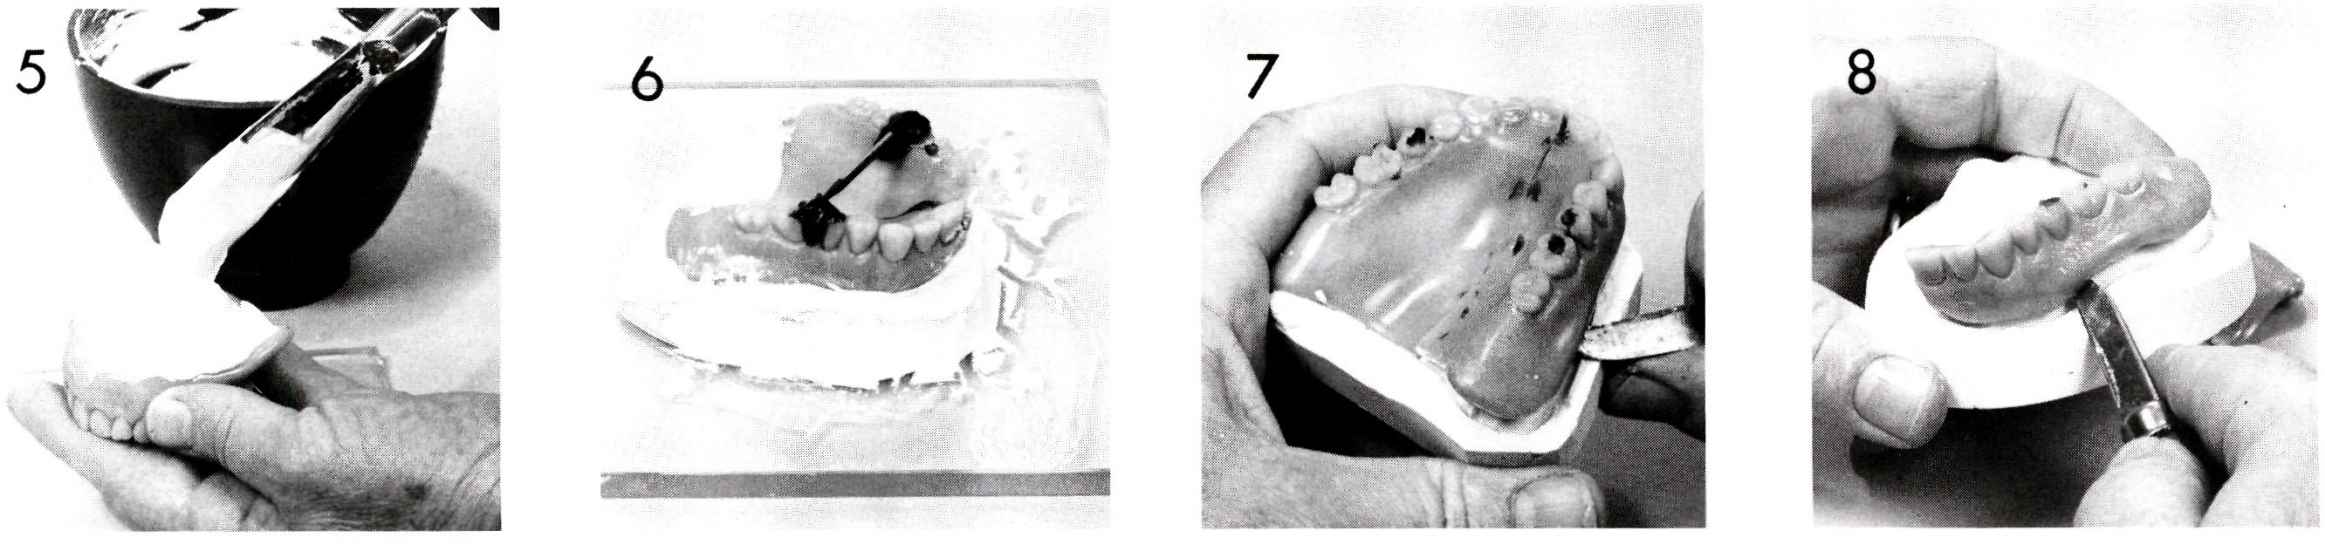
Figures 5 and 6 A cast is poured into the denture using quick-set plaster.
Figures 7 and 8 After the cast is set, it is trimmed and the pieces of the denture gently removed. Caution must be exercised so that the ridge areas of the cast are not broken.
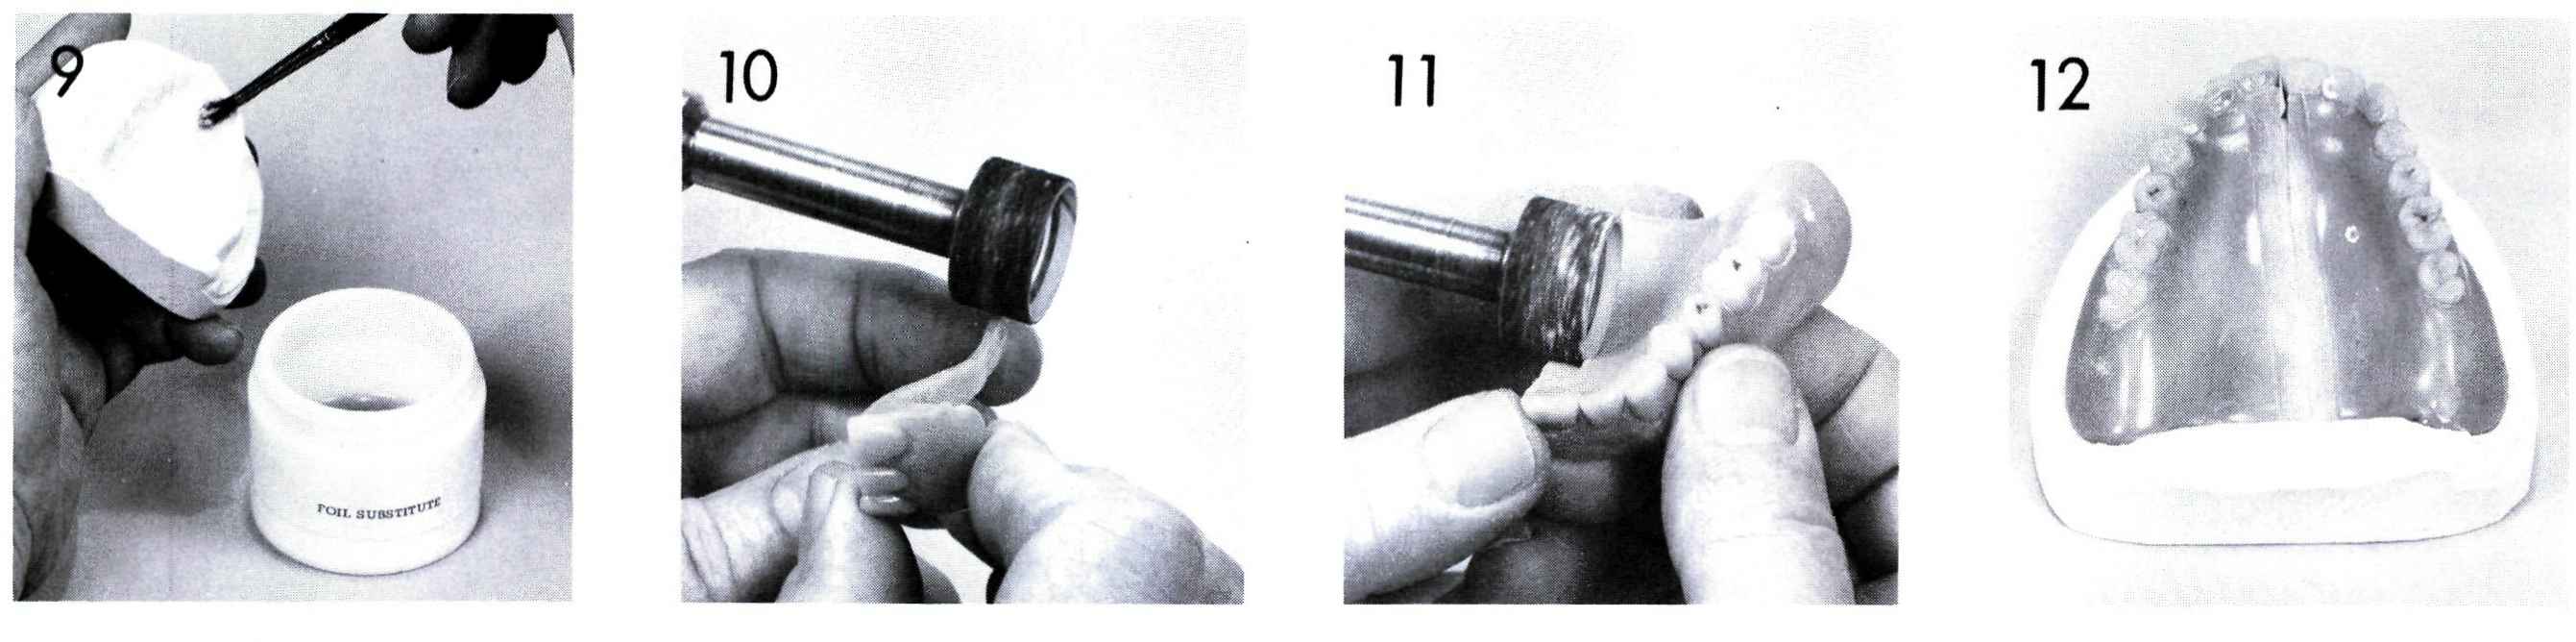
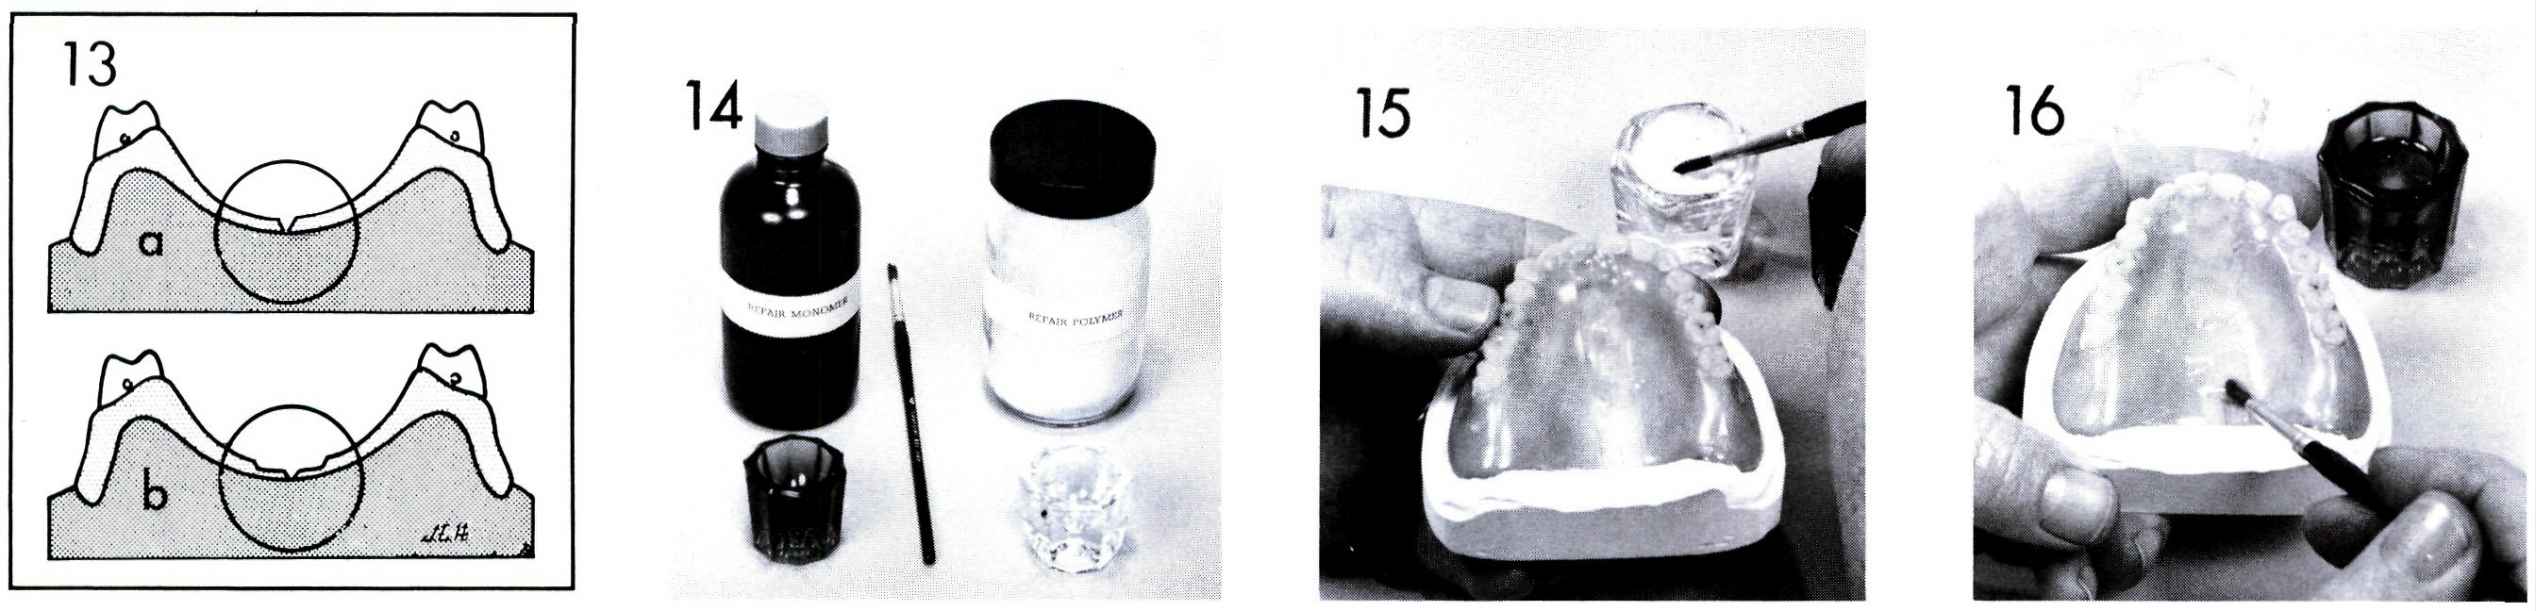
Figure 9 The cast is coated with tinfoil substitute and set aside to dry.
Figure 10 The edges of the fracture are beveled toward the polished surface using an arbor band on a lathe.
Figure 11 The polished surface of the fractured pieces is reduced to form a groove 8 to 10 millimeters wide along the fracture line. Four to 5 millimeters of the groove are on either side of the fracture line.
Figure 12 The pieces of the denture are re-assembled on the cast.
Figure 13 This drawing is a cross-section of a fractured denture prepared for repair: “a” shows the first step in preparation, the creation of a bevel toward the polished surface on each fragment; “b” shows the formation of the groove along the fracture line.
Figure 14 Self-curing repair material is used to repair the denture. Most manufacturers of denture base resins supply repair materials in the same shades as their regular denture base resins. An almost undetectable repair can be made by using the proper material.
Figures 15 and 16 Alternate applications of monomer and polymer are made until the area to be repaired is filled. The area should be slightly overfilled to allow for finishing.
Figure 17 The repair process may be hastened and porosity in the repair material prevented by using a pressure-curing unit. 100°F. water is placed in the curing unit so that it just covers the repaired area.
Figure 18 The curing unit is re-assembled.
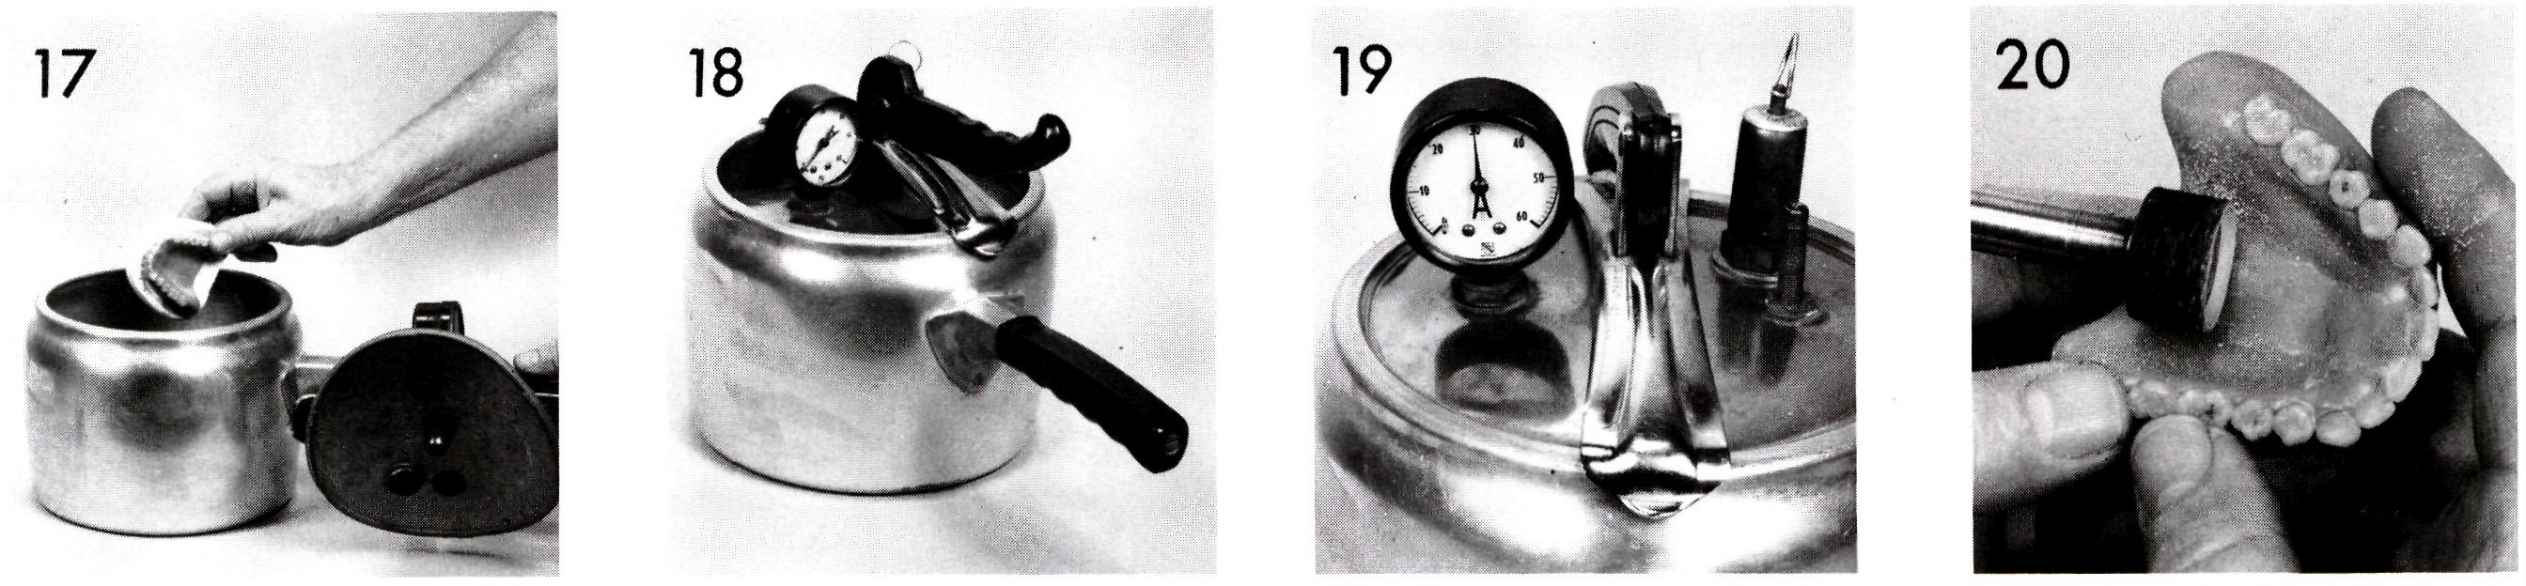
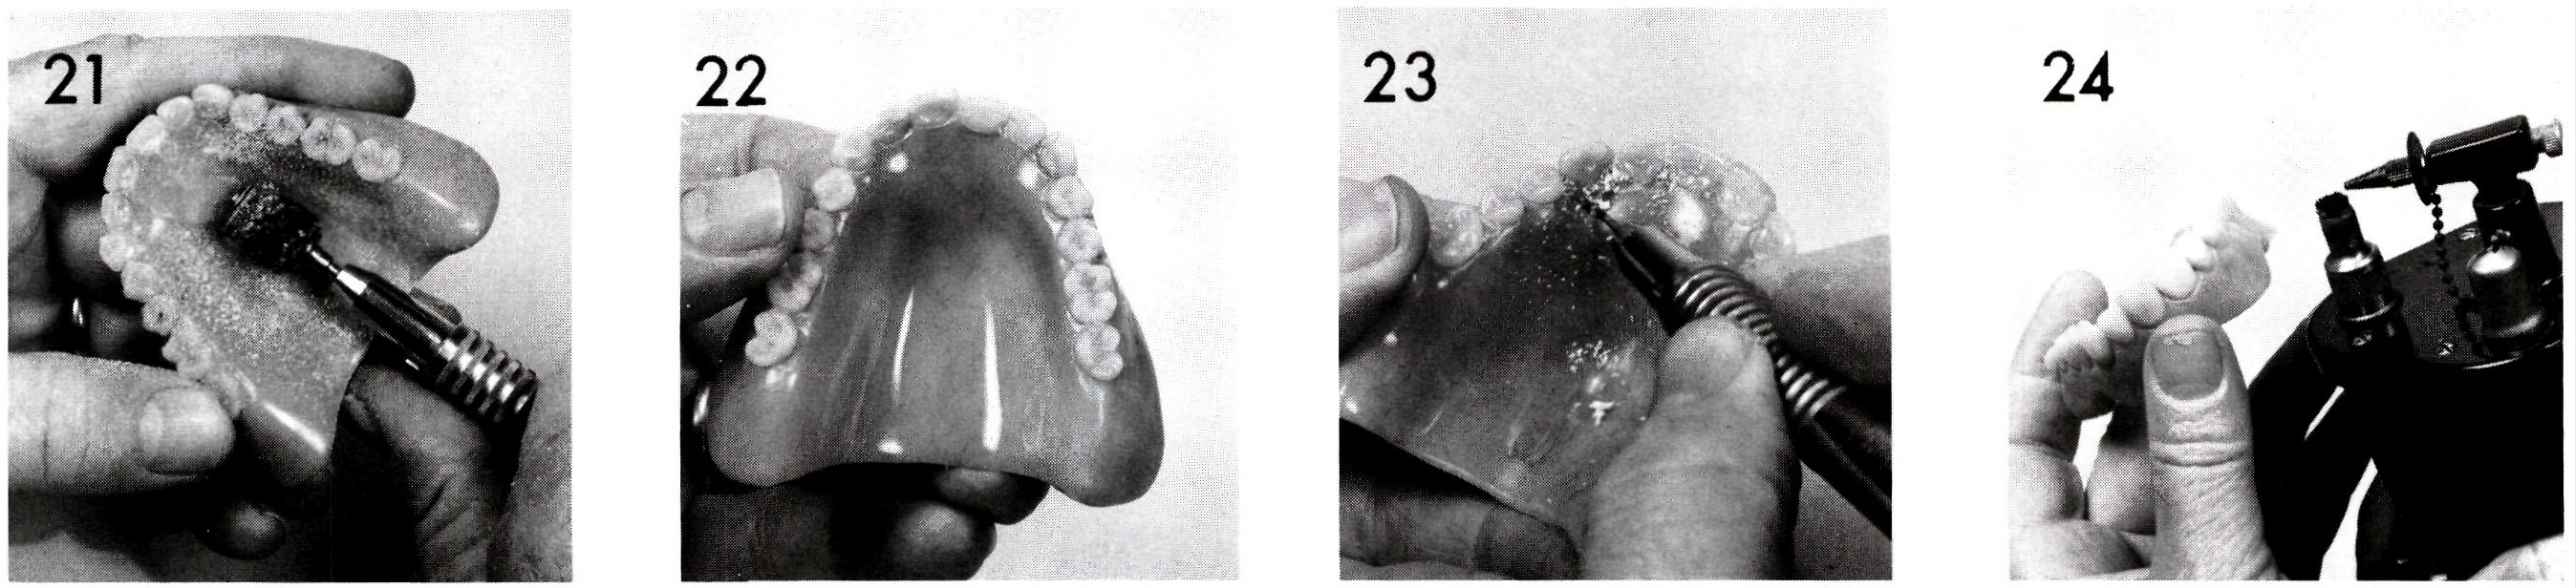
Figure 19 Compressed air is introduced into the curing unit until it contains 30 pounds per square inch pressure. The denture is left in the pressure-curing unit for a minimum of 10 minutes. These curing units are available commercially or may be adapted from inexpensive pressure cookers and parts available in hardware and automobile supply stores.
Figure 20 The denture is removed from the curing unit and removed from the cast. An arbor band is used to remove the excess repair material from the denture.
Figure 21 A small arbor band in a handpiece, or other small instruments are used in hard-to-reach areas. The repaired area is then polished in a conventional manner.
Figure 22 The completed repair.
REPLACING A TOOTH
Replacing a broken tooth is a simple task in a methyl methacrylate based denture. The following technique provides satisfactory results, although there are acceptable variations to this technique.
Figure 23 The area lingual to the fractured tooth is reduced using a fissure bur.
Figure 24 The fractured tooth is then heated with a needle-point flame. Heating the tooth softens the plastic surrounding it.
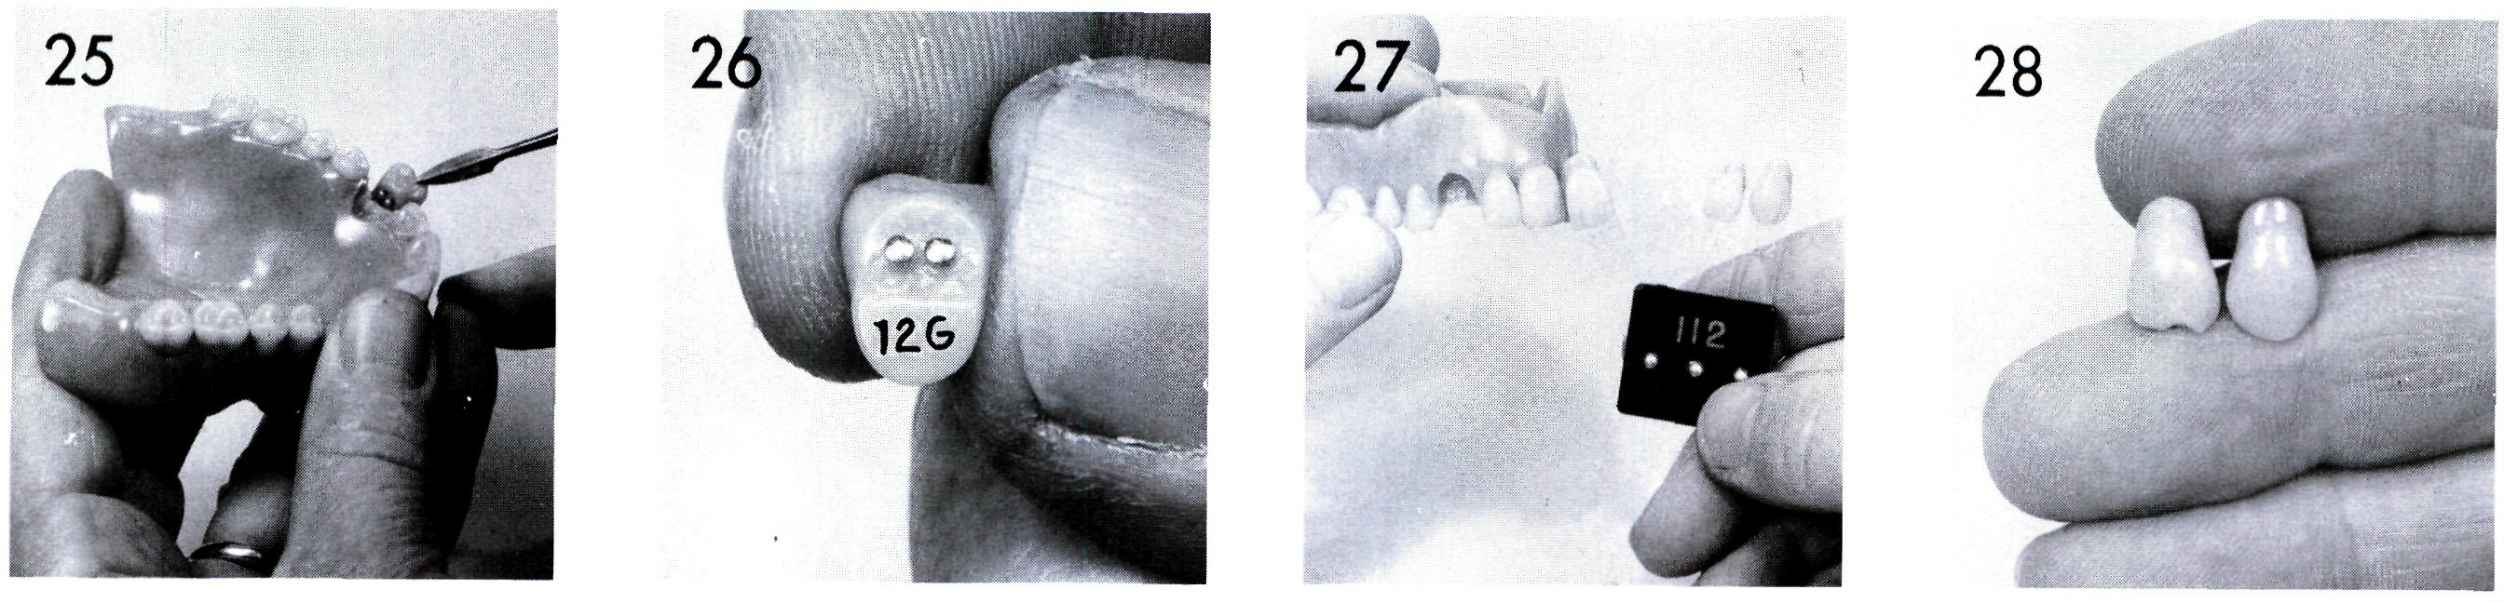
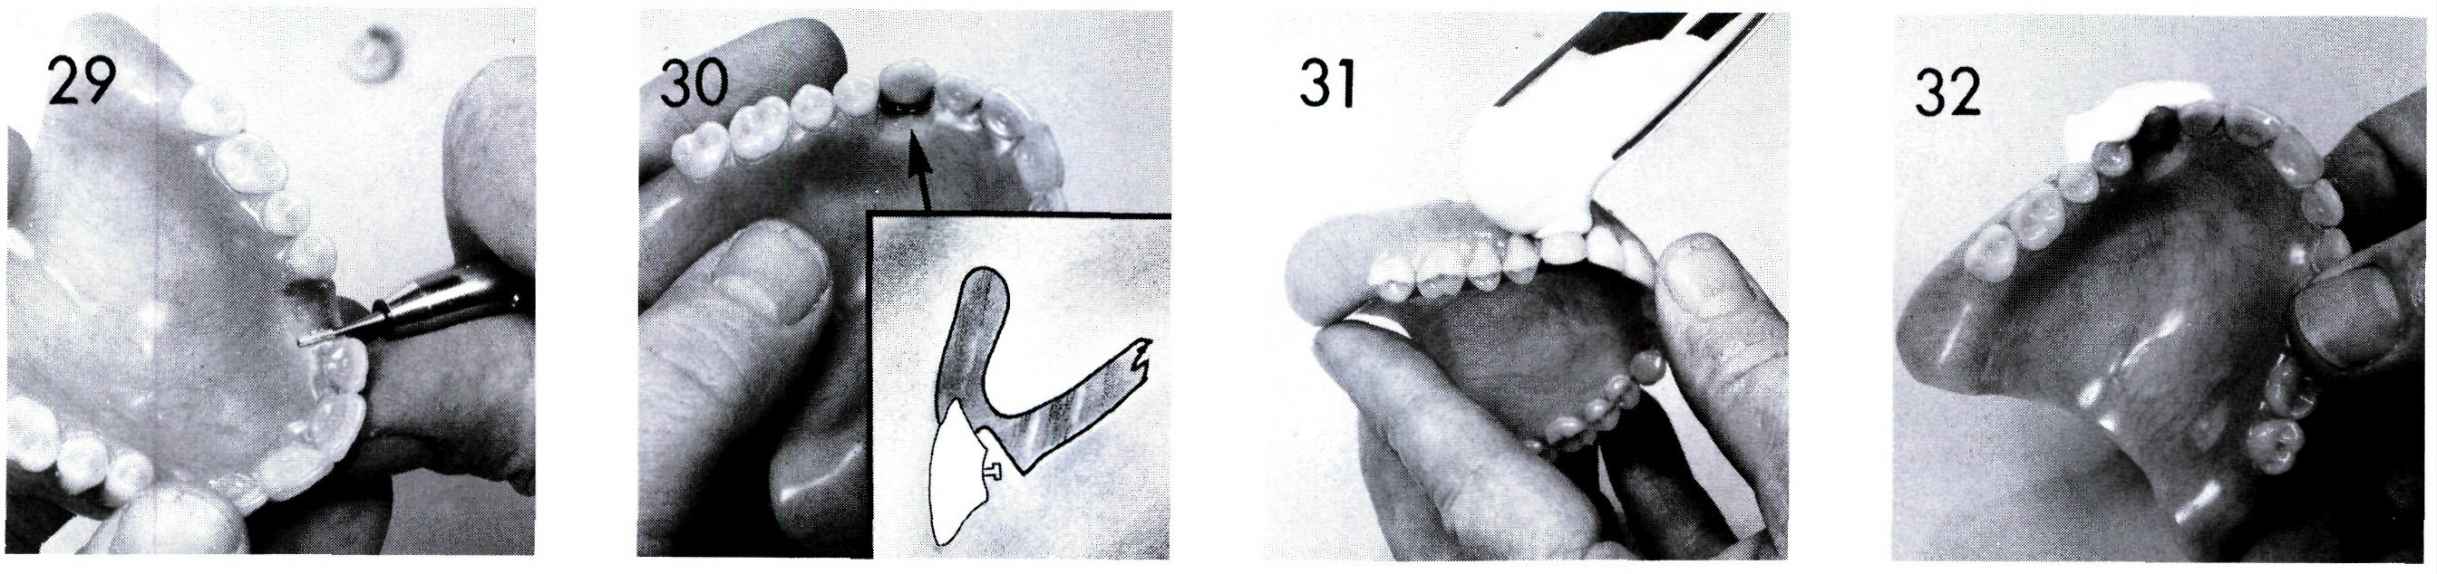
Figure 25 The tooth is pushed out of the denture with an instrument.
Figure 26 The mold of the tooth is determined by inspecting the ridge lap. The mold number is found on the ridge lap of most artificial teeth.
Figure 27 The shade is determined by using a shade guide.
Figure 28 A tooth identical to the one removed from the denture is selected.
Figure 29
Stay updated, free dental videos. Join our Telegram channel
VIDEdental - Online dental courses


