Since the 1980s, bone-anchored dental implants have become a well-established and predictable treatment for restoring missing teeth. Today many researchers and clinicians are focusing on ways to achieve these successful results while simplifying and shortening the treatment process.
One of these approaches involves immediate implant loading. Immediate implant loading generally involves inserting one or more dental implants and attaching the fixed prosthesis on the same day or within just a few days.
The obvious advantage to this increasingly popular technique is that it allows patients to regain function and natural-looking “teeth” more quickly. In cases where there is immediate implant placement and loading, this technique also helps to maintain the soft and hard tissue architecture.
Immediate implant loading was first successfully used for overdentures. During the past several years, however, a plethora of studies and reports published in the dental literature have reported excellent success rates with immediate implant loading for partial edentulism and single crowns in either the maxilla or mandible and for complete edentulism of the mandible. In select cases, immediate implant loading can provide equally good results as delayed loading.
It is important to put these papers into proper context, however. Most of the published studies on immediate implant loading through 2006 are essentially anecdotal reports. Very few include a “gold standard” randomized clinical trial design comparing the outcomes of immediate loading with delayed loading. There is also considerable variability among published studies and case reports in terms of the data quality, the techniques employed, the cases treated, the implant and provisional types used, clinician experience, and so forth. As such, it is difficult to establish standard clinical guidelines for immediate implant loading. In fact, based on published scientific data, there is limited evidence to support or guide most clinical applications of immediate implant loading.
Most published reports concur, however, with regard to the following requirements for a successful immediate implant loading case:
- •
The implant(s) must be primarily stable in the native bone.
- •
Occlusal loading of the implant should be minimized as much as possible to ensure optimal osseointegration.
- •
The patient should be fully informed of the risks and benefits of immediate implant loading and understand that results can vary.
- •
Patient candidates must be carefully selected (e.g., smoking patients tend to have a much higher failure rate).
- •
Immediate implant loading is best undertaken by a well-experienced surgical and restorative team with advanced knowledge of implant dentistry.
- •
Immediate implant loading is contraindicated in patients with compromised immune systems, uncontrolled diabetes mellitus, or psychiatric illnesses.
Based on this author’s extensive experience with immediate implant loading, the use of tapered, surface-treated implants helps to ensure the best results in these cases. The tapered design offers good compression of bone and stability. Surface treatment encourages quicker integration. Using an implant that is as long as possible is also recommended to engage more and better quality bone based on the anatomic boundaries.
This chapter provides a clinical outline for immediate implant loading for single-tooth replacements, other partially edentulous cases, and the completely edentulous mandible and maxilla. The techniques are based on the author’s nearly 10 years of experience with immediate implant loading and placement of several thousand implants.
▪
IMMEDIATE IMPLANT LOADING FOR SINGLE-TOOTH OR OTHER PARTIALLY EDENTULOUS RESTORATION CASES
Compared with conventional crown and bridge restorations, the main disadvantage to restoring teeth with implantsupported restorations is that the patient must typically wear a removable provisional restoration for up to 6 months. This well-established healing period allows dental implants to optimally osseointegrate and to build the supportive foundation for a long-lasting restoration.
In many partially edentulous cases, however, this waiting period can be avoided with immediate nonfunctional loading of the implants. To be done successfully, two important principles must be met. First, the implant must be stable in the native bone. An important first step is to do a thorough radiographic study to assess bone quality and quantity. Although it is important to look for adequate bone apical to the tooth, sufficient bone on the sides of the tooth sockets can also be engaged to promote stability. Second, occlusal load on the implant must be prevented to deter macromovement that can lead to fibrous encapsulation of the implant. If this occurs, osseointegration can be lost, or worse, the implant may become ailing yet still integrated.
The success rate may be lower when implants are immediately loaded after being placed in fresh extraction sites. This may be related to the surgical dentist’s skill and comfort level. Whereas a fresh extraction site certainly offers the advantage of preserving hard and soft tissue architecture, it can be easier to get initial stability when placing implants into a solid, healed ridge.
HEALED EXTRACTION SITE WITH ADEQUATE HEIGHT AND WIDTH OF ALVEOLAR BONE
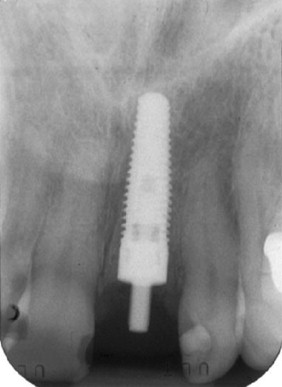
In most cases, a midcrestal or slightly lingual incision is made to reveal the underlying bone in the healed extraction site. Subsequently, standard surgical preparations are made for implant placement. A round bur followed by pilot drills and a series of increasing-diameter drills are used until the osteotomy is properly completed. Depending on the bone density, narrower drills may be used as the final drills to achieve good primary stability.
It is common to place the implant with a torque wrench and to achieve at least 30 Ncm of required torque for final seating of the implant.
IMMEDIATE PLACEMENT AND LOADING OF IMPLANTS IN FRESH EXTRACTION SITES
In many cases, a tooth extraction is required for endodontic or periodontal reasons or because of root fracture, resorption, or carious lesions. These extracted teeth can often be restored with immediately placed implants followed by immediate nonfunctional loading. As mentioned, the advantage of immediate placement and loading in a fresh extraction site is that the maximum amount of bone and soft tissue are preserved.
Whenever an implant will be placed into a fresh extraction site, patients should be placed on an antibiotic 2 to 3 days before the appointment to deter infection.
To be most successful, the extraction must be performed as atraumatically as possible to prevent damaging the surrounding bone. This can be the most difficult aspect of immediate implant placement.
The socket should be carefully curetted with small, long curets to ensure that the apex of the socket is thoroughly débrided to the bone.
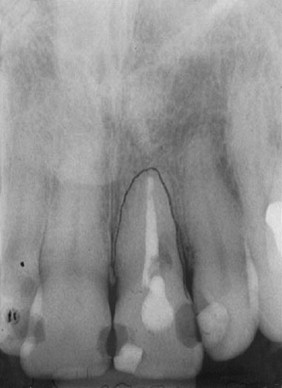
Once the extraction is complete, care must be taken to place the implant into the ideal axial direction. In most cases, this is not the same as the direction of the tooth socket itself. The clinician should be careful to avoid slipping down the palatal wall of the socket and starting the osteotomy at the socket’s apex. If that occurs, the clinician will often create a more labial location for the implant than planned. Thus, the palatal wall of the socket should be prepared or perforated slightly with a round bur on the apical third of the socket. It is very important to start with a round bur and be very definitive in starting the osteotomy. The socket should never dictate placement of the implant; ideal location should.
Because the palatal cortical plate is stronger, it is common during the next series of drill preparations for the osteotomy to slide or drift toward the empty socket and labial plate. Starting with a palatal approach helps to seat the implant in the center of the ridge at the end of the placement procedure. Care should be taken to end up slightly palatal to the planned incisal edge ( Figures 31-1 through 31-6 ).
Bone grafting is almost always required when doing any immediate implant placement. This is generally because the shape of the socket is not the same as the shape of the implant, and there are often voids of more than 1 or 2 mm around the implant. Autologous, bovine, or Puros cancellous particulate allograft material is often used. Care must be taken not to overprepare the site. In fact, undersizing it can help to ensure that the implant is fully seated with a torque of at least 30 Ncm.
If sutures are needed, and often they are not, 5-0 sutures should be placed. Care should be taken to place the knots on the palatal aspect. This avoids creating a nuisance for the restorative clinician when preparing the provisional restoration.
RESTORATIVE CONSIDERATIONS FOR PARTIALLY EDENTULOUS CASES
For any partially edentulous case, the restorative protocol is the same.
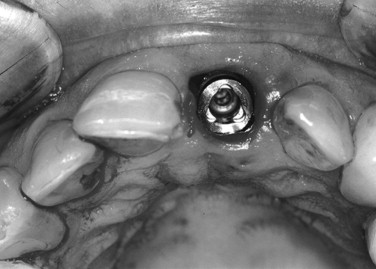
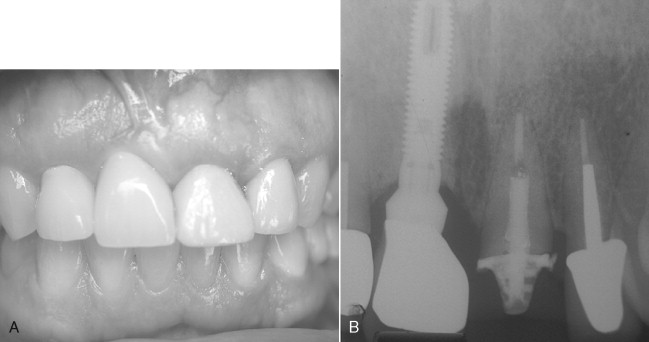
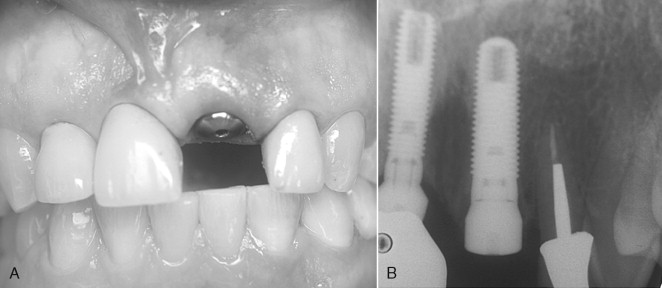
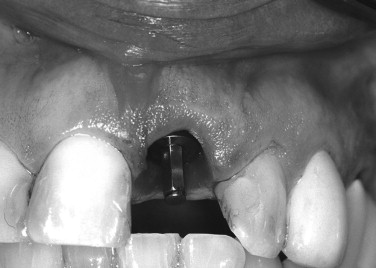
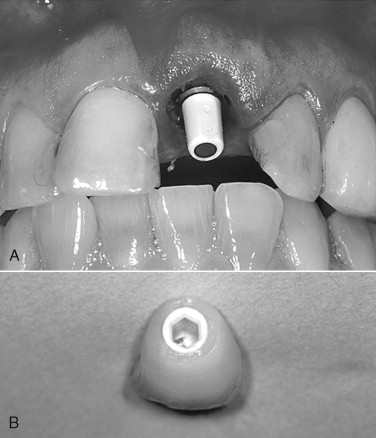
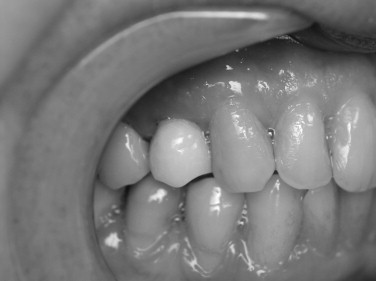
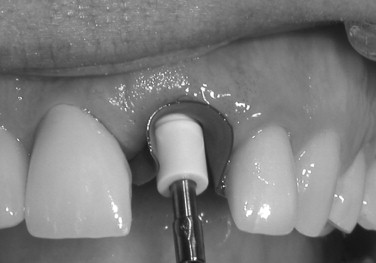
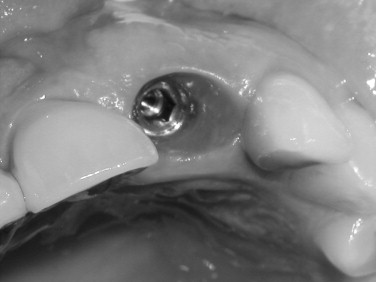
Immediately after implant placement, either: (1) the abutment is placed with 10 to 15 Ncm of torque after preparing the abutment out of the mouth ( Figures 31-7 through 31-9 ); (2) a temporary abutment is placed and torqued, which usually requires no preparation ( Figures 31-10 and 31-11 ); or (3) a healing cap is placed (see Figure 31-6 ); or (4) a single stage one-piece implant with abutment as part of the implant is placed.
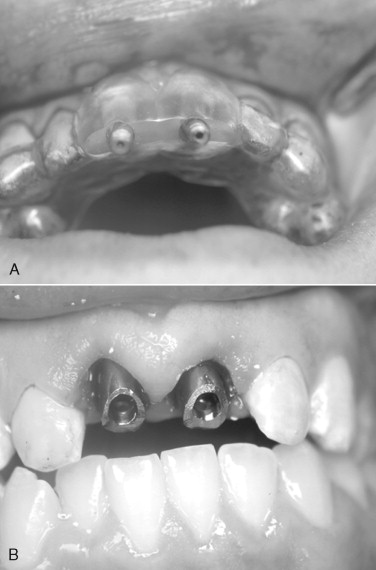
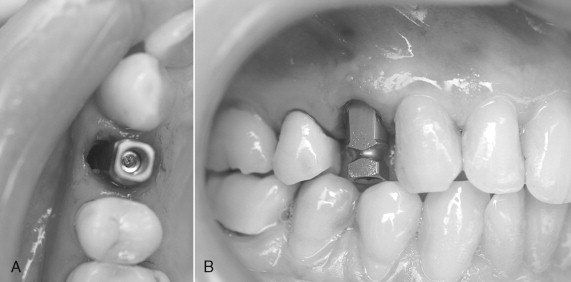
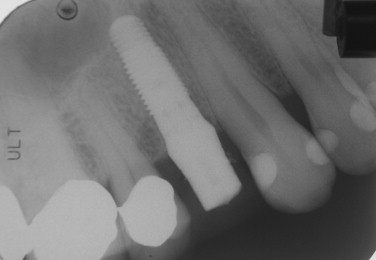
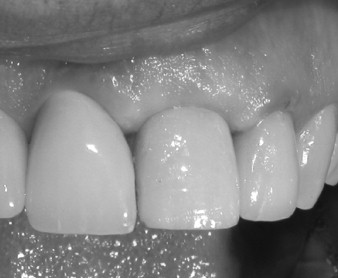
If an abutment or temporary abutment was torqued into position or a single-stage, one-piece implant was placed, a temporary crown is then fabricated and cemented in place ( Figures 31-12 and 31-13 ). Very small amounts of cement should be applied with care taken to remove any excess because it is toxic to bone. Another useful precaution is to take a periapical radiograph after cementation and analyze this for excess material ( Figures 31-14 and 31-15 ).
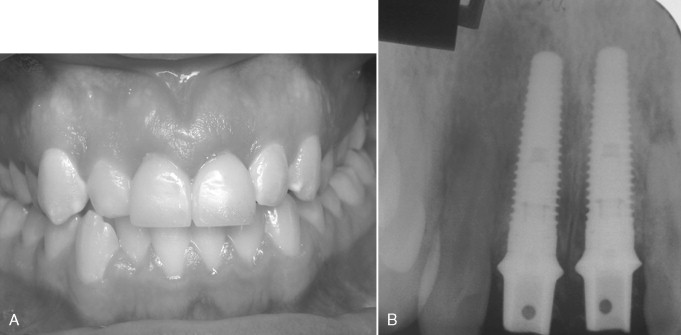
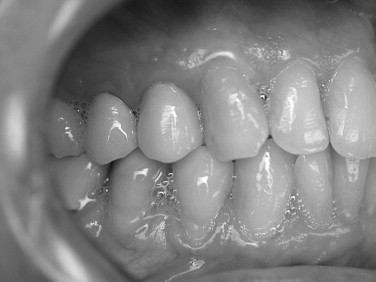
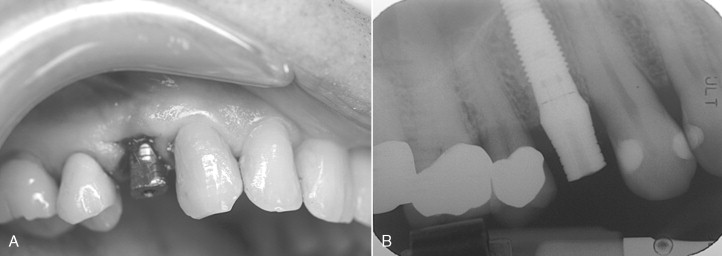
Screw-retained provisional restorations obviously eliminate cement entrapment problems. These also allow the restorative physician to precisely manipulate the soft tissue profile around the implant without worrying about cement ( Figures 31-16 through 31-18 ). For that reason, this author prefers screw-retained provisionals whenever possible. However, many restorative clinicians work only with cemented crowns because they require less specialized skill and chair time.
NONFUNCTIONAL LOADING
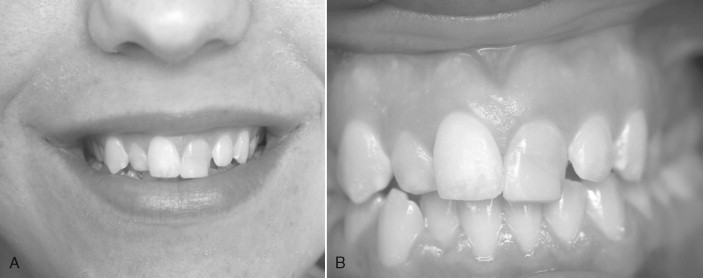
For any partially edentulous case involving immediately loaded implants, the temporary restoration(s) should be out of occlusion by at least 1 mm to achieve nonfunctional loading ( Figures 31-19 , 31-13 , and 31-18 ). Nonfunctional immediate loading means that although the lips, tongue, or food may put some force on the restoration, there is no occlusal loading from the opposing teeth. The dentist must adjust the occlusion as needed and explain to the patient the importance of keeping pressure out of the treated area. As mentioned, nonfunctional loading is critical to deter any implant macromovement that could cause fibrous encapsulation or lost osseointegration.
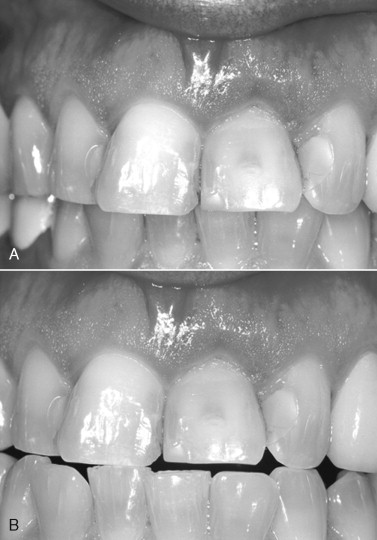
For implant restorations placed in the posterior maxilla, the author suggests significantly reducing or removing the lingual cusp.
According to Choquet et al., the distance from the contact area to the bone should be no more than 5 mm to reliably maintain the papilla. In their study, the customized provisional crown restorations were fabricated and contoured for optimal marginal fit emergence profile and interproximal contacts. Occlusal centric and eccentric contacts were not permitted on the provisional restoration. When evaluating and modifying the occlusion, the clinician should place the patient in both the upright and reclined positions. Patients should always be asked if they can “hit” the provisional when biting down. If they can, it must be modified to prevent this contact and protect against implant macromovement.
POSTOPERATIVE INSTRUCTIONS FOR IMMEDIATELY LOADED IMPLANTS IN PARTIALLY EDENTULOUS PATIENTS
After implant placement and loading, patients should be instructed to eat a soft diet for 6 weeks and to avoid placing food near the implant and provisional crown. The provisional crowns serve both aesthetic and transitional purposes during implant osseointegration, in place of transitional partial dentures or invisible retainers. If the patient wears a mouth guard or retainer, it must be adjusted after the provisional crown is placed. If it is worn without adjustment, it will place untoward forces on the implant. Patients should also be instructed to lightly brush around the implants with a soft-bristle toothbrush during the first 3 weeks and to rinse daily with over-the-counter alcohol-free mouth rinse containing cetylpyridinium chloride or with 0.12% chlorhexidine. Thereafter, conventional brushing and flossing can be resumed ( Figures 31-20 through 31-22 ).
Stay updated, free dental videos. Join our Telegram channel
VIDEdental - Online dental courses


