Fig. 8.1
(a) Actual photo of how some dentists loaded crowns with cement as if they were to be placed on implants in their offices. (b) Mean and range of cement used with different application techniques (Used with permission from Wadhwani et al. (2012). Copyright © Quintessence Publishing Company, Inc., Chicago, IL, USA)
Solution
Understanding how much cement is needed for an individual restoration is paramount if residual excess cement extrusion is to be avoided. An “ideal” volume of cement can be calculated if the size of the abutment is known and how it compares to the internal dimensions of the crown that is to be seated onto it.
When fabricating tooth-borne restorations such as full coverage crowns, the technician will frequently apply a die spacer material. This provides relief space for the cement lute. The crown is therefore fabricated on a die that is larger than the actual prepared tooth. The space provided for cement on the inside of the crown during the making of the crown is the same thickness as a layer of nail polish approximately 50 μm thick, which is about the thickness of a human hair!
When an implant restoration is made to be cemented over an abutment, the crown or bridge has a relief space provided in a similar manner. In the case of the CAD/CAM restoration, this is usually milled into the restoration. Some implant companies make laboratory analogs, which are inclusive of the abutment (Straumann solid abutment). These abutments are larger in size than the actual implant abutment used in the patient. The larger dimension of the laboratory analog is advantageous to the technician, as he or she does not have to apply additional spacer material.
A technique has been developed using a spacer and some fast-setting dental impression material to make a Chairside Copy Abutment (CCA) that can be used to coat the inside of the crown with a layer of cement approximating to the 50 μm needed.
The first stage: The crown is painted internally with Vaseline or a water-soluble lubricant. This allows polytetrafluoroethylene (PTFE) (plumber’s tape, which is 50 μm thick) to be adapted to, and stick to, the inside of the crown using a dry brush (Fig. 8.2a, b). The adaptation is completed by gently pushing the abutment into the crown and then carefully removing it (Fig. 8.3a).
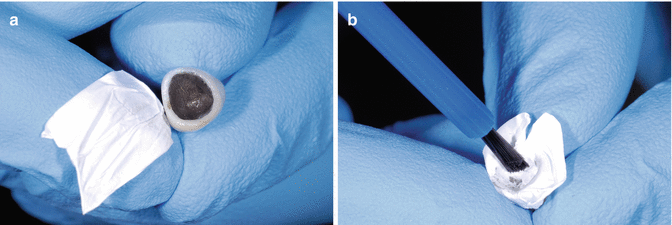
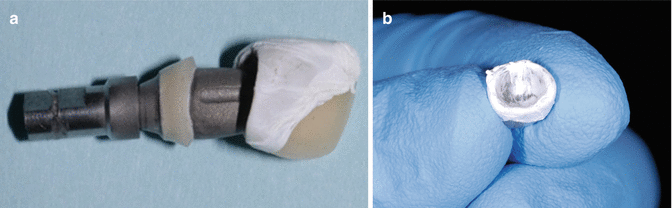
Fig. 8.2
(a) A piece of PTFE ready to be adapted to the inside of the crown. This has Vaseline painted internally. (b) A dry paintbrush is used to fully adapt the PTFE
Fig. 8.3
(a) The abutment is gently seated if the PTFE requires further adaptation. (b) The inside of the crown has a layer of PTFE tape adapted to it
To make the CCA use a fast-setting impression or bite registration material. Fill the inside of the crown and continue to overfill until a “handle” is produced (Fig. 8.4a, b). Hint: use a fine-tip nozzle. Then allow the material to set (Fig. 8.5).
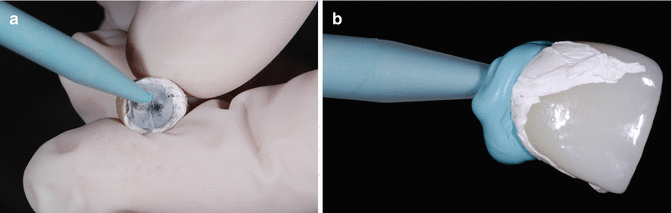
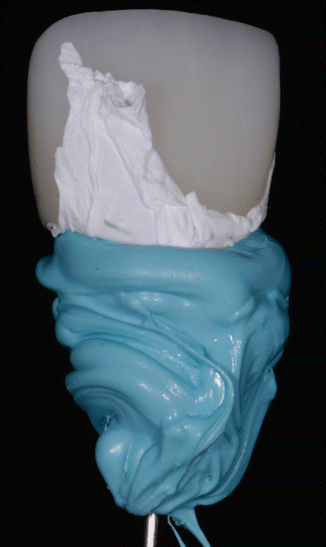
Fig. 8.4
(a) Making the CCA. The crown with the PTFE lining is being filled with Blu-Mousse. (b) A handle is being formed
Fig. 8.5
The completed Blu-Mousse replica is allowed to set
Remove the CCA, and then remove the PTFE and discard. Thoroughly clean the inside of the crown (important!) to remove the lubricating agent (Fig. 8.6). Now you have a chairside copy abutment. The CCA is 50 μm smaller than the inside of the crown. Inspect it, compare it to the actual abutment, and make sure you know the orientation (Fig. 8.7).
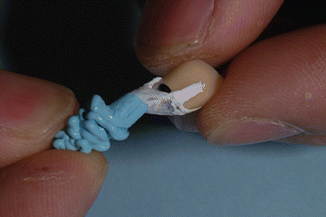
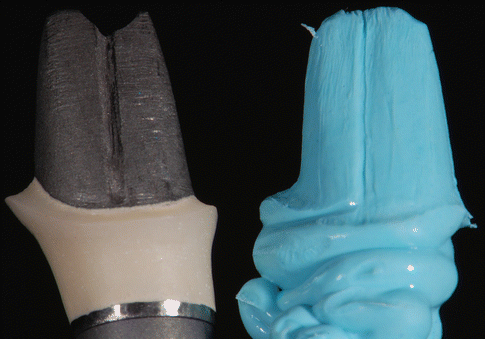
Fig. 8.6
Remove the Blu-Mousse copy abutment, take out the PTFE and discard, and then follow with thorough cleaning of the crown
Fig. 8.7
Comparing the real abutment to the CCA, confirm orientation and check for defects
The CCA is now ready for use. Place the abutment in the patient’s mouth, confirm that it seats correctly, and then torque the screw to the appropriate preload value. The crown is now ready to be cemented. Load the crown with more cement than is required. When CCA is pushed into the crown and seated fully, the excess cement will be extruded chairside and easily removed—this is done outside of the mouth (Figs. 8.8a, b and 8.9).

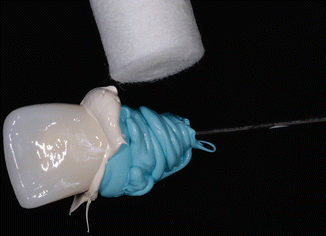
Fig. 8.8
(a) The CCA is gently seated at first, (b) then completely pushed into the crown, allowing excess to be removed extraorally. Hint: when you first try this, use cement with an extended setting time
Fig. 8.9
Once fully seated, the excess cement is removed
The Blu-Mousse (Bite registration material, Parkell, Edgewood, NY, USA) CCA has acted as a plunger, extruding excess cement. It is now discarded and the inside of the crown should have an even amount of cement lining it. If there is a deficiency, add a minimal amount. The crown is seated intraorally (Fig. 8.10) with almost no excess cement, maintaining health and reducing cleanup time. Cleanup should be absolutely minimal.
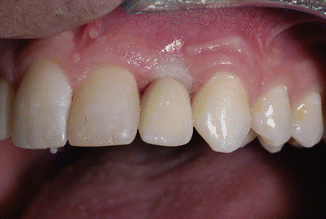
Fig. 8.10
The crown is seated onto the abutment. Cleanup is minimal (Note blanching is from the abutment, which has a 360° porcelain supragingival margin)
On completion, it is advised to make a post-cementation radiograph to confirm both that the crown has been seated correctly and that no excess cement exists—that is, provided the cement used is radio-opaque enough!
Advantages of the CCA
A fast, inexpensive, simple technique, this approach limits excess cement to an absolute minimum and makes cleanup quicker and easier. The CCA can be used for custom, stock, and even multiple abutments (Fig. 8.11a, b).
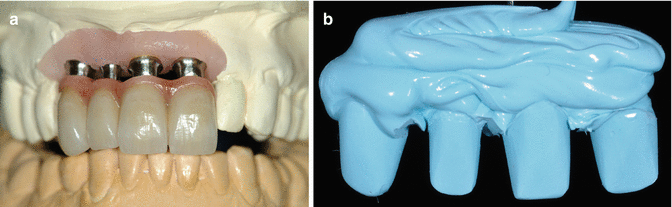
Fig. 8.11
(a) This four-unit cemented prosthesis had a (b) copy custom abutment device made to pre-extrude excess cement. It was fabricated in a similar manner as the CCA using PTFE as a spacer providing 50 μm lute space
Stay updated, free dental videos. Join our Telegram channel
VIDEdental - Online dental courses


