Fig. 14.1
(a) Facial and, (b) intraoral view of the patient
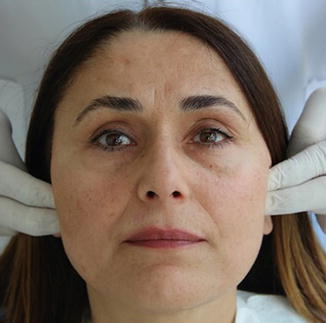
Fig. 14.2
TMJ evaluation of the patient
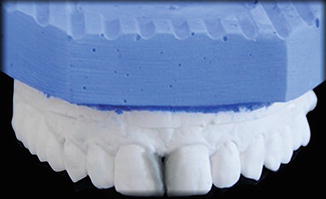
Fig. 14.3
Prepared study model with sectional wax setup
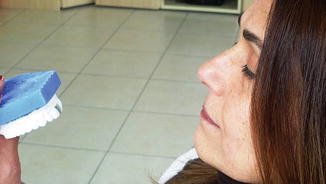
Fig. 14.4
Evaluating the wax setup and appearance of the diastema closed on the study model with the patient
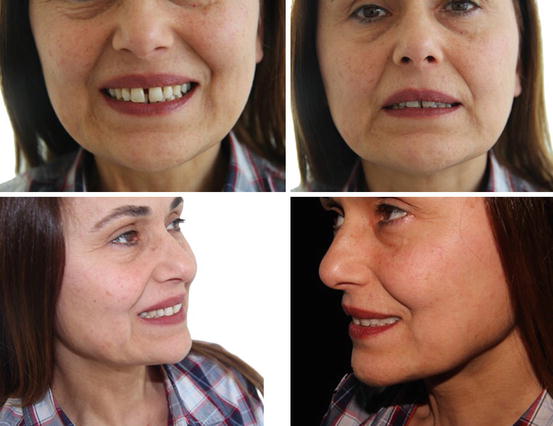
Fig. 14.5
Some of the extraoral photographs of the patient
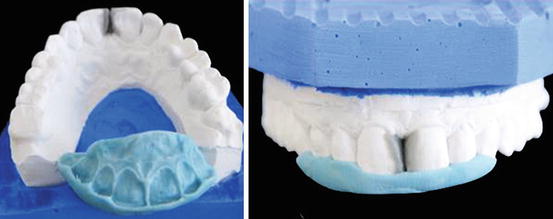
Fig. 14.6
Prepared palatal silicone putty index
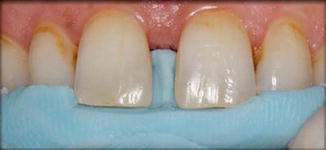
Fig. 14.7
Preview of the silicone putty index in the patient’s mouth
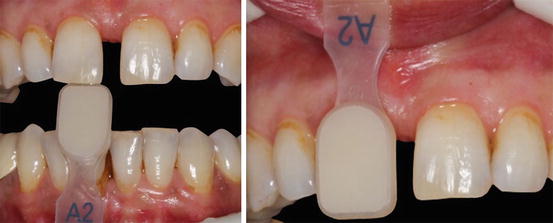
Fig. 14.8
Shade selection of the teeth using manufacturer’s shade guide

Fig. 14.9
Roughening enamel surface with a fine diamond bur before initiation of restorative procedure
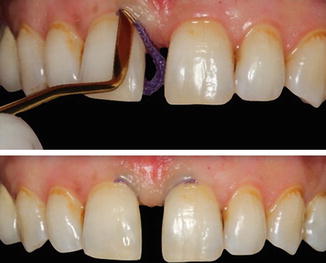
Fig. 14.10
Placement of retraction cords into the gingival sulcus in order to control the fluid
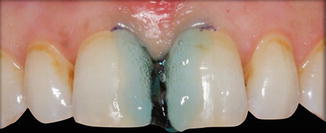
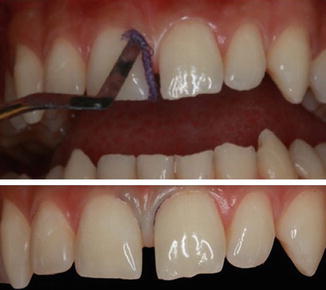
Fig. 14.11
Etching mesial surfaces of the central incisors with 32 % phosphoric acid
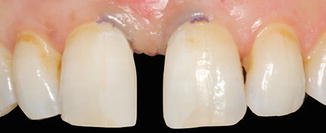
Fig. 14.12
Chalky-white appearance of the enamel surface after acid etching
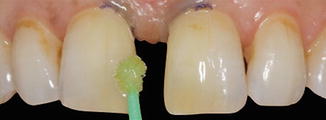
Fig. 14.13
Application of multimode adhesive bonding to the enamel surface

Fig. 14.14
Light-curing of the adhesive bonding
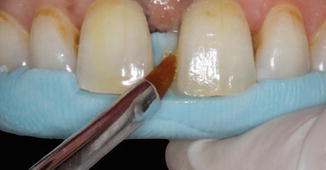
Fig. 14.15
Placement of resin composite with the help of silicone putty index as guide on lingual/palatal surface
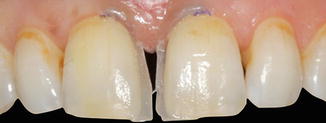
Fig. 14.16
Creation of lingual/palatal enamel layer for each tooth using silicone putty index as a guide
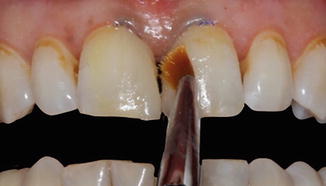
Fig. 14.17
Placement of enamel layer on top surface and thinning with a brush
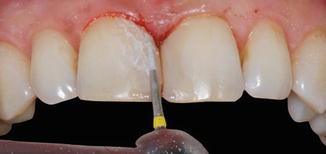
Fig. 14.18
Finishing of the restorations with a fine diamond bur

Fig. 14.19
Finishing and polishing of the proximal surfaces using progressively finer-grit strips

Fig. 14.20
Finishing palatinal contours of the restorations from composite to enamel using a fine-grit diamond bur
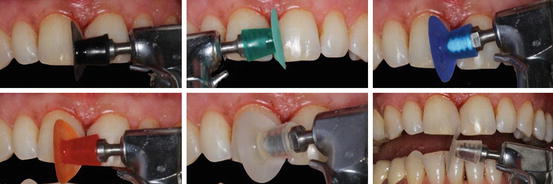
Fig. 14.21
Finishing and polishing of the restorations with sequentially used polishing discs
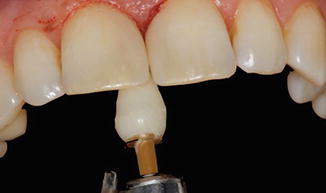
Fig. 14.22
Polishing palatinal surface using diamond impregnated polishing point
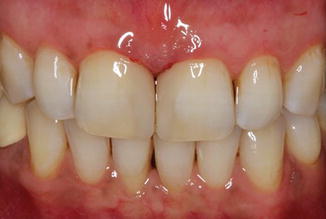
Fig. 14.23
Postoperative appearance of the restorations immediately after finishing and polishing

Fig. 14.24
The patient was very happy and satisfied for the closing of the space
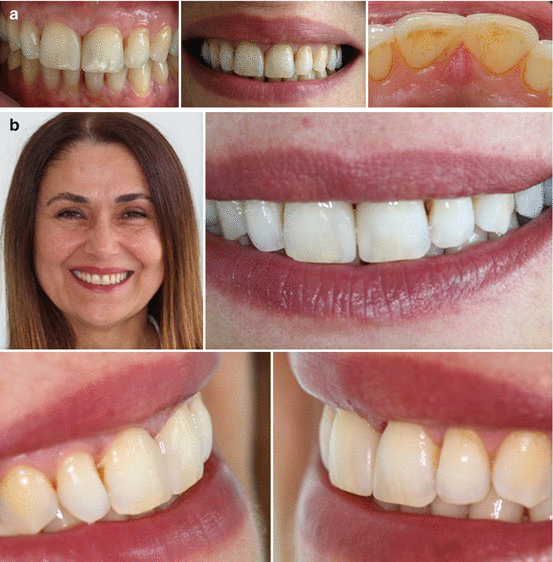
Fig. 14.25
(a) Intraoral and (b) facial photographs of the patient after 3 months
14.2 Case 2: Midline Diastema Closure with Direct Resin Composite Buildup
A 25-year-old male referred to our clinic because of spacing between his maxillary central incisors and he was unhappy with his smile. The clinical examination revealed maxillary midline diastema (approximately 2-mm width) with excellent oral hygiene and incisal wear on his mandibular incisors (Fig. 14.26a–c). Occlusal examination also revealed no pathology or interferences that would contraindicate diastema closure with direct resin composite between maxillary central incisors. After discussing the treatment options with the patient, he decided to have resin composite restorations for the closure of midline diastema. Before starting the diastema closure with direct resin composite buildup, patient lips and cheeks were retracted and the operation field was isolated with retraction cords (Fig. 14.27). After placement of retraction cords, shade selection of the teeth was made using shade guide (Fig. 14.28) that was provided by the manufacturer. In this case, no enamel roughening procedure was used, and uncut mesial enamel surfaces were acid-etched (Fig. 14.29) for 30 s with 32 % phosphoric acid gel (Uni-etch, Bisco Inc.), rinsed for 20 s, and air-dried. A multimode adhesive bonding agent (Single Bond Universal, 3M ESPE) was applied to the acid-etched surfaces (Fig. 14.30), gently air-dried, and light-cured for 10 s. Then, first proximal layer of resin composite in A2 enamel shade (Clearfil Majesty ES-2, Kuraray) was placed on tooth #11 and light-cured (Fig. 14.31). Thereafter, dentin replacement layer in A2 dentin shade and final enamel composite layer were placed and each layer light-cured. During this step, resin composite material was carefully manipulated and shaped using a brush (Fig. 14.32). The same procedure was also followed on tooth #21 and restorations were finished. After completion of the restorations, retraction cords were removed and each restoration was then light-cured for 40 s from facial and palatinal directions. During placement of the resin composite, care was taken to create the desired anatomical proximal contacts especially in the gingival region (Fig. 14.33). Finishing and polishing of the restorations were primarily done with a fine diamond bur (Fig. 14.34a) and then with sequentially used polishing discs and progressively finer-grit finishing strips (Fig. 14.34b) (Super-Snap, Shofu). Figure 14.35 shows the postoperative appearance of the diastema closure with direct resin composite buildup. Patient was happy with the final outcome.
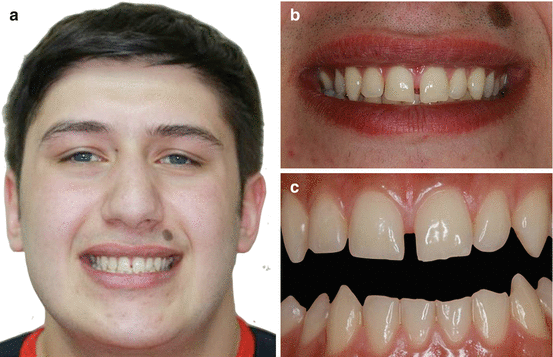
Fig. 14.26
(a) Frontal and (b, c) intraoral view of the patient
Stay updated, free dental videos. Join our Telegram channel
VIDEdental - Online dental courses


