Chapter 9
Delayed Loading: Implant Exposure
Introduction
The philosophy that has been described in the earlier chapters has as its main objectives the predictable achievement of osseointegration and the creation of an adequate hard tissue foundation to provide support for the soft tissues. It is intended that sufficient soft tissues in bulk and contour are present to facilitate the development of the desired harmonious emergence profile.
It is the shape of the component part, which is attached at the time of exposure, that influences the emergence profile. It is, therefore, obvious that the size and the shape of the component part used should closely match the final abutment and restoration. It is for this reason that the definitive abutment, selected at first-stage surgery, is considered to be ideal for attachment at this stage.
This enables the abutment that is ideally shaped for the proposed restoration to be connected at the time of implant exposure. Attachment of the definitive abutment at this stage of treatment prevents the repeated disconnection and reconnection of component parts. This has several benefits:
- • it prevents excessive negative tissue reactions associated with repeated disconnection and reconnection144
- • it avoids inaccuracies that are associated with repeated transfers of component parts between the surgery and laboratory145–148
- • it reduces costs by avoiding the purchase of component parts required for transfer of information and additional laboratory procedures
Furthermore, a transitional restoration fabricated from impressions taken at first-stage surgery may also be contoured and fitted at this stage.
Healing abutments are, therefore, not considered ideal unless they can be shaped to prevent the soft tissues from being unacceptably deformed. Attention needs to be paid, in particular, to implants requiring restorations with abutment angles greater than 15 degrees. Re-contouring by healing abutments may result in unacceptable gingival recession (Fig 8-63, p. 126). Nevertheless, if the conditions are such that a healing abutment is used as a sulcus former, modification of the existing provisional restoration might be necessary in order to provide continuing function after implant exposure.
The incisions that are described to gain access to the implant are designed to allow the creation of a natural papillary and marginal contour consistent with the adjacent teeth. The aim of the protocol is to simplify the treatment for the patient, clinician and dental technician.
Preoperative Planning
A hollow acrylic resin transitional restoration should be fabricated based on the original diagnostic preview with respect to the tooth form and position. Additional impressions may be required to incorporate any changes made during the course of treatment to this stage.
Implant Exposure
Sound surgical principles to minimise the surgical exposure based on the access required should be employed. A series of surgical approaches to achieve this are described in Flowchart 9–1.
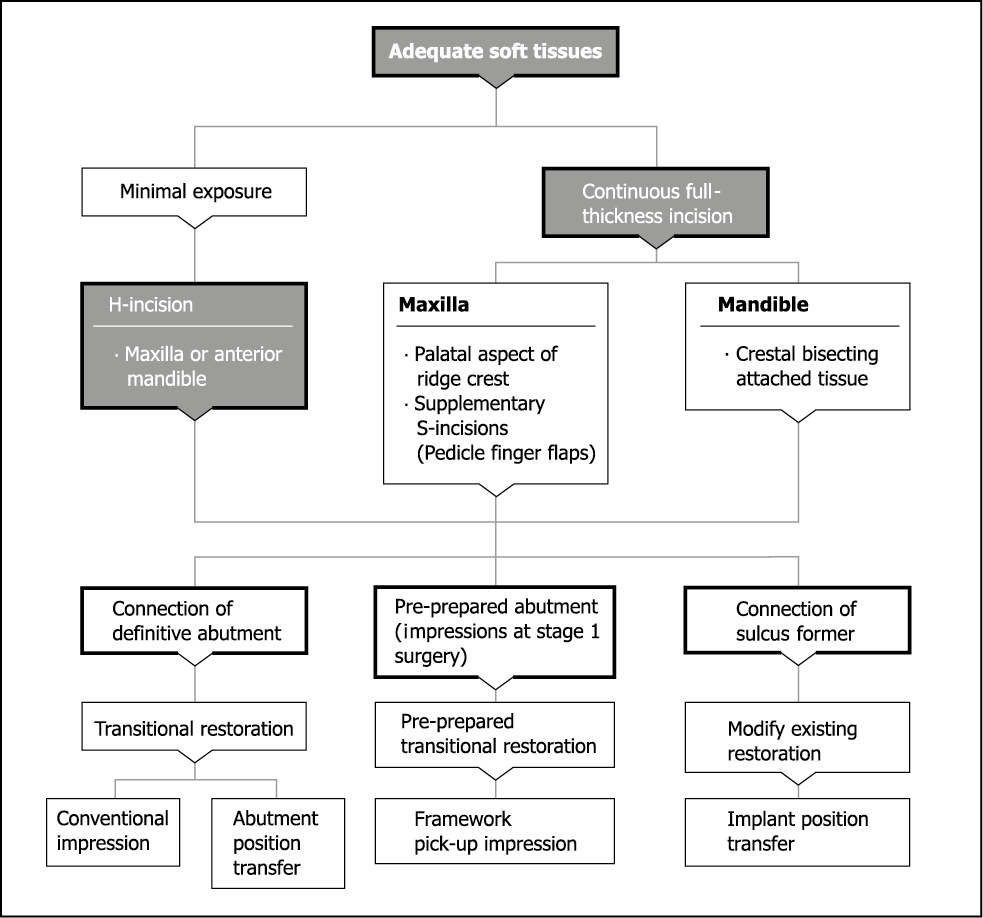
Flowchart 9-1 Surgical exposure of implant.
Minimal Exposure Incision
When adequate tissue is present, the purpose of this phase is to remove tissue for the insertion of the abutment and a transitional restoration. However, excision of this tissue with a circular punch, for example, may not achieve the ideal position for the gingival margin. It is for this reason that the minimal incision (‘H’ shaped) was devised. This provides an opportunity to assess the contours and manipulate the tissues, if necessary, or to excise them, if more appropriate (Figs 9-1–9-14).

Fig 9-1 Occlusal view of the stone cast constructed from impressions taken at first-stage surgery showing the position of the implant. This position can be transferred to the clinical situation. An abutment selected at first-stage surgery is modified based upon this cast containing an implant analogue. The transitional crown, as well as the metalwork, has been constructed.
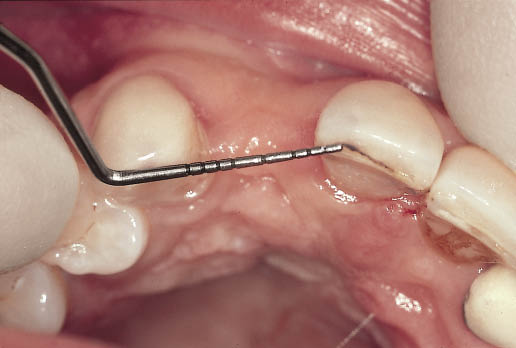
Fig 9-2 Occlusal view of the healed ridge prior to exposure of the implant. The position of the implant can be accurately located in the mouth by transferring the information from the laboratory cast.
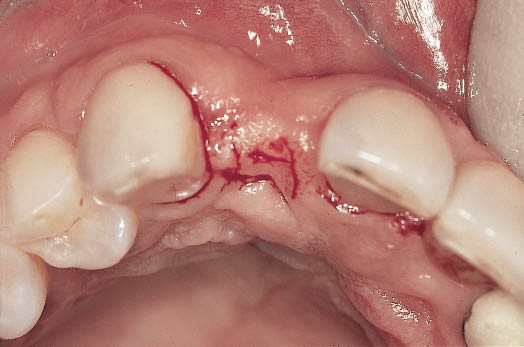
Fig 9-3 The ‘H’-shaped incision can be seen inscribed in the ridge. The crossbar of the ‘H’ is positioned towards the palatal aspect of the crest. This will enable soft tissues to be displaced towards the labial where the depression is visible in this view.
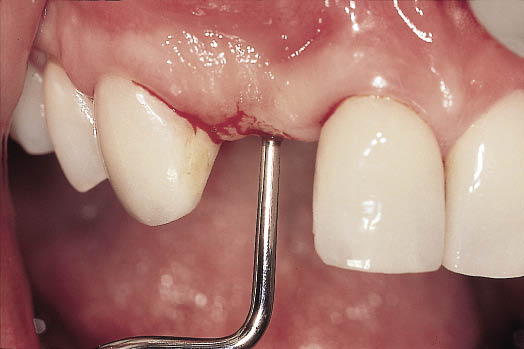
Fig 9-4 Labial view showing a sharp probe (Ankylos exposure kit [available from Dentsply Frident, Mannheim, Germany]) being used to accurately locate the implant.
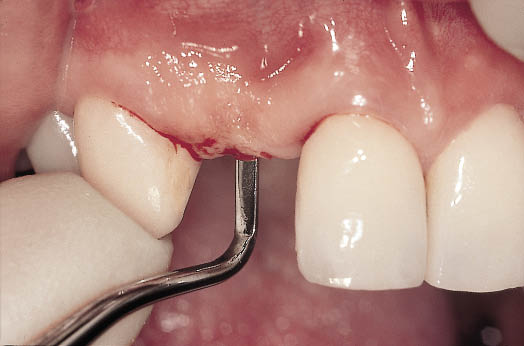
Fig 9-5 Flat instrument (Ankylos exposure kit) can be seen being used to clear the soft tissues from the implant surface to gain access to the cover screw.
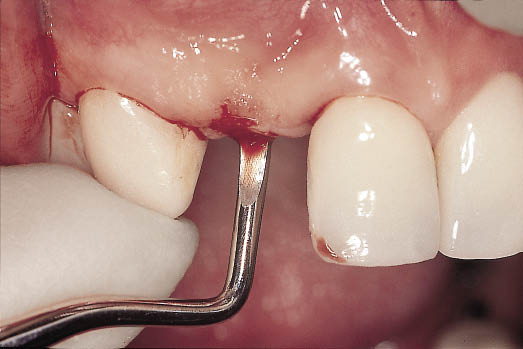
Fig 9-6 Excavator (Ankylos exposure kit) maybe used to undermine the soft tissues to allow their manipulation and for the removal of any bone that may have grown over the implant and may prevent access to the cover screw.
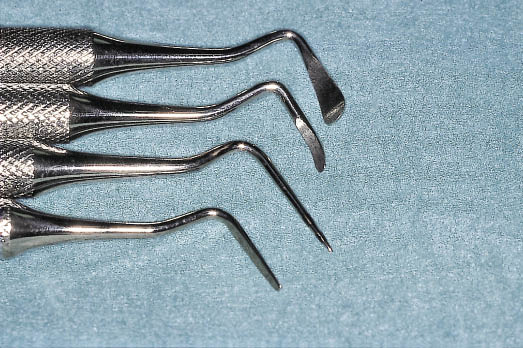
Fig 9-7 Ankylos exposure kit showing the four instruments that facilitate exposure of the implant and the clearance of hard and soft tissues particularly when a minimal incision is used.
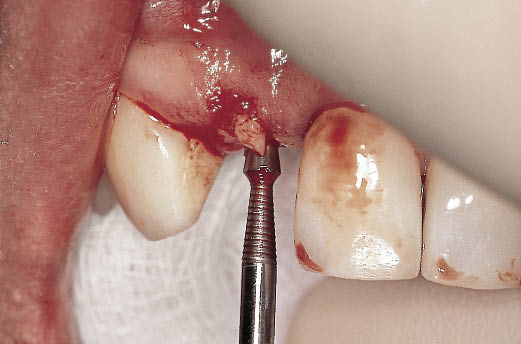
Fig 9-8 Labial view showing the cover screw being removed. The reverse thread on the special instrument designed for cover screw removal engages the screw thread within the cover screw. This minimises the risk of the accidental loss of the cover screw.
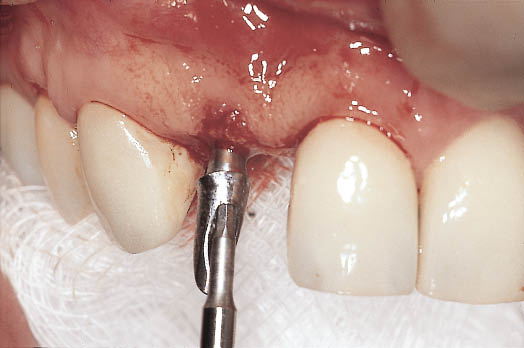
Fig 9-9 The abutment, modified in the laboratory (by master dental technician Mr Peter Sochor) from an impression taken at first-stage surgery, can be seen prior to attachment to the implant. The internal taper connection greatly facilitates attachment of the abutment to the implant through a minimal incision. Finger pressure is used to confirm that the conical connection is engaged prior to tightening. This ensures that there is no obstruction to the seating and engagement of the taper. Ensuring that the taper is engaged at this stage minimises the risk of abutment loosening at a later stage.
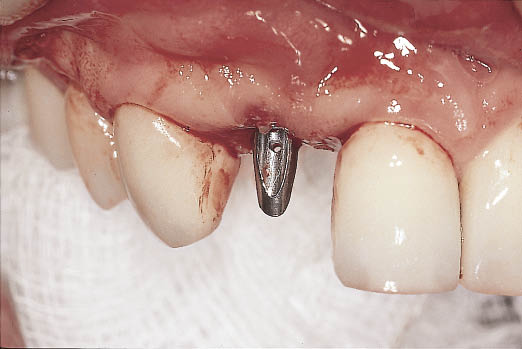
Fig 9-10 Labial view of the abutment seated and tightened to 15 Ncm. The level of the soft tissues is visible. The labial depression that was visible earlier has been re-contoured by the labial manipulation of the soft tissues. Gauze is used to protect the airway during any stages involving small component parts.
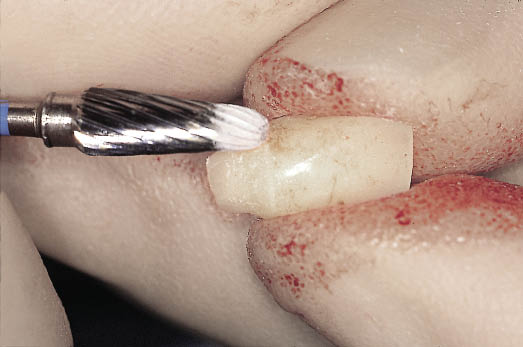
Fig 9-11 The transitional restoration fabricated (by master dental technician Mr Peter Sochor) directly on the abutment, which has been seated from impressions taken at first-stage surgery, can be seen being modified. This will create the emergence profile for the transitional restoration and subsequently for the definitive restoration.

Fig 9-12 The transitional restoration after modification showing the narrower subgingival portion. This form has been achieved by trying the transitional restoration in and observing its effect on the soft tissues.
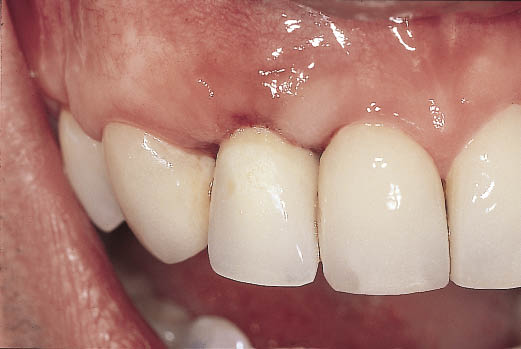
Fig 9-13 Labial view of the transitional restoration in situ. Note that there is some blanching on the mesial aspect but none on the labial. Pressure, as identified by blanching, on the interstitial soft tissues may result in the development of a papilla. Blanching of the labial soft tissues, however, will indicate pressure that could result in recession of the soft tissues.
Stay updated, free dental videos. Join our Telegram channel
VIDEdental - Online dental courses


