CHAPTER 9 Conversion Technique for Immediate Loading
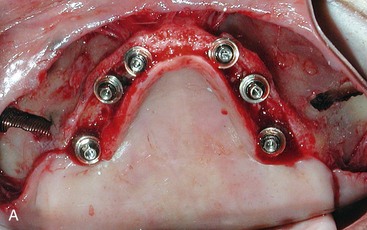
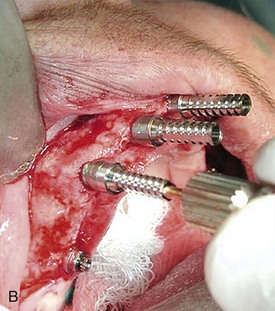
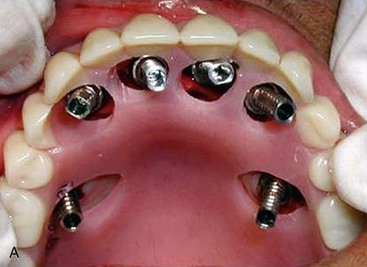
To provide a surgical patient with a fixed provisional prosthesis immediately after the procedure, conversion of the patient’s existing full denture or conversion of the newly fabricated immediate denture is undertaken.1–12 The preoperative denture should be at the proper vertical dimension of occlusion, as well as at the proper tooth position.9–11 Once the implants have been placed with 40 Ncm insertion torque, attachment of the abutments begins, as does soft tissue closure. For the two anterior implants, as described in Chapter 8, it is advisable to connect temporary abutments, indexing the position of the abutments as they relate to the teeth in the patient’s denture, prior to committing to the final abutment. This is important because in many cases it may be necessary to use a 17° angulated abutments to increase the distance between the screw access hole and the cingulum of the anterior teeth, allowing for greater acrylic packing volume to support the teeth on the metal substructure (Figure 9-1). The larger the separation, the more acrylic or porcelain is necessary between the lingual aspect of the anterior teeth and the screw access holes, limiting the potential of “popping” teeth under function. Therefore, prior to suturing, temporary healing abutments are connected to the two anterior implants, allowing closure of the soft tissues using 3-0 gut sutures (Figure 9-2). The heights of the healing abutments are chosen so that after suturing the crestal incision, 1 mm of the healing abutment is above the soft tissue line. When using the tilted-implant protocol, 30° multiunit abutments are placed on the two posterior implants. Likewise, when using the zygoma protocol, two regular straight multiunit abutments are placed on the distal implants. Because the use of the final abutments is known for the posterior implants, the final abutment of choice may be placed and the healing cap attached prior to suturing the soft tissues (Figure 9-3). The patient’s denture is relieved to allow passive seating without interference from the anterior temporary healing abutments or the final abutments placed on the distal implants. Polyvinylsiloxane bite registration is flowed into the denture as it is seated in the mouth, ensuring proper occlusion with the apposing dentition as well as proper midline orientation (Figure 9-4). The positions of the healing abutments are imprinted into the polyvinylsiloxane as it sets (Figure 9-5). An acrylic bur is used to perforate the denture base, marking and relating the positions of the implants with the denture acrylic (Figure 9-6). Care must be taken not to make excessive holes or to fracture the denture base. The denture with the prepared holes is once again seated in the mouth in the proper position. Relating the position of the temporary healing abutments to the holes in the denture base allows the practitioner to determine whether straight or 17° multiunit abutments will be used on the two anterior implants for fabrication of the screw-retained provisional profile prosthesis. Once the abutments are chosen and seated onto the implants, reconfirmation of the screw access holes is made by properly seating the denture in the patient’s mouth (Figure 9-7). The abutments are torqued to 35 Ncm for straight multiunit abutments and 20 Ncm for 17° or 30° abutments. To fabricate this fixed prosthesis, temporary multiunit titanium cylinders are used (Figure 9-8, A). Passive fit of all temporary abutments with the denture is checked prior to luting the temporary abutment to the denture base (Figure 9-8, B). The temporary titanium cylinders are cold-cured to the denture base using quick-setting denture repair acrylic (Figure 9-9). After the acrylic hardens of the acrylic, the denture is removed from the patient’s mouth by unscrewing the retaining screws. The voids on the tissue surface of the denture base around the temporary titanium cylinders are further reinforced with quick-setting acrylic; the practitioner must be careful not to introduce any acrylic into the seating surfaces of the cylinders (Figure 9-10). The palate and denture flanges are removed (Figure 9-11). Recontouring the acrylic on the intaglio side of the prosthesis is completed in an attempt to remove all concavities that may trap food. The patient’s occlusion is checked to ensure group function and uniform loading across the entire prosthesis in centric occlusion.13,14 To avoid bending moments, teeth close to 0° are used to fabricate this provisional prosthesis (Figure 9-12). A temporary material of the practitioner’s choice is used to cover the retaining screw holes. In cases in which four premaxillary implants and two posterior implants have been placed, the same sequence is followed. The implants are indexed with polyvinylsiloxane (Figure 9-13). The desired abutments are attached and torqued, and the temporary cylinders are then connected (Figure 9-14). Passive fit of the prosthesis in relation to the temporary cylinders is confirmed prior to luting with quick-set acrylic (Figure 9-15). To maintain soft tissue health, the 2-mm collar of the temporary cylinder should be left exposed, as demonstrated in Figure 9-16 by the temporary cylinder on the right.
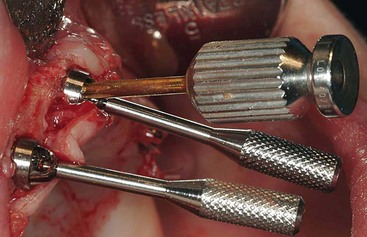
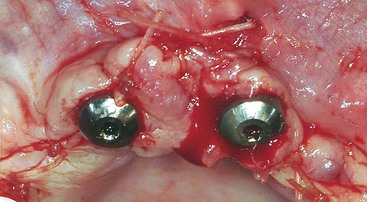
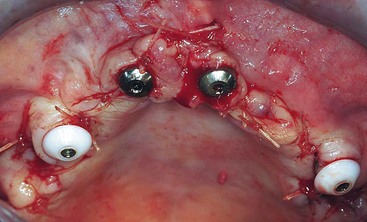
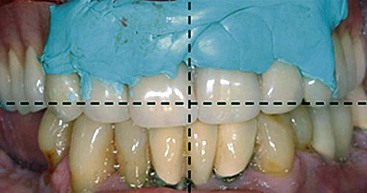
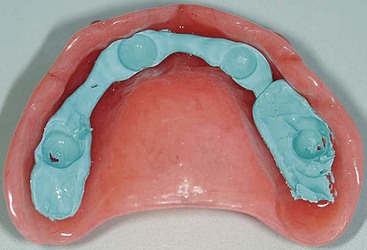
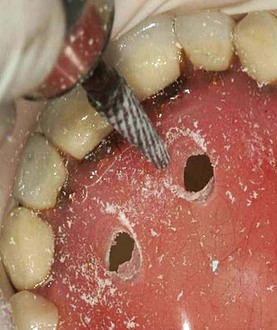
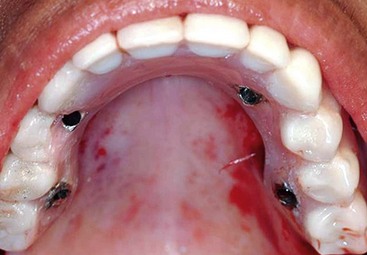
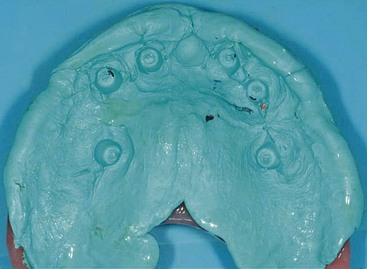
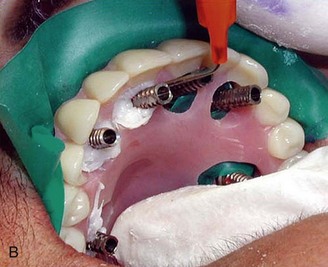
FIGURE 9-6 An acrylic bur is used to perforate the positions of the implants through the denture base.
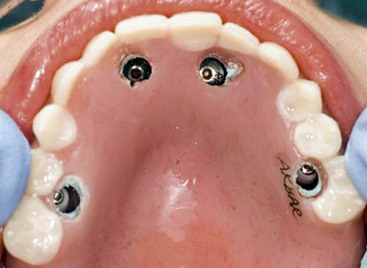
FIGURE 9-7 The proper opening of the access holes through the denture base is confirmed intraorally.
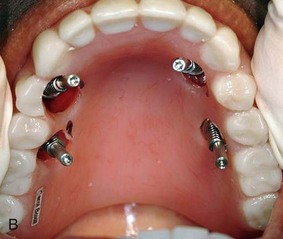
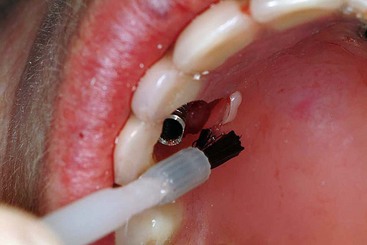
FIGURE 9-9 The salt and pepper technique is used to lute the temporary cylinders to the denture base.
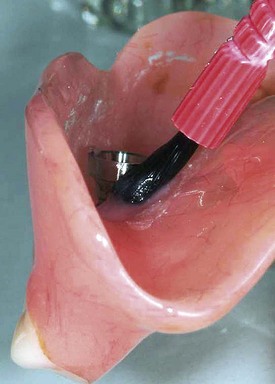
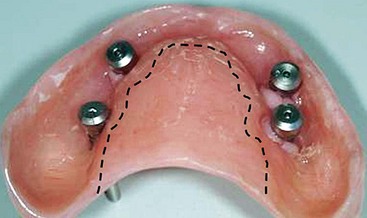
FIGURE 9-11 The palate of the denture is removed after securing all temporary cylinders to the denture base.
Stay updated, free dental videos. Join our Telegram channel
VIDEdental - Online dental courses


