6
Traumatology (Child)
There is perhaps no single dental disturbance that has a greater psychological impact on both parent and child than the loss or fracture of a child’s anterior teeth. This is especially true if the injury affects the permanent dentition and involves the extensive loss of tooth structure. Every dentist who treats children must be prepared to meet these emergencies. It is incumbent upon the dentist to preserve the vitality of injured teeth whenever possible and to restore them to their original appearance.
Appropriate treatment is based on the correct diagnosis. Essential to arriving at an accurate diagnosis are a proper history and physical examination. Information obtained from the history and the oral and radiographic examination are essential in determining the type of treatment required at the emergency visit as well as subsequent necessary treatment. It is important to record this information for future reference with regard to clinical management of the patient and for administrative purposes. Accidental injuries are frequently covered by insurance carriers who will require detailed information before payment is made.
Basic Emergency Procedures: Physical Examination
After the history is secured, the dentist must complete a thorough oral examination.
| Step 1 | Assess soft tissue damage. The location of extraoral wounds may indicate where dental injuries can be suspected. A wound located under the chin suggests the possibility of dental injuries in the premolar/molar regions. Palpation of the facial skeleton may disclose jaw fractures. Injuries of the oral mucosa should be noted. Suturing may be required. |
| Step 2 | Determine mobility of teeth. All teeth should be tested for abnormal mobility in both the horizontal and vertical direction. Remember that teeth in the process of eruption always exhibit physiologic mobility. The same applies to primary teeth undergo ing physiologic root resorption. Disruption of vascular supply to the pulp should be expected in the case of mobility. |
| Step 3 | Note displacement of teeth. Displacement of teeth includes intrusion, extrusion, lateral displacement, or avulsion. In the case of displacement (luxation), the extent and the direction of the dislocation should be noted. |
| Step 4 | Note fractures of teeth. Infraction lines in the enamel should be diagnosed by directing a light beam parallel to the vertical axis of the tooth. Determine whether the fracture is confined to the enamel or includes dentin. The fractured surface should be care fully examined for exposure of the pulp. If exposure is present, its size and location should be noted. In some cases the dentin layer may be so thin that the pulp outline can be seen as a pink ish tinge. In such cases, care should be taken not to perforate the thin dentin with an explorer (Fig 6-1). |
| Step 5 | Investigate evidence of alveolar bone fracture. The typical sign of an alveolar fracture is movement of adjacent teeth when test ing the mobility of a single tooth. Uneven contours of the alveolar bone are another indication of alveolar plate fractures. |
| Step 6 | Evaluate pulpal vitality. Pulp testing following traumatic injuries is a controversial issue. The procedure requires cooperation and a relaxed attitude on the part of the patient to avoid false reac tions. This is often not possible during the emergency treatment of children. The principle of the pulp test is the conduction of stimuli to and then registration on the sensory receptors of the pulp. The utilization of the electric vitalometer test in the exami nation of a traumatized tooth provides a reference point against which to evaluate the tooth at subsequent follow-up visits. As such, it can be a valuable diagnostic tool. A positive test result can indicate a vital tooth. A negative test result, however, should not by itself condemn the tooth to pulp therapy. |
| Step 7 | Perform radiographic examination. Radiographs of the injured tooth (teeth) and adjacent structures should be obtained and the following observed: the size of the pulp chamber of the injured tooth and the proximity of the fracture to the pulp tissues; the stage of root development; the presence of root or alveolar fractures ; and the presence of pathosis resulting from earlier injuries. |
| The initial radiograph serves as a baseline record for comparison with future radiographs of the teeth in the area of the injury. Comparison of serial radiographs can assist in evaluating root apexification, root resorption, internal resorption, pathologic bone resorption, and reparative deposition (Fig 6-2). |
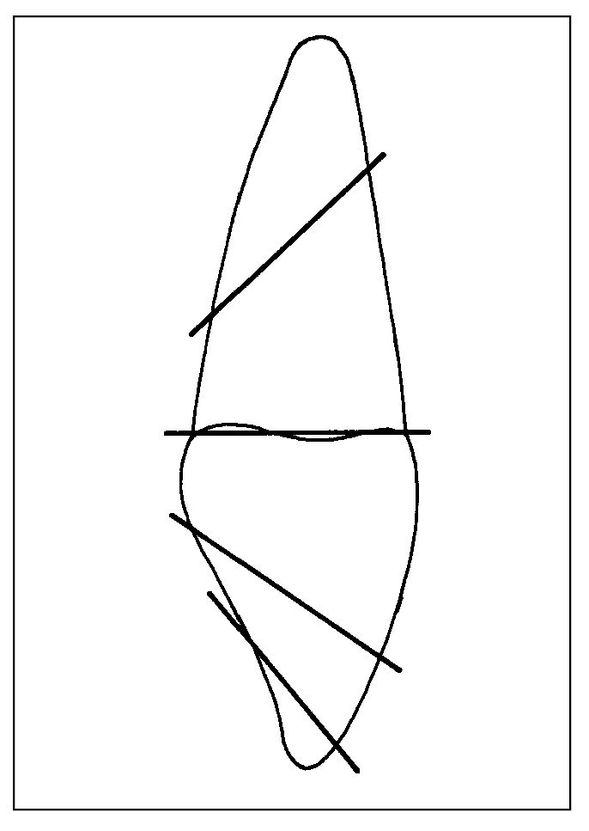
Fig 6-1 Common fracture lines for the maxillary permanent central incisor. Anticipation of common lines of fracture can guide the practitioner in clinical evaluation of the tooth and in aligning radiographs.
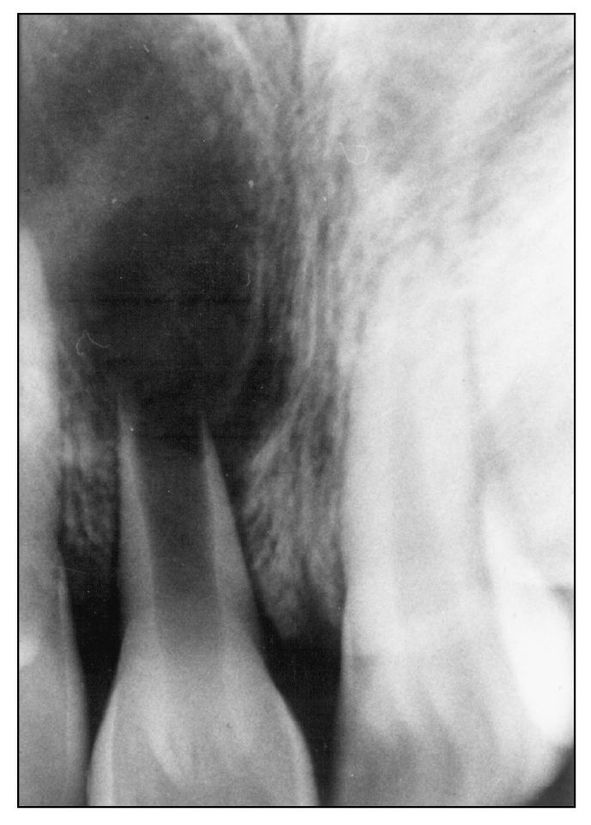
Fig 6-2 Cyst formation following trauma.
Extensive Crown Fracture
Treatment of Fracture Involving Dentin but Not Pulp
Measures should be taken to protect the exposed dentin, permitting the pulp to create a protective barrier, or reparative dentin. When the dentin is exposed, dentinal tubules come into contact with the oral environment. The pulp may react favorably to such stimuli by walling off the exposed dentinal tubules with reparative dentin. However, there is a risk that the insults may exceed the recuperative power of the pulp, thus leading to inflammatory changes and the ensuing death of the pulp.
| Step 1 | Traditionally, it has been recommended that a calcium hydroxide preparation be placed over all the exposed dentin prior to restoring the tooth. Controversy has emerged about this practice, how ever, with some investigators suggesting the use of a calcium hydroxide base only when the remaining dentin thickness is 0.5 mm or less. Others suggest that calcium hydroxide is unnecessary even in these instances. The use of glass-ionomer cement liners to protect exposed dentin has become increasingly popular due to their demonstrated biocompatibility with the dental pulp, their ability to adhere to dentin and enamel, and their fluoride release. | |
| Step 2 | After determining whether or not to place a protective base, an acid-etched composite resin restoration is placed. To be effective, the restoration should: | |
Stay updated, free dental videos. Join our Telegram channelVIDEdental - Online dental courses
 Get VIDEdental app for watching clinical videos

| ||