Zygomaticus implants and angled implants for the edentulous maxilla
 Additional illustrations can be found on the companion website at www.blockdentalimplantsurgery.com
Placement of zygomaticus implants combined with anterior implants
General considerations
Brånemark has reported the use of the zygomaticus fixture with follow-up of function for 10 years in a small number of patients; follow-up of function has been reported in larger numbers for 5 years. The patient population treated by Brånemark includes those with totally edentulous, intact maxillae and those who have undergone maxillectomies after tumor resection. The reported success rate is greater than 96%.1–3
The recommended protocol includes placement of two zygomaticus implants—one on each side of the maxilla—in combination with two to four anteriorly placed, standard-length endosseous implants (Figure 5-1). After 6 months has been allowed for integration of the zygomaticus fixture to the zygomatic bone, the restoration is completed with the fabrication of a rigid bar connecting the two zygomaticus implants to the anterior implants. Rigid cross-arch stabilization is the key to the success of this system. The final prosthesis is an implant-supported, full arch fixed prosthesis or a fixed-removable prosthesis.
Surgical procedure
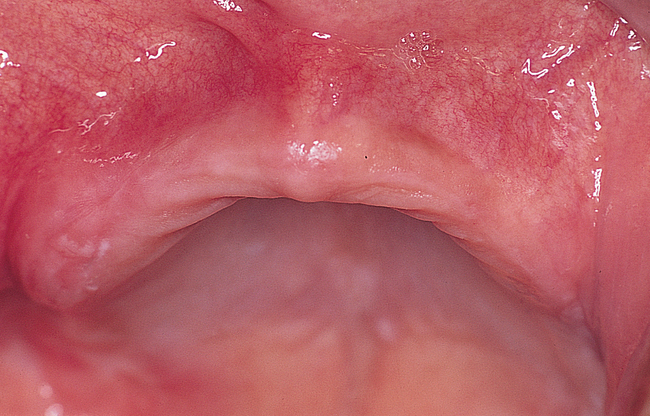
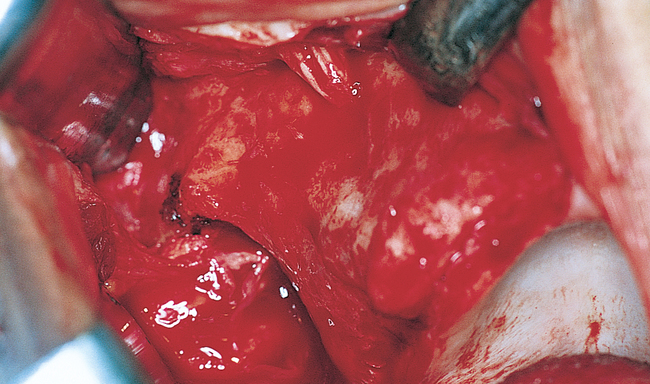
As mentioned, the patient may have either general anesthesia or deep sedation for this surgery. The incision is made and released to allow the subperiosteal reflection to extend over the superior aspect of the zygoma (Figure 5-2). The incision can be made in the vestibule, directly over the alveolar crest, or slightly palatal to the crest. This author prefers the incision to be slightly palatal to the crest. The incision extends from the second molar region to the midline with a vertical release in the midline of the maxilla. One side of the maxilla is operated on first; the contralateral dissection then is performed.
2. Infraorbital nerve and foramen
3. Lateral and inferior aspect of the orbital rim
4. Anterior portion of the zygomatic arch
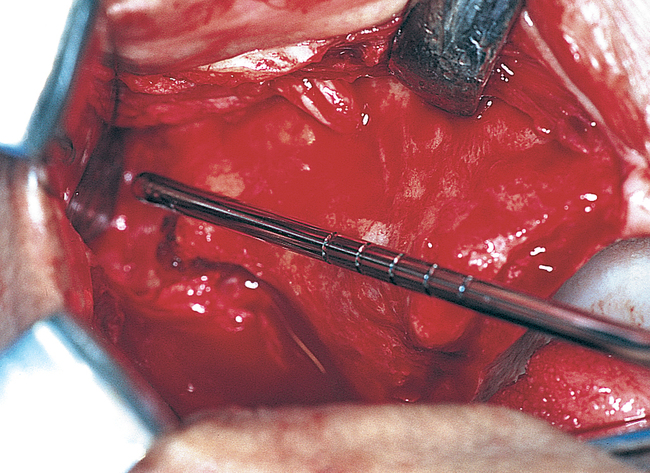
After exposure of the lateral aspect of the maxillary bone, the palatal mucosa is elevated from the first molar to the incisive canal region for placement of the implants. An instrument is aligned from the palate to the zygoma to approximate the planned path of the zygomaticus implant. This path enables the surgeon to locate the proposed implant site and perform the sinus membrane elevation (Figure 5-3).
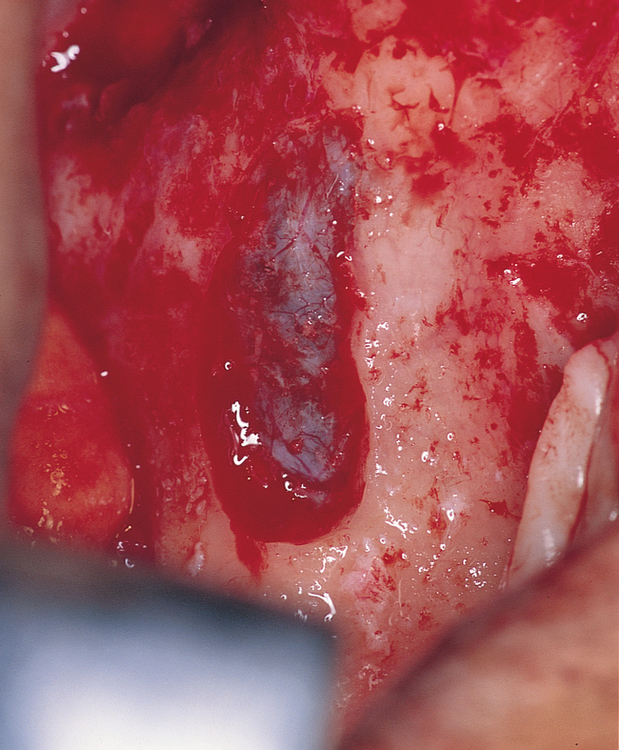
This author uses a round bur to prepare the site for the maxillary sinus membrane elevation. A rectangular piece of bone, approximately 8 × 20 mm, is carefully removed while the integrity of the underlying sinus membrane is maintained. The sinus membrane is elevated from the inner aspect of the maxillary sinus to allow direct visualization of the entry of the zygomaticus drills, place the implant into the zygoma, and prevent membrane entrapment between the implant and bone (Figures 5-4 and 5-5).

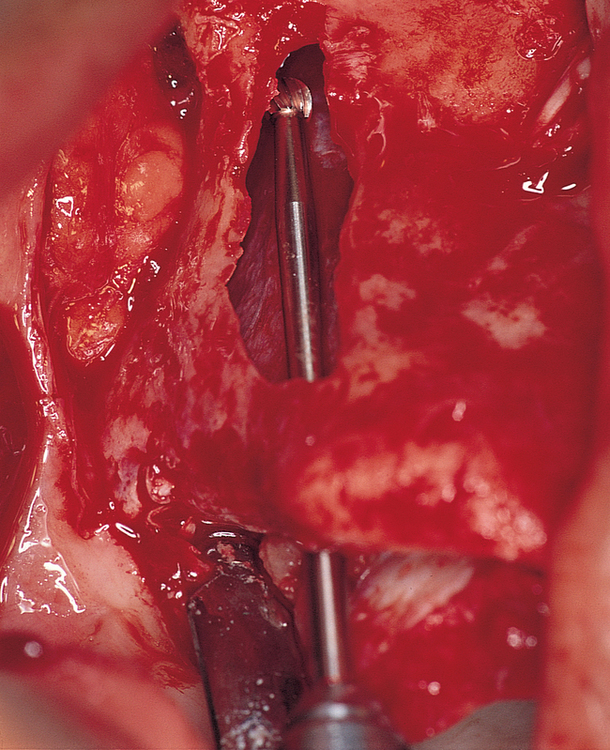
After the membrane has been elevated, the long round bur is used. The drill is angled to place the entry point in the maxilla within the crest of the alveolus, often palatal to the crest (Figure 5-6). The drill should enter the maxillary sinus and engage the inner aspect of the zygoma. The drill should be completely within the confines of the lateral wall of the maxilla. The round bur is used to create a purchase point for the next drill.
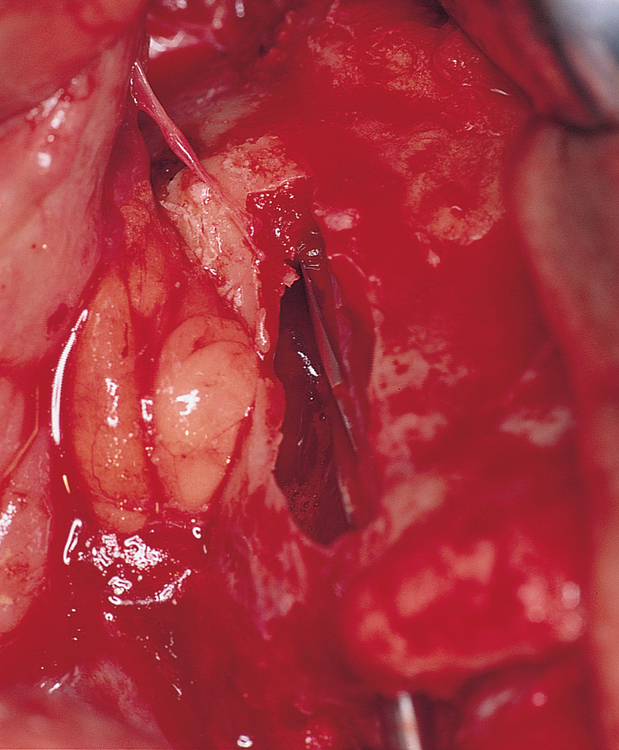
The next drill is a transition drill, which has a guide to enter the 2.9-mm-diameter hole in the palate and zygoma (Figure 5-7). This drill opens the hole to the final size in the zygoma. This transition drill is not intended to complete the implant site. The next drill is the 3.5-mm-diameter twist drill, which is taken through the superior aspect of the zygoma. If the palatal bone is thick, the 4.0-mm twist drill can be used to complete the palatal site. If the maxillary alveolar bone is thin, the 3.5-mm drill is used, and the 3.5-mm drill is used in the zygoma.
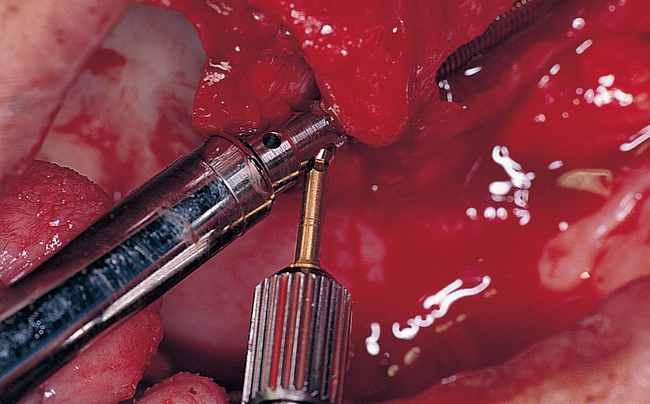
At this point in the procedure, the surgeon is ready to place the zygomaticus implant. However, the necessary length of the implant must be confirmed before an implant is removed from its container. The measuring instrument, which has the implant’s length etched by sequential lines, is placed into the site, entering the palatal hole and exiting the zygoma site. The length of the implant is determined by identifying the line of corresponding length at the palatal site (Figure 5-8).
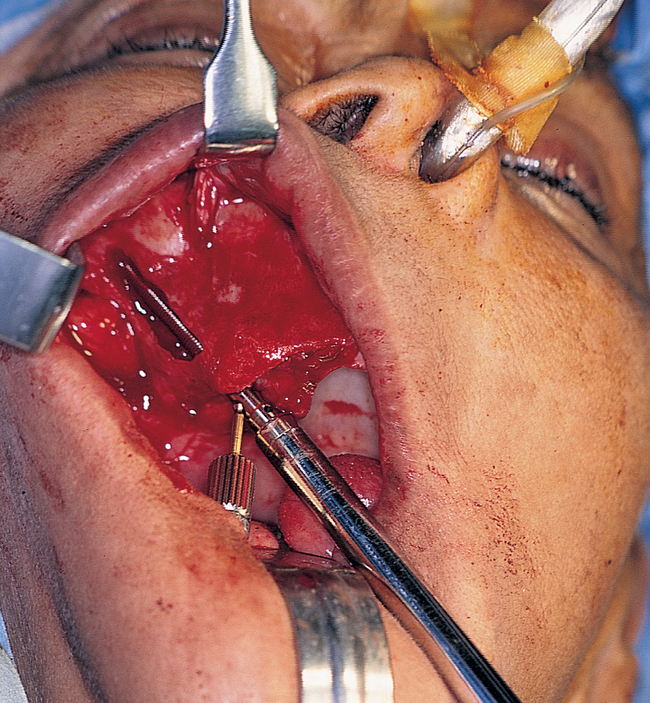
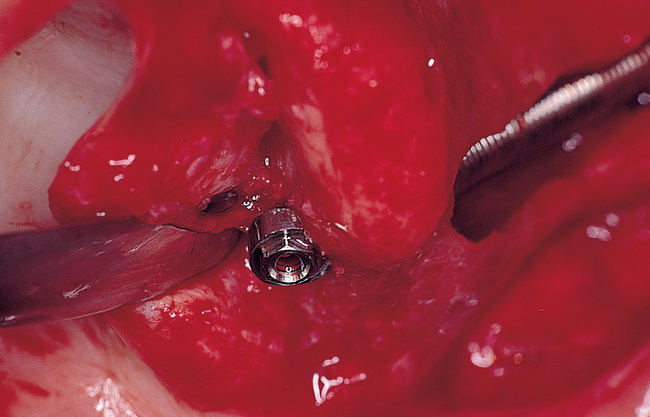
The appropriate-length implant is chosen and placed onto the sterile field. The glass container is opened, and the implant is carefully removed with its sheath. The two wings of the sheath are expanded and removed, exposing the cover screw on the implant. The cover screw is removed and placed onto a sterile tray. The implant is mounted on the delivering handpiece adapter and is placed into the palatal site. As the implant enters the dense zygoma bone, the torque of the drill most likely will be exceeded. The handpiece adapter is removed, and the manual turning instrument is used to complete placement of the implant. The angle of the driving mount screw should be inferiorly oriented. The driving mount is removed, and the external hex of the implant is visible. The cover screw is placed to cover the external hex. The same procedure is performed on the contralateral side of the maxilla (Figures 5-9 to 5-13). After the two zygomaticus implants have been placed, two to four anterior implants are placed. The wound is irrigated thoroughly and closed. Nonresorbable sutures are recommended.
Stay updated, free dental videos. Join our Telegram channel
VIDEdental - Online dental courses


