Chapter 21
Restorative options in implant dentistry
After successful surgery and osseointegration, the restorative phase involving fabrication of the prosthesis commences. For this, the laboratory requires an impression that accurately captures the position of the implant in the mouth. The laboratory can then produce an ideal restoration that fits accurately on the implant.
This chapter discusses the various stages involved in the process of fabricating a screw- or a cement-retained prosthesis, single- or multiple-unit prosthesis, and prosthetic options for an edentulous patient. The following questions are addressed.
1. What are the techniques for transferring the implant position to a working cast?
2. What is an implant abutment and what are the various available types?
3. What are the methods of attaching a restoration to the dental implant?
4. What restorative options can be considered for an edentulous patient?
Several clinical case examples are presented to illustrate the various restorative options.
What are the techniques for transferring the implant position to a working cast?
In order to record an accurate impression of the position of an implant, specially designed components called impression copings or transfer aids are used. All implant manufacturers have their own corresponding impression copings, which are machined to fit accurately over an implant. These are either screwed or press-fit (snap-on impression copings) on the implant and are used for open-tray or closed-tray impression techniques, respectively.
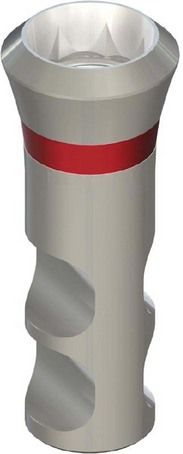
Accurate seating of impression coping is important, and the coping has to engage the internal or external antirotational features of the implant. For example, in < ?xml:namespace prefix = "mbp" />
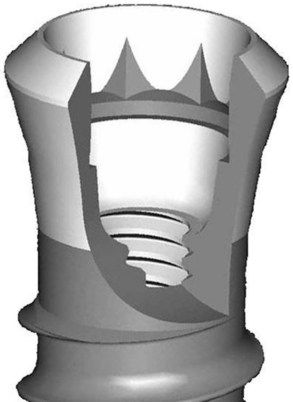
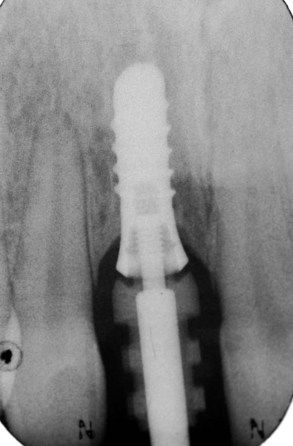
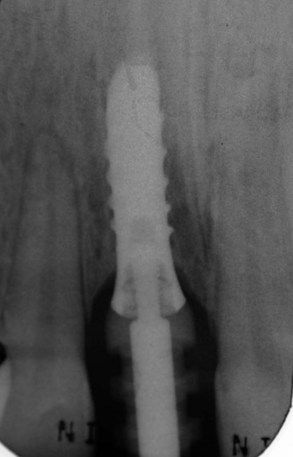
Fig 21.3 Screw-retained impression coping fully engaging the internal antirotational features and fully seated for accurate impression.
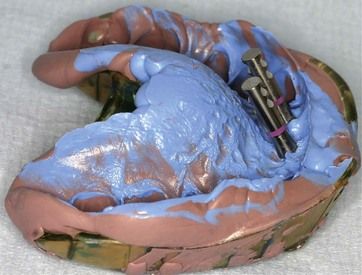
Following confirmation of complete seating of the impression coping, an accurate impression is recorded using either a polyether or addition-cured silicone impression material. It is important to handle the impression tray with care to ensure an accurate impression. It is particularly relevant when using snap-on impression copings because they can be easily dislodged if the tray is forced into position.
Although it is advisable to have a special custom tray made for an implant impression, for a single-tooth and a short-span restoration, a correctly selected stock tray can be adequately used. The author prefers to use a lower impression tray without palatal coverage when recording an impression for a fixed restoration.
As the name implies, an open-tray impression tray has an opening to access the screw head in order to unscrew the impression coping after the material has set (
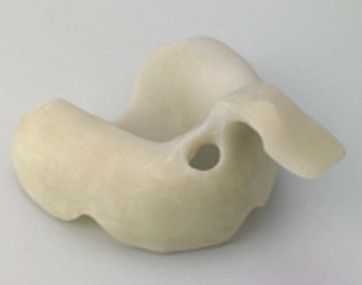
Fig 21.4 Custom tray with an opening allowing access to impression coping to facilitate removal after setting of the material.
After the impression material is fully set, the tray is removed. The snap-on impression coping will snap off the implant and remain embedded within the impression material. In contrast, the screwed type will need to be unscrewed to detach the coping from the implant, and the tray is removed from the mouth (
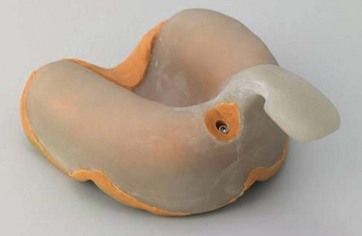
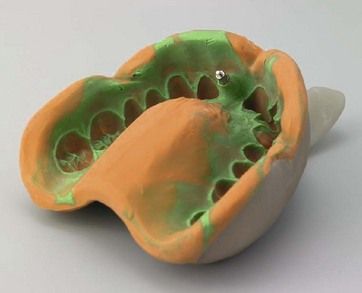
The next stage involves attaching an implant analogue (replica implant) to the impression coping within the impression (
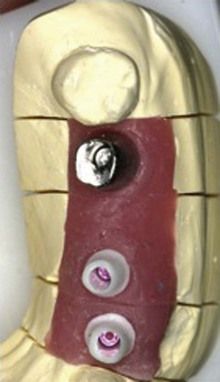
In order to easily develop the subgingival emergence of the implant restoration, the peri-implant gingivae is mimicked using pink-coloured silicone material (
What is an implant abutment and what are the various available types?
The implant abutment has a very important role to play and constitutes a critical interface between the implant and the prosthesis. An abutment connects the implant to the restoration and also interfaces with the peri-implant soft tissue as it emerges through these tissues. Therefore, abutments should be biocompatible, stable in the oral environment, allow an intimate soft tissue attachment, and withstand occlusal forces.
Abutments can be classified according to their fabrication techniques:
Implant manufacturers offer prefabricated abutments in various shapes, sizes, and angulations (
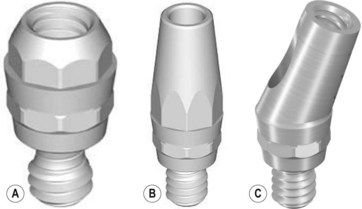
Fig 21.10 Prefabricated (A) screw-retained abutment, (B) straight-cemented abutment, and (C) angled abutment.
Although most of the prefabricated types are noncustomizable, some can be customized, />
Stay updated, free dental videos. Join our Telegram channel
VIDEdental - Online dental courses


