Technique for N2O/O2 Administration and Assessment of Recovery
CHAPTER OBJECTIVES
Upon completion of this chapter, the reader should be able to:
1. Understand the fundamental principles for appropriate N2O/O2 sedation.
2. Discuss general unit preparation activities before N2O/O2 administration.
3. Understand how to activate N2O/O2 sedation equipment.
4. Describe measures taken to prepare the patient before N2O/O2 sedation.
5. Describe the technique steps for the appropriate administration of N2O/O2 sedation.
6. Understand the principles of recovery.
7. Describe the psychological and psychomotor effects of N2O/O2 sedation recovery.
8. Recognize the appropriate technique for assessing adequate recovery from N2O/O2 sedation.
9. Recognize the signs and symptoms of adequate N2O/O2 sedation recovery.
10. Understand how individual biovariability affects N2O/O2 sedation recovery time.
11. Recognize appropriate sterilization and disinfection procedures for N2O/O2 sedation equipment.
12. Recognize important documentation procedures associated with N2O/O2 sedation.
The basic principles of N2O/O2 administration have been developed from decades of experience. Adhering to these principles helps to ensure a positive experience for both the patient and the operator. Titration of the drug and careful observation of patient response are keys to successful administration. It is extremely important to know the fundamentals of the technique for administering N2O/O2. If these basic principles are followed, it will result in a positive experience for both the operator and the patient. If these basic principles are not followed, negative patient experiences can result. Concomitantly, operator frustration and lack of confidence occurs. It may take several positive experiences for a patient to become convinced that previous uncomfortable experiences were caused not by the N2O but rather by its method of administration. The technique is not difficult; titration of the drug while observing patient response is the key to success. Recovery from N2O/O2 sedation is also an important part of the sedation experience. Several components of the process are necessary to complete recovery. The literature holds a plethora of references regarding psychological and psychomotor effects that occur during N2O/O2 administration.1–10 The extent of psychological and psychomotor effects during N2O/O2 sedation is not the same for any two individuals. Recovery time varies from individual to individual and can depend on a number of factors.1–10 Return to physiologic normalcy from N2O/O2 sedation may seem to be readily apparent; however, the prudent practitioner acknowledges the potential for individual biovariability regarding all aspects of recovery and acts with common sense regarding patient dismissal from the clinical setting.
1 Fundamental Principles for Appropriate Administration
A. The operator should be enthusiastic and confident that the experience will be positive. This attitude will be transferred to the patient.
B. Confidence is primarily preparation-reflected in the individual, who is informed and educated about N2O pharmacokinetics. The operator should be knowledgeable about the possible benefits of N2O administration.
C. Recognize that a patient in your care represents the best opportunity you have to express genuine care and concern. Patients are more likely to refer others to you after a good experience.
D. Informed consent must be obtained from each patient before each N2O/O2 administration.
E. The amount of N2O required by a patient on any given day or time varies. Do not adopt the fixed-dose philosophy; the amount of N2O required on the previous visit is not relevant for this appointment (see Chapter 11).
F. The procedure begins and ends with 100% pure O2.
G. The patient should never be left unattended. The effects of central nervous system depression may be quick and/or subtle; constant monitoring must be done by a professional trained in N2O/O2 sedation. Remember, you are responsible for the effects that occur at the intended level of sedation and the next (deeper) level.
H. Accurate documentation of all procedures must be maintained in the patient’s file.
I. Because the final objective of the procedure is patient comfort, the patient should be placed in a comfortable position.
1. To begin, depending on the discipline and the area of the body to be treated, the patient should be relaxed in a basic physiologic position.
2. The upper torso should be slightly reclined and the legs slightly elevated. This can be easily accomplished with an adjustable chair. If a bed is used, support the patient with pillows.
J. Maintain open communication with the patient. Sedated patients may not be able to accurately state their feelings. Specific questions are necessary to assess the patient. For example, you may ask, “Are you uncomfortable?” or “On a scale of 1 to 10, what is your level of comfort?”
K. If N2O/O2 is to be given at a subsequent appointment, the patient should be advised to avoid eating a big meal that includes fatty, fried foods before that appointment.
2 General Unit Preparation
A. The N2O/O2 sedation armamentarium should include all equipment necessary to provide safe sedation experiences for the patient and a safe environment for the operator and all other exposed personnel. Equipment should be evaluated for efficiency and integrity on a periodic basis.
1. This equipment should be current and accurate, and include all components for minimizing trace gas contamination (e.g., scavenging system).
2. A scavenging system will include an accurate flowmeter, scavenging masks, and a vacuum system able to eliminate gases at a rate of at least 45 liters per minute (L/min).11
B. Ensure vacuum and ventilation exhausts are vented to the outside; make sure they are not near fresh-air intake vents.11
C. Assess the room and area ventilation.11 The recirculation of room air, such as air conditioning, is not recommended to remove trace gas. A ventilation system with a fresh-air exchange system ensures that waste gases are not circulated elsewhere within the building.
D. Confirm the absence of leaks at pressure connections on the unit. Bubbles will appear at leaking locations when a soap and water solution is used.
1. Each time a cylinder is changed, checking the connections for leaks is also recommended. An inadequate seal will produce an audible hissing sound.
2. High-pressure lines should also be assessed periodically. The American Dental Association (ADA) expert panel recommends that this be done quarterly.11
E. Inspect the conducting tubing and the reservoir bag and their connections for leaks. Reservoir bags can tear if pulled off by the bag. Sterilizing tubing and bags will decrease their life expectancy. Make sure to have replacements on hand.
F. Connect the conducting tubing and reservoir bag to the unit if they are not already in place.
3 Activating N2O/O2 Equipment
A. Open Both the O2 and the N2O Cylinders
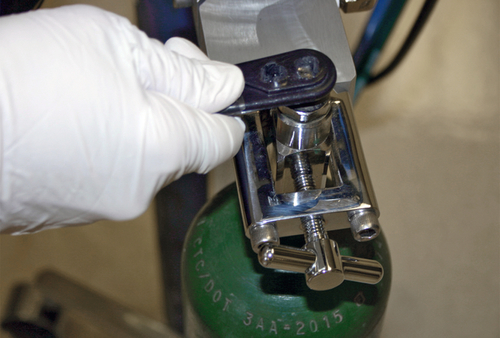
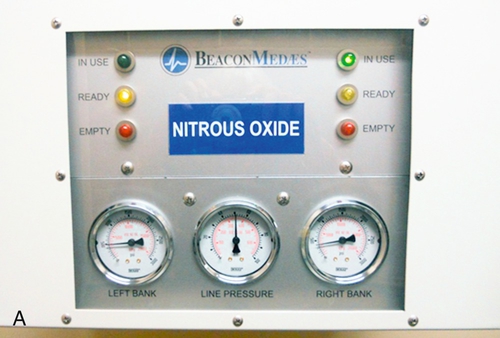
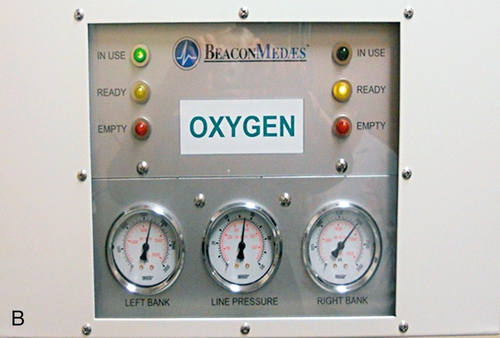
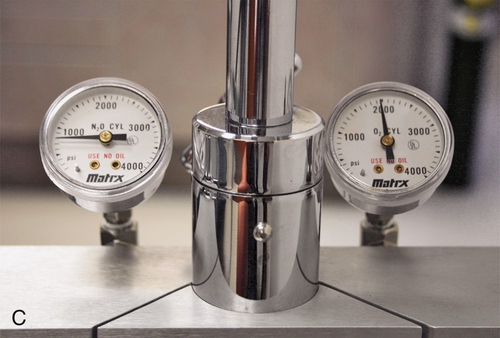
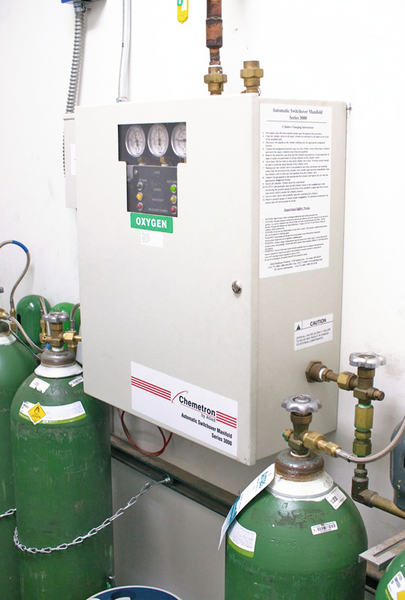
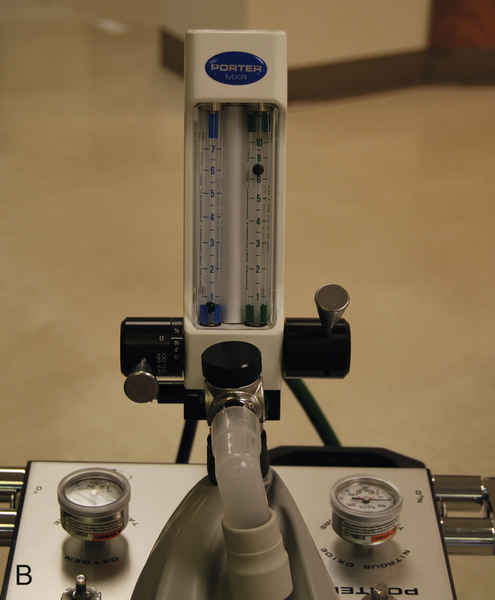
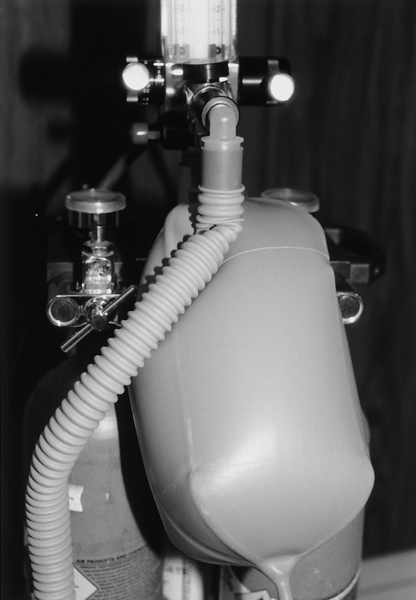
1. Turn the knob counterclockwise on the top of the large cylinders used in a central gas supply system. Open the stem valves on the top of smaller cylinders associated with a portable system (Figure 13-1). Pressure dials will show the contents of cylinders when the tanks are opened (Figure 13-2, A–C).
2. A central supply manifold should automatically switch the system to a full O2 tank should one become depleted (Figure 13-3). If no additional O2 is available for a central system, an alarm will sound or an indicator light will flash on the system monitor. If there is no gas for the system, the lack of O2 will automatically stop the flow of N2O, and gas will cease flowing to the patient. The sedation machine becomes inoperable.
3. The operator managing a portable system has to visually monitor the O2 pressure gauge and manually replace cylinders when the oxygen supply is diminishing. It is important to have a second cylinder readily available and opened before the oxygen is completely depleted to prevent loss of gas flow and interruption of patient sedation.
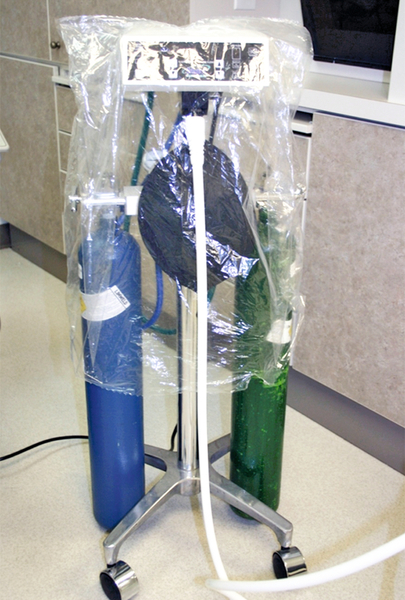
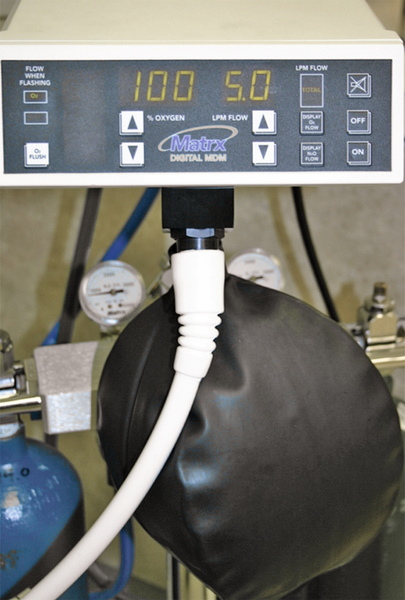
B. A bag barrier may be used to cover the unit; however, make sure the flowmeter can be easily read and knobs are easily accessible through the barrier (Figure 13-4).
C. Ensure that the master switch on the flowmeter is in the “on” position.
D. Activate the main portion of the scavenging system by turning on the suction or evacuation system to the appropriate level.
1. This level may be automatically preset for some central supply systems. In this case, no further adjustments are necessary.
2. In some central supply systems, it is necessary to attach the end of the conduction tubing into the suction at the operatory surface.
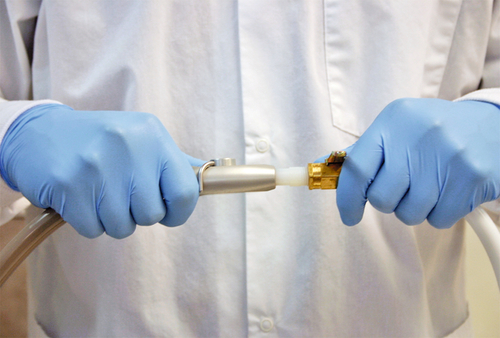
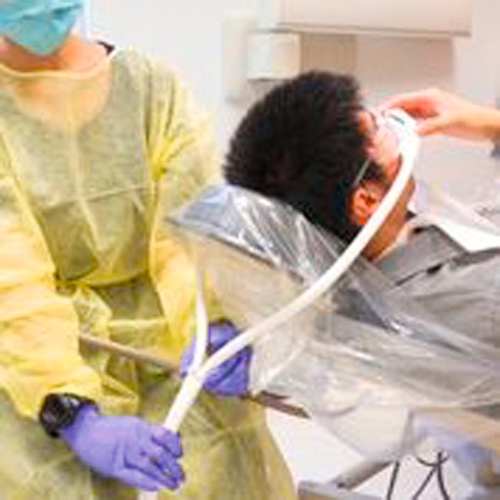
3. For portable systems, it is necessary to place the tubing end into the high-speed suction (Figure 13-5).
4. If manual adjustment of the suction is necessary, create enough flow to prevent waste gas from entering the atmosphere. Manufacturing companies are currently marketing monitoring devices that indicate the optimal evacuation level of 45 L/min. Devices may be mounted close to the flowmeter; others may be found at the end of the conduction tubing before it is placed into the vacuum. The dependability of these devices can vary. An adequate level is achieved when the suction is barely audible (Figure 13-6).


4 Patient Participation
A. Review the patient’s health history and obtain informed consent.
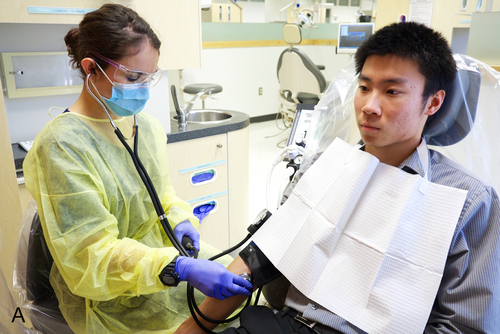
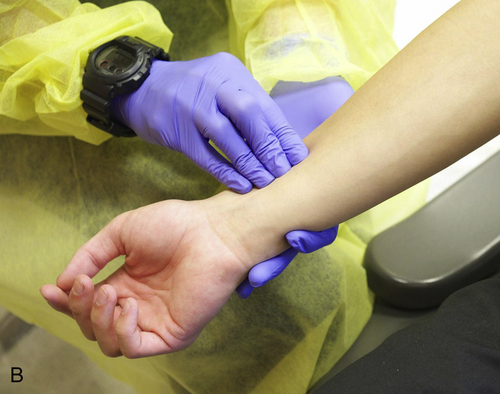
B. Measure the baseline vital signs of blood pressure (Figure 13-7, A), pulse rate (Figure 13-7, B), and respirations. Record these values on the sedation record or in the patient’s chart.
C. Select the appropriate size and type of scavenging nasal hood for the patient. Find the size that fits the patient; the patient may select a scented or unscented variety. Attach the breathing apparatus to the conduction tubing.
D. Begin O2 flow to the nasal hood or mask. The ball will float or the light will appear on the O2 side of the flowmeter.
E. Estimate the total liters flow per minute (L/min) according to the size and physical and physiologic condition of the patient.
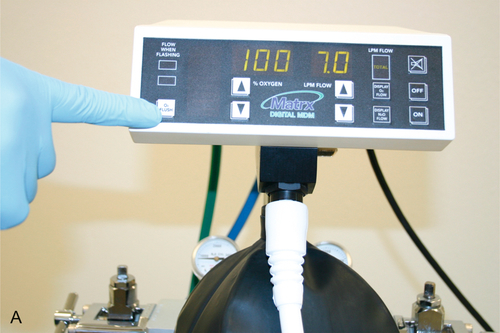
1. For an average-size adult, begin with 6 to 7 L/min (Figure 13-8, A, B). It is best to err with more flow than needed initially to avoid a suffocating feeling. As the patient becomes relaxed, you may find that less flow is adequate.
2. Begin with 4 to 5 L/min for most children.
3. Set the machine to deliver 100% O2 at the level of liters per minute that you have initially chosen. To ensure that flow is present, listen for the sound of O2 moving into the breathing apparatus.
F. Push the O2 flush button until the reservoir bag is partially inflated to approximately two-thirds full (see Figure 13-8, A). Inflation of the bag is evaluated again when appropriate flow to the patient is established.
G. Place the nasal hood or face mask on the patient (Figure 13-9). Ask the patient to assist you in obtaining a snug but comfortable fit.
1. Instruct the patient to adjust it at any time throughout the procedure. Allowing patients this option gives them a sense of control.
2. Adjust the conducting tubes behind the patient’s head to ensure a snug fit (see Figure 13-9). This will decrease the amount of air leaking from the mask.
a. Take care not to tighten the apparatus so that patient movement is prohibited or pressure marks appear on the face.
b. A piece of gauze may be folded over the patient’s nose to minimize gas leakage should adjustment be inadequate.
3. Not only does an improper fit waste gas, but also trace gas leakage contaminates the clinician’s immediate environment (breathing zone).
H. Determine the appropriate minute volume needed for the patient by use of the flow of 100% O2.
1. Ask patients if the flow is sufficient to enable them to breathe comfortably. Also determine whether the patient feels that there is gas leaking out of the mask.
2. The reservoir bag is a good indicator for appropriate flow11 (Box 13-1).
a. If the bag is bulging (Figure 13-10), the patient most likely is not breathing as much gas as is flowing from the machine. The extra gas is being retained in the bag, causing it to overinflate. It is also possible that the patient is mouth breathing. Often, the breathing pattern becomes more normal and relaxed once the patient becomes familiar with the nasal hood.
b. Decrease the O2 level (L/min) until the bag deflates to about two-thirds full.
c. If the bag continues to inflate like a balloon, it is possible that flow has somehow been blocked (Figure 13-11). Sometimes the bag may get caught between cylinders or the non-rebreathing valve may stick. Attend to this situation quickly.
d. If the bag is collapsing, the patient is breathing all of the flow coming from the machine plus the reserve stored in the reservoir bag. In this case, increase the amount of flow to the patient. />
Stay updated, free dental videos. Join our Telegram channel
VIDEdental - Online dental courses


