CHAPTER 12 Case Presentations
Immediate-Loading Tilted Implants
Tilted Treatment Concept: Maxilla
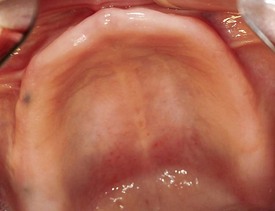
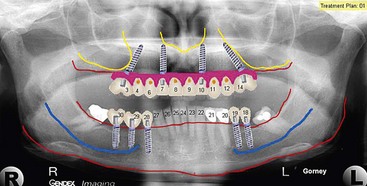
A 62-year-old woman presented with maxillary full and mandibular partial edentulism. She reported a poor-function maxillary full denture. The patient’s primary concern was rehabilitation of her dentition with a fixed maxillary and mandibular prosthesis. Initial evaluation of the patient’s smile line demonstrated an unaesthetic buccal corridor in her existing full maxillary denture. With the denture removed and while animating, the patient did not demonstrate edentulous maxillary soft tissues, suggesting that a hidden transition line and therefore an aesthetic outcome would be possible for a fixed, implant-supported maxillary prosthesis. Intraoral examination demonstrated excessive horizontal overlap and visible unaesthetic clasps of the mandibular removable partial dentures. With the maxillary denture removed, the edentulous maxilla had a uniform U shape with a relatively shallow palatal vault (Figures 12-1 to 12-4).
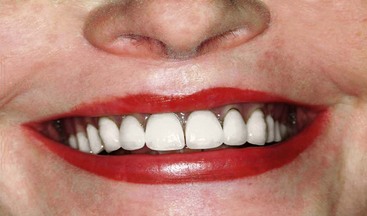
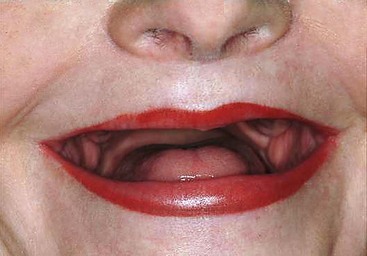
FIGURE 12-2 Hidden transition line is evident; the crestal soft tissues are not visible during animation.
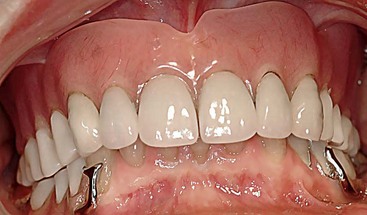
FIGURE 12-3 Excessive horizontal overlap and unaesthetic mandibular removable partial denture clasps.
Treatment Plan
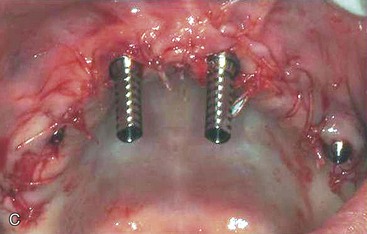
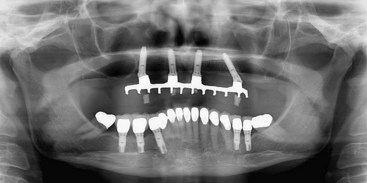
Treatment planning for the maxilla begins with placement of anterior maxillary implants in positions 7 and 10. The posterior implants are placed as distal as possible, immediately in front of and paralleling the anterior wall of the maxillary sinus bilaterally. This position achieves the maximum anterior-posterior implant distribution, minimizing the need for posterior cantilevering of the final fixed maxillary prosthesis (Figures 12-5 to 12-9).
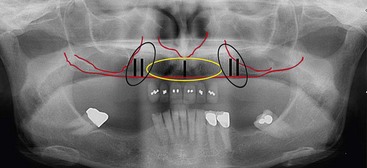
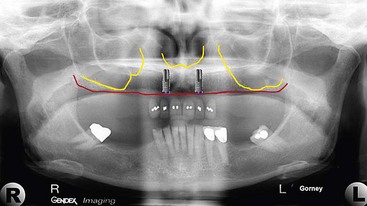
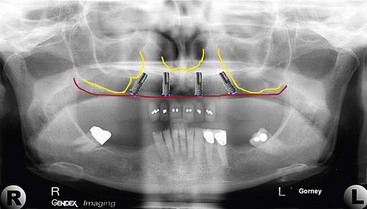
FIGURE 12-7 Posterior maxillary implants, tilted and paralleling the slope of the anterior maxillary sinus walls.
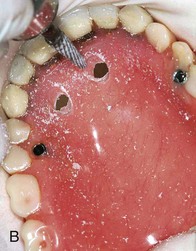
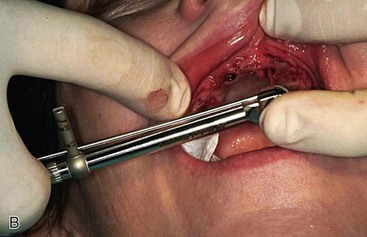
Placements of the four maxillary implants are completed after minor recontouring of the maxillary alveolus to achieve a uniform topography of the edentulous ridge. For the posterior tilted implants, 30° multiunit abutments are placed, bringing the prosthetic platform into the occlusal plane. Temporary healing abutments are placed on the anterior implants and temporary abutment covers are placed on the posterior implants, allowing closure of the soft tissues. Registration material placed into the intaglio surface of the existing full upper denture allows transfer of the implant positions to the denture base (Figures 12-10 to 12-13).
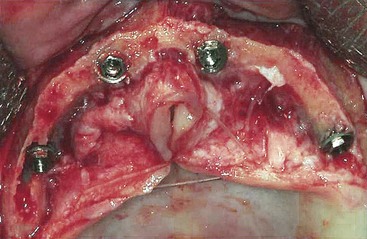
FIGURE 12-10 After establishing a uniform topography of the maxillary alveolar ridge, the implants are placed.
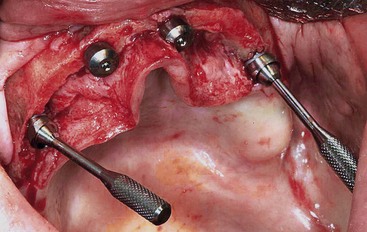
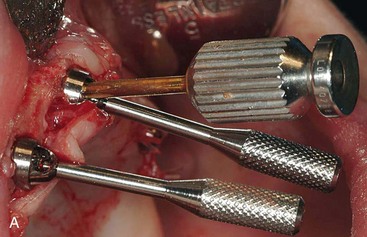
FIGURE 12-11 Multiunit 30° abutments are placed on the posterior tilted implants and torqued to 20 Ncm.
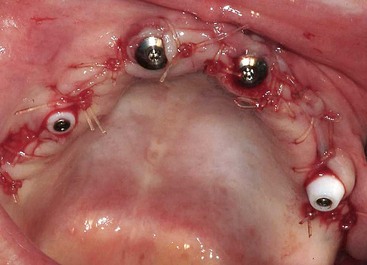
FIGURE 12-12 Placement of temporary healing abutments onto the anterior implants with soft tissue closure.
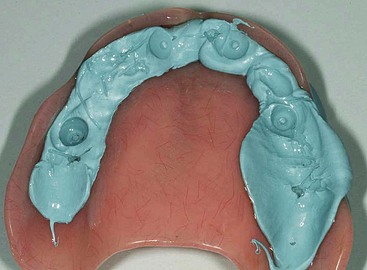
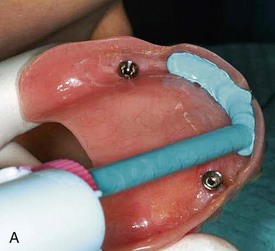
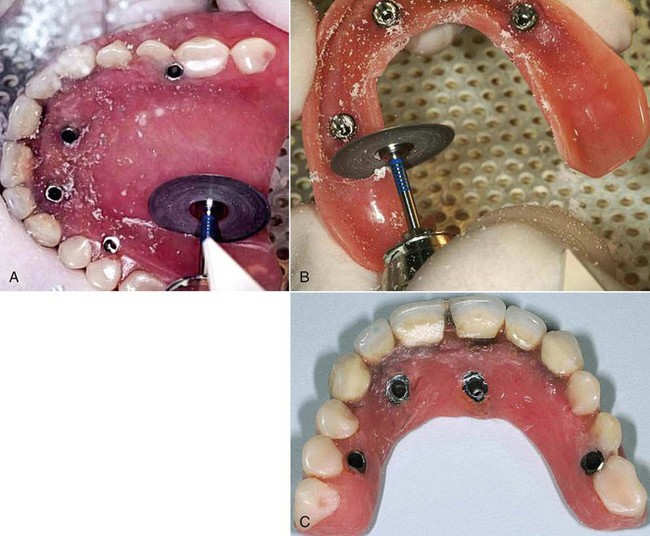
The decision was made to place temporary titanium cylinders individually on the posterior abutments and lute them with quick-setting acrylic material to the denture base. After connecting the titanium cylinders to the posterior implants, the anterior portion of the denture is filled with registration paste and the position of the temporary healing abutments is indexed onto the anterior portion of the denture. The decision was made to place 17° multiunit abutments for the anterior implants. The abutments are fully seated and torqued to 20 Ncm. The transferred implant positions are indexed onto the denture base using an acrylic bur. Two titanium cylinders are placed onto the anterior implants and luted to the denture base. Once all four titanium cylinders are connected, the palate and the flanges of the denture are removed. The edges of the prosthesis are contoured to eliminate the concavity of the intaglio surface between the titanium cylinders to permit adequate oral hygiene during osseointegration. The prosthesis is complete (Figures 12-14 to 12-18).
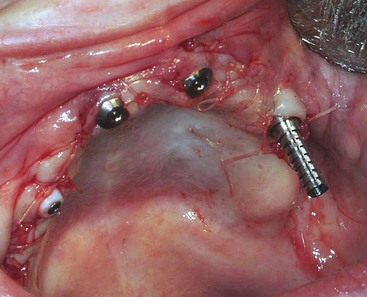
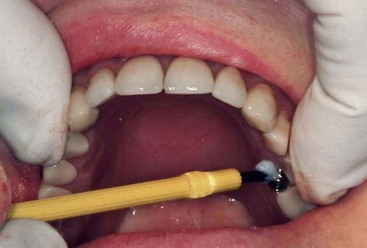
FIGURE 12-15 Quick-setting acrylic material is used to connect the titanium cylinder to the denture base.
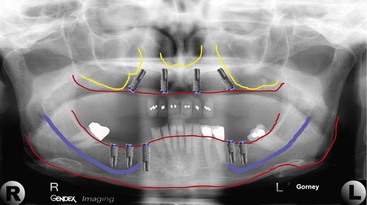
The positions of the mandibular implants are identified on the mandibular cast and are placed in the posterior mandible bilaterally using the surgical stent (Figures 12-19 and 12-20).
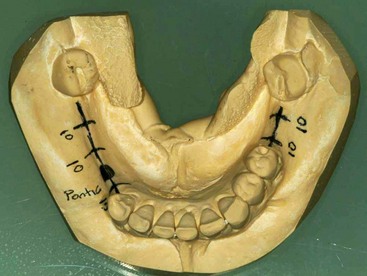
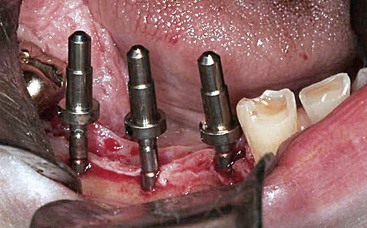
FIGURE 12-20 Paralleling pins demonstrating the positions of the implants in the lower-right quadrant.
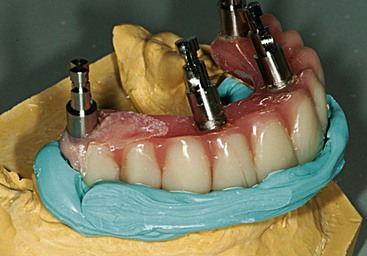
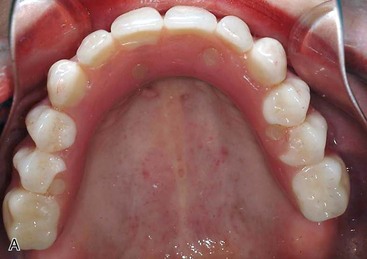
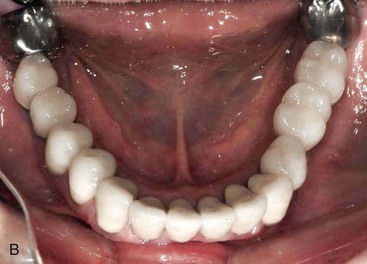
After the 6-month osseointegration period, the protocol for fabrication of the final metal-based maxillary profile prosthesis is carried out. Impressions of the mandibular implants are also taken for fabrication of the implant-supported bridges. The final maxillary prosthesis allows exposure of more than 95% of the patient’s palate. The stability of the prosthesis allows the patient to have excellent masticatory ability. The cement-retained mandibular bridges allow restoration of the mandibular missing teeth with two implant-supported bridges (Figures 12-21 to 12-25).
Stay updated, free dental videos. Join our Telegram channel
VIDEdental - Online dental courses


