FLORIN LĂZĂRESCU
ALECSANDRU IONESCU
Chapter XI
LUTING PROTOCOL FOR ALL-CERAMIC RESTORATIONS
11.1 CHOICE OF THE RESIN CEMENT
Bonding represents a special adhesive connection between the dental and ceramic pre-conditioned surfaces through the physical and chemical properties of the interposed resin.
Clinical studies show that adhesive cementation (eg, resin cements) yields better results than other types of cementation (eg, zinc phosphate cements, glass ionomer cements).1,2
As dental materials have been detailed in Chapter V and adhesion is comprehensively explained in Chapter VII, this chapter will describe the luting clinical protocol.
Temporary luting is strongly contraindicated in the case of single restorations. Due to the intimate marginal adaptation, removal of the prosthesis can damage the restoration’s structural integrity.3
At the same time, temporary luting may affect long-term adhesion. Comparative studies were performed between all-ceramic restorations that were definitively luted, and restorations that were temporarily luted with eugenol-based and eugenol-free cements. The results indicate a superior adhesion of all-ceramic restorations that were definitively luted, with insignificant differences between temporary luted restorations with eugenol-based and eugenol-free cements.4
The use of resin cements (Fig 11-1)17 is mandatory in the case of silicate-based ceramics (feldspathic and glass-ceramic restorations), because they can be etched. Furthermore, this is just one option for infiltration technique ceramics (eg, alumina- and zirconia-based ceramics, such as Vita In-Ceram Alumina or Vita In-Ceram Zirconia) or crystalline oxide ceramics (zirconium dioxide and aluminum oxide), as there are other materials and techniques that can be considered.5
Even in these cases, comparing the use of traditional techniques and cements like zinc-phosphate or glass ionomer cement with the use of adhesive techniques and resin cements, it was concluded that resin cements provide better cementation due to the higher strength of materials (laboratory studies) and a better seal of the resin-ceramic interface.17
The debate in the case of resin cement is whether to use dual-cure (auto-cured and light-cured) cements, or only light-cured cements. The use of the former is debatable due to the chromatic instability that may occur as a result of the degradation of the amino compounds6 in their structure.
It has been clinically demonstrated that light-cured cements are not inferior compared to dual-cured cements, if the light-curing time is respected (between 60 and 120 seconds for each surface of the restoration, depending on the intensity of the curing light).
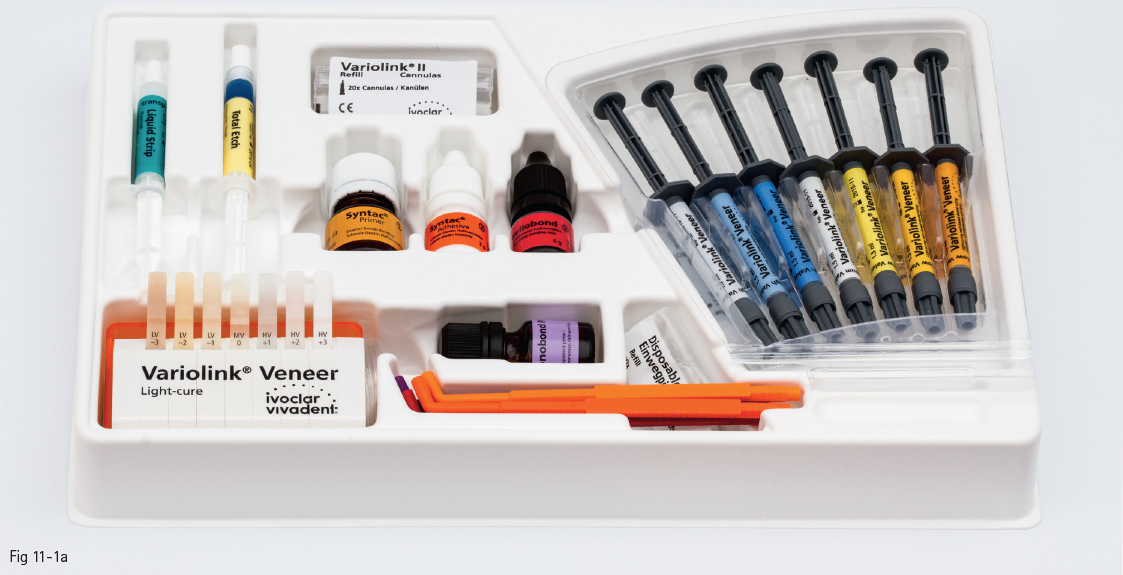
Fig 11-1 a Resin cement kit.
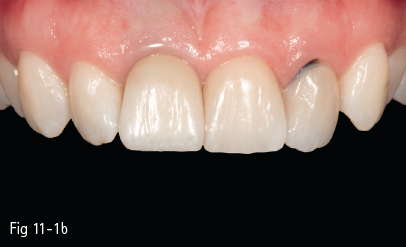
Fig 11-1 b Initial clinical situation of 12.
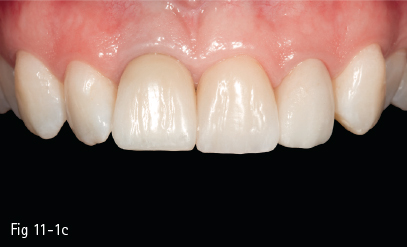
Fig 11-1 c Final clinical situation – luting of 22.
In most cases, dual-cured cements can be avoided due to their handling difficulties (shorter working time) and chemical instability. They are indicated for ceramic restorations that are either thicker than 2 mm, or very opaque (eg, when covering tooth discoloration).5
11.2 EXAMINATION OF ALL-CERAMIC RESTORATIONS
After the removal of the provisional crowns, the cement residues should be cleaned out from the dental surfaces with the usual instruments, and subsequently, with a slightly abrasive paste.
Prior to the conditioning of dental and ceramic surfaces, a final examination of the restorations is made in situ with a try-in glycerin-based paste, which is the exact color of the resin cement to be used (Figs 11-2, 11-3a and 11-3b). As more and more ceramic restorations are thin and transparent, the resin color can change the final appearance of the restoration.
Patients are not allowed to bite because of the high risk of the non-bonded restoration fracturing.
After the try-in, dental surfaces to be bonded are perfectly isolated using retraction cords and a rubber dam.7
Some specialists recommend the use of 3.0 silk suture instead of conventional retraction cords.
Depending on the type of preparation performed, the type of restoration, and the clinician’s choice, the rubber dam can be applied in several ways. The conventional technique involves the alternate application of the clamp on each tooth or group of teeth on which the ceramic restorations will be bonded. This is the preferred technique, especially when the preparation limit is placed slightly subgingivally. The great disadvantage of this technique is the lack of perspective and visibility of the symmetry points during cementation in the anterior area, as well as the gingival irritation that can be caused by the clamps. The alternative technique meant to eliminate these disadvantages, particularly for non-prep veneers and juxta-/supragingival preparations, is to cut out the rubber dam over the entire working area and place the clamps distally. The rubber dam’s free margins can be either glued to the fixed gingiva with cyanoacrylate, or rolled buccally on a cotton-roll placed in the vestibule (Figs 11-4a and 11-4b).
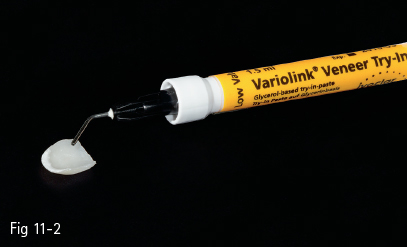
Fig 11-2 Application of the try-in paste.
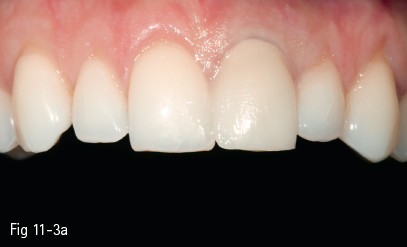
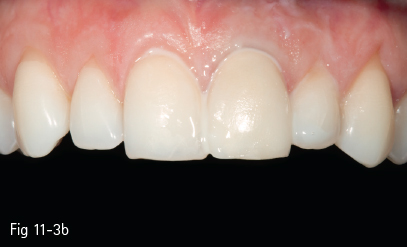
Fig 11-3 a, b Clinical examination of different try-in pastes.
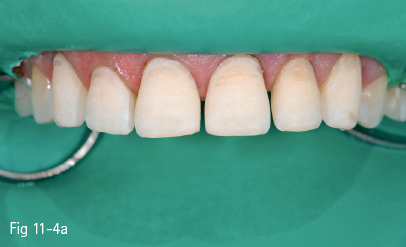
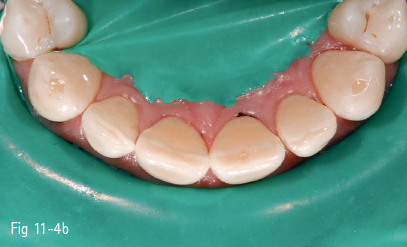
Fig 11-4 a, b Isolation with rubber dam.
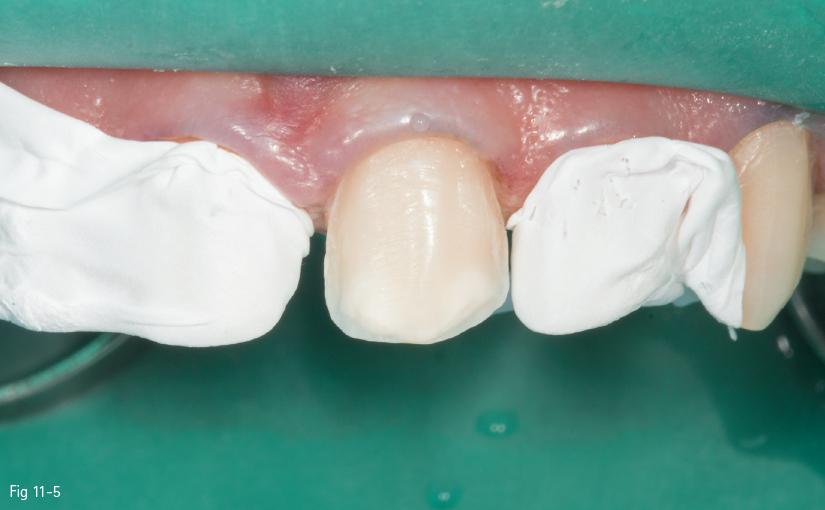
Fig 11-5 Protection of the adjacent teeth with Teflon tapes.
Before conditioning the surfaces, one last examination of the restoration’s insertion and marginal closure is made with the rubber dam placed in situ.
Teflon tapes should be used on adjacent teeth while bonding in order to prevent their accidental conditioning, particularly when the contact points are preserved, otherwise the excess resin may adhere to the adjacent dental surfaces, which is extremely difficult to remove (Fig 11-5).
Before luting, special attention is required to avoid the contamination of the ceramic surfaces with polishing paste, latex from the gloves, saliva, or materials used for try-in (silicone material, try-in paste), which will decrease adhesion strength.23
The internal ceramic surfaces of the restorations to be luted should be carefully cleaned with solvents such as acetone, ethanol, methanol, and methyl chloride.12
11.3 CONDITIONING OF THE DENTAL AND CERAMIC SURFACES
11.3.1 Conditioning the ceramic restorations
Hydrofluoric acid conditioning is compulsory for glass-ceramic restorations (silica-based dioxide) (Figs 11-6 and 11-7). There are divergent opinions regarding the application time of hydrofluoric acid (from 60 seconds, to 2 to 3 minutes), as well as its concentration (from 2.5% to 10%).7,13,14,15
Relevant studies have concluded that the number, the size, and the distribution of the leucite crystals influence the formation of microporosities created by hydrofluoric acid. This is why the application time and concentration may vary depending on the type of ceramic from which the final restoration is made. For feldspathic porcelain reinforced with leucite crystals, the application of a 9% HF solution for 60 seconds has proved to be the most satisfactory formula. Sandblasting is recommended for this type of ceramic, followed by hydrofluoric acid etching and silanization of the ceramic surfaces.14
The studies performed over a 20-year period on 318 porcelain veneers made from both feldspathic ceramic and lithium disilicate ceramic in 84 patients – of whom 50% had bruxism – using various adhesive systems (96% of the cements used being light-cured cements) led to the following conclusions: the success rate was 94.4% at 5 years, 93.5% at 10 years, and 82.93% at 20 years. Only 7% of failures were attributed to decementation, the risk of failure being 7.7 times higher in the case of patients with bruxism.7
However, analyzing the adhesion of porcelain restorations with a zirconia infrastructure yields different results. Currently, the most frequently recommended zirconia-conditioning method is to combine the sandblasting of the surfaces to be cemented using silica-covered alumina particles (50 to 110 µm) and chemical conditioning with a phosphate-based monomer, such as 10-methacryloyloxydecyl dihydrogen phosphate (MDP).
The recommended cement should preferably include MDP, which allows for better adhesion.8 However, studies showed that after 150 days, the restorations that had been cemented and conditioned using this method had a high failure rate.9
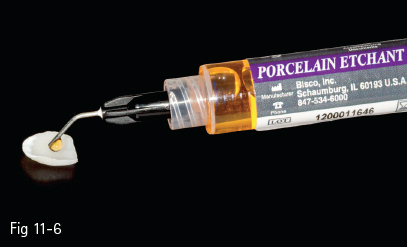
Fig 11-6 Hydrofluoric acid etching the restoration.
< div class='tao-gold-member'>
Stay updated, free dental videos. Join our Telegram channel
VIDEdental - Online dental courses


