Clinical Example of a Young Patient
Characterization of ceramometal restorations is very important in simulating natural changes that occur with age. In the clinical example, simulation of an incisal, chromatic fingerlike structure and white zones commonly seen in young persons are shown in this series of photos.
1. Clinical Example A

Fig. III-1 The following photos show the build-up sequence for simulating the shade by using the incisal, chromatic fingerlike structure and white zones.
2. Primer
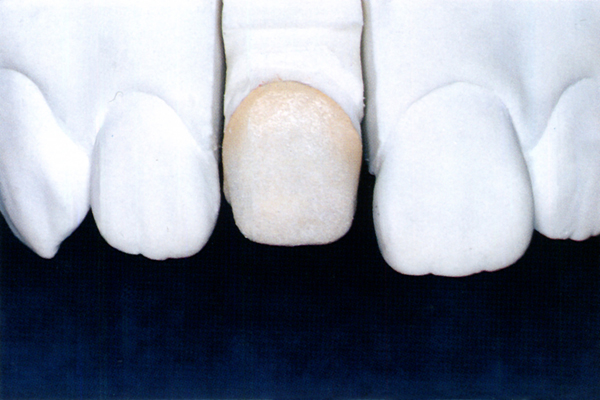
Fig. III-2 Follow the basic building technique for build-up. The opaque porcelain layer, divided into three sections (cervical, middle, and incisal thirds) is joined to the cervical porcelain layer in a smooth transition.
• Opaque porcelain, Vintage (SHOFU/UNITEC) A3O in cervical third, A2O in middle third, and C1O in incisal third.
• Cervical porcelain: Vintage mixture of AC and A2B in equal quantities.
3. Dentin Porcelain Build-up
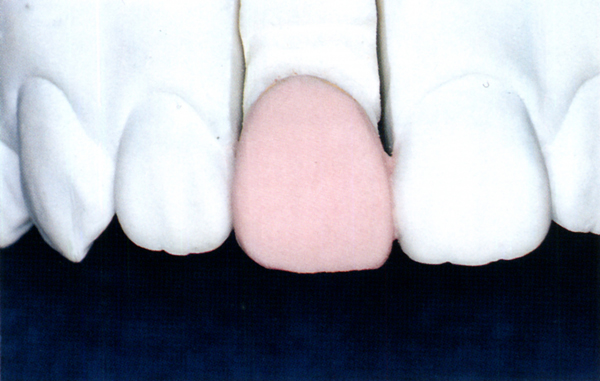
Fig. III-3 Build to the same dimensions as the completed crown.
• Dentin porcelain: Vintage A2B.
4. Dentin Porcelain Cut-Back Figs. III-4~III-8
Step 1 Initial dentin porcelain cut-back
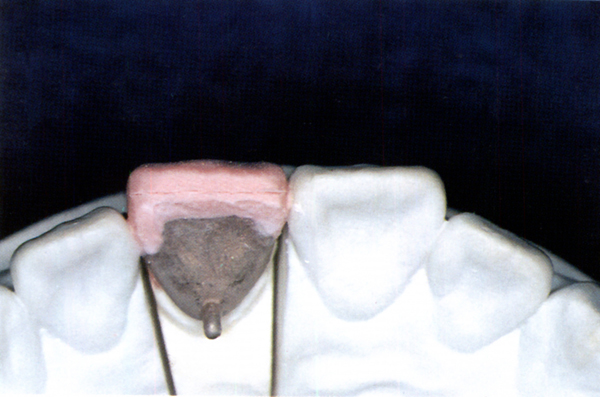
Fig. III-4a The area to be reduced is marked on the labial surface. The cut-back should be done following the basic building technique.
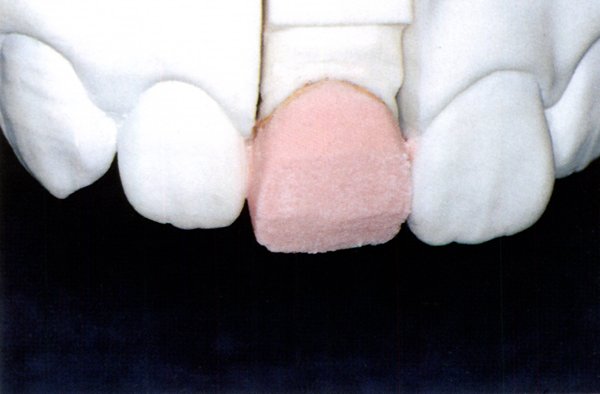
Fig. III-4b Labial view after two-step reduction.
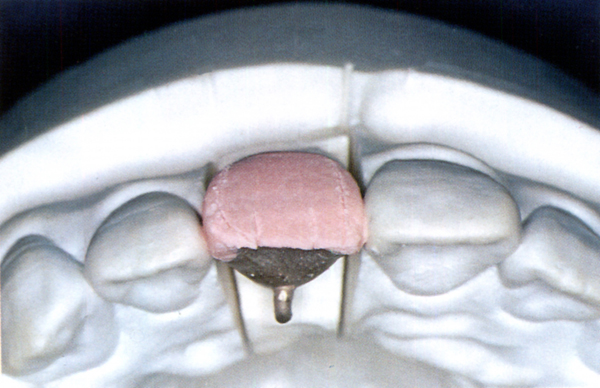
Fig. III-4c Proximal cut-back and fingerlike structure should be marked accurately at this stage.
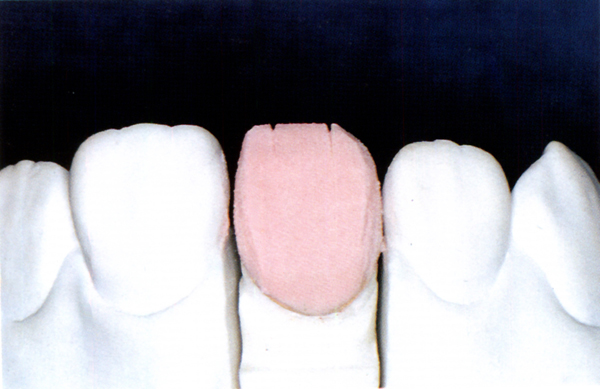
Fig. III-4d Proximal cut-back completed.
Step 2 Secondary dentin porcelain cut-back
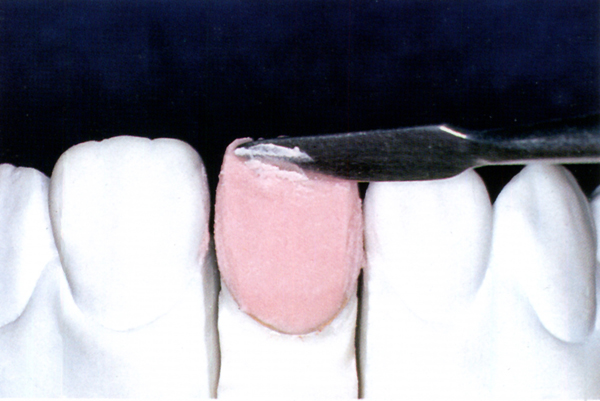
Fig. III-5a To provide the effect of the natural chromatic fingerlike structure, reduction is extended to the labiolingual center of the crown in the dentin porcelain. With the LeCron carver, dentin porcelain is cut flat at the incisal third starting from the incisal line made in the first cut-back to expose the opaque porcelain layer, i.e. to the depth of labiolingual center.
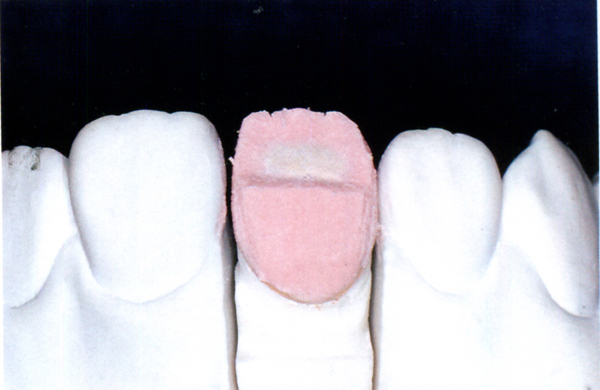
Fig. III-5b Labial view after the second cut-back.
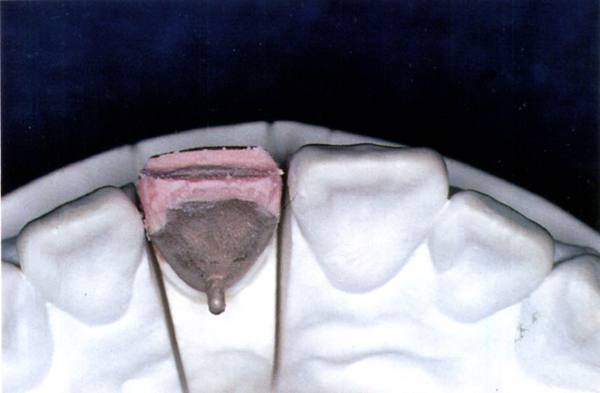
Fig. III-5c Incisal view after the second cut-back.
Step 3 Building chromatic fingerlike structures
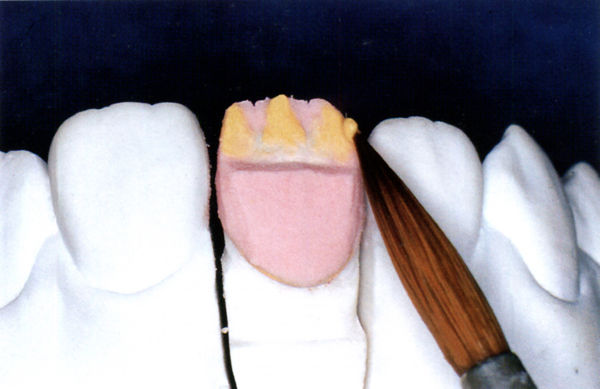
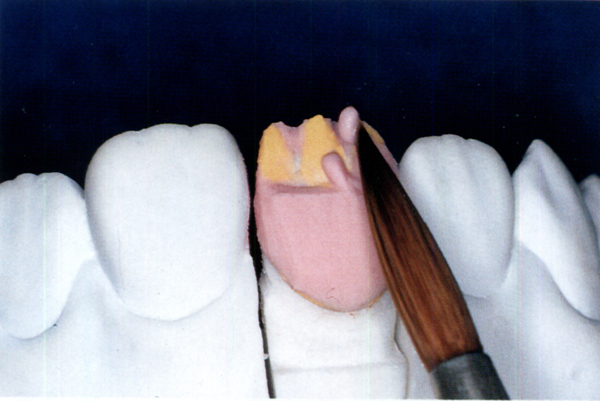
Fig. III-6a On the second cut-back surface, porcelain material prepared to simulate shade and opacity of the fingerlike structure is built up from the incisal edge cervically to form a thin layer to simulate the fingerlike structure in smooth transition. (Porcelain material used for the fingerlike structure: Mixture of Vintage EF1 and yellow opaque {OM5} at a ratio of 4:1.)
Note: The yellow color seen in the photo is for emphasis.
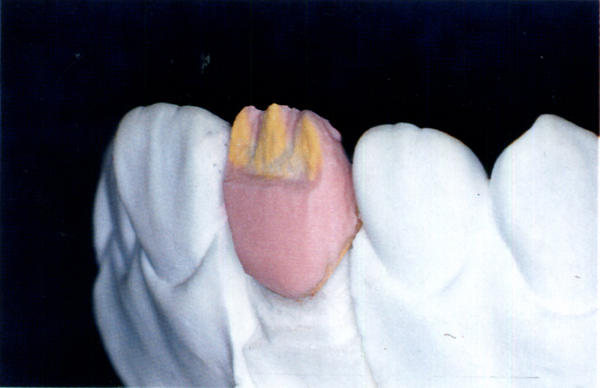
Fig. III-6b Lateral view after completion of Step 3. The fingerlike structure in youth often appears pinkish; a single color (EF1) or Pink Color Powder (Vintage Color Powder) is used. A small amount of yellow opaque (OM5) or pink opaque (OM2) is added in many instances. In older teeth, the shade approaches yellow and has higher opacity.
Stay updated, free dental videos. Join our Telegram channel
VIDEdental - Online dental courses


