CHAPTER 6 Bonding and setting up
Since the Tip-Edge appliance is preadjusted, with a torque and tip prescription incorporated in each attachment, it follows that it should be set up just like any other straight-wire appliance. In this, the reader is referred to the work of Dr Lawrence Andrews, who was the originator of the preadjusted appliance and so defined the optimal bonding position for his crown related system.1,2 This was designed around the best achievable reproducibility in bracket placement, based on easily visualized objectives, resulting in torque delivery that would prove consistent, irrespective of the size of the crown.
Bracket placement
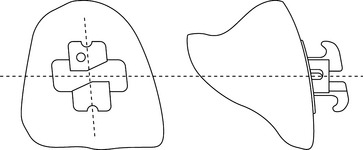
A mid-crown position is therefore recommended for routine bonding. Each bracket should be aligned with its vertical axis parallel with the long axis of the tooth, and at the mid-point of the crown mesio-distally. The height of the bracket should be at the vertical mid-point of the fully erupted clinical crown (Fig. 6.1). All three dimensions are critical to an accurate end result, as with any preadjusted appliance, so that great care is required at the setting up visit.
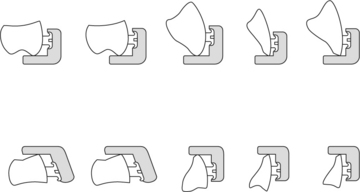
Previously, the jigs were produced only in ‘L-shaped’ form, which prescribes a fixed bonding height for each bracket from the incisal edge or tip, as denoted by the colour coding (Fig. 6.2). While this may have been appropriate for the Begg appliance, it is at variance with the requirements of a preadjusted appliance, in which the measurement of the mid-crown point to the incisal edge will vary according to the overall size of the crown. The L-shaped jigs are still available, but the more recently introduced Universal jigs are a better option (Fig. 6.3). These can easily be aligned up the long axis of the tooth, while the mid-crown height can be gauged by eye (Fig. 6.4). On a normally shaped incisor, correct angulation up the long axis will result in the incisal tie wing being parallel to the incisal edge of the crown.
Stay updated, free dental videos. Join our Telegram channel

VIDEdental - Online dental courses


