9
Occlusion and Implant-Supported Overdenture
Occlusion is a key factor in the success of any implant treatment. It is very important to establish an occlusal scheme that minimizes the lateral forces on supporting implants without compromising chewing efficiency.
Establishing an ideal occlusal scheme for edentulous patients is more challenging, since it is very difficult to remove all of the lateral forces from supporting implants, because no natural teeth are available to share the oc-clusal forces. Choosing the proper denture teeth and occlusal scheme are important factors in the long-term success of osseointegration in implant-supported overdenture.
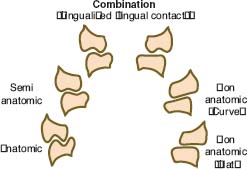
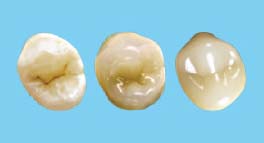
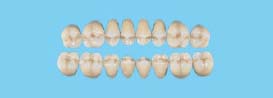
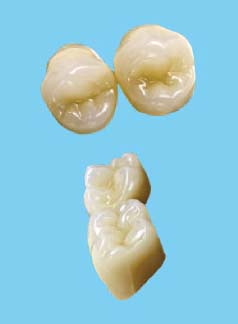
DIFFERENT OCCLUSAL SCHEMES FORMED BY DENTURE TEETH
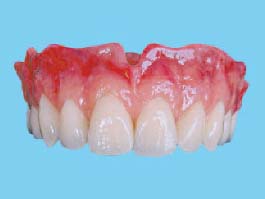
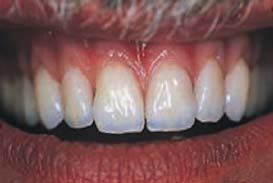
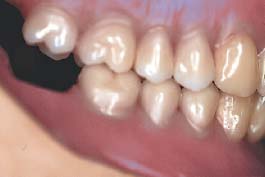
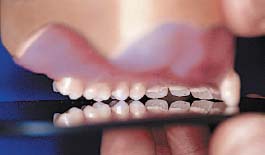
(Figures 9.1 and 9.2)
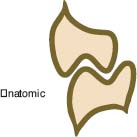
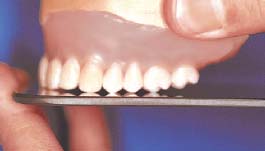
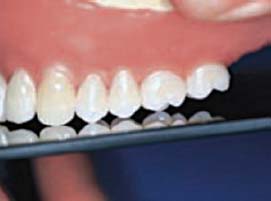
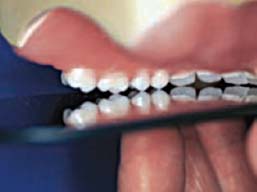
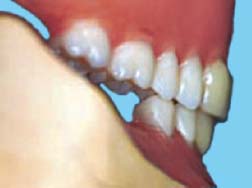
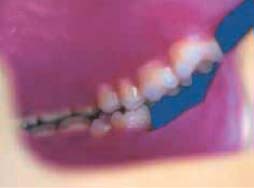
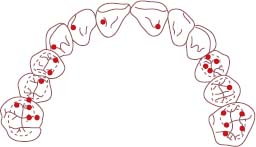
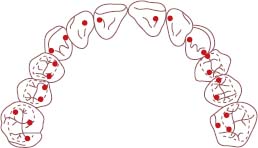
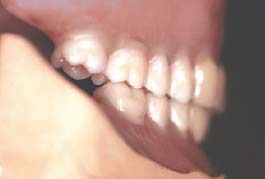
In the anatomic scheme, denture teeth have cusp angles of 30 degrees or more. They have been designed to intercuspate similar to the natural teeth occlusion. The steep cusp angles facilitate bilateral balanced occlusion and anterior disclusion (Figures 9.3 and 9.4).
Advantages
- Natural tooth anatomy
- Enhanced food penetration
- Cusp angles can achieve bilateral balanced occlusion
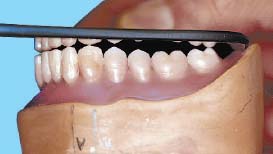
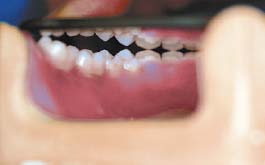
- Cusp angles allow for anterior disclusion, which is an advantage especially for those patients who require significant anterior vertical overlap to satisfy their esthetic needs (Figure 9.5)
Disadvantages
- Greater potential for destructive lateral forces
- Limited intercuspation relationship. For example, the anterior teeth must be arranged in a class I relationship; otherwise, distemas and/or tooth modifications are necessary to keep the first premolars positioned next to the canines
- Greater need for occlusal adjustment after processing
SET-UP PROCEDURE FOR THE BALANCED OCCLUSION UTILIZING VITA PHYSIODENS TEETH
Setting Up the Premolars
SETTING UP THE 1ST UPPER PREMOLAR Refer to Figure 9.6.
- The buccal cusp touches the occlusal plane and is perpendicular to it.
- The palatal cusp does not.
SETTING UP THE 1ST LOWER PREMOLAR Refer to Figure 9.7.
- Its labial surface is positioned above the vestibule.
- The vertical axis is upright or slightly mesially inclined.
- It is slightly inclined lingually.
- It will be slightly below the occlusal plane.
OCCLUSAL CONTACTS BETWEEN THE UPPER AND LOWER 1ST PREMOLARS Refer to Figure 9.8.
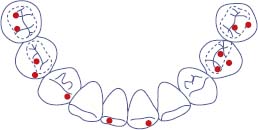
Contact between the upper and lower first premolars is mainly on the inner slopes of the working cusps. Non-working contacts are infrequent, but if they do occur they do so more usually on the non-working cusps of the upper premolar. The working cusps of the lower first premolar may be in contact with the distopalatal surface of the upper canine or the mesial marginal ridge of the upper first premolar or both. The lower first premolar should be in normal intercuspation with its long axis between the upper canine and the first premolar. It may be displaced a little mesially or distally depending on the amount of space taken up by the lower anterior setup (Figures 9.9 and 9.10).


SETTING UP THE UPPER 2ND PREMOLAR Refer to Figures 9.11 and 9.12.
- Both cusps touch the occlusal plane.
- The tooth is set perpendicular to the plane.
- If viewed from the buccal, its axial inclination should be similar to the upper canine and premolar.
- It is positioned in the arch so that the ellipse formed by the buccal outline and the central fissure (when viewed from the occlusal) is paralleled to the crest of the alveolar ridge.
- The proximal contact is a spherical interdental contact area, not a contact point.
OCCLUSAL CONTACTS OF THE UPPER 2ND PREMOLAR Refer to Figures 9.13 and 9.14.


- Contacts are mainly on the inner slopes of the working cusps.
- The outer slopes of the working cusps are mostly out of contact.
- Non-working cusps are mostly out of contact.
- Some marginal ridge contacts are acceptable as with the first premolar.
SETTING UP THE LOWER 2ND PREMOLAR Refer to Figures 9.15–9.18.
- This tooth will be a little below the occlusal plane compare the lower first premolar.
- Its buccal surface should not be over the vestibule.
- Its central fissure should be set on the canineretromolar line.
- Its position should follow the mandibular arch.
- It should not incline lingually as much as the first premolar.
- The lingual (non-working) cusp should be out of contact but closer to the occlusal plane compared to the first premolar.
- Its long axis is mesially inclined (but not so much as the first premolar).
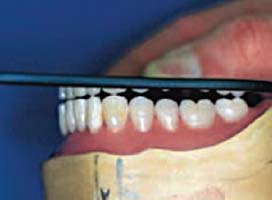
FIGURE 9.16.
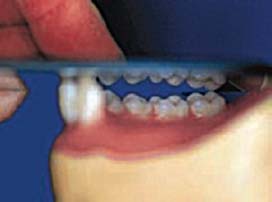
FIGURE 9.17.
OCCLUSAL CONTACTS OF THE LOWER 2ND PREMOLAR Refer to Figures 9.19 and 9.20.
- Contacts are mainly on the inner slopes of the working cusps.
- The buccal non-working contacts (upper) are more frequent than lingual (lower) non-working contacts.

Note: It is a good practice when setting up the upper and lower premolars to leave a small space, perhaps 1mm, behind the canines, so that the anterior teeth setup can be altered as needed at a later time. This space also allows the lab technician to modify the posterior teeth setup to improve the intercuspation.
Setting Up the Molars
The molars are set up so that their cusps are in contact with the transverse Wilson, and the anterior-posterior compensating curves of the occlusion.
SETTING UP THE UPPER 1ST MOLAR Refer to Figures 9.21 and 9.22.
- Only its mesio-palatal cusp forms contact with the occlusal plane.
- The disto-palatal cusp starts rising up and away from the occlusal plane.
- The buccal cusps are out of contact with the occlusal plane and positioned about 1mm above the occlusal plane.
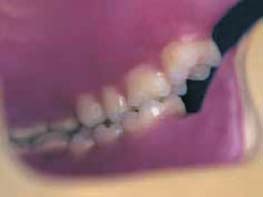
- If the patient’s upper posterior teeth are viewed from frontal aspect, less and less buccal surface of the teeth should be visible starting from the first upper premolar and going back toward the second molar. This transition in the contour and positioning of the upper posterior teeth forms the buccal corridor (Figures 9.23 and 9.24).

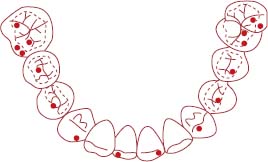
OCCLUSAL CONTACTS OF THE UPPER 1ST MOLAR Refer to Figures 9.25 and 9.26.
- Contacts are located mainly on the inner slopes of the working (palatal) cusps.
- There are few marginal ridge contacts.
- There are few non-working contacts.
- The non-working contacts are located more on the molars than on the premolars.
- The first molars (upper and lower) have more points of contact than any other occluding teeth.
SETTING UP THE LOWER 1ST MOLAR Refer to Figures 9.27–9.29.
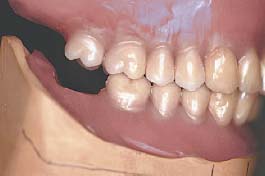
FIGURE 9.28.
- It is usually positioned at the lowest part of the anterior-posterior compensating curve.
- Its occlusal surface is lingually inclined and rises distally to accommodate the formation of the compensating curve.
- Its long axis is inclined mesially.
OCCLUSAL CONTACTS OF THE LOWER 1ST MOLAR Refer to Figures 9.30 and 9.31.

- The contacts are mainly located on the lingual slopes of the buccal cusps.
- There are few marginal ridge contacts.
- There are few non-working contacts.
- Its mesio-buccal and mesio-lingual cusps are in contact with the distal of the upper 2nd premolar.
SETTING UP THE UPPER 2ND MOLAR Refer to Figures 9.32 and 9.33.
- Neither palatal cusps are touching the occlusal plane, and the buccal cusps, like the upper first molar, are about 1mm above the occlusal plane.
- Disto-palatal cusp starts rising up and away from the occlusal plane.
OCCLUSAL CONTACTS OF THE UPPER 2ND MOLAR Refer to Figures 9.34 and 9.35.
Stay updated, free dental videos. Join our Telegram channel
VIDEdental - Online dental courses


