Chapter 9
Complications and Contraindications
Aim
The aim of this chapter is to discuss the common complications together with the contraindications in undertaking dental bleaching.
Outcome
The practitioner will be familiar with how best to manage or, where possible, avoid problems which may be commonly encountered with bleaching.
Overbleaching
There may be a problem of overbleaching with inside/outside bleaching because it is so effective. Overbleaching may, in part, be associated with the limited amount of dentine remaining within the root-filled tooth. The removal of dentine in accessing the root canal system can be considerable, especially if a high-speed rotary instrument is used within the pulp chamber while attempting to identify a canal opening (Fig 9-1). Unnecessary removal of sound tooth tissue is all too easy when using a high-speed cutting instrument.
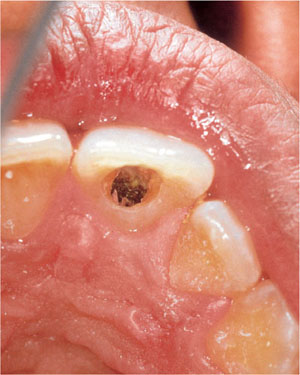
Fig 9-1 Excessive removal of tooth tissue in gaining access. Note the dark stained material still left within the tooth chamber.
Lack of knowledge of the anatomy of the pulp chamber when undertaking endodontic procedures may lead to unnecessary weakening of the tooth. It is very important to remove all the blood breakdown products from the pulp chamber, including the pulp horns, down to a level below the cervical margin. Instead of using a high-speed cutting instrument to complete this procedure, it is much more sensible to use a fine ultrasonic tip for this purpose. Once access has been gained to the pulp chamber the ultrasonic tip can be used to loosen, fragment and flush away the discoloured contents of the coronal pulp space (Fig 9-2).
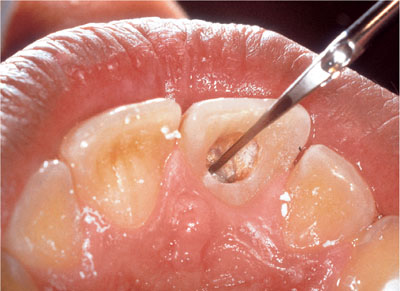
Fig 9-2 Ultrasonic tip cleaning coronal pulp space.
While overbleaching usually “rebounds” quite quickly, the visual effect can generally be modified by using a relatively dark shade of restorative material to restore the access cavity. To test the visual effect of the selected shade of restorative material, the pulp chamber is filled with water prior to trial insertion of the material. Once the effect has been observed, the material is quickly removed using an ultrasonic tip. The material must be removed completely before there is a possibility of polymerisation under ambient operating light. The empty pulp chamber is then dried, etched and primed, with the selected material then being placed according to the manufacturer’s directions.
As an alternative to this, the adjacent teeth can be bleached to match the overbleached teeth using conventional nightguard vital bleaching (Figs 9-3 to 9-6).
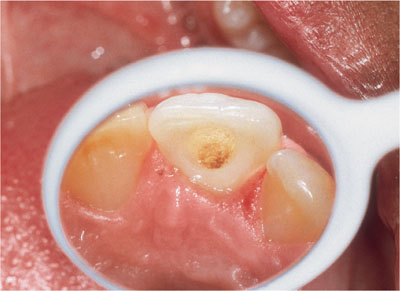
Fig 9-3 Palatal view of the upper left central incisor after bleaching.
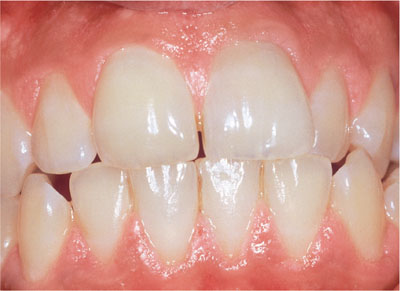
Fig 9-4 Labial view of the upper left central incisor before bleaching.
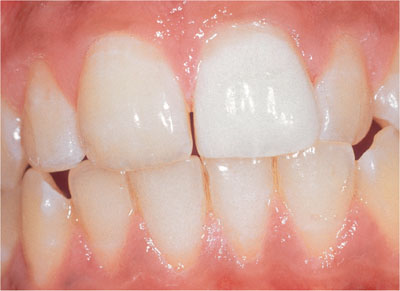
Fig 9-5 Labial view of overbleached upper left central incisor.
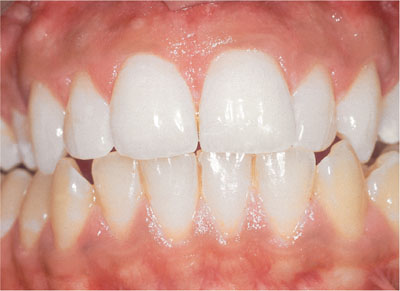
Fig 9-6 The overbleached upper left central incisor has been restored and the adjacent teeth bleached to match with nightguard vital bleaching.
Wrong Order of Bleaching
It is recommended to bleach especially dark teeth first to match the adjacent teeth before proceeding to bleach the rest of the teeth. This is preferable to bleaching all the teeth first and then trying to bleach the darker teeth to match the newly lighter ones. It is generally difficult to bleach very dark teeth to the brightness of electively lightened adjacent teeth (Figs 9-7 and 9-8).

Fig 9-7 Discoloured upper left central incisor adjacent to an upper left lateral incisor restored with a composite tip.
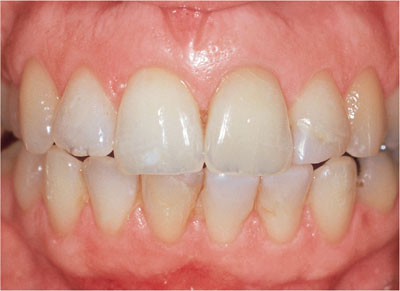
Fig 9-8 The upper left central incisor was bleached first, followed by general bleaching.
Bleaching of Teeth Restored with Composite
Composite restorations will not change colour with bleaching. If it is planned to bleach a composite veneered tooth, the veneering composite should, wherever possible, be removed first. This should include the resin tags in the enamel to allow the hydrogen peroxide to penetrate and bleach the discoloured tooth tissue. The teeth should be checked by etching them with phosphoric acid and then by washing and drying them. Any areas that do not appear “frosty” still have resin tags present, which may stop effective bleaching in that area (see Figs 9-9 and 9-10).
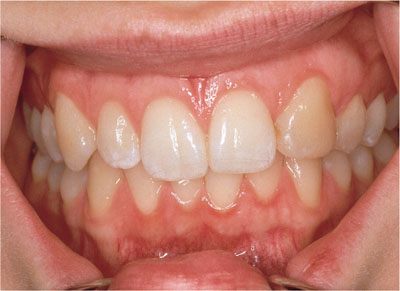
Fig 9-9 Upper left canine in t/>
Stay updated, free dental videos. Join our Telegram channel
VIDEdental - Online dental courses


