Chapter 4
Bleaching of Teeth Affected by Specific Conditions
Aim
The aim is to discuss the bleaching of teeth discoloured by fluorosis, tetracyclines and certain congenital problems.
Outcome
The practitioner will be aware of the causes of atypical discolouration and of the various bleaching techniques that can be used in their management.
Introduction
Correct diagnosis of the causes of discolouration is essential in its management. Other causes of discolouration are detailed in Chapter 7.
Fluorosis
Fluorosis causes brown spots or white flecks on teeth. The appearance varies from white striations or localised spots to yellow or brown bands or general discolouration of enamel, with or without pits and other surface abnormalities (Figs 4-1 and 4-2).
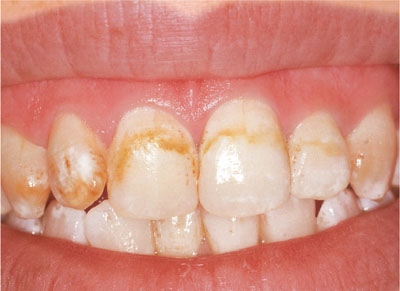
Fig 4-1 Brown and white fluorosis.
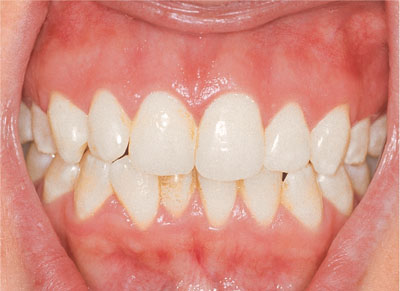
Fig 4-2 Appearance after three weeks of nightguard vital bleaching with 10% carbamide peroxide.
In moderate fluorosis there is subsurface porosity which typically appears to resemble white spot lesions.
In more severe fluorosis there is pitting and loss of the outer layer of enamel, increasing the risk of caries through plaque accumulation and retention.
Appearance of Fluorosis
Fluorosis is often first seen in the gingival third of the second primary molars. This presentation is usually indicative of fluorosis being a problem for at least the permanent anterior teeth.
Classically, the banding type of fluorosis follows the developmental lines of the enamel and is symmetrical. Because mild white fluorosis is common and is of little, if any, clinical consequence, some dentists regard this as acceptable and a small price to pay for a substantial reduction in caries.
Cause of Fluorosis
Fluorosis is caused by exposure to too much fluoride during the development of the dentition. The main risks for developing fluorosis are swallowing toothpaste, excessive fluoride supplements and baby food reconstituted with fluoridated water (Figs 4-3 and 4-4).
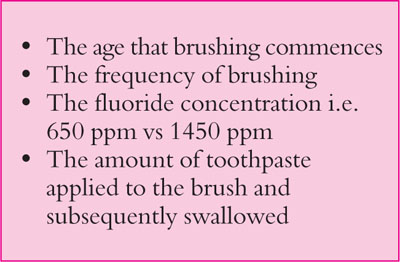
Fig 4-3 Risk factors for developing fluorosis from toothbrushing.
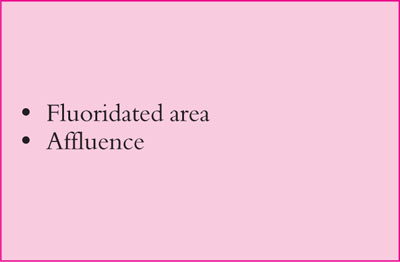
Fig 4-4 General risk factors.
Swallowing Toothpaste
The aesthetic damage caused by fluorosis is often done before a child sees a dentist. A lot of fluorosis is related to unsupervised tooth brushing with relatively large amounts of toothpaste with the toothpaste being swallowed rather than being spat out. Over 90% of toothpastes contain fluoride, usually with 1450 parts per million (ppm). Flavoured toothpastes have been shown to be associated with an increased use of toothpaste by children.
The higher the socio-economic group the greater the use of toothpaste. Toothpastes for children with lower concentrations of fluoride (e.g. 650 ppm) are available but many families, for convenience and through lack of awareness, just use one regular toothpaste for all the family. However, the use of toothpastes with lower fluoride content (650 ppm) may reduce protection against possible development of caries in susceptible children.
Young children swallow between half and 90% of toothpaste used. They should be supervised when brushing and only small amounts of toothpaste should be used. Toothpaste should be applied across the brush rather than along it as this limits the amount used more effectively. Children should spit out used toothpaste but not rinse. In this way the teeth are bathed in fluoride for some time and this helps reduce the risk of caries (Fig 4-5).
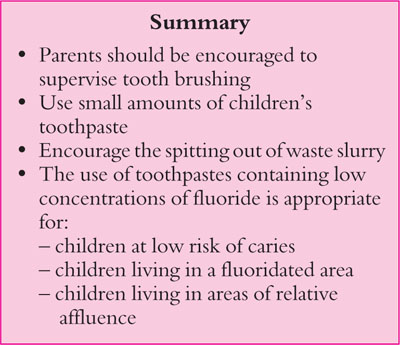
Fig 4-5 Preventing fluorosis.
Management of Fluorosis
Nightguard vital bleaching is the treatment of choice. Localised brown fluorosis located well away from the gingival margin can be dealt with by careful chair-side bleaching. Bleaching should be undertaken before resorting to any invasive procedure such as microabrasion. Microabrasion should precede direct bonding with composite. Porcelain veneers should be a last resort given the loss of enamel necessary to achieve a satisfactory aesthetic outcome.
Brown fluorotic spots respond moderately well to bleaching. White flecks are usually less obvious or worrying than brown ones but can look more obvious during the bleaching process, when the teeth affected become “blotchy”. This is not normally a problem once the bleaching has been completed as the white flecks are less obvious against the lightened background. This is usually acceptable to most patients.
Protocol for Bleaching Fluorotic Teeth
-
Identify the areas of fluorosis and record them in the dental notes. Take photographs and discuss the treatment options. Warn about secondary flecking (white fluorotic flecks on teeth) which patients or parents usually do not notice until the brown fluorosis (Fig 4-6) has been bleached away.
-
Dry the teeth and apply a contrasting coloured (old or scarcely used) composite over the brown areas without etching the teeth (Fig 4-7).
-
Light-cure this composite in position (Fig 4-8).
-
Take an impression with the composite still on the teeth.
-
Remove the composite from the teeth.
-
When the impression is cast, the teeth will appear overbuilt in the areas of maximum discolouration (Fig 4-9).
-
Once formed, the tray will have reservoirs corresponding to where the composite was applied (Fig 4-10). This allows the gel to be held in the tray over the areas selected for bleaching.
-
The tray is cut back to produce windows as appropriate (Fig 4-10). Teeth that are not being bleached will be bathed in saliva and this prevents them from being bleached.
-
The patient is shown how to put the 10% carbamide peroxide in the tray. The patient is told to wear this every night until happy with the colour change (Figs 4-11 and 4-12).
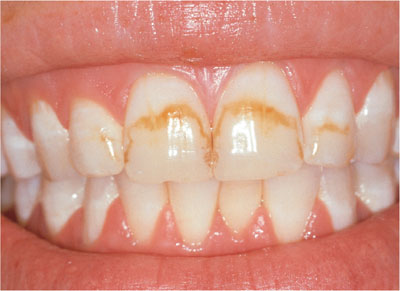
Fig 4-6 Brown banded fluorosis.
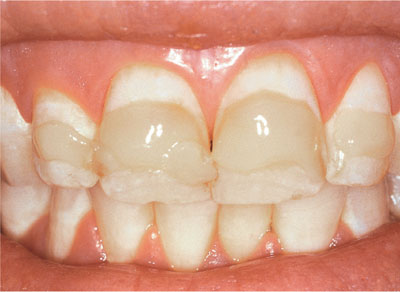
Fig 4-7 Composite applied over the dried, not etched, brown areas.
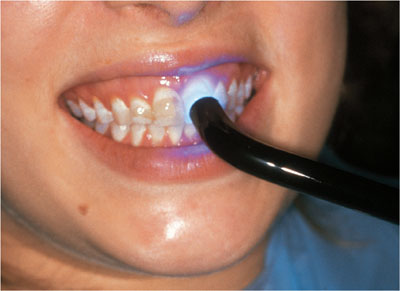
Fig 4-8 Composite being light-cured.
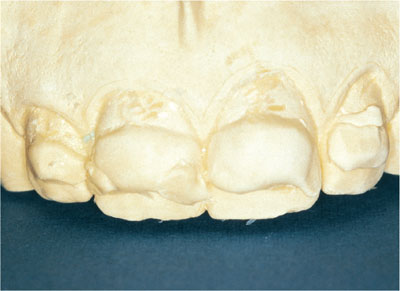
Fig 4-9 Positive areas on the cast.
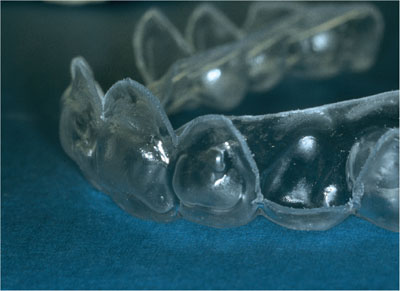
Fig 4-10 Reservoirs correspond to where the composite was placed on teeth. Windows are cut over teeth not to be bleached.
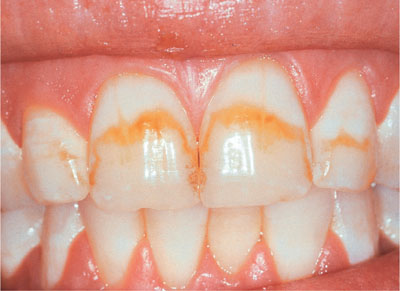
Fig 4-11 Teeth with banded fluorosis.
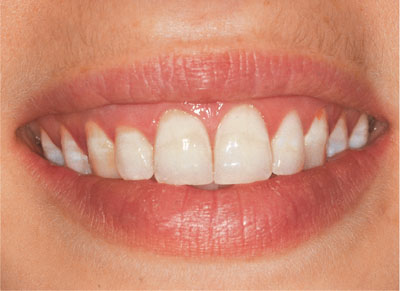
Fig 4-12 Teeth following four weeks of nightguard vital bleaching with 10% carbamide peroxide.
Treatment Times
There are no particular reasons for delaying the bleaching of fluorosed teeth. Bleaching is safe in young patients and can be undertaken as soon as the first permanent molars are sufficiently erupted to retain the tray for conventional nightguard vital bleaching with 10% carbamide peroxide. This can be started as soon as a tray can be tolerated and retained in position by the child.
Chair-side bleaching using up to 38% hydrogen peroxide can be undertaken in young patients, but only if there is excellent cooperation and if effective isolation can be achieved. Localised small brown areas of fluorosis, usually well away from the gingival margin, can be successfully bleached using this technique.
Bleaching of moderately fluorosed teeth takes about four to six weeks to complete. A review at about one month is generally indicated. Bleaching may be safely extended over a period of at least six months but this is rarely necessary in the management of fluorosis.
Mild sensitivity is a common complaint but this typically resolves in a few days after bleaching has stopped. In the event of sensitivity developing before bleaching is completed the bleaching regimen may be changed to every second night rather than every night. This approach is a compromise which delays the bleaching process but will achieve a good result.
To reduce sensitivity, toothpaste containing 5% potassium nitrate (KNO3) can be placed in the bleaching tray, which can be worn for half an hour prior to bleaching. This toothpaste needs to be washed out of the tray before inserting the 10% carbamide peroxide. This technique reduces sensitivity and improves patient compliance and satisfaction with the bleaching process.
Figs 4-13 shows brown fluorosis in a young teenager and Figs 4-14 and 4-15 show the teenager before and after bleaching.
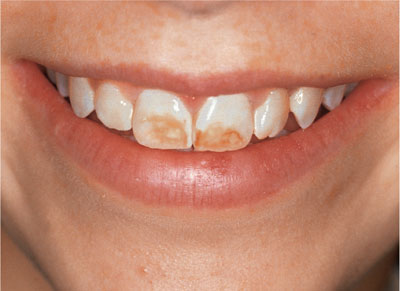
Fig 4-13 Marked brown fluorosis in a young teenager.
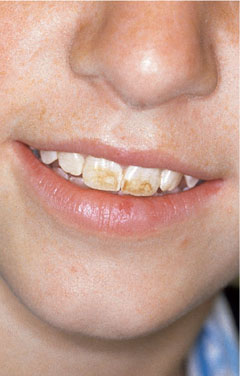
Fig 4-14 View of a young teenager with brown fluorosis.
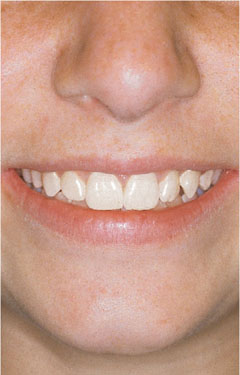
Fig 4-15 View following bleaching.
Troubleshooting
Where there is a mixture of brown fluorosis and white fluorotic flecks (“secondary flecking”) it is important to draw attention to the less obvious white fluorosis. Patients and their parents should be warned that the brown fluorosis is likely to reduce gradually in a blotchy pattern. They should be reassured when this pattern becomes obvious and advised to carry on bleaching. As bleaching progresses, the white flecks, while still present and evident on close examination, are usually less obvious against the bleached background.
Fig 4-16 shows brown and white fluorosis before bleaching and Fig 4-17 shows the appearance following poor-compliance bleaching.

Fig 4-16 Brown and white fluorosis before bleaching.
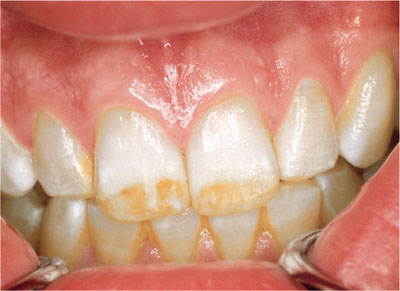
Fig 4-17 Appearance after poor compliance and only intermittent use of nightguard bleaching with 10% carbamide peroxide.
Microabrasion
The simplest way to effect microabrasion of recalcitrant flourotic areas is to use a fine multibladed tungsten carbide bur (Jet FG 7901) held in a highspeed handpiece and operated with a feather-light touch (Fig 4-18). Microabrasion should be undertaken only following prolonged nightguard vital bleaching extending over at least two months.

Fig 4-18 Microabrasion with a fine multibladed tungsten carbide bur.
Any form of destructive removal of enamel is to be avoided unless absolutely necessary. It is essential to warn the patient that enamel will be removed, is irreplaceable and that the discolouration may not be limited to the superficial layer to be reduced by microabrasion. Consent for microabrasion should be obtained from the patient prior to commencing treatment.
Microabrasion can be achieved with composite finishing discs but this technique results in a generalised flattening of the enamel surface. Alternatively, microabrasion can be undertaken using a slurry of 18% hydrochloric acid and pumice applied using a polishing cup operating at slow speed. This procedure must be undertaken under rubber dam as the slurry is acidic and splatter needs to be carefully controlled. Eye protection is essential for the patient, nurse and operator. The material of choice is Opalustre (Ultradent Products Inc.) (see Fig 4-19).
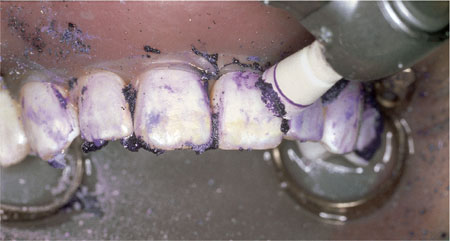
Fig 4-19 Microabrasion under rubber dam with 18% hydrochloric acid and pumice.
Microabrasion results in a ground glass effect termed abrosion, a term coined from abrasion and erosion (see Figs 4-20 and 4-21).

Stay updated, free dental videos. Join our Telegram channel
VIDEdental - Online dental courses


