CHAPTER 7

VENEERS CEMENTATION
MACIEJ ŻAROW


The placement of veneers is very precise work. If you have patients waiting for an appointment in the waiting room, this is not a good time for cementation. You must have enough time to check the veneers for leaks, esthetics, and contact points. Remember: it is four-handed teamwork!
Veneers cementation
The cementing procedure will determine the durability of the veneers. When placing veneers, we must be sure about their marginal fit, color, shape, length, the composition in which they create a smile, their position in relation to the upper and lower lip, and of course, the patient’s satisfaction. Perfect adhesive preparation will result in clinical success.
WHEN TO USE ANESTHESIA?
After receiving the porcelain veneers from the dental laboratory (Fig 7-1a), first check their marginal fit on the die stone. Then, you can start working with the patient.
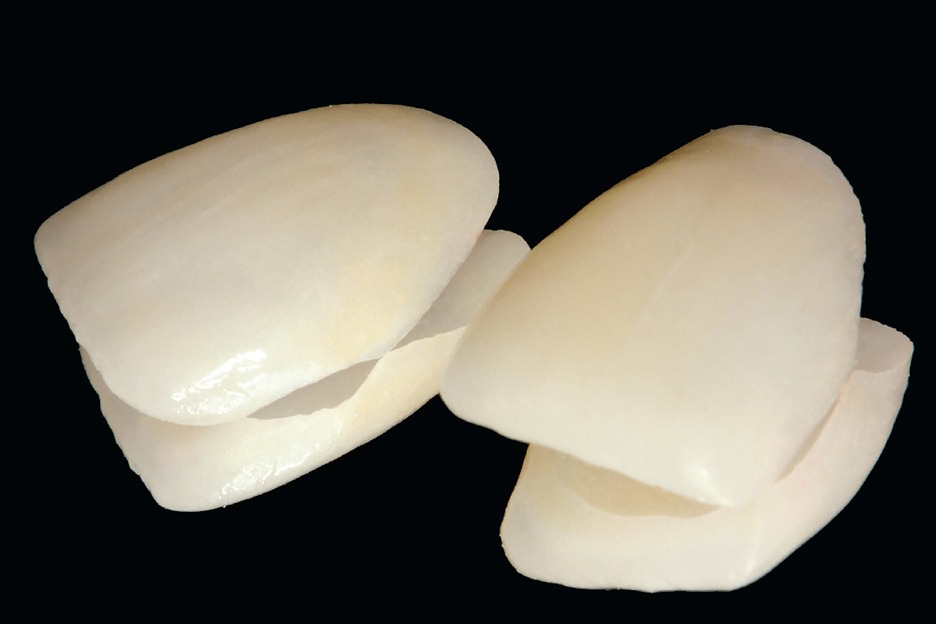
Fig 7-1a
Veneers were fabricated in the dental laboratory. It is important to check their marginal integrity on the die stone before starting the work with the patient.
It is important not to anesthetize the patient before the veneers are tried in, as they will not feel their lip, and the dentist will not be able to evaluate the actual smile. If the patient has a high level of hypersensitivity of the teeth, anesthesia should be performed from the palatal side (for example, with The Wand device) to prevent the upper lip from becoming immobilized (Fig 7-1b).1,2 The Wand device is an interesting alternative for veneers due to the need to control the upper lip.
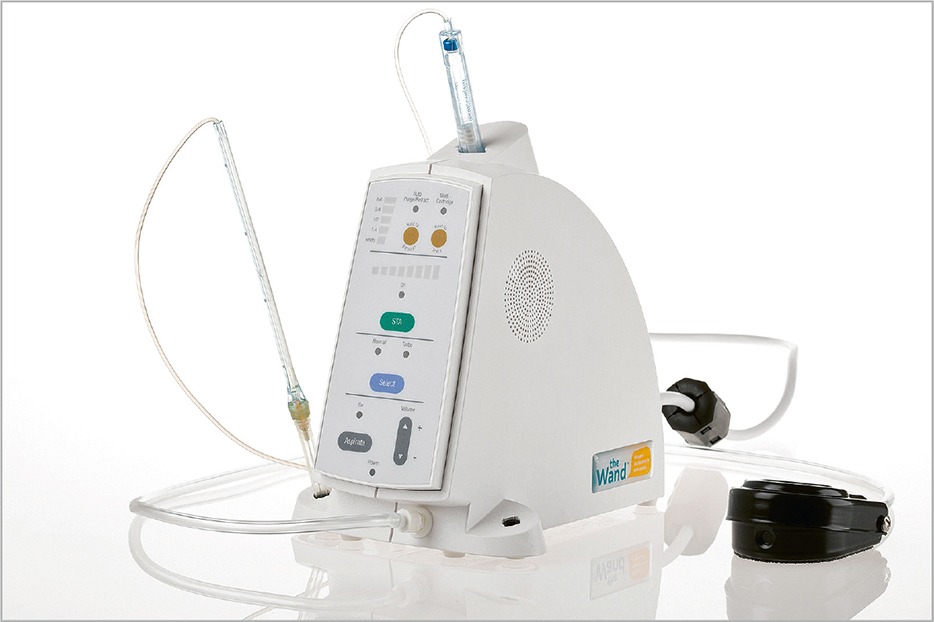
Fig 7-1b
Anesthesia from the palatal side with The Wand device is an interesting alternative for veneers due to the need for upper lip control and the ability to control the smile and phonetics during the try-in.
 TIP
TIP
Veneers should be carried carefully from one place to another by a dental assistant to avoid accidents. A fall onto a ceramic floor will certainly crack the restoration.
 CHECKLIST
 Removing provisional veneers (Fig 7-2)
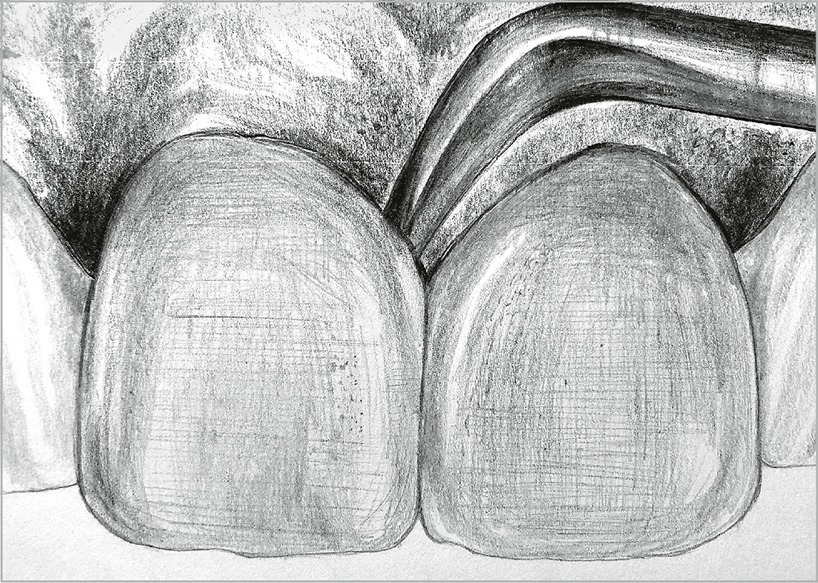
Fig 7-2
For the removal of provisional veneers, it is worth using a solid curette: pry up the veneers, which should easily detach from the hard tissues.
To remove provisional veneers, you can use curettes, which will no longer be used for scaling. You should pay special attention to the proximal surfaces, as the temporary composite may have invisible excesses (eg, ProTemp).
If the excess temporary material is not completely removed, the veneer cannot be seated in the correct position, and there can be a false impression that the veneer does not fit.
 Trying in “dry” veneers
First, the veneers should be tried in “dry.” The adaptation of the veneers has to be checked to see whether they are reaching the preparation margin. If not, there is likely a problem with the proximal surface, which is too convex and needs to be adjusted slightly.
 Checking the adaptation of proximal surfaces (Fig 7-3)
You should always check that the proximal surfaces are properly contoured and connecting properly.3
When trying in veneers, the dental assistant places the articulation foil (8–12 µm) in the needle holder. Then, they place it between the proximal surfaces of the teeth (Fig 7-3a) before the dentist seats the veneers in the correct position. Now, the dentist presses the veneers slightly against the teeth, and the dental assistant gently pulls the foil toward the incisal edge.
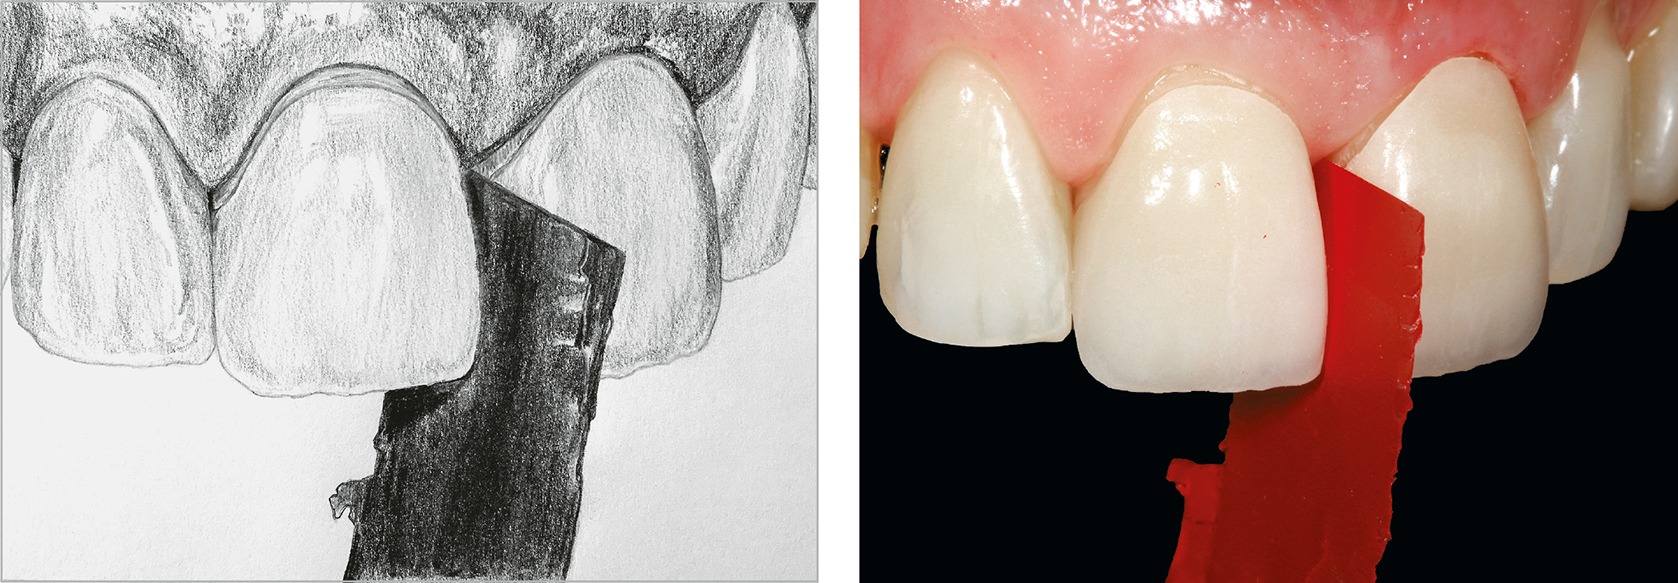
Fig 7-3a
An 8 µm articulation foil placed in the needle holder is a way to clearly mark places of interference on the proximal surface.
If the articulation foil tears (Fig 7-3b) or becomes blocked, leaving a clear mark on the proximal surface of the veneer, it means that the contact point is too tight.
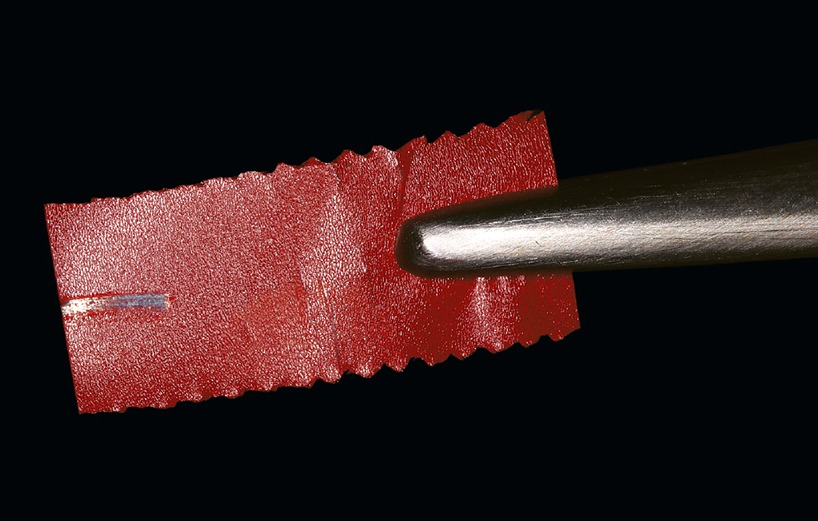
Fig 7-3b
A torn or heavily thinned articulation foil proves that the contact surface is too convex and must be modified.
In such a case, the heaviest red marks on the interproximal surface are gently removed with a gray porcelain rubber placed on a straight handpiece (Figs 7-3c and 7-3d).
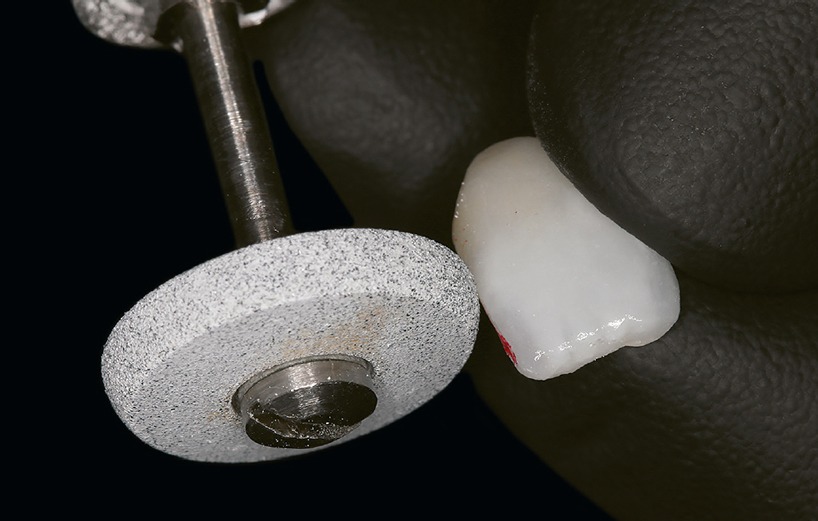
Fig 7-3c
A gray porcelain rubber (Diatech Polisher 230134AA) on the straight handpiece is used to correct the proximal surfaces.

Fig 7-3d
Note: when correcting the proximal contact point with a gray porcelain rubber, blunt the new rubber so that its tip does not immerse into the porcelain (the porcelain rubber in the upper part of the photograph is new, and in the lower part it is blunt).
After gentle adjustment with a gray porcelain rubber, repeat the activity of pulling the articulation foil toward the incisal edge (and further adjustment with a porcelain rubber if necessary). This procedure can be repeated as often as required until the perfect proximal contact point/surface is achieved. This perfect fitting should be checked with dental floss. For example, the dentist holds the veneers with their fingertips while the dental assistant slides the dental floss between the contact points of the veneers. If the dental floss causes a significant displacement of the veneer, felt under the dentist’s fingertips, it indicates too tight contact point.
Good adaptation of proximal contact point/surface is very important.4 If necessary, it should be performed not once or twice, but even 15, 20, or more times. If the contact point is too tight, the veneer may crack or be cemented in the wrong position, resulting in a lack of marginal seal.
 Evaluation of black triangles closure (Fig 7-4)
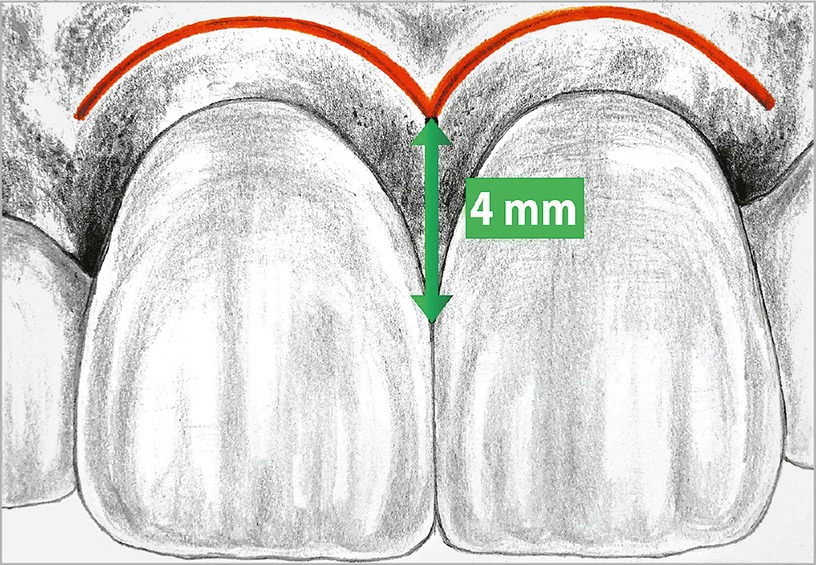
Fig 7-4
The closure of the proximal contact point should be located 4 mm from the alveolar bone. In order to be sure of the distance from the bone, anesthetize the patient and place the dental explorer subgingivally until the bone is reached. Perhaps the black triangle will not be closed at the cementing stage due to the effect related to the impression and provisional restorations. Still, during the healing stage, if measured correctly, the triangle will be closed with soft tissues.
Check that there is no gum recession after provisional veneers. If something alarms you, for example, black triangles,5 a periodontal examination should be performed: the closure of the proximal contact point should be located 4 mm from the alveolar bone.
If the proximal contact point is further away and black triangles are visible, extend the proximal surface by adding porcelain to the veneers. This can be inconvenient because the veneers have to be returned to the laboratory. Therefore, it is better to ask your dental technician to fabricate relatively longer contact surfaces.
In the case of proximal surfaces that are too long, modification with a porcelain rubber is simple enough to be carried out by a dentist. On the other hand, adding porcelain to the proximal contact point on the veneer is beyond the skills of a dentist – so a laboratory becomes necessary.6,7
 Control of marginal seal and adaptation
If the palatal part of the incisal edge protrudes from the preparation margin, it is most likely that the veneer is not seated in its correct position. In such a case, check that any material from the provisional veneer is left in the interproximal space, and that the proximal contact point is not too convex, preventing passive placement of the veneer. Veneers should be seated passively! When the proximal contact point no longer interferes with the insertion of the veneer into place, the marginal seal and adaptation should be re-checked, especially on the proximal and palatal surfaces.
 Trying in “wet” veneers
How to check the color of porcelain veneers? Do they change color after cementation? In what light should you verify a color? These are all questions of concern to dentists. The most important aspects of color assessment are presented below.
 THE MOST IMPORTANT STAGES OF COLOR VERIFICATION
1. The veneer should always be tried in daylight.
2. The color cannot be checked while trying in “dry” veneers. There is a layer of air between the veneer and tooth structure, which blocks light transmission deep into the tooth. In the presence of this layer, the veneers always appear brighter than they really are. Therefore, a layer of glycerin gel (for example, a glycerin gel for intimate hygiene that will easily rinse out with water) should be applied to the inner surface of the veneer before trying in. Due to the presence of the gel, one optical unit is generated, and the light is also absorbed by hard tissues and then diffused. This allows you to predict the definitive appearance of the veneers after cementing.8,9
3. Veneers are first evaluated by the dentist (Fig 7-5), and if possible, by the dentist with the technician. Only after the team’s (dentist–technician) acceptance of the color and the shape can restorations be shown to the patient.
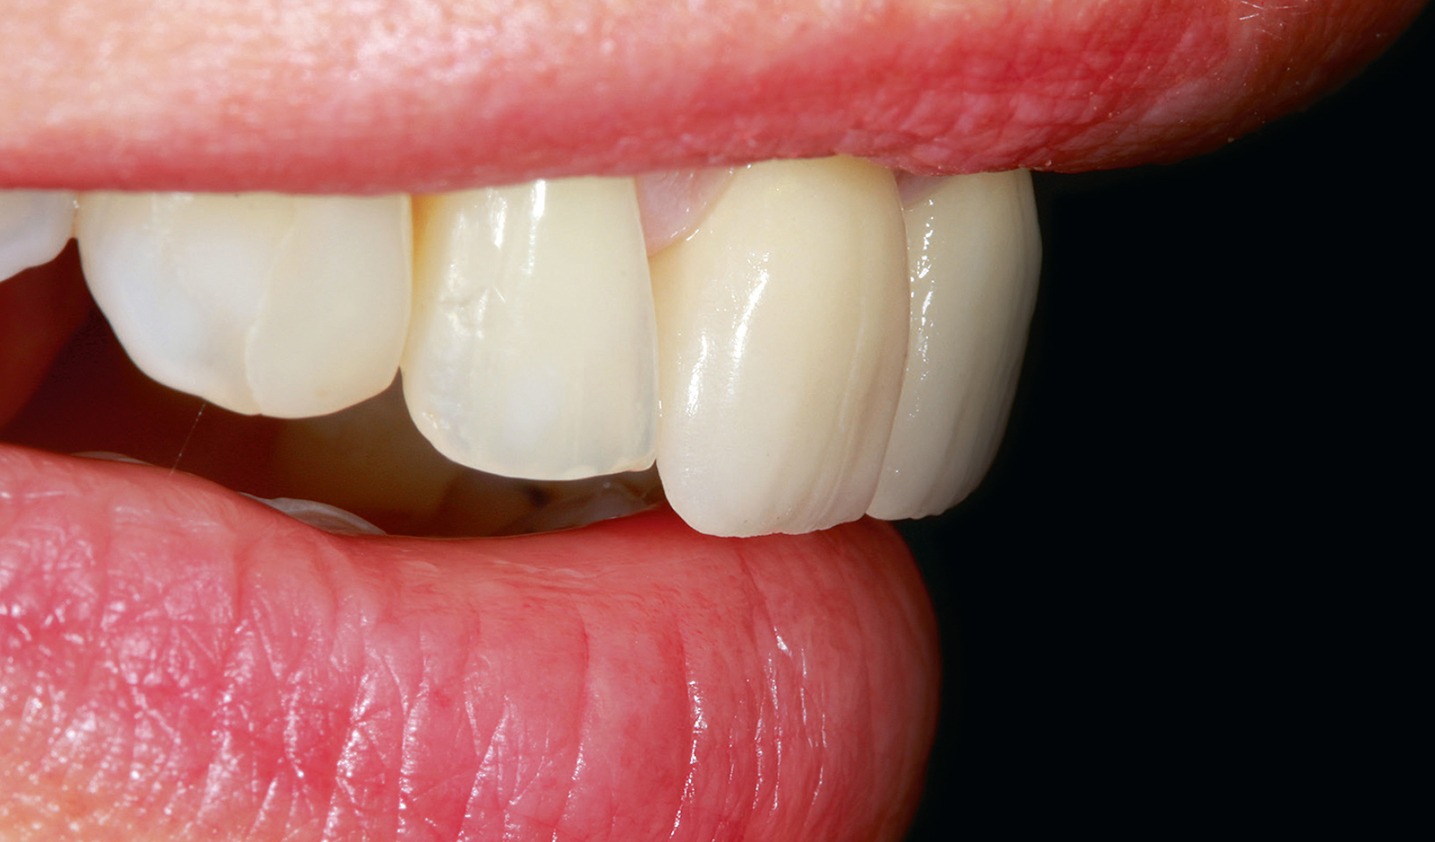
Fig 7-5
Color evaluation of the veneers: the dentist is always the first to evaluate (shade, shape, length, characteristics of the surface). Only when the dentist is satisfied with the restorations can they be presented to the patient.
4. The patient must have time in an appropriate space to accept the veneers. Walls of a neutral color are important to avoid changes to light color, and patients need a room in which they can assess the veneers calmly.
 Corrections
At this stage, it may turn out that the veneers need to undergo corrections, which can be divided into:
 Simple corrections without the need to return the veneers to the dental laboratory
The most common corrections concern reducing the length, width, changing the incisal angles, emergence profile or a slight correction of the tooth axis inclination. This is done with a gray, slightly abrasive rubber, applied to the straight handpiece.
 Corrections requiring the use of a porcelain furnace
- Color correction: In some clinical cases, there is a need for color correction. That makes the participation of the dental technician and the use of a porcelain furnace necessary. The dental technician can modify the veneers by slightly staining them from the outside (Fig 7-6a) or by blocking penetrating tooth discoloration from the inside of the veneer (Fig 7-6b). This must be done in such a way as to avoid interferences during the clinical seating of the restoration.
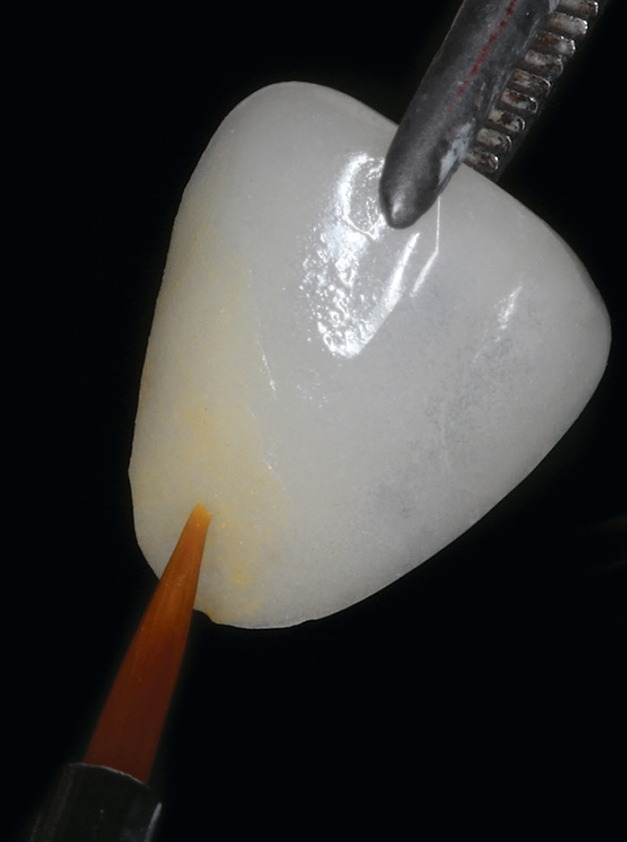
Fig 7-6a
Modification of the veneer by the dental technician with slight staining from the outside …
Fig 7-6b
… or by blocking from the inside of the veneer penetrating tooth discoloration. - Shape modification: In some cases, the veneers may need to be lengthened or widened, or black triangle closure may be required by adding porcelain to the veneer (Fig 7-6c).
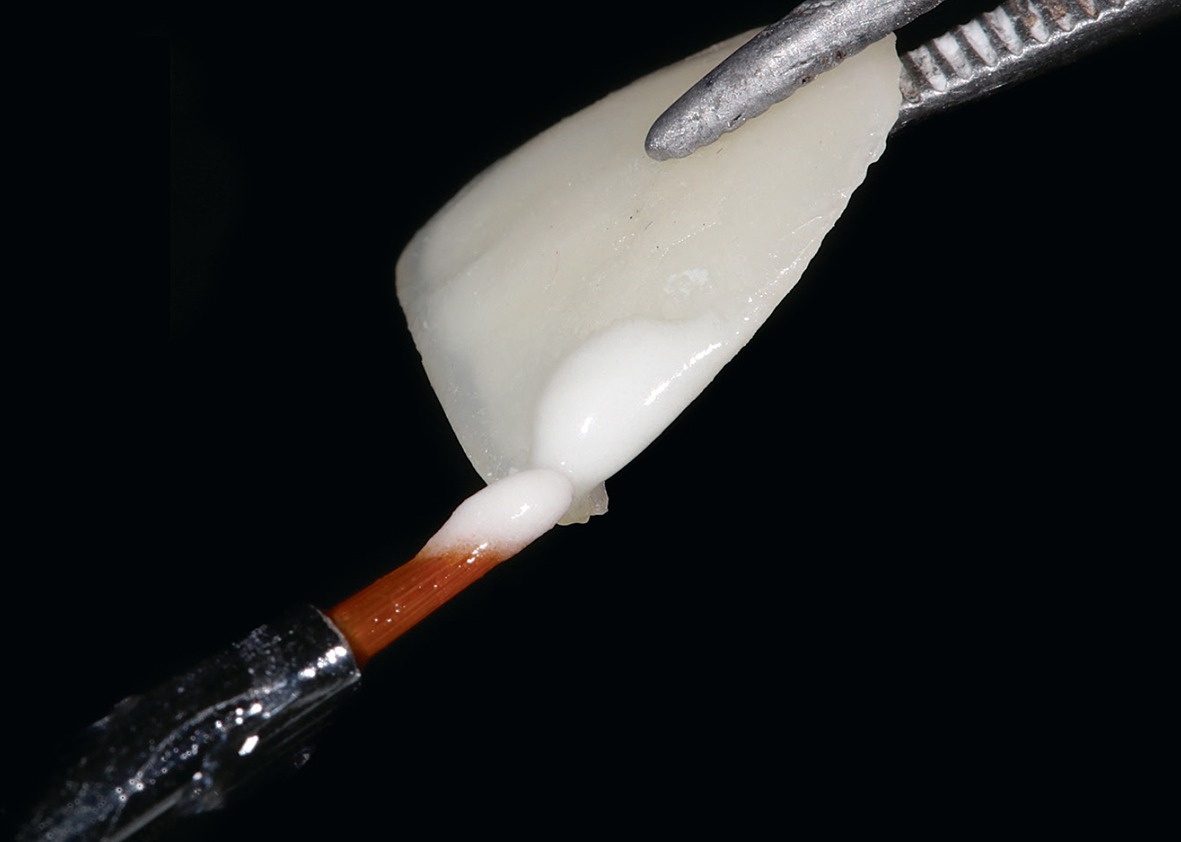
Fig 7-6c
Modifying the proximal surfaces or closing black triangles by adding the porcelain to the veneers requires the presence of the dental technician and the use of a porcelain furnace. That is why the technician should be provided with precise information about where the proximal surfaces should be located.
 REMEMBER
Laboratory corrections of the veneers are possible, but they require the presence of a dental technician and the use of laboratory equipment. Therefore, it is important to plan the restorations properly and to provide the laboratory with information that is as detailed as possible, such as:
- The length and shape of the teeth and the curvature of the mesial/
distoincisal angle (wax-up) - Precise information about where the proximal contact surface should meet (closing the black triangles 4 mm from the alveolar bone)
- Color map of final veneers
- Color of the tooth core after preparation
- The level of surface characterization
- The level of dominance of the central incisors in relation to the lateral incisors
 VENEER ESTHETIC EVALUATION BEFORE CEMENTATION: CHECKLIST (FIG 7-7)10–15
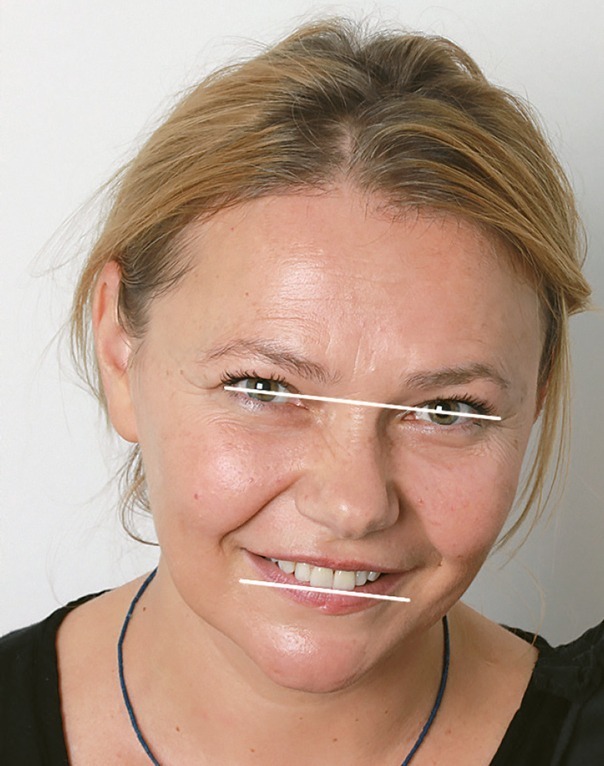
| A. The horizontal line | Evaluate whether the incisal edges are parallel to the interpupillary line (Fig 7-7a)
Fig 7-7a |
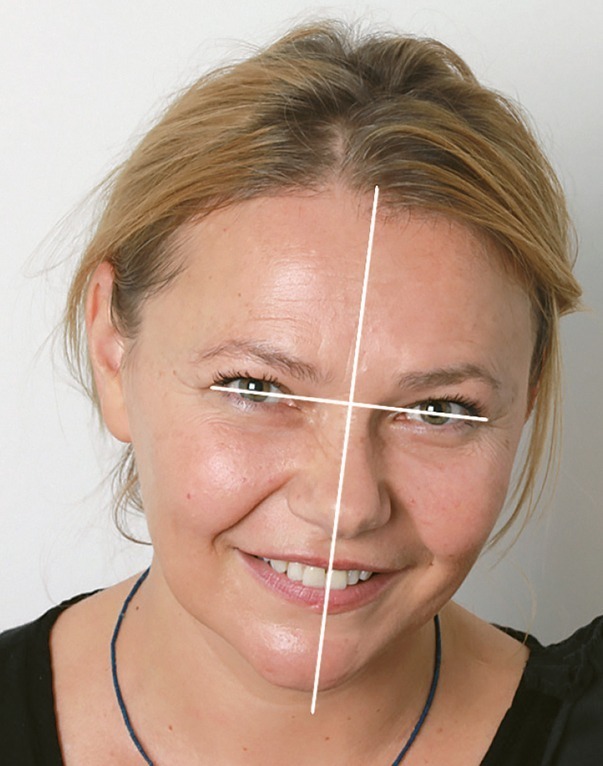
| B. The midline | Evaluate whether the line connecting the mesial proximal surfaces of the central incisors coincides with the facial midline (Fig 7-7b)
Fig 7-7b |
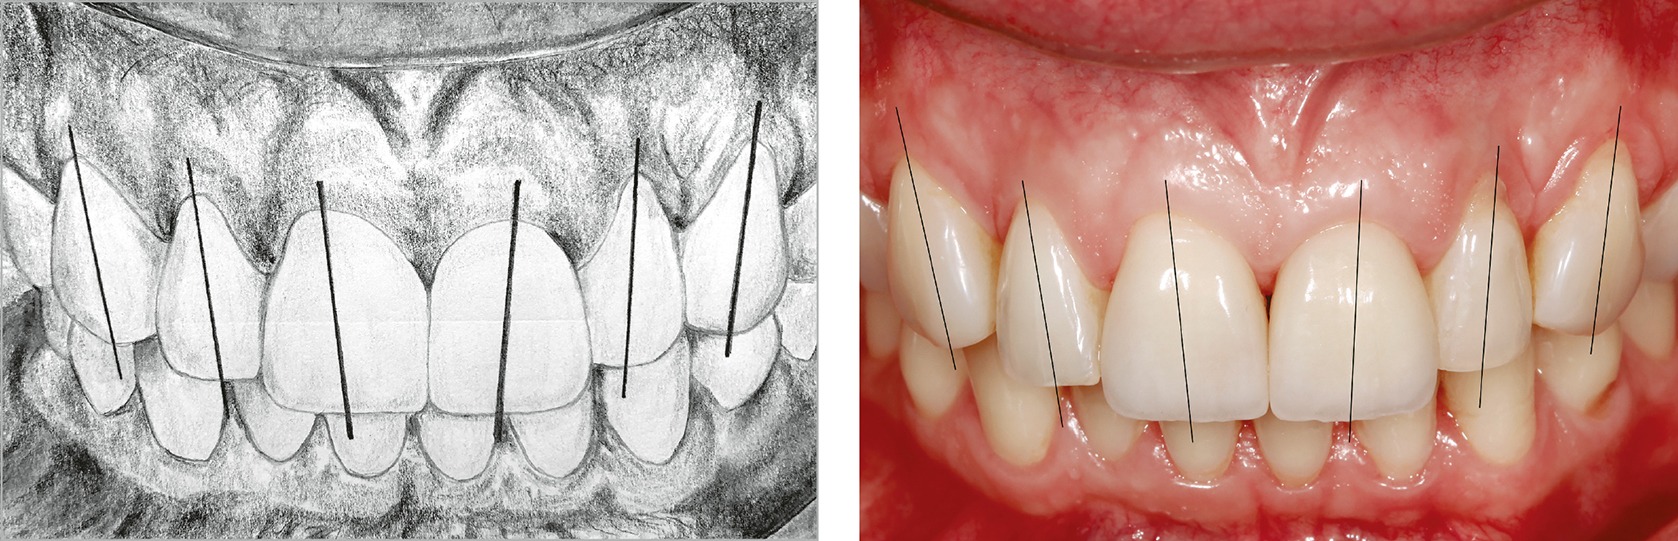
| C. Tooth axis | Evaluate whether the axes of the teeth with veneers tilt distally (in other words: whether consecutive teeth further away from the midline tilt more and more distally) (Fig 7-7c)
Fig 7-7c |
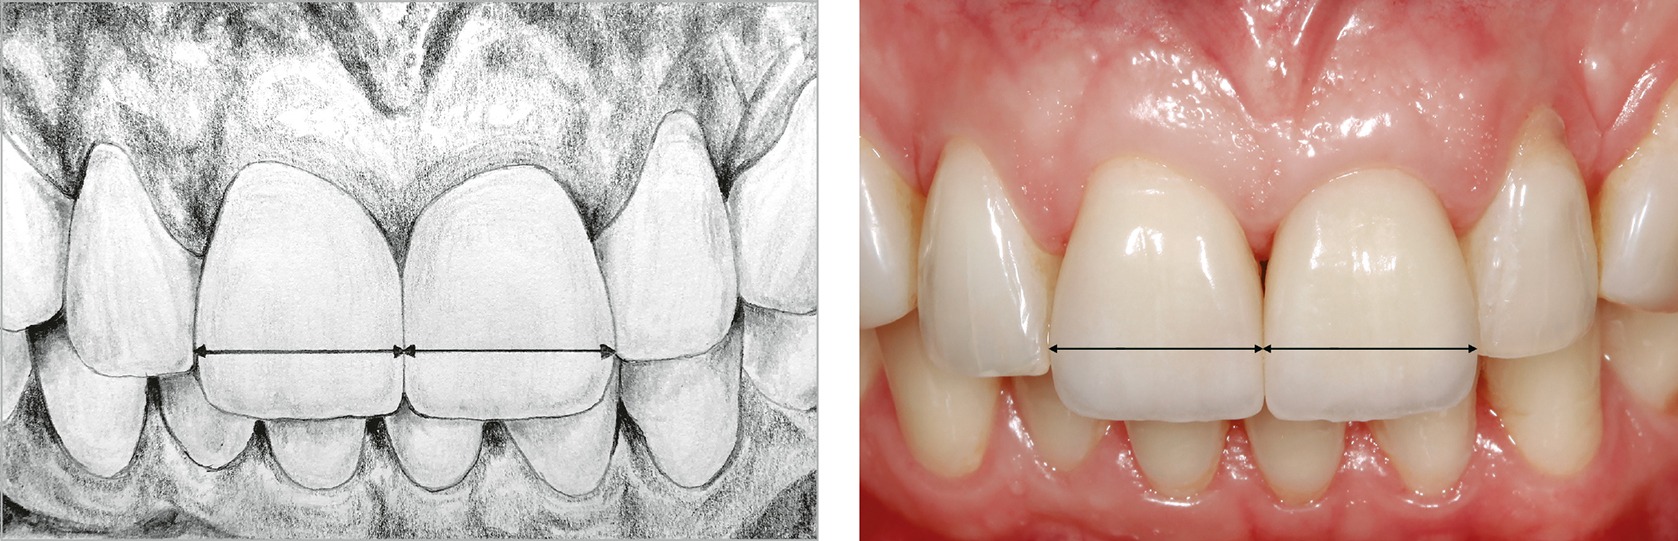
| D. Width of the central incisors | Evaluate whether the width of both central incisors is identical (Fig 7-7d)
Fig 7-7d |
| E. Mesial and distoincisal angle | The mesial incisal angle should be more acute than the distal one. The mesial incisal angles of the maxillary central incisors should be identical (Fig 7-7e)
Fig 7-7e |
| F. Exposure of the incisal edges from under the upper lip | According to the esthetic treatment plan, tested on mock-up (veneers test drive), the maxillary incisors should protrude 1–3 mm from under the upper lip in repose position (Fig 7-7f)
Fig 7-7f |
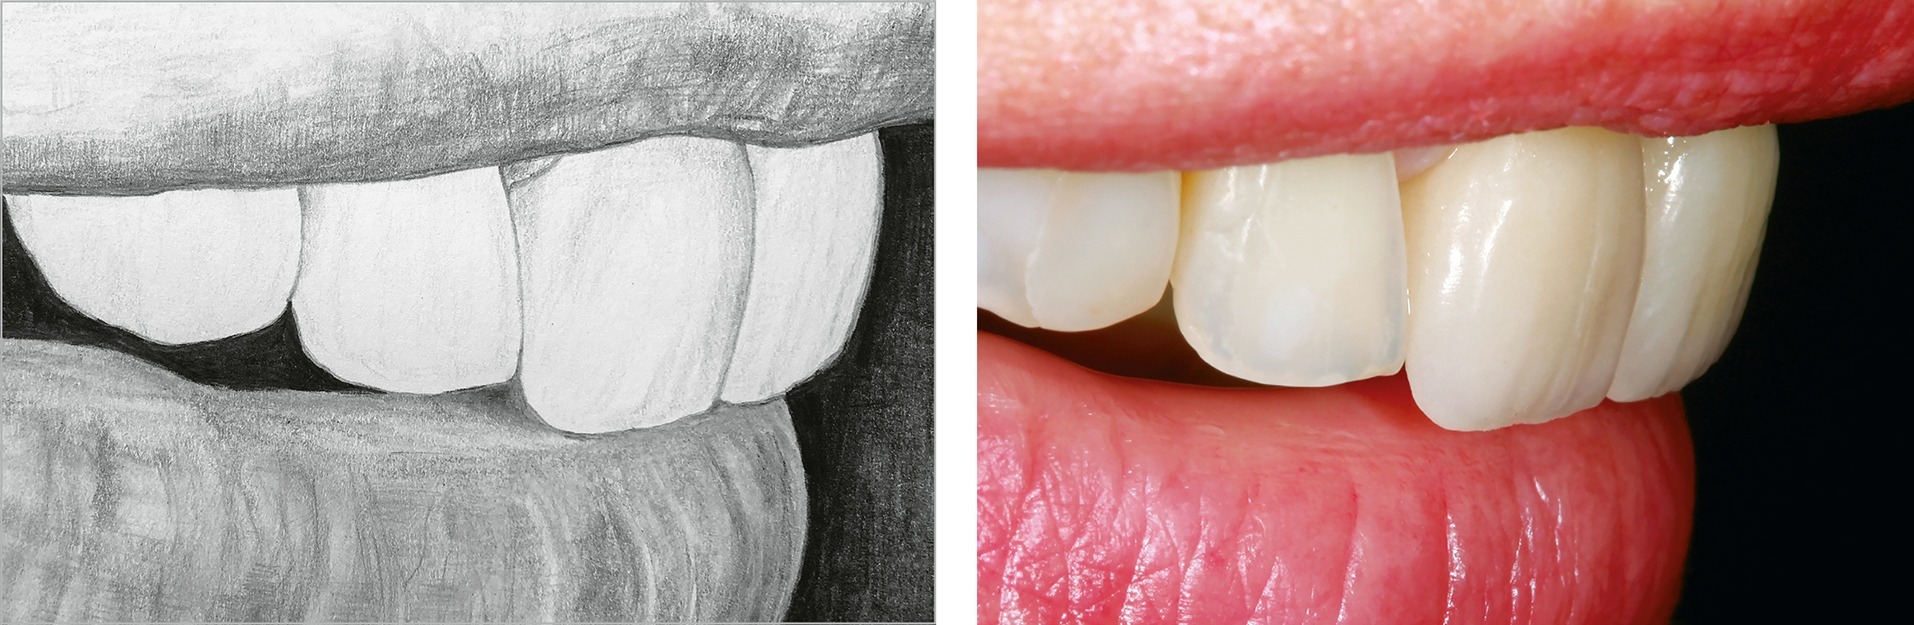
| G. Veneer profile and inclination of the incisal part toward the oral cavity | When looking at the profile, one-third of the incisal part of the veneer should tilt toward the oral cavity, and the incisal edge should touch the border of the wet and dry part of the lower lip (the “Vermilion line”) |
| H. Shape of the tooth crown | Evaluate the shape of the veneers (square, oval, triangular), their compliance with the treatment plan, diagnostic wax-up and patient’s expectations |
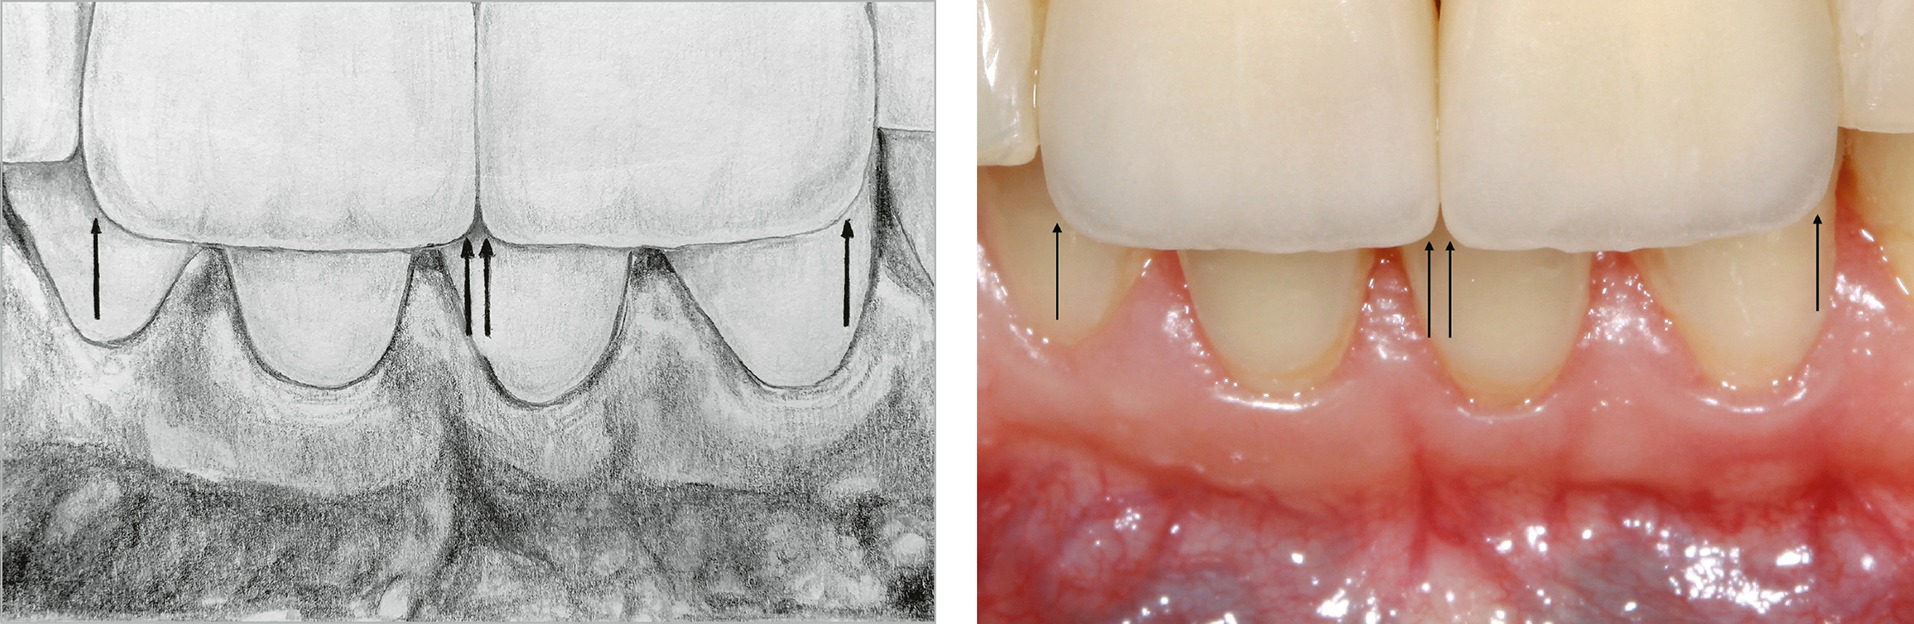
| I. Emergence profile | Evaluate whether the gingival emergence profile is too convex, which could adversely affect periodontal health when the veneer is cemented. The transition between the root/cervical and the veneer should be smooth |
| J. Proximal contact surfaces/points | The proximal contact surfaces/points should give some resistance to floss, but the floss should not displace seated veneer held by the fingers |
| K. Black triangles | The closure of black triangles should be located 4 mm from the alveolar bone |
ADHESIVE PREPARATION OF THE VENEERS
Step 1: Cleaning with 70% alcohol
After trying in and touching the veneer with your fingers, it is very important to clean it thoroughly with alcohol. In particular, the inner surface of the veneer should be clean and free from the articulation foil or any other contamination (Fig 7-8a).
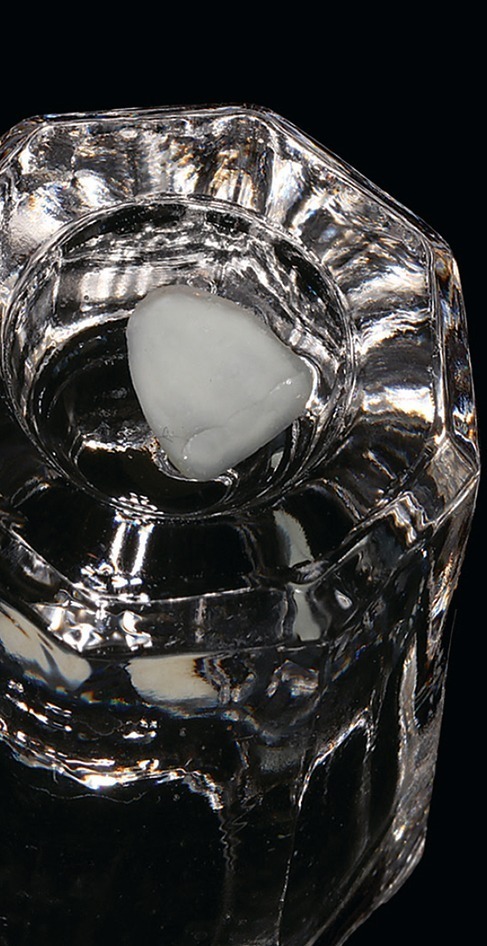
Fig 7-8a
Bathing the veneer in alcohol. In the event of traces of articulation foil, make sure that the veneer has been properly cleaned.
Step 2: Etching with hydrofluoric acid
Etching the porcelain with hydrofluoric acid (HF) is one of the most important steps to ensure the correct adhesion of the veneer (Fig 7-8b). Hydrofluoric acid etching of the ceramics and increasing the surface gives a better chance of micromechanical bonding between the resin cement and the porcelain veneer surface (Table 7-1).
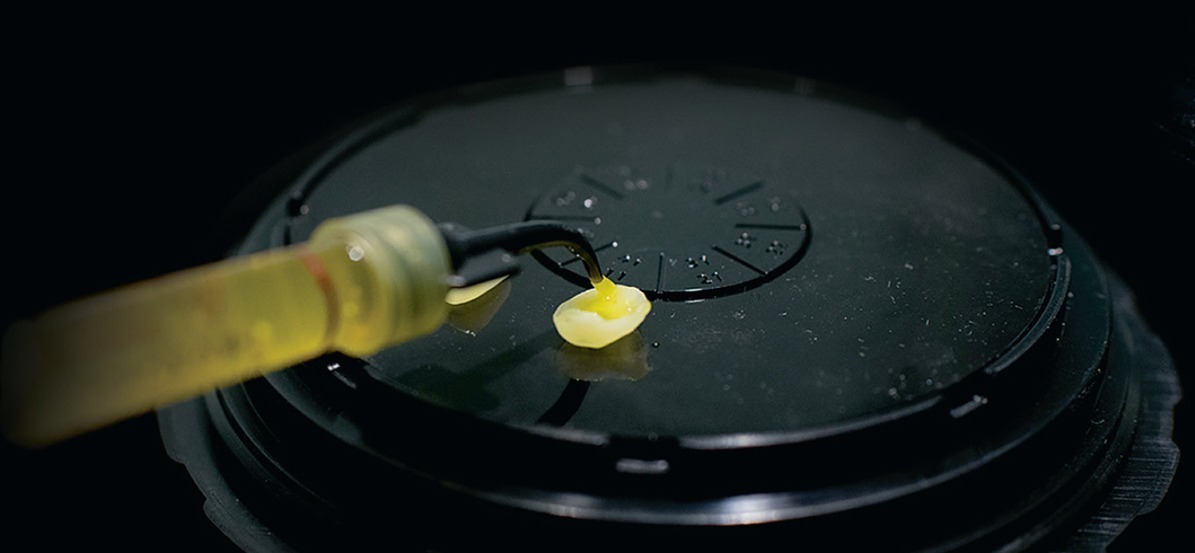
Fig 7-8b
Hydrofluoric acid is applied to the inner surface of the veneer for a specific period, depending on the thickness of the veneer and the type of porcelain (20 to 90 seconds).
Table 7-1 Recommended concentration of hydrofluoric (HF) acid and etch time
| Feldspathic porcelain veneer | 5–10% HF, 60–90 seconds |
| Lithium disilicate veneer (E.max) | 5% HF, 20 seconds |
| Leucite-reinforced glass-ceramic veneers | 5% HF, 20 seconds |
Traditionally, 10% HF is used for 60–90 seconds.16–33
However, keep in mind that hydrofluoric acid is a highly toxic substance (Fig 7-8c). The higher its concentration, the greater the health risk for the dental staff member carrying out the etching.21,22
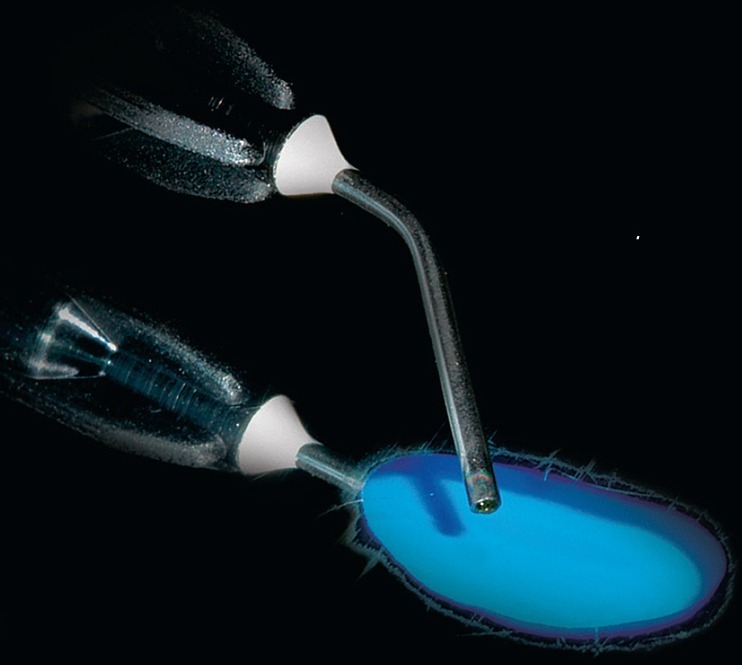
Fig 7-8c
Hydrofluoric acid is a highly toxic substance. This picture shows its reaction on the surface of a mirror. In the event of skin contact, it can penetrate and cause severe damage to the bone tissue.
Hydrofluoric acid can cause severe skin and nail burns, systemic toxicity, chemical eye burns, and breathing disorders leading to death. The symptoms caused by the activity of hydrofluoric acid are not related to the pH, but to its high toxicity. In 1982, a mistake occurred in a dental office in Japan when a dentist applied hydrofluoric acid to the teeth of a 3-year-old patient instead of sodium fluoride. This resulted in the death of the young patient.23
Since then, Japan has changed regulations and restricted the use of hydrofluoric acid in dental offices.24
The person carrying out the etching procedure of the veneers should wear a protective visor and gloves, and avoid direct contact with HF at all costs, even when wearing gloves (Fig 7-8d). Besides the health risk to the dental team, there is a risk of over-etching the veneer, which may result in a reduction in its mechanical strength, especially in the case of very thin and less invasive restorations.

Fig 7-8d
Basic precautions should be followed when etching porcelain veneers with hydrofluoric acid. Mask, protective visors, and gloves are mandatory.
|
|
Video: Etching the veneers with hydrofluoric acid https://books.dentist.com.pl/veneers/video/10 |

To reduce the risk of HF toxicity, over-etching, and weakening of the veneers caused by application beyond the recommended time, it is advised to use HF with a concentration of 5% while fabricating thinner veneers using new materials such as lithium disilicate25–29:
 10% HF may have a weakening effect on leucite and lithium disilicate veneers, especially in the case of very thin restoration.25
 When cementing thin veneers, 10% concentration of HF will be too strong. It will lead to the dissolution of a large amount of the glassy phase causing large irregularities, which can damage the integrity of the material and probably lead to cracks.30
 FROM THE LITERATURE REVIEW
Increased time of etching with HF reduces the flexural bond strength of the lithium disilicate porcelain.34,35
Stay updated, free dental videos. Join our Telegram channel
VIDEdental - Online dental courses


