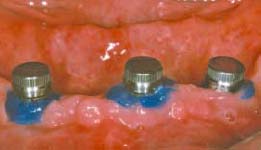
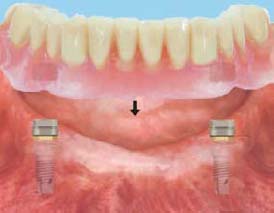
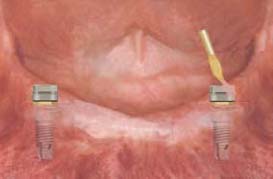
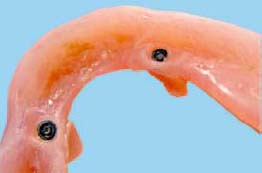
5 Stud Attachments

5

Stud Attachments

Hamid Shafie

James Ellison

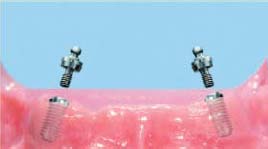
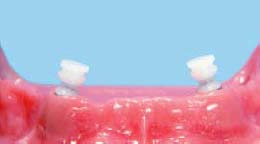
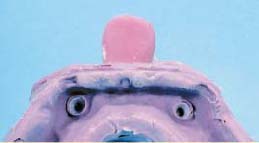
Stud attachments have been available on the market for several decades. They are very straightforward to use and provide reasonable retention and stability for implant overdentures.

IMPORTANT CONSIDERATIONS REGARDING THE ALIGNMENT OF STUD ATTACHMENTS

  • Relationship of the Stud Attachments with Each Other: Having all of the stud attachments parallel to each other is important. Some universal joint (ball and socket) attachments may be as much as 5–7 degrees out of parallel with each other and still function properly.
  • Relationship of the Stud Attachments with the Path of Insertion: The attachments should not interfere with the path of insertion of the overdenture.
  • Height of the Stud Attachments: Achieving an ideal alignment is much more difficult with taller attachments than with shorter ones.

ERA ATTACHMENT

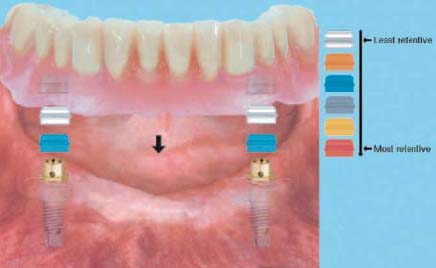
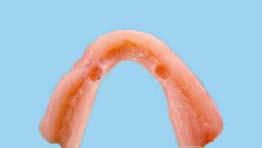
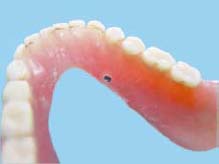
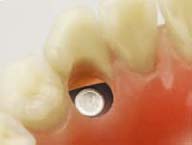
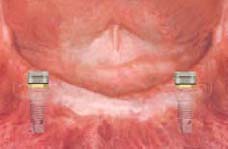
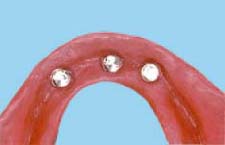
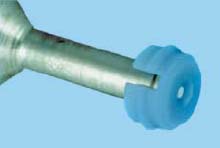
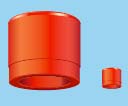
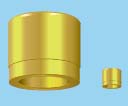
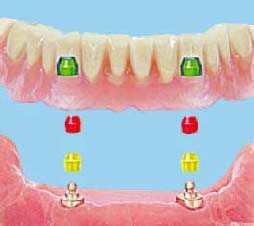
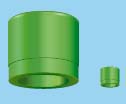
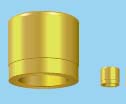
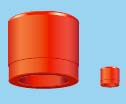
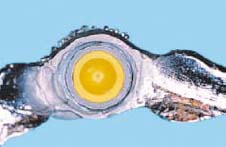
The ERA attachment is a resilient stud attachment that provides hinge and vertical resiliency (Figure 5.1). The fixed component of this attachment is made of titanium alloy with the female attachment portion coated with titanium nitride to decrease attachment wear. The female component comes with different gingival cuff heights: 2mm, 3mm, and 5mm. The nylon male component is captured in the denture acrylic. Six color-coded males correspond to six levels of retention. In order from the least to the most retentive, they are white, orange, blue, gray, yellow, and red (Figures 5.2 and 5.3).
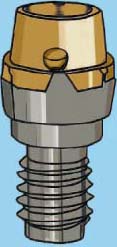
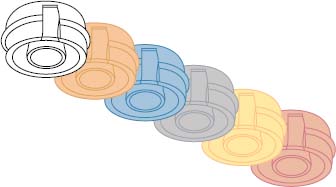
FIGURE 5.1.

image

FIGURE 5.2.

image

FIGURE 5.3.

image

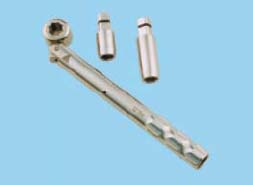
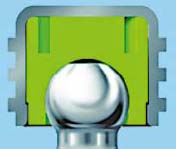
An optional metal housing supports these nylon male components, and the metal housing is preloaded with a black male. The black male is slightly taller (0.4mm) than the final males. Unlike other resilient attachments that have a separate spacer that fits between the male and female during processing, the ERA has a spacer built into the black male. Therefore, when the black male is processed into the denture, removed using two special tools, and replaced with one of the final males, there is 0.4mm of empty space between the male and female. This procedure creates true vertical resiliency and allows a hinging function. Overall height of the male attachment is 3.0mm, and the width of the male is 4.3mm. A new microhead version has a height of only 2.0mm and a width of 3.4mm.

The male attachment (Figures 5.4 and 5.5) accommodates four different implant trajectories: a one-piece with a trajectory of zero degrees, a two-piece with a trajectory of five degrees, a two-piece with a trajectory of 11 degrees, and a two-piece with a trajectory of 17 degrees. The male attachment is available for several implant systems.
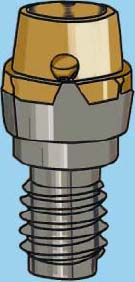
FIGURE 5.4.

image

The one-piece, zero degree female component screws directly into the implant. The two-piece angled female component has a polished titanium abutment base and a titanium-nitride-coated female component. The abutment base is screwed into the implant, and the angled female component is cemented into the abutment base using a strong resin or resin ionomer cement.

Chair-Side Utilization Procedure
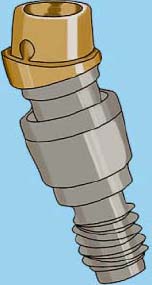
1. Choose the proper ERA abutment according to the implant system that has been used for the patient.
2. Measure the thickness of the soft tissue and choose an abutment with the proper cuff height. When the abutment is completely tightened into the implant, the lateral drain holes should be at or above the tissue surface.
3. The ERA abutments should be parallel in the mouth. The trajectory of the supporting implants and their relationship to each other will determine if you have to chose the zero-degree straight one-piece abutments or the two-piece, 5-degree, 11-degree, or 17-degree angled abutment female attachment. Two methods are available for determining the angulations between the trajectory of the supporting implants that help the clinician to determine the proper angulations for the ERA abutment:

FIGURE 5.5.

image
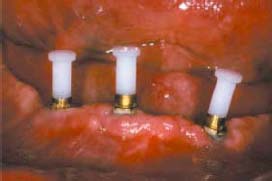
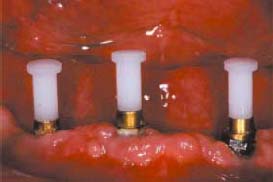
  • Using ERA Plastic Handle Gauges: Snap one handle onto a zero-degree, one-piece female and screw the abutment fully into the implant using only finger pressure (Figures 5.6, 5.7, 5.8, 5.9, and 5.10).
  • Repeat this step for all of the supporting implants. Next, look at the trajectory of each implant. If at least one implant is positioned in the correct path of insertion for the overdenture, use that implant as a guide to make other abutments parallel to that implant or within a maximum of five degrees out of parallel (Figure 5.11). If none of the implants are positioned in the correct path of insertion, make a pick-up impression and a master cast. Then use a surveyor to determine the discrepancy among the trajectory of the supporting implants.
  • Using an ERA Angle Correction Gauge Kit: There are four different alignment metal gauges (0, 5, 11, and 17 degrees) that can be use to determine the discrepancy between the trajectory of the supporting implants. The gauges are made of polished titanium. These gauges can be inserted into the screw access holes of most implant systems. These gauges have no thread pattern, just a smooth pin that slides into the screw access hole of the implant. After insertion of the gauge into the implant, manually rotate the gauge until it reaches an ideal trajectory that is aligned with the path of insertion of the overdenture. Choose the proper angled female abutment for each implant by checking the laser mark on each gauge.
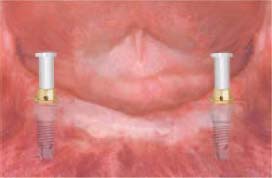
FIGURE 5.6

image

FIGURE 5.7

image

FIGURE 5.8

image

FIGURE 5.9

image

FIGURE 5.10

image

FIGURE 5.11

image
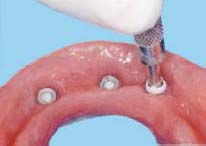
4. After choosing the proper female abutments, use an ERA abutment driver and a 20Ncm torque wrench to tighten any zero-degree abutments as well as the base of the two-piece angled female abutment. When using angled ERA abutments, mark the proper relationship of the two pieces with a permanent marker after tightening the bottom piece with a 20Ncm torque wrench (Figure 5.12).
To handle the top piece (the gold titanium nitride part), snap a plastic handle into the selected angled female. The retention of the angled female in the base has been designed only for a hold light enough to retain it during alignment orientation. Use a strong cement (Fuji Plus, GC, or ERA Lock Cement) to bond the two pieces together based on the permanent marks.

FIGURE 5.12.

image
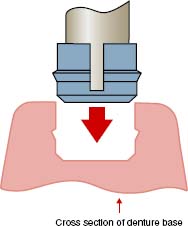
5. Use a large laboratory round carbide bur to cut a hole in the denture base exactly above each ERA abutment (Figure 5.13). Continue the hole toward the lingual flange and create a window (Figure 5.14). This hole should be large enough to insert a pre-loaded metal housing over the female abutment with no contact between the metal housing and the denture base (Figure 5.15).

FIGURE 5.13.

image

FIGURE 5.14.

image

FIGURE 5.15.

image
6. Snap a black male, which is pre-loaded in a metal housing, onto each female abutment (Figure 5.16). Block out any remaining exposed surfaces of the abutments or any potential undercuts with small pieces of rubber dam, soft wax, or block-out resin (Figure 5.17).

FIGURE 5.16.

image

FIGURE 5.17.

image

FIGURE 5.18.

image
7. Insert the denture and verify that there is no contact between each attachment and the denture base (Figure 5.18). If interference exists, trim the denture base.
8. Apply self-cure acrylic around and above each metal housing, as well as inside each hole in the denture base (Figure 5.19). Ensure that the external retention ridge on the outside of the metal housing is completely covered with acrylic. Insert the denture into the patient’s mouth over the attachment and guide the patient into maximum intercuspation, but do not allow the patient to close firmly. Allowing the patient to close firmly could cause an improper position of the males to the females.

FIGURE 5.19.

image
9. After the acrylic is set, remove the overdenture, fill any void with acrylic, and finish and polish the prosthesis (Figure 5.20).

FIGURE 5.20.

image
10. Replace each black male nylon attachment with a white final male (Figures 5.21 and 5.22). Since the final male is 0.4mm shorter than the black male, it creates vertical resiliency for the prosthesis. If the patient desires additional retention, replace the white male with an orange male. Use the blue, gray, yellow, or red male components as necessary.

FIGURE 5.21.

image

FIGURE 5.22.

image
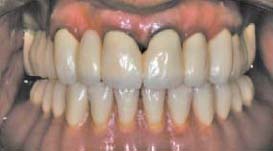
11. Verify the occlusion and perform any necessary occlusal adjustments (Figure 5.23).

FIGURE 5.23.

image

Changing ERA Male Component

Note: A dentist’s tool kit (core cutter and seating tool) is necessary for replacement of ERA males.
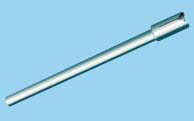
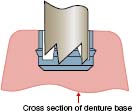
1. Use a core cutter bur and a slow speed hand piece to core the nylon male out of the metal housing (Figures 5.24 and 5.25). This step should be done at a low RPM. Use a short cutting cycle and an in-and-out motion. Push in for about one second at a time. Check to see if the core is removed. The core remains in the core cutter and can be ejected by sliding a thin blade along the cutter’s side slot.

FIGURE 5.24.

image

FIGURE 5.25.

image
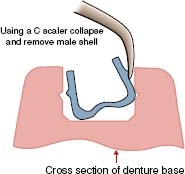
2. Use a C scaler and collapse the remaining ring into the open space created by removal of the core, then lift it out (Figure 5.26).

FIGURE 5.26.

image
3. Seat a new male component on the seating tool (Figure 5.27). Push the new male firmly into the metal housing until the male snaps securely into place (Figure 5.28).

FIGURE 5.27.

image

FIGURE 5.28.

image

VKS-OC RS STUD ATTACHMENT

The Vario Ball-Snap-OC rs stud attachment abutment is designed for implant overdentures that are partly implant born and partly tissue born (Figures 5.29, 5.30, 5.31, 5.32, 5.33, 5.34, and 5.35).
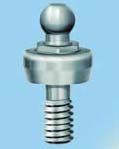
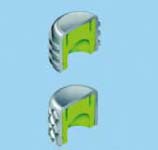
FIGURE 5.29.

image

FIGURE 5.30.

image

FIGURE 5.31.

image

FIGURE 5.32.

image

FIGURE 5.33.

image

FIGURE 5.34.

image

FIGURE 5.35.

image

This stud attachment is available for the following implants:

  • Branemark 3.75 mm, 4.0 mm, 5.0 mm
  • 3i external hex 4.0 mm, 5.0 mm, 6.0 mm

The VKS-OC rs stud attachment is available in the following three cuff heights:

  • 2mm
  • 4mm
  • 6mm
   Note: As a general rule, the cuff height of the attachment should be approximately 1mm taller than the thickness of the gum.

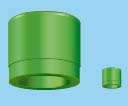
The male part (ball) of this attachment assembly will be screwed into the implant, and the female matrices will be secured inside the acrylic denture base.

Different Types of Matrices/Clips

Rigid:

FIGURE 5.36.

image

FIGURE 5.37.

image

FIGURE 5.38.

image

This attachment system can be utilized in either of the following two ways:

FIGURE 5.39.

image

FIGURE 5.40.

image

Clinical and Laboratory Procedures for VKS-OC rs Attachment Embedded in the Acrylic Denture Base

CLINICAL STEPS

1. After uncovering the implants four weeks later, the patient should be seen for attachment selection. Consider the following factors when choosing a VKS-OC rs stud abutment:
  • Brand of the implant
  • Diameter of the implant
  • Thickness of the gingiva
Remove the healing abutments, measure the thickness of the gingiva, and determine the cuff height of the stud abutments.
2. Replace the healing abutments with the designated stud abutment (Figure 5.41) and use a 30Ncm torque driver (part # 460 0001 0) to tighten all of the abutments.

FIGURE 5.41.

image

3. Place a transfer impression matrix over the stud abutments (Figure 5.42). There should be a slight snap. Then take a pick-up impression with a rigid impression material. After the impression is removed from the patient’s mouth, the transfer impression matrices remain in the impression material (Figure 5.43). Retention grooves in the transfer matrices ensure stabilization of the matrices in the impression material.

FIGURE 5.42.

image

FIGURE 5.43.

image

LABORATORY STEPS

1. Insert the laboratory analogues inside the transfer impression matrices and pure the impression with a very low expansion or zero expansion stone (Figures 5.44 and 5.45).

FIGURE 5.44.

Stay updated, free dental videos. Join our Telegram channel

Jan 5, 2015 | Posted by in Implantology | Comments Off on 5 Stud Attachments

VIDEdental - Online dental courses

Get VIDEdental app for watching clinical videos