Chapter 32 Sterilization and Disinfection
Brief History of Sterilization
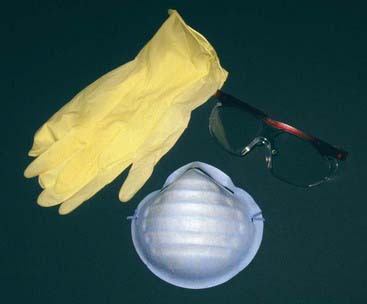
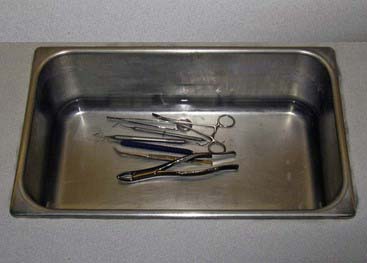
At one time merely wiping down dental instruments with an antiseptic solution was considered adequate to prevent the transmission of disease from one patient to another (Figure 32-1). In time, techniques progressed to cleansing instruments in solutions that were designed to eliminate most, if not all, bacteria and possibly viruses as well. It was then recognized that sterilization was the only effective means of ensuring that bacterial transmission did not occur (Figure 32-2). Coincidentally, the use of personal barriers such as gloves, masks, and protective eyewear also became common during this period (Figure 32-3).
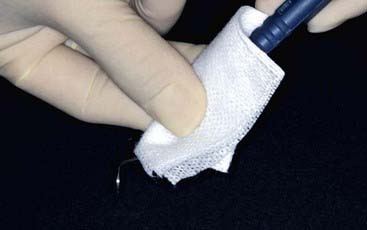
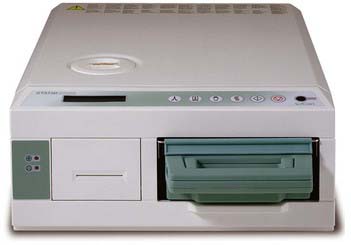
FIGURE 32-2 An autoclave “flash” sterilizer used for sterilization of instruments and handpieces
(Statim 5000s, Courtesy SciCan, Toronto, Ontario).
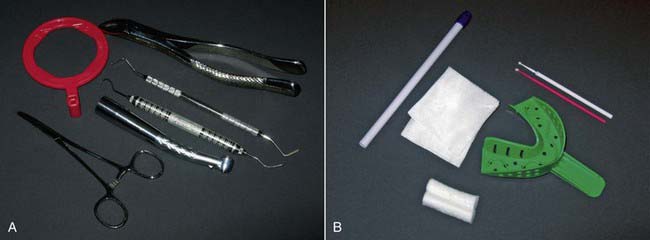
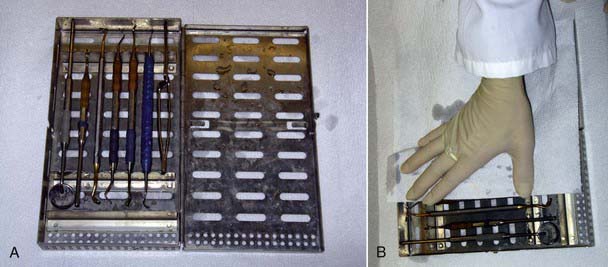
Dental materials and instruments were categorized into two subsets:
• Sterilizable—typically metal and heavy-duty plastic items (Figure 32-4, A)
• Disposable—cotton, paper, or lightweight plastic recyclable items (Figure 32-4, B)
• Instruments that are solid, whose external surfaces must be sterilized (Figure 32-5, A)
• Hollow instruments, such as handpieces, that have internal lumens that can harbor bacteria and viruses and require flushing out during the sterilization process (Figure 32-5, B)

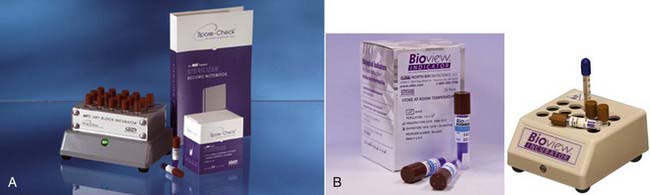
Today, effective sterilization systems are available that can be utilized for every type of dental instrument, whether solid or hollow, and regardless of shape or size. It is important to recognize that sterilizer verification is an absolute necessity. Not only must the sterilizer be working, but it must be regularly and continuously proven to be working effectively. Sterilizer verification can be done in house (Figure 32-6), at the dentist’s office with kits that are commercially available, or by outside agencies that provide the service for a fee.
Effective Pre-Sterilization
There are various approaches to in-office autoclaving, but a common thread of these procedures is that pre-sterilization (or washing) of the instruments is an indispensable step. Guidelines from the Centers for Disease Control and Prevention (CDC), the British Dental Association, and the Robert Koch Institute indicate a preference for automated washing over manual washing (Box 32-1). These guidelines and standards should be considered when establishing dental office protocols.
Box 32.1 Organizations That Handle Infection Control


The clinical success of pre-sterilization is directly related to two main factors:
Debris Removal
The removal of organic and inorganic debris and protein is typically the most labor-intensive, most time-consuming, least effective, and most dangerous of the three actions. The most common technique for debris removal is hand scrubbing the instruments (Figure 32-7). The effectiveness of manual decontamination is highly suspect. No brushing instruments or scrubbing techniques can effectively eliminate 100% of all the debris on every single dirty instrument. Even if this could be accomplished, questions arise concerning how long the cleansing takes and how to verify its effectiveness. The evaluation of debris removal by scrubbing should be microscopic, but in the bustle of an active practice, often only a quick visual glance is practical. The inherent risks of manual scrubbing are serious ones:
1. Glove and/or skin punctures risk the dental auxiliary’s health and well-being (Figure 32-8).
2. Incomplete debris removal risks cross-infection among patients (Figure 32-9).
3. The scrubbing action aerosolizes fluid droplets that can strike the auxiliary’s unprotected arms, face, eyes, or mouth, risking the auxiliary’s health (Figure 32-10).
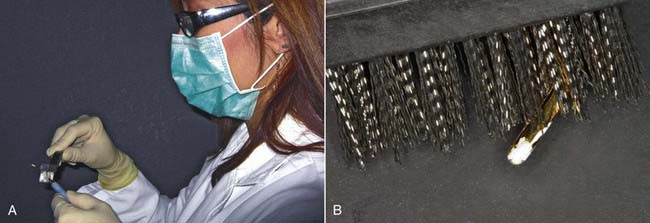
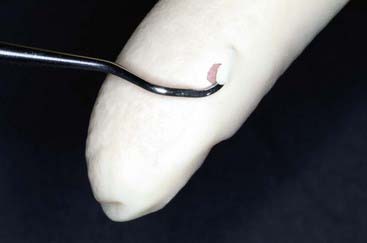

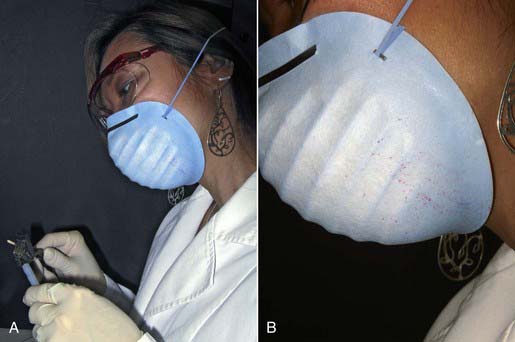
FIGURE 32-10 Fluid droplets on mask and skin of the dental auxiliary caused by the scrubbing action.
Ultrasonic baths and solutions (Figure 32-11) have been used to remove debris for many years. They apply high-frequency sound waves to separate debris from the instruments. The two major concerns with this approach are that ultrasonic baths may not have enough power to remove all of the debris (requiring an additional hand scrubbing session) and the ultrasonic process can destroy the sharpness of dental instruments. Ultrasonic solutions are not disinfecting and have no antimicrobial properties, yet they are often used for more than one patient over a day or longer. Hence instruments may be cross-contaminated prior to sterilization.
Automated debris removal with instrument washers (such as the HYDRIM C51w and HYDRIM L110w [SciCan, Ltd., Toronto, ON, Canada]) (Figure 32-12) is far less technique sensitive and much more predictable. These units are professional-grade, hospital-grade washers. They are loaded with instruments after the chairside removal of any residual dental materials, such as cements and composites, which are insoluble in water. Effective in removing over 99.9% of all protein from instruments, the washer provides uniform results in pre-sterilization instrument processing. The automated washing, rinsing, and drying procedure is hands-free, eliminating puncture and aerosolized microbe risks for the auxiliary.
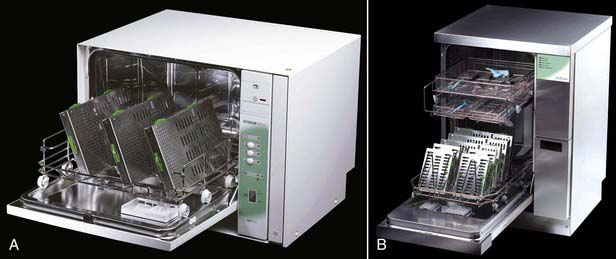
FIGURE 32-12 The HYDRIM C51w (A) and HYDRIM L110w (B) instrument washers.
(Courtesy SciCan, Ltd., Toronto, Ontario.)
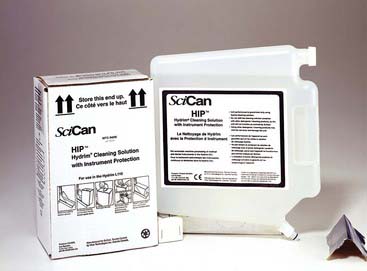
Not all cleaning solutions are equally compatible with all instruments, and this is clearly indicated on packaging. Dentists, however, must deal with various metals and coatings, including stainless steel, carbon steel, and aluminum. It makes sense to use advanced chemistry cleaning solutions that have the best compatibility profile, such as HIP (HYDRIM Instrument Protection [SciCan Ltd.]) (Figure 32-13). HYDRIM washers automatically dispense small, optimal amounts of HIP solution to the pre-wash, wash, and rinse cycles for maximum effectiveness, providing benefits not only for dental instruments but also for the environment.
Rinsing
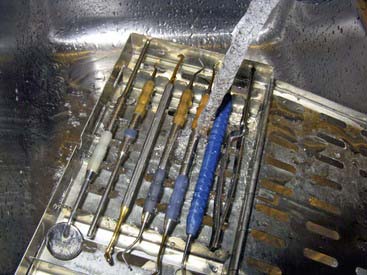
Instruments that have been manually scrubbed or placed in an ultrasonic bath are rinsed with cold or warm water at normal pressures to remove loosened debris. It is unlikely that even detached debris can be effectively rinsed out of the nooks and crannies of dental instruments (Figure 32-14).
Drying
Passive drying can often take an hour or longer (Figure 32-15, A). During this time the instruments are out of active clinical circulation. Patient treatment is an ongoing and continuous process, and each individual requires a freshly sterilized set of instruments. The longer the combined pre-sterilization and sterilization procedures take, the longer a set of instruments is out of active clinical use, requiring the practice to have more instrument sets. Because the typical instrument setup (including handpieces) can cost $2000 to $3000 or more, the number of instrument kits not in active clinical use at any given time has a major bearing on practice overhead.
Manual scrubbing and ultrasonic cleaning are usually followed by manual drying (patting dry) (Figure 32-15, B). However, manual drying does not completely eliminate wetness, risking instrument corrosion and compromising the sterilization process when instruments are wrapped or bagged. Manual drying risks puncture contamination for the auxiliary, and the process is also very time-consuming whether done properly or not. Automated drying in the HYDRIM is accomplished hands-free and is totally technique insensitive. Because the instruments are already warm from the thermal rinse, they take only 10 minutes or less to dry. Thus, instrument kits are efficiently cycled for rapid, efficient sterilization, reducing overall practice overhead. HYDRIM baskets are designed to fit precisely into a Statim sterilizer, allowing for their direct transfer from one unit to the other, further increasing efficiency.
The automated pre-sterilization technique is very simple and straightforward:

Stay updated, free dental videos. Join our Telegram channel
VIDEdental - Online dental courses


