Dental Office Equipment
By Don Hobbs
Clinical Recommendations by Mark Tholen, D.D.S., M.B.A.
LEARNING OBJECTIVES
• Understand the basic equipment needs of a dental office
• Learn about the different varieties of delivery systems
• Describe the equipment essentials of a practice sterilization area
• Determine the imaging needs for your practice
• Discuss the features of your ideal practice management system
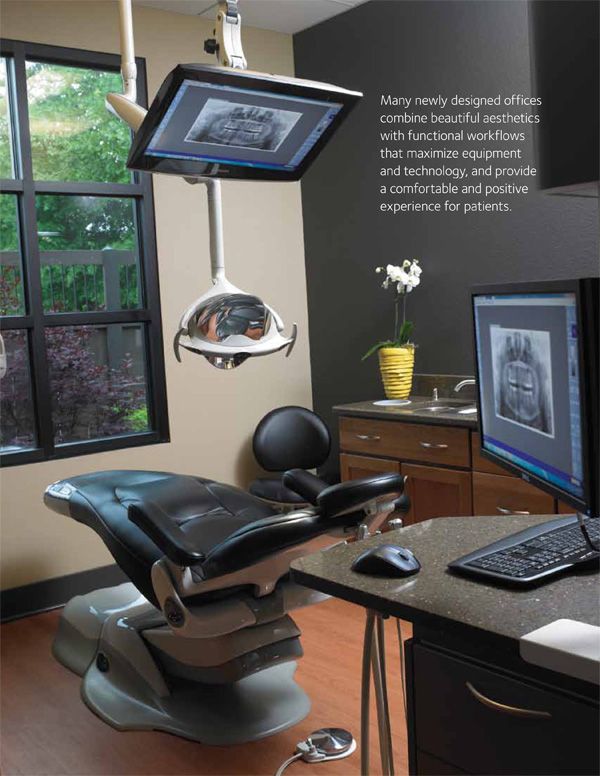
One of the best ways to begin planning a new dental office is to browse through photos and articles written by doctors who have already constructed a new practice. Many newly designed offices combine beautiful aesthetics with functional workflows that maximize equipment and technology, and provide a comfortable and positive experience for patients.
A well-planned dental office design, while personalized to meet your short and long-term objectives, should begin with a foundation of proven, effective elements that not only look beautiful, but also deliver superior care to patients, a satisfying work environment for the entire dental team, and efficiencies that contribute to productivity and, ultimately, profit. By building on a strong foundation and using the following recommendations, your office will be both effective and elegant.
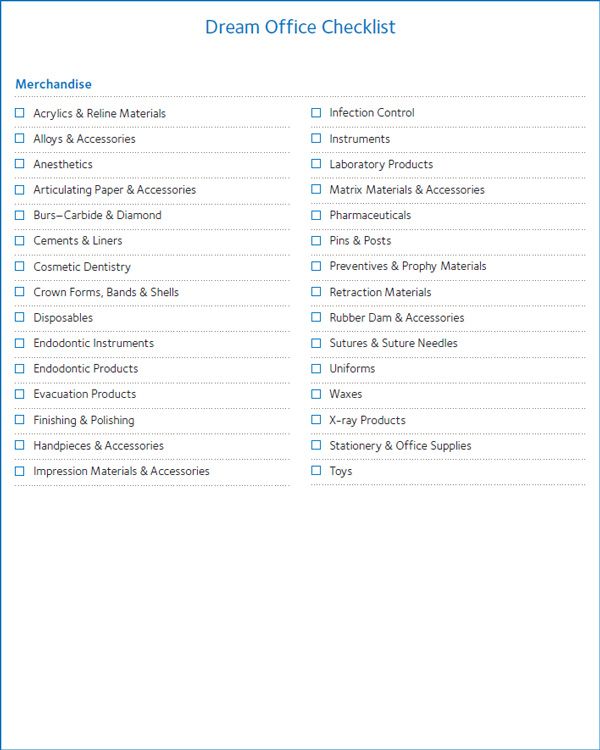
Before you begin thinking about building or remodeling your practice, it is a good idea to determine the equipment you will need.
FIGURE 3.1: DREAM OFFICE CHECKLIST

Building Site and Office Space
The size of your building site depends on a number of factors. For example, what type of dentistry do you practice? For orthodontic and pediatric practices, a general rule of thumb is seven times the size of the office building. For all other practices, the recommendation is six times the size of the office building.
The rationale behind these rules is simple: adequate parking and all building codes can be accommodated with this guideline, reducing patient frustration and avoiding space-saving compromises during construction.
Now that you can estimate the size of your building site, the next step is to figure out the suggested usable square footage for your office. Usable square footage is an important factor when building or remodeling because adequate space can lead to increased productivity while reducing emotional stress. The following guidelines will assist you with this decision:
Square Footage Guidelines
• 4–5 operatories at 500 square feet of office space per operatory (4 operatories = 2000 square feet office)
• 6–7 operatories at 450 square feet of office space per operatory
• 8 or more operatories at 400 square feet of office space per operatory
Number of Operatories
The number of operatories in your practice depends on the number of dentists who will be practicing in your space:
• One full-time doctor and one hygienist: 4 or 5 operatories
• One full-time doctor and two hygienists: 5 or 6 operatories
• Two full-time doctors and two hygienists: 6 or 7 operatories
One operatory should be vacant about 50% of the day.
Following these guidelines may increase your practice’s productivity and could dramatically reduce the physical and emotional stress of the day.
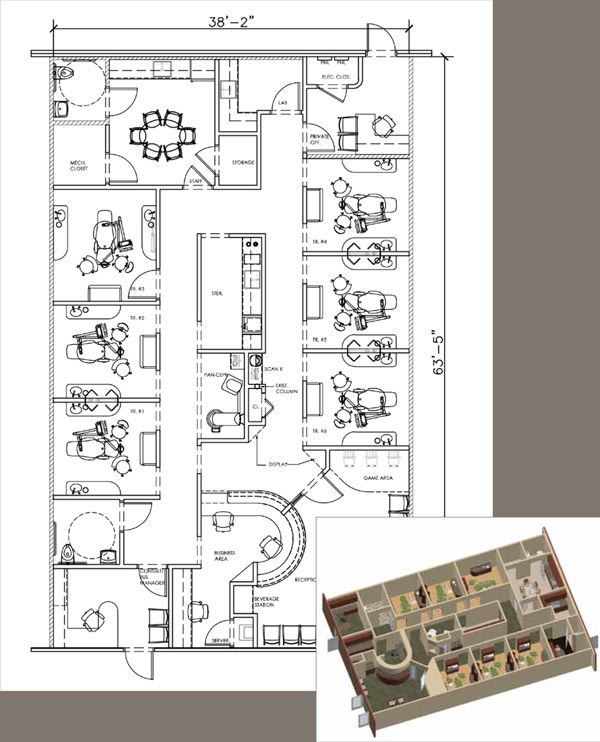
FIGURE 3.2:
DENTAL OFFICE FLOORPLAN, SIX OPERATORIES
Determining Your Preferred Delivery System
An important aspect of the comfort of both the dentist and the patient is the system by which you deliver care. While a large part of this decision comes down to personal preference, some delivery systems may be less stressful on your body and more comfortable to patients than others.
Figure 3.3 shows an over-the-patient (trans-thoracic) delivery system. Class IV and V movements are necessary with this system, and could be physically devastating over time. Additionally, this delivery system could create a high-fear environment for the patient because all the handpieces are in full view, and it does not support four-handed dentistry.
Figure 3.4 depicts a dual unit/split system. With the dual unit/split system, Class IV movement requirements decrease and Class V are eliminated, reducing the physical damage to the brachial plexus and shoulder muscles of the dental treatment team. While four-handed dentistry can be practiced with this configuration, a disadvantage is that the operatory must be defined as left- or right-handed.
Some delivery systems may be less stressful on your body and more comfortable to patients than others.
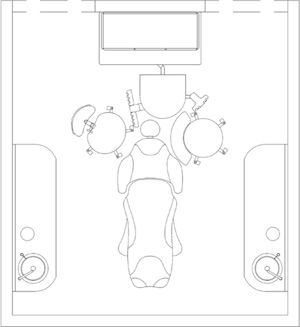
Figure 3.5 demonstrates a flexible rear delivery system. For this particular delivery system, all Class IV and V movement can be eliminated, negating the physical damage to the brachial plexus and shoulder muscles of the dental treatment team. This configuration is ideal. Single operator (dentist or hygienist) use is possible with some Class IV movement. An advantage of this system is that it is ambidextrous, so there is no left- or right-handed operatory configuration — anyone can use this system. Furthermore, the patient cannot see the handpieces, so the fear environment is low.
Dental Chair and Dental Stool Designs
Dental chairs have been in the operatory since the dawn of dental treatment. New designs now allow the doctor and assistant to move closer to the patient, dramatically enhancing the ergonomics of the operatory. Employing thinner and narrower designs, dental chairs are reducing the daily physical stress on the dental team because the doctor and assistant can minimize trunk flexion (bending) and rotation, as well as arm extension. Both movements, when repetitive, are very damaging to the musculoskeletal system.
New designs now allow the doctor and assistant to move closer to the patient, dramatically enhancing the ergonomics of the operatory.
One of the best pieces of advice regarding dental chairs is to select one with a narrow, thin back. This allows the operator to come close to the patient with his or her legs completely under the chair, and to maintain a posture with the back held upright and the operator’s elbows at his or her side. This may decrease the likelihood of back, neck, and shoulder injuries over time.
Most members of the dental team believe they are positioned around the patient, but the science of ergonomics reveals that the patient and assistant are positioned relative to the doctor’s placement, and the stool is integral to that placement.
When choosing a dental stool, pick one where the seat cants forward to allow the hips to tilt, thereby straightening the back. The piston or stem of the seat should be tall enough to allow the operator or assistant’s thighs to be positioned at approximately a 10° angle in relation to the floor. This significantly contributes to a sustained, effortless straight back posture without actively using the muscles of the back. The assistant’s stool should place the eye level 6˝-8˝ above the doctor’s eye level. This position affords a clear view of the operating field.
FIGURE 3.3:
OVER-THE-PATIENT (TRANS-THORACIC) DELIVERY SYSTEM
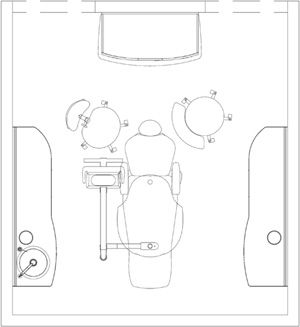
FIGURE 3.4:
DUAL UNIT/SPLIT DELIVERY SYSTEM
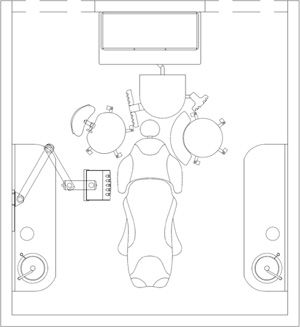
FIGURE 3.5:
FLEXIBLE REAR DELIVERY SYSTEM
Good operatory lighting can make the difference between feeling energetic or exhausted at the end of the workday.
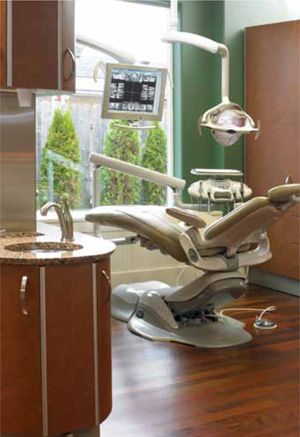
FIGURE 3.7
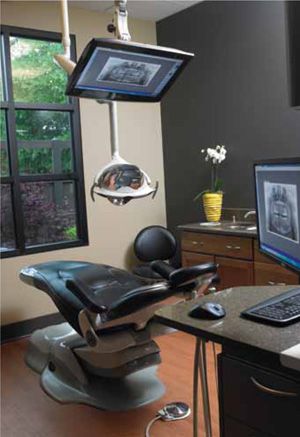
A chair with a narrow, thin back allows the operator to come close to the patient.
Maintaining the suggested ratio of operating light intensity to ambient light intensity may help prevent eye fatigue and headaches, especially in the afternoon.
The ergonomic objective of these specifications is to minimize Class IV and V movements while employing Class I-III movements of the finger, wrist, and elbow with occasional shoulder rotation, but not elevation. This may he/>
Stay updated, free dental videos. Join our Telegram channel
VIDEdental - Online dental courses


