Chapter 3 Background of Mini Dental Implants
The Early Historical Perspective: Sendax, Balkin, and Ricciardi
History
Dental implants date back to the ancient Egyptian and South American civilizations. Recorded progress commenced in the 1880s and progressed into the 1900s, and the Harvard and National Institute of Health’s consensus development conference on dental implants indicated acceptance as a mode of treatment in 1988.1
In 1970-80 Brånemark and associates advocated an extended, soft-tissue covered healing period after implant insertion to allow for what came to be termed osseointegration and maintained in an unloaded environment for optimum predictability.2,3 In the 1980s implantologists gradually saw a need to try to accommodate the desire of patients for more immediate implant support. Thus narrow-diameter mini dental implants came into use initially as a provisional treatment during healing/integration periods of traditional endosteal root-form implants. However, during this period, while utilizing mini dental implants for provisionalization, it was noted that these immediately loaded mini implants were often difficult to remove and appeared to have become clinically integrated. This led to an ongoing development of applications and to the current use for long-term restorative cases. The initial concept was developed and tested by Dr. Victor Sendax with further development of use, trials, and applications by co-investigators Dr. Burton Balkin (Professor of Periodontology and Oral Implantology, Temple University School of Dentistry) and Dr. Anthony Ricciardi (New Jersey College of Medicine and Dentistry). Dr. Balkin demonstrated bone stability with mini implants inserted via the auto-advance technique and immediately loaded. Supportive information was obtained from a human histologic study and a human subtraction radiography study.
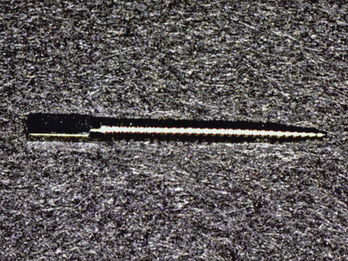
The Sendax insertion protocol included preparing a minimal receptor site for a 1.8-mm implant by drilling directly through the attached gingiva into the bone for the part of the length of the implant portion that would be inserted but without the classic osteotomy that removed substantial bone to provide premeasured space for stabilizing traditional implants. The mini implant would then be turned and threaded into the bone with pressure from finger and thumb drivers until the threads were fully inserted.
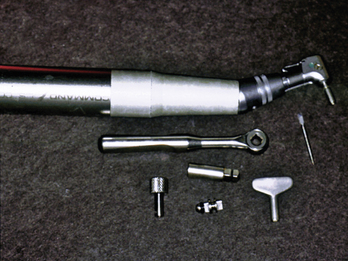
The auto-advance technique was a modification initiated by Balkin and colleagues4 to enhance immediate implant stability for both ongoing and long-term applications and to refresh the well-used self-tapping concept with a newly dynamic image of the narrow-width mini implant feeling drawn into the bone automatically during guided insertion. The technique used only a minimal starting point opening in bone, and then the 1.8-mm implant was inserted by turning into the bone without a deeply drilled receptor site. This insertion was performed by using either an ultra-slow high-torque machine driver and/or hand drivers (Figures 3-1, 3-2). Cases were immediately loaded and anecdotal evidence indicated a more predictably stable result with the auto-advance insertion technique in accommodating bone of varied trabeculation and density (Box 3-1). Very dense Type 1 bone and extremely osteoporotic Type 4 bone required limited compensatory deviation from this basic underlying process.
1. Histological specimens of minis were obtained by Dr. Balkin at 4 to 6 months after insertion and placement into immediate function while other traditional root-form implants integrated. Mini implants that supported the transitional prostheses were removed by trephination. The specimens were prepared and read by histologist David Steflik, M.S., EdD. Results indicated osteointegration to the surface of the implants based upon close adaptation of bone to the surface of the implants without interposition of soft tissue. This information was published in The Journal of Oral Implantology in 2001 and was the first human histologic report on the auto-advance insertion technique with immediate loading of mini dental implants, demonstrating feasibility for ongoing applications.4
Description of Histologic Preparation
Two mini dental implants were fixed in 10% neutral buffered formalin for at least 72 hours. The samples were dehydrated in ascending concentrations of ethenol (50%, 75%, 90%, and 100% twice). Samples were transferred through acetone and infiltrated with methacrylate. Initially samples were immersed into a 50/50 mixture of methyl methacrylate, and samples were immersed into a 50/50 mixture of methyl methacrylate monomer and acetone for 24 hours, followed by 100% methacrylate monomer for 24 hours. The samples were then vacuumed and infiltrated with methacrylate at room temperature for 14 days. Thereafter, they were placed in a vacuum oven, as per our previous report. As embedded blocks, they were then sectioned on an Isomet low-speed saw (Buehler Ltd., Lake Bluff, Ill.). The low-speed saw was affixed with a diamond wafering blade. Sections were cut in serial cross sections at thicknesses of 150 UM if necessary. They were ground to 80 UM if there were irregularities in the surface texture. The sections were stained with warmed toluidine blue and basic fuchsin, cover slipped, and viewed with a Zeiss Axiophat photomicroscope (Carl Zeiss Microscopy, LLC, Thornwood, N.Y.). Images were taken at various magnifications using Nomarski deferential interference imagery or polarized microscopy and routine light microscopy.
Stay updated, free dental videos. Join our Telegram channel
VIDEdental - Online dental courses


