CHAPTER 23 Root Form Implant Prosthodontics: Single-Tooth Implant Restorations
PROVISIONAL RESTORATIONS
A single-tooth edentulous area requires a provisional restoration to maintain esthetics and function and to prevent movement of adjacent or opposing teeth during osseointegration (see Chapter 21). The provisional restoration can be a removable partial denture (flipper) or a fixed prosthesis. The latter requires a pontic supported by adjacent teeth; this should be done only when the teeth require significant restoration. In such cases, a pontic may be cantilevered from one adjacent tooth with a full-coverage acrylic/composite restoration or supported bilaterally. However, when such peripheral care is required, the need for an implant should be reconsidered. The patient should be discouraged from choosing removable appliances, because their tissue-borne saddles may cause ischemia or in some other manner injure the implant host site.
IMPRESSIONS AT FIRST-STAGE SURGERY: IMPLANT PLACEMENT
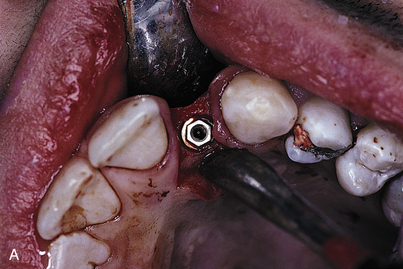
After insertion of the implant, an impression coping is seated. This coping is accommodated by the implant’s hexagonal (or other) antirotational characteristic (Fig. 23-1, A). If the implant comes with a carrier attached to it, the carrier can act as an impression coping to register the timing of the hexagonal or other antirotational characteristic.
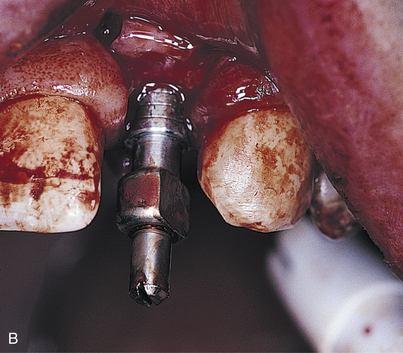
The coping, which is tapered or has the square-locking design, has a center screw, which is turned clockwise until it engages the implant. Before full tightening, the coping is turned until it drops into a nonrotational mode by nestling over the hex. The center screw then is tightened completely (Fig. 23-1, B). Using a paralleling technique, a radiograph is taken to verify complete seating of the impression coping.
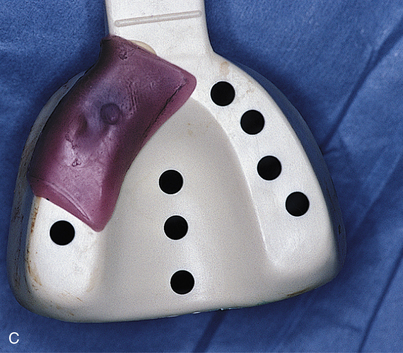
Open trays require a window directly over the copings. This is achieved by modifying a stock tray. When the tray is seated, the center retaining screw of the coping must protrude through the opening. A square of pink base-plate wax is heated and placed over the opening. It is sealed with sticky wax, closing the tray over the coping (Fig. 23-1, C).
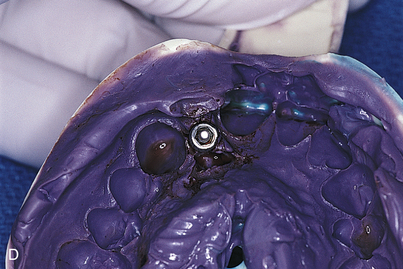
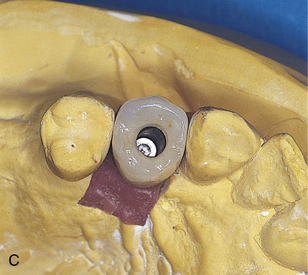
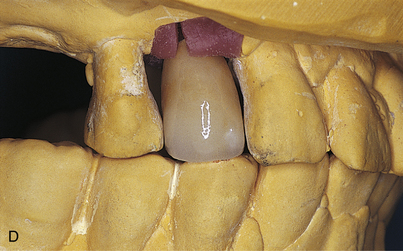
When the impression material has set, the pink base-plate wax is peeled back. The center screw, which is visible, is turned counterclockwise until it completely disengages from the implant. The impression tray now may be removed. The coping will come away with the impression (Fig. 23-1, D). The appropriate implant analog is secured to the square-locking impression coping in the impression material, and a stone cast is poured.
If a nonlocking, tapered impression coping is used in a closed tray technique, it will remain attached to the implant upon removal of the impression tray. It is removed from the implant, and the proper implant analog is attached to it. The coping is reseated with the analog in the impression. To prevent errors in orientation, these tapered copings must be placed accurately. The copings have flat sides or similar identifying characteristics, so that the implant analog in its model occupies a position that exactly replicates the posture of the dental implant that has just been placed surgically. A stone cast is then placed.
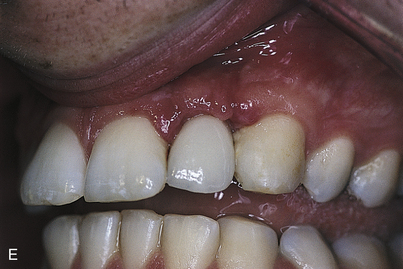
The master cast made from either of these impressions allows the dental surgeon to select and complete an abutment; also, a provisional or final restoration can be made to ideal tooth contours during the osseointegration period. The abutment and restoration can be inserted at second-stage surgery with the expectation that the soft tissues will heal to their outlines (Fig. 23-1, E).
ABUTMENTS
Two types of abutments are available (see Chapter 22); those that receive screw-retained restorations, and those that receive cement-retained restorations. Abutments must always be detachable from these implants. Most abutments are themselves screw retained, although a few other designs are fastened by a Morse taper (or cold weld). These do not require antirotational devices or a cementing medium, and they often are retrievable.
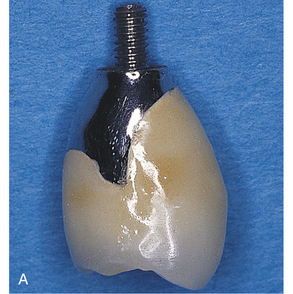
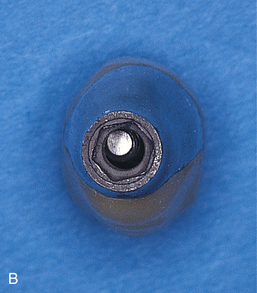
UCLA-type crowns also are made to be screw retained. These crowns are seated on the implant and are cast abutment-to-crown as a single entity (see Chapter 22). The unit is affixed to the implant with a center screw (Fig. 23-2).
Stay updated, free dental videos. Join our Telegram channel
VIDEdental - Online dental courses


