12: Instrumentation

CHAPTER 12 Instrumentation

PURPOSE OF INSTRUMENTATION

The purpose of clinical instrumentation is to create an oral environment where periodontal health is maintained and tissues can return to health. It is accomplished by debridement (or scaling) of the teeth to remove hard deposits to discourage dental biofilm (dental plaque) attachment, such as calculus and/or stain during an oral prophylaxis or nonsurgical periodontal therapy (NSPT), as well as periodontal maintenance (PM). Manual instruments, power-driven instruments, or combination of the two can be used to effectively debride (scale) the teeth and accomplish this goal. Loupes and a headlight are BOTH useful for improving instrumentation. Use of the dental endoscope (Perioscope) creates further opportunity for successful NSPT or PM by offering a tool to aid in definitive instrumentation.

Any instrument that means removal of endotoxins (altered cementum) or by-products of microorganisms from root surface is controversial, and use of other means for removal of dental biofilm is now stressed. Also controversial is the use of traditional root planing with removal of root structure to produce a smooth, glasslike root surface. In addition, soft tissue curettage with removal of the pocket lining is no longer recommended for health of the tissue. Section on polishing in this chapter covers the selective method. Discussion of all these issues is included to allow for changes in testing materials over time. The term “operator” may be used here instead of “clinician” when discussing instrumentation. The Centers for Disease Control and Prevention (CDC) recommends antimicrobial mouthrinse before any instrumentation.

See Chapter 13, Periodontology: NSPT and PM discussion.

Positioning

The CORRECT positioning of BOTH patient and clinician during instrumentation is critical to long-term comfort and effectiveness of clinician. Takes into account ergonomic principles and incorporation of neutral positioning (see later discussion). Transfer of instruments is not discussed here, except to emphasize that to prevent injury to patient, instruments should never be passed over the patient’s face or eyes. Also not discussed is concept of work zones that are set up like a “clock” around the patient (review from class texts).

See Chapters 6, General and Oral Pathology, and 16, Special Needs Patient Care: medical diseases and disabilities and additional modifications.
C. Principles of clinician positioning:

CLINICAL STUDY

Scenario: A dental hygienist is on the first day of his new position at a large dental clinic. Before taking this new position, he was the only dental hygienist for over 10 years at the same small dental practice after graduating top of his class at age 20. He notices that he is unable to put his feet on the floor when he sits on the stool provided for him. He also has trouble instrumenting the lower arch; it just seems there is not enough overhead light, especially on the lingual of the anteriors. He also wants to get closer to his patients; he has forgotten what the effective distance to a patient’s mouth is. At the end of the day he notices that his back hurts. He is worried about what this means to his future in his profession.

Basic Instrument Design

Basic manual instrument design determines the intended purpose and location of use. Specific selections are also based on personal preference and/or ergonomic concerns. Instrumentation with manually activated instruments, BOTH for assessment and for treatment, requires high degree of precision and control and in some cases power and force. CORRECT use of instruments can BEST be accomplished with consistent application of basic principles of instrumentation.

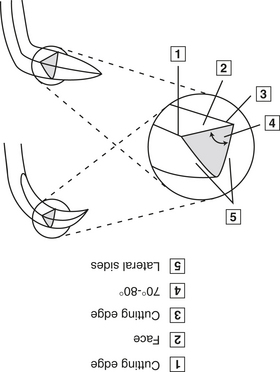
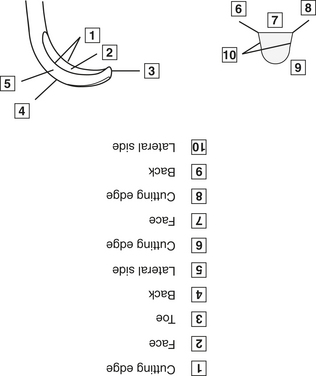
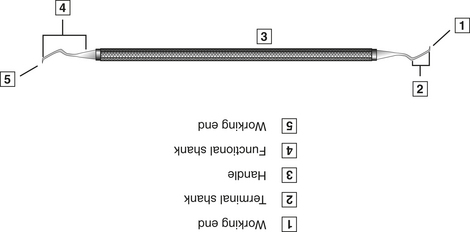
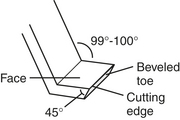
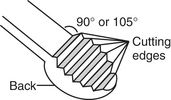
A. Basic instrument design (Figure 12-1):

B. Manual instrument types: functions and area of use are based on design of working end.

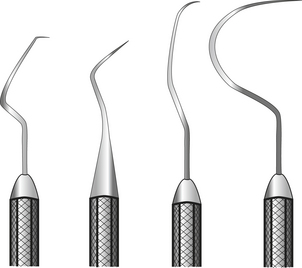
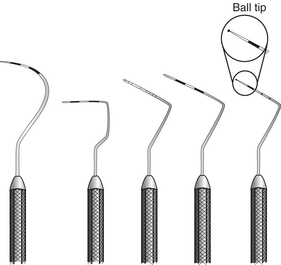
3. Probes (periodontal probes): calibrated measuring tool, usually single-ended but can be combined with explorers or other probes on one end; blunt tip (Figure 12-3):

5. Curets (Figure 12-5):

Table 12-1 Gracey area-specific curets

Gracey curet Designated area of use
Gracey 1-2 and 3-4 Anterior teeth
Gracey 5-6 Anterior or premolar teeth
Gracey 7-8 and 9-10 Posterior teeth buccal and lingual surfaces
Gracey 11-12 and 15-16 Posterior teeth mesial surfaces
Gracey 13-14 and 17-18 Posterior teeth distal surfaces

Principles of Manual Instrument Use

Principles of manual instrument use include grasp, fulcrum, adaption, angulation, stroke.

A. Grasp:

2. Modified pen grasp: BEST grasp with manual instruments for BOTH assessment and treatment.

B. Fulcrum (finger rest): mechanical leverage point that allows greater force to be exerted at working end without increased effort.

1. Purpose:

E. Stroke: types differ by amount of pressure applied to tooth (lateral pressure) and by length and direction of movement; goal is to cover ALL tooth surfaces.

INSTRUMENT SHARPENING

Manual instruments become dull with use. Sharpening is technique of grinding one or both surfaces that join to form the cutting edge of manual instrument blade until a fine, sharp edge is produced.

Stay updated, free dental videos. Join our Telegram channel

Jan 1, 2015 | Posted by in Dental Hygiene | Comments Off on 12: Instrumentation

VIDEdental - Online dental courses

Get VIDEdental app for watching clinical videos