The shade matching of a restoration is the critical final step in aesthetic restorative dentistry once morphology and occlusion are addressed. This article describes a seven-step approach to successful shade matching: patient and tooth evaluation, image capture and shade analysis, communication, interpretation, fabrication, verification, and placement of restoration. A step-by-step protocol to shade matching is comprehensively outlined through a case study using a combination of technology-based instrumentation, conventional techniques, and reference photography.
The shade matching of a restoration is the critical final step in aesthetic restorative dentistry once morphology and occlusion are addressed. The variables in the dental treatment room and human error are recognized obstacles first divulged by Dr. Jack Preston at USC Dental School. Color is both a science and an art, and can often be difficult to measure.
Conventional shade methods and technology by itself have limitations, because technicians require more visual information to interpret shade information. Advances in technology have greatly elevated the likelihood of a clinically acceptable shade match through accurate shade analysis, if properly performed. After much research and clinical evaluation, this article addresses a culmination of knowledge that embodies how the author perceives predictable shade matching.
A step-by-step protocol to shade matching is comprehensively outlined through a case study using a combination of technology-based instrumentation, conventional techniques (ie, shade tabs), and reference photography: a wonderful way for predictable shade matching that, if performed properly, can limit costly remakes.
Predictable shade matching protocol
Step 1: evaluation
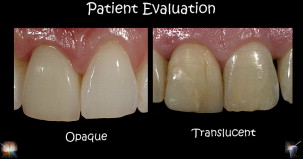
This phase of treatment may be the most clinically significant because proper shade matching is directly dependent on the tooth type (ie, whether the tooth is high or low in translucency) ( Fig. 1 ).
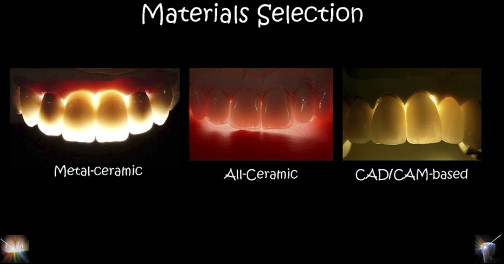
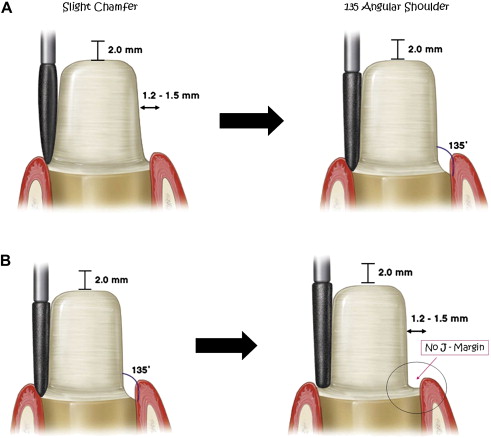
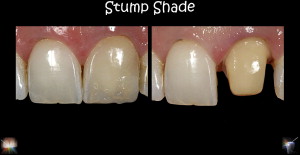
Preoperative evaluation affects material selection because the choices of materials that can be used for the definitive restoration (ie, metal-ceramic or high-strength computer aided design-computer aided manufacturing (CAD-CAM)–based ceramics, such as alumina or zirconia [ Fig. 2 ]) ultimately dictate the tooth preparation design ( Fig. 3 ). The stump shade of the tooth must be taken into consideration because it may influence the value, chroma, and hue of the final restoration if a translucent or semitranslucent material is used ( Fig. 4 ).
Questions to consider during the preoperative patient evaluation include the following:
- 1.
Is there significant variation of shade from gingival, to body, to incisal?
- 2.
Are there any characterizations or effects in the tooth?
- 3.
Can the patient’s teeth be categorized as high in translucency or high in opacity?
- 4.
Can materials selection affect the final aesthetic outcome of the restoration?
After those questions have been addressed a treatment plan can be developed, and the clinician can determine the ideal material selection and preparation for the restoration.
Step 2: image capture and shade analysis
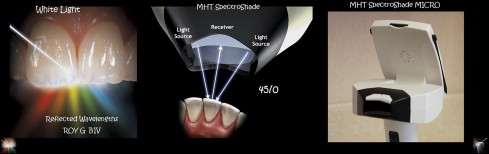
One way to analyze the shade is to use technology (SpectroShade Micro, MHT S.P.A., Milan, Italy) ( Fig. 5 ), because it is the least influenced by contrast effects and visual discrepancies associated with improper lighting. Technology requires image capture ( Fig. 6 ) or image acquisition. Once the images are brought into the database and stored, they can then be analyzed for shade ( Figs. 7 and 8 ). Today’s technology streamlines shade analysis by indicating which shade tabs the clinician should select for reference photography (shade communication).
Stay updated, free dental videos. Join our Telegram channel
VIDEdental - Online dental courses


