and Paolo Biondi2
(1)
Aesthetic and Maxillofacial Surgery, Padova, Italy
(2)
Maxillofacial Surgery, Forlì, Italy
Abstract
This chapter discusses how to approach a new patient. The ideal room – with three separate areas dedicated for the interview, clinical examination, and clinical photography – is described in detail.
Only by walking behind him shall I discover where he is going!
This chapter discusses how to approach a new patient. The ideal room – with three separate areas dedicated for the interview, clinical examination, and clinical photography – is described in detail.
The first consultation is divided into various steps: entrance, interview, direct clinical examination, photographic documentation, and final communication. The successive preoperative consultations are also considered.
1.1 The Single Room Concept
The communication between patient and doctor, the direct clinical examination, and the taking of clinical photographs require three dedicated areas of the office. After a variety of experiences, we strongly favor concentrating all three areas in the same room. Figure 1.1 shows the plan of the room in my current office.
Fig. 1.1
Plan of the room in my current office with the three areas dedicated to interview (a), clinical examination (b), and clinical photographs (c)
1.1.1 The Interview Area
For the initial and successive consultations, most of the time is spent in the interview area. A large table, with a lateral extension for the computer, the printer, a plant, and the telephone, is centered under a diffuse, but not too intense, light; care is taken to avoid any visual obstruction preventing eye contact. Adequate extra space around the table is needed when other colleagues and accompanying persons are attending the interview.
When sitting down around the table, the distance between the doctor and the patient is about 110 cm (Fig. 1.2). Only in one of the successive consultations, when we discuss the clinical photographs and the treatment plan in detail, does the doctor sit beside the patient, reducing the distance to about 60 cm (Fig. 1.3).
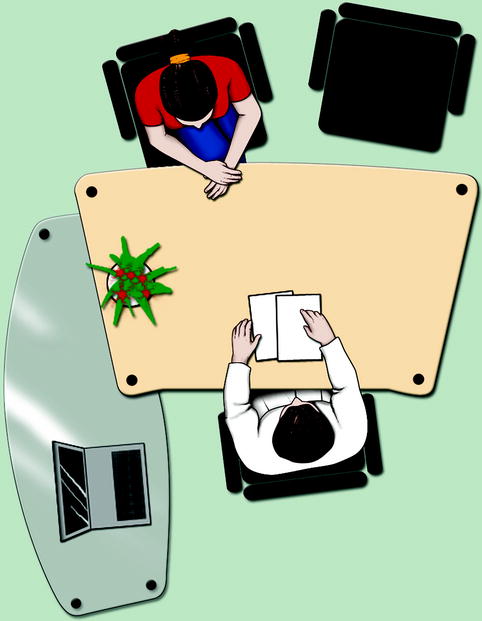

Fig. 1.2
During the initial interview and successive communication, the patient is seated opposite the doctor (the distance between them is about 110 cm)
Fig. 1.3
Only when discussing the clinical photographs and the treatment plan in detail is the doctor seated beside the patient, reducing the distance to about 60 cm
1.1.2 The Clinical Examination Area
A modified dental chair and two different lighting systems occupy the central area of the room, which is dedicated to the clinical examination.
The main characteristics of the chair are:
-
It is adjustable in height and inclination. As I remain in a standing position during direct clinical examination, I can elevate the chair in order to have my eyes at the same height as the patient’s eyes so that I may help him to maintain the natural head position1 (Fig. 1.4).
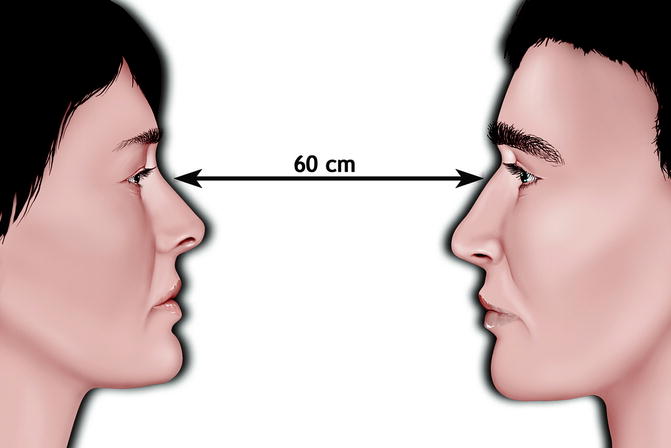 Fig. 1.4During the clinical facial examination, the doctor’s eyes should be at the same height as the patient’s eyes, and the distance between them is about 60 cm
 -
Instead of the original dental instruments, there is a small plane support useful for holding a facial mirror, a camera, a ruler, or other small objects.
-
It is equipped with a vacuum tube and an air-compressed tube.
-
It is easily adjusted to the Trendelenburg’s position.
One large, ceiling-mounted lighting system produces a diffuse and intense white light. This is preferred for the external examination due to the complete absence of dark shadows.
The other lighting system is adjustable and produces an intense light beam that is very helpful for the anterior nasal and intraoral examination.
There is enough space around the chair to see the patient’s face from any view point and at any distance.
When the patient is seated in the examining chair, the mean distance between the doctor and the patient is about 60 cm (Fig. 1.4).
Stay updated, free dental videos. Join our Telegram channel
VIDEdental - Online dental courses


