Chapter 9 Gold restorations
the metals, the manufacture and the fit
Fabrication of gold restorations
Once tooth preparation has been completed by the dentist (Figure 9.1), an impression of the tooth is recorded, decontaminated and disinfected (see Chapter 13). Upon receipt of this, the dental laboratory technician casts an accurate die stone model of the preparation (Figure 9.2). Die stone is a gypsum-based material (calcium sulphate dihydrate) which has undergone a treatment process to make it harder and have a lower expansion on setting than conventional plaster. Die stones expand by 0.05–0.10% on setting compared to plaster’s 0.2–0.3%. This small amount of expansion therefore produces a microscopically larger crown than the tooth preparation, ensuring a full seat at try-in.
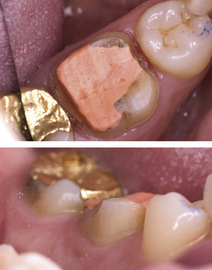
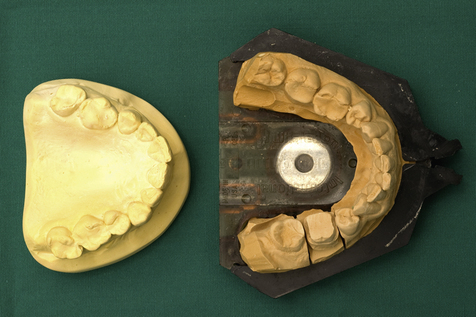
Figure 9.2 Lower die stone model cast from an impression taken of the tooth preparation seen in Figure 9.1 (right). Note the model has to be sectioned to allow the master die of the lower right first molar crown preparation to be removed from the model to build up the wax pattern. The upper model (left) is used to check the occlusion and create the occlusal form of the crown.
Once the die stone has set, the technician has to section the model so that the master die of the prepared tooth can be removed to allow a wax pattern to be built up (Figures 9.2 and 9.3). It is therefore critical that the clinician clears the contact point during tooth preparation, not only to allow an impression to be taken of the margin but also to allow the model to be sectioned. Failure to do this will lead to the laboratory not being able to proceed with the work or, worse still, attempting to proceed and working on a die and contact damaged in the sectioning process. Once the model has been sectioned, the master die is covered with die spacer, a paint that is applied in coats to the master die (Figure 9.3). Two to three coats of conventional die spacer amount to a thickness of about 25–30 µm. Ideally, the die spacer should be painted to just short of the preparation margin. The die spacer is placed to allow for an adequate layer of luting cement and full seat of the crown at fit.
Once the master die has been prepared, a wax pattern of the restoration is built up using the wax additive technique (Figure 9.4), checking that all contours are correct, all contact points are tight, and the occlusal surface and contacts conform to the existing occlusion; articulated study models facilitate this (Figure 9.5). It is also possible with the advent of computer-aided design and computer-aided manufacture (CAD-CAM; see Chapter 11) technology to computer design and mill wax blocks to form wax patterns of crowns. Once the wax pattern has been made, it is then removed from the die and a wax sprue attached (Figure 9.6). The sprued pattern is then placed in a lined investment cylinder and invested in an investment material which is mixed under vacuum so as to avoid the incorporation of air and hence porosities in the investment mould (Figure 9.6).
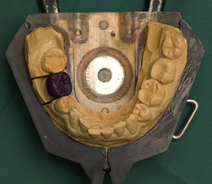
Figure 9.4 Wax pattern of a full gold crown built up on the model of the lower right first molar tooth.
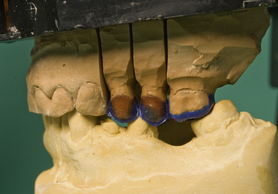
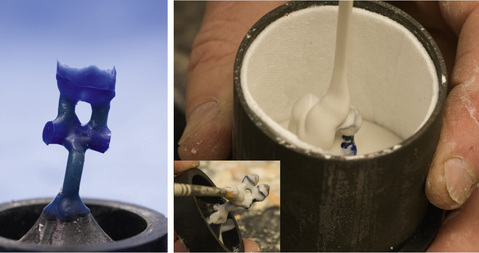
Figure 9.6 Cuspal overlay wax pattern seen in Figure 9.5 being sprued (left) and being invested in investment material (right). The sprued wax pattern is placed in an investment cylinder and the investment material is poured over – initially a small paintbrush is used (inset) to coat the wax pattern and to ensure no air bubbles attach to the wax surface.
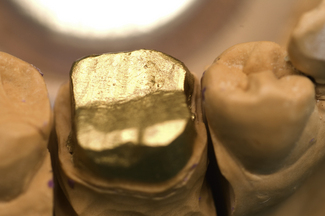
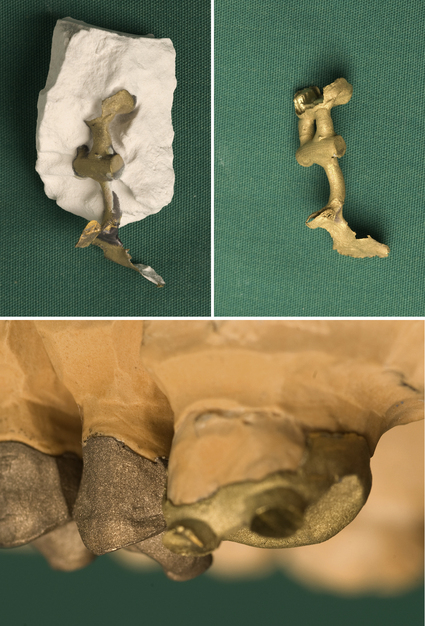
Thereafter, once the investment has set, the wax is removed from the mould by burning it off. For gold alloys this is achieved by placing the investment mould in a furnace at either 450°C (slow burn out) or 700°C (fast burn out). The mould is then placed into a casting machine and gold alloy, in molten state, is forced into it using centrifugal force. Once cooled, the surrounding investment is removed, the sprue is cut off the restoration and the resultant alloy casting trimmed and polished (Figure 9.7).
Clearly in such an elaborate process faults in the casting may occur. Common faults include:
Stay updated, free dental videos. Join our Telegram channel
VIDEdental - Online dental courses


