Instrument Processing
Learning Objectives
1 Pronounce, define, and spell the Key Terms.
2 Describe the seven steps of processing dental instruments.
3 Describe the various types of packaging materials used for sterilization.
4 Discuss the precautions necessary when packaging instruments for sterilization.
6 Explain the differences between process indicators and process integrators.
Key Terms
Autoclave
Biologic Monitoring
Chemical Vapor Sterilization
Clean Areas
Contaminated Area
Dry Heat Sterilization
Forced Air Sterilizer
Holding Solution
Instrument Processing
Process Indicators
Process Integrators
Static Air Sterilizer
Ultrasonic Cleaner
One of the most important responsibilities of the dental assistant is to process contaminated instruments and other patient care items for reuse.
Instrument processing involves much more than sterilization. Proper processing of contaminated dental instruments is actually a seven-step process (Table 8-1). Although the seven steps are not difficult to learn, it is very important for you to have a clear understanding of how and why each step is performed. To prevent disease agents from a previous patient from being transferred to you, to another member of the dental team, or to the next patient, instrument-processing procedures must be performed in a consistent and disciplined manner.
TABLE 8-1
Seven Steps for Instrument Processing
| Step | Technique |
| Transport | Transport contaminated instruments to the processing area in a manner that minimizes the risk of exposure to persons and the environment. Use appropriate PPE and a rigid, leakproof container. |
| Cleaning | Clean instruments using a hands-free, mechanical process, such as an ultrasonic cleaner or instrument washer. If instruments cannot be cleaned immediately, use a holding solution. |
| Packaging | In the clean area, wrap and/or package instruments in appropriate types of materials. Place a chemical indicator inside the package next to the instruments. If an indicator is not visible on the outside of the package, place an external process indicator on the package. |
| Sterilization | Load the sterilizer according to the manufacturer’s instructions. Label packages. Do not overload the sterilizer. Place packages on their edges in single layers, or on racks to increase circulation of the sterilizing agent around the instruments. Operate the sterilizer according to the manufacturer’s instructions. Allow packages to cool before removing them from the sterilizer. Allow packages to cool before handling. |
| Storage | Store instruments in a clean, dry environment in a manner that maintains the integrity of the package. Rotate packages so that those with the oldest sterilization dates will be used first. |
| Delivery | Deliver packages to the point of use in a manner that maintains sterility of the instruments until they are used. Inspect each package for damage. Open package aseptically. |
| Quality assurance program | An effective quality assurance program should incorporate training, record keeping, maintenance, and use of biologic indicators. |
PPE, Personal protective equipment.
Modified from Organization for Safety and Asepsis Procedures (OSAP).
Processing reusable instruments begins at the chairside at the completion of the patient visit and ends with procedures that ensure the quality of the entire reprocessing procedure.
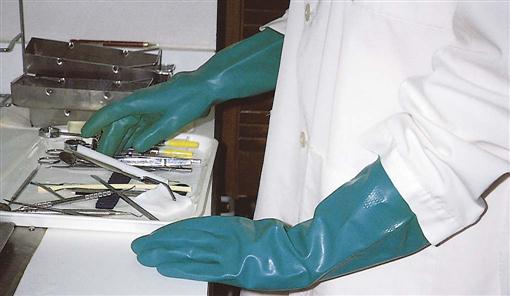
First, put on your utility gloves and discard disposable needles, scalpels, and other contaminated sharp items into a puncture-resistant sharps disposal container. Dispose of other waste, such as used cotton rolls and gauze squares (Figure 8-1). Now take the contaminated instruments to the sterilization center (processing area). To prevent injury, the instruments should be transported in a rigid, leakproof, covered container (Box 8-1).
The Sterilization Center
The instrument-processing area, or sterilization area, should be centrally located in the office to allow easy access from all patient care areas. This minimizes the need to carry contaminated items through clean areas of the office, where sterilized instruments, fresh disposable supplies, and prepared trays are stored.
The “ideal” instrument-processing area (1) should be dedicated only to instrument processing, (2) should be physically separated from the operatories and the dental laboratory, and (3) should not be a part of a common walkway. The size of the area should accommodate all the equipment and supplies necessary for instrument processing, with multiple outlets and proper lighting, water, and an airline and vacuum line for flushing high-speed handpieces.
A deep sink should have hands-free controls for instrument rinsing and (if space permits) a foot-operated or other hands-free trash receptacle. The flooring should be an uncarpeted, seamless, hard surface. The size, shape, and accessories of the instrument-processing area vary among dental offices.
Workflow Pattern
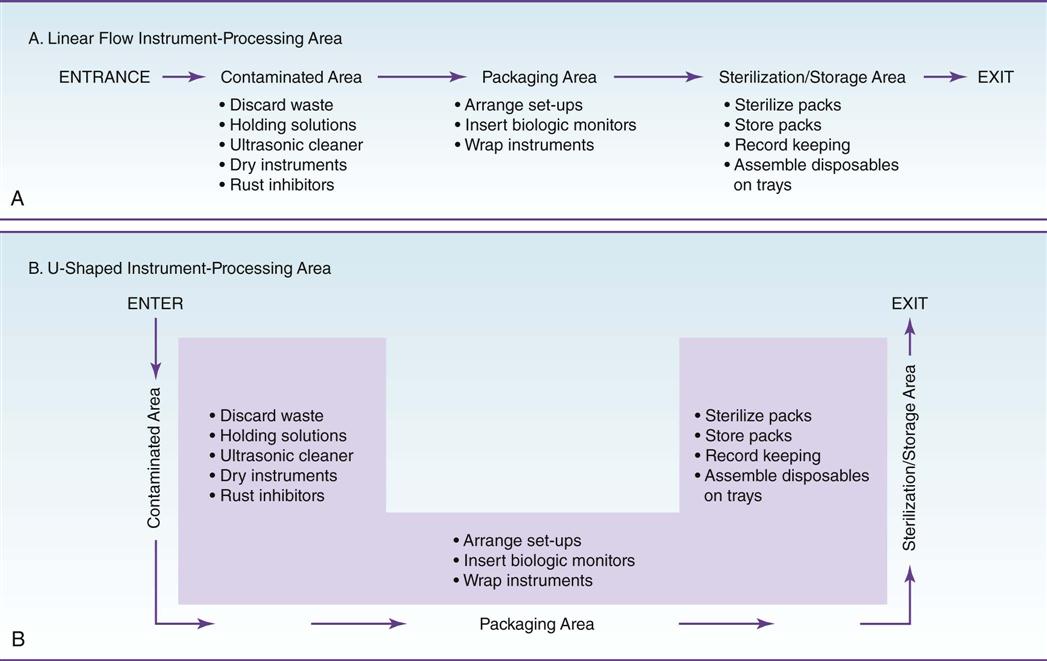
Regardless of the size or shape of the instrument-processing area, four basic areas govern the pattern of workflow. Instruments that are being processed should proceed in a single loop—from dirty, to clean, to sterile, to storage—without ever “doubling back” (Figure 8-2).
If the instrument-processing area is small, you can use signs that read, “Contaminated items only,” “Precleaning area,” “Cleaned items only,” “Sterile items only,” or “Sterilization area,” to separate contaminated and clean areas. This method works well to prevent mixing of contaminated and sterile items in a small sterilization area.
Contaminated Area
All soiled instruments are brought into the contaminated area, the initial receiving area where they are held for processing. Any disposable items not already discarded in the treatment room are removed from the instrument tray and disposed of as contaminated waste.
The contaminated area contains clean protective eyewear and utility gloves, counter space, a sink, a waste disposal container, holding solution, an ultrasonic cleaner, an eyewash station, and supplies for wrapping instruments before sterilization.
Note: Soiled and clean instruments are never stored in the same cabinet.
Holding Solution
If the instruments cannot be cleaned immediately after the procedure, they should be placed in a holding solution to prevent the drying of blood and debris on the instruments.
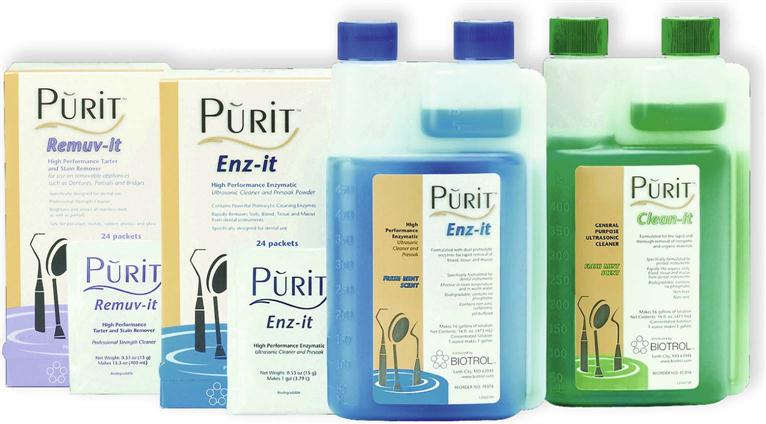
The holding solution may be any noncorrosive liquid. A commercial enzymatic solution that partially dissolves organic debris may be used (Figure 8-3). Dishwasher detergent also makes a good holding solution because it is low cost, low foaming, and readily available. It is neither cost-effective nor desirable to use a disinfectant alone as a holding solution. The dental professional should read and follow the manufactures instructions for use on the ultrasonic unit when choosing a solution.
The container must have a lid and must be labeled with both a biohazard label (because of the contaminated instruments) and a chemical label (because of the cleaner and/or detergent). The holding solution should be changed at least twice daily, more frequently if it becomes clouded.
Remember, a holding solution is necessary only when contaminated instruments cannot be processed immediately.
Clean Area
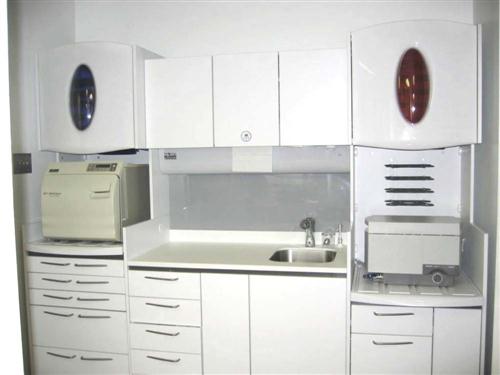
In the clean area, cleaned instruments and other dental supplies should be inspected, assembled into sets or trays, and wrapped or placed in packages for sterilization (Figure 8-4).
Clean instruments are not sterile and could still harbor pathogens. Instruments must be packaged and sterilized before being used on a patient.
Precleaning and Packaging Instruments
Instruments may be precleaned in one of three ways: hand scrubbing, ultrasonic cleaning, and instrument washing machines.
Hand Scrubbing
Hand scrubbing is the least desirable method of cleaning instruments because it requires direct hand contact with the contaminated instrument. If you absolutely must hand-scrub instruments, adhere to the following precautions:
• Wear goggle-type eyewear, puncture-resistant gloves, and your protective clothing.
• Clean only one or two instruments at a time.
• Use only a long-handled brush, preferably one with a hand guard or a wide surface.
Note: Some states have specific infection control guidelines or Occupational Safety and Health Administration (OSHA) plans that prohibit hand scrubbing of instruments. In these states, you must use an ultrasonic cleaner or machine cleaning.
Ultrasonic Cleaning
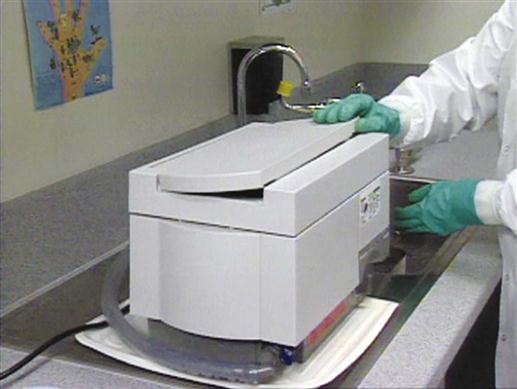
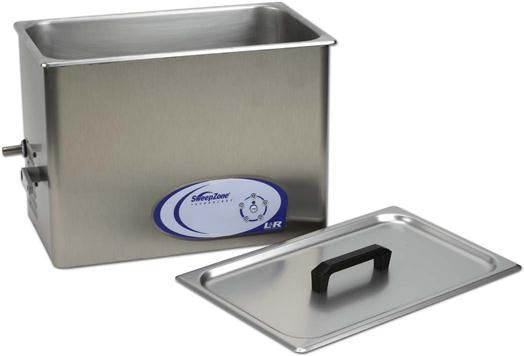
Ultrasonic cleaners are used to loosen and remove debris from instruments. These cleaners also reduce the risk of hand injuries from cuts and punctures during the cleaning process (Procedure 8-1).
Puncture-resistant utility gloves, a mask, protective eyewear, and a protective gown should always be worn when the ultrasonic cleaner is used. To further limit contact with contaminated instruments, keep a set of tongs near the ultrasonic unit for removing instruments after the cleaning cycle (Figure 8-5).
The ultrasonic cleaner works by producing sound waves beyond the range of human hearing. These sound waves, which can travel through metal and glass containers, cause cavitation (formation of bubbles in liquid). The bubbles, which are too small to be seen, burst by implosion (bursting inward, the opposite of an explosion). The mechanical cleaning action of the bursting bubbles combined with the chemical action of the ultrasonic solution removes the debris from the instruments.
Instruments should be processed in the ultrasonic cleaner until they are visibly clean. The time may vary from 5 to 15 minutes, depending on the amount and type of material on the instruments, and the efficiency of the ultrasonic unit. Instruments in plastic or resin cassettes require slightly longer cleaning times because the cassette material absorbs some of the ultrasonic energy.
You should use ultrasonic solutions that are specially formulated for use only in the ultrasonic cleaner. Some ultrasonic cleaning products have enzyme activity (Figure 8-6). Other ultrasonic cleaning products have antimicrobial activity, which reduces the buildup of microbes in solutions with repeated use. Antimicrobial activity does not disinfect the instruments; it merely prevents microorganisms from increasing in number.
Do not use other chemicals such as plain disinfectants in the ultrasonic cleaner. Some disinfectants can “fix” the blood and debris onto the instruments, making subsequent cleaning more difficult. Specific ultrasonic solutions are available that remove difficult materials, such as cements, tartar, stains, plaster, and alginate (Figure 8-7). Refer to the ultrasonic unit manufacturer’s instructions regarding the specific solution to be used.
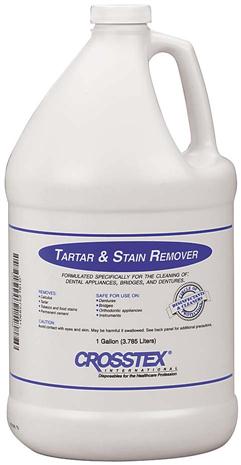
Similar to the holding solution, the ultrasonic cleaning unit should be labeled with both a chemical label and a biohazard label because it contains a chemical along with contaminated instruments.
Care of the Ultrasonic Cleaner
The ultrasonic cleaner solution is highly contaminated and must be discarded at least once a day or sooner if it becomes visibly cloudy. When the solution is changed, the inside of the pan and lid should be rinsed with water, disinfected, rinsed again, and dried. All personal protective equipment (PPE) should be worn for changing of solutions in the ultrasonic cleaner.
Testing the Ultrasonic Cleaner
If you notice that the instruments are not being cleaned completely after processing in the ultrasonic cleaner, the unit may not be functioning properly.
To determine whether the ultrasonic cleaner is working properly, hold a 5 × 5 inch sheet of lightweight aluminum foil vertically (like a curtain) half-submerged in the fresh, unused solution. Run the unit for 20 seconds, and then hold the foil up toward the light. The surfaces that were submerged in the solution should be evenly marked with a tiny pebbling effect over the entire surface. An area on the foil that is greater than one-half inch without pebbling indicates that there is a problem with the unit, and that it needs servicing by the manufacturer.
Automated Washers/Disinfectors
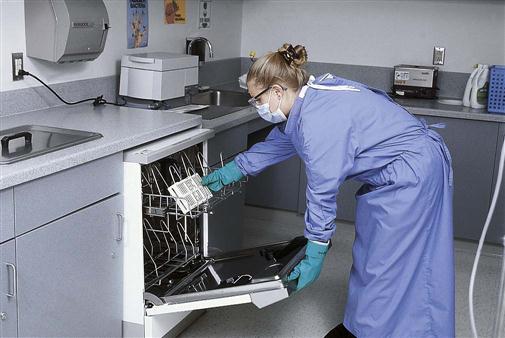
Automated instrument washers/disinfectors look and work similar to a household dishwasher. However, the U.S. Food and Drug Administration (FDA) must approve them for use with dental instruments (Figure 8-8).
Automated washing/disinfecting units use a combination of very hot water recirculation and detergents to remove organic material. Then the instruments are automatically dried. These units are classified as thermal disinfectors because they have a disinfecting cycle that subjects the instruments to a level of heat that kills most vegetative microorganisms.
Instruments processed in the automatic washers/disinfectors must be wrapped and sterilized before use on a patient.
Drying, Lubrication, and Corrosion Control
Instruments and burs made of carbon steel will rust during steam sterilization. Rust inhibitors, such as sodium nitrate or commercial products, are available as a spray or dip solution and help to reduce rust and corrosion.
An alternative to using rust inhibitors is to dry the instrument thoroughly using dry heat or unsaturated chemical vapor sterilization (see “Chemical Vapor Sterilization” section), which does not cause rusting.
Hinged instruments may need to be lubricated to maintain proper opening. Take care to remove all excess lubricant before heat sterilization.
Packaging Instruments
Before sterilization, the instruments should be wrapped or packaged to protect them from becoming contaminated after sterilization. When instruments are sterilized without being packaged, they are immediately exposed to the environment as soon as the sterilizer door is opened. They can be contaminated by aerosols in the air, dust, improper handling, or contact with nonsterile surfaces.
An additional advantage of packaging instruments is that they can be grouped into special setups, such as crown/bridge, amalgam, prophy, or composite.
Packaging Materials
Sterilization packaging materials and cassettes are medical devices and therefore must be U.S. Food and Drug Administration (FDA)-approved. It is critical to use only products and materials that are labeled as “sterilization” packaging. Never substitute products such as plastic wraps, paper, or zipper-lock freezer bags that are not registered for this purpose. These products may melt or may prevent the sterilizing agent from reaching the instruments inside.
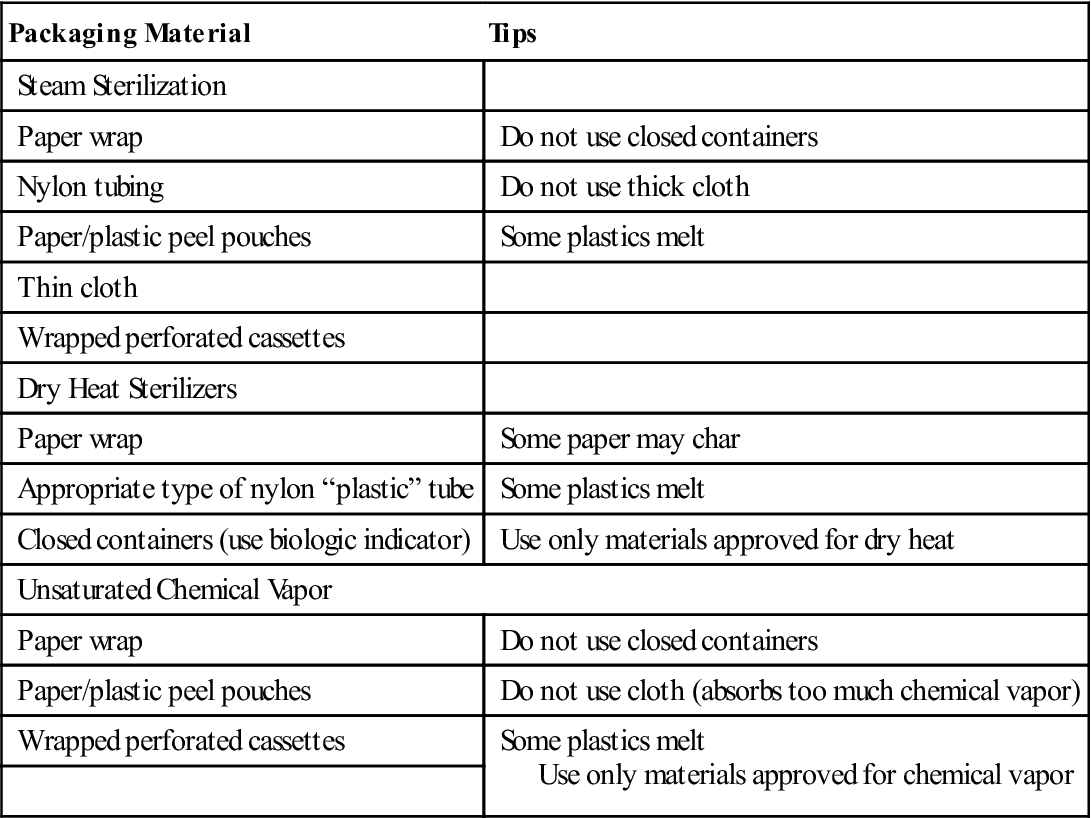
Specific types of packaging material are available for each method of sterilization. You should use only the type of packaging material designed for the particular method of sterilization that you are using (Box 8-2).
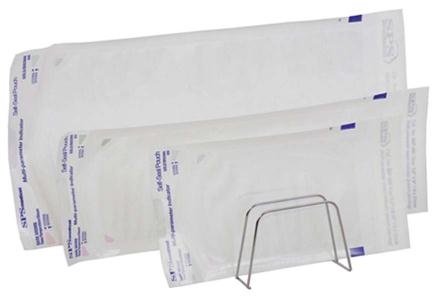
A wide variety of sterilization packaging materials are available. Self-sealing or heat-sealed “poly” bags or tubes provide an excellent wrap (Figure 8-9). In addition, paper wraps and cloth wraps are available. If the package is not the self-sealing type, you should use only sterilization indicator tape to seal the package.
Never use safety pins, staples, paper clips, or other sharp objects that could penetrate the packaging material.
The instruments are now ready for the sterilization process.
Reusing Wraps
Standard sterilization wraps are not to be reused; they are neither designed for reuse nor FDA registered for reuse. Reuse of single-use sterilization wraps or bags can result in loss of chemical indicator ability, insecure sealing of the package, and an inability of the package material to maintain sterility of the contents afte/>
Stay updated, free dental videos. Join our Telegram channel

VIDEdental - Online dental courses


