CHAPTER 8 Hard Tissue Surgery and Bone Grafting
ARMAMENTARIUM
GENERAL GUIDELINES
Bone Management
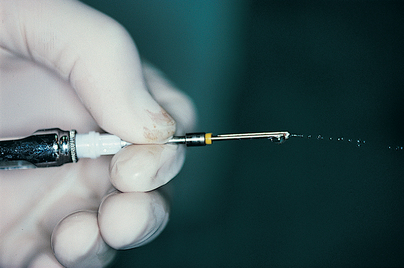
Both internal and external irrigation should be used when possible (this feature is not available on all systems), and hollowed drills should be cleaned immediately after each use to ensure future patency (Fig. 8-1). The dental surgeon need not always use the drilling systems supplied by implant manufacturers. Generic consoles, motors, handpieces, and drills are available that offer irrigation systems (which keep endosteal sites cool) and assist the final steps in making osteotomies (see chapters 9 and 10 for specifics). Using drills with 0.5-mm diameter increments results in minimal bone injury and allows the drill to be used a greater number of times.
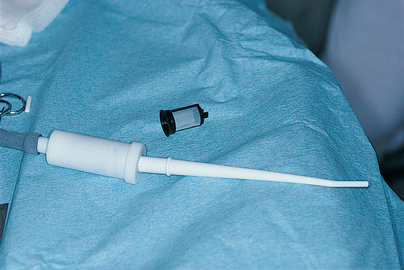
Bone grindings should be preserved, when possible, by placement of a filter in the suction system (Fig. 8-2). The recovered osseous coagulum (mixed with a synthetic particulate grafting material, if necessary) can be used for bone repair, after implant placement, or in the floor of the maxillary sinus after an elevation procedure.
Every implantologist should become competent in the use of synthetic bone grafting materials (Table 8-1). These materials offer a number of benefits and may be needed unexpectedly.
| Advantages | Shortcomings | |
|---|---|---|
| Autografts | ||
| (Bone self-donated by the patient) | ||
| Iliac crest | Patient’s own bone Osteogenic Readily available |
Second site morbidity Requires general anesthesia Prolonged postoperative recovery |
| Ascending ramus or symphysis of mandible | Patient’s own bone Osteogenic Readily available |
Second site morbidity Prolonged postoperative recovery |
| Torus | Patient’s own bone Osteoconductive |
Host site availability Second site morbidity Cortical bone only |
| Rib or tibial plateau | Patient’s own bone Osteogenic Readily available |
Second site morbidity Requires general anesthesia Prolonged postoperative recovery |
| Calvarium | Patient’s own bone Osteogenic Readily available |
Second site morbidity Requires general anesthesia Prolonged postoperative recovery |
| rhPDGF-BB | ||
| (Highly purified additives derived from recombinant human platelet-derived growth factors [rhPDGF-BB]; used with allografts, xenografts, or alloplasts or alone in a resorbable carrier matrix (Infuse only); used in an infrabony defect or an area where natural host bone is absent but required. Types: OP-1/BMP-7, GEM-21S, INFUSE) |
Bioactive protein Accelerated growth and bone maturation, more predictable and shows greater bone fill than without Readily available |
Very costly May not be acceptable to patient |
| Homografts/Allografts | ||
| (Bone donated from a human source other than the patient; obtained from bone banks) | ||
| Demineralized freeze-dried bone (DFDB)* | Readily available Osteoinductive/conductive Biologic acceptability Replaced by patient’s own bone |
Cost May not be acceptable to patient |
| Freeze-dried bone matrix | Readily available Osteoconductive Biologic acceptability Replaced by patient’s own bone |
Cost May not be acceptable to patient |
| Irradiated bone | Readily available Osteoconductive Biologic acceptability Replaced by patient’s own bone |
Cost Increased concern about disease transmission as a result of decreased processing |
| Fresh-frozen bone | Readily available Osteoconductive Replaced by patient’s own bone |
Cost Significant risk of disease transmission and graft-host reaction |
| Human bone ash (Osteomin) | Readily available (Pacific Coast Tissue Bank) Osteoconductive (human hydroxyapatite [HA]) Resorbable No risk of disease transmission |
Cost An HA based on human bone |
| Xenografts | ||
| (Mineralized bone matrix from a species other than humans; bovine source) | ||
| Bio-Oss | Readily available Osteoconductive Patient acceptance Biologic acceptability |
Cost Similar to HA |
| Alloplasts | ||
| (Synthetic bone materials available from a variety of manufacturers) | ||
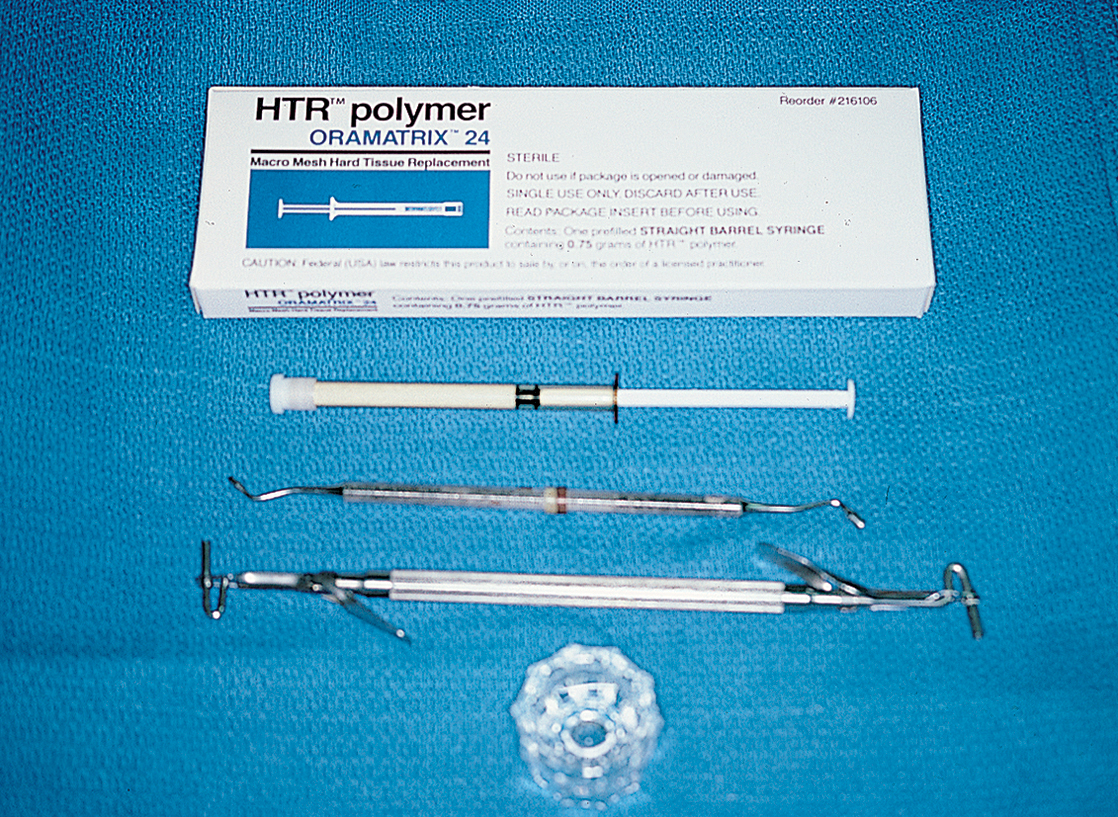
| Nonresorbable polymer (hard tissue replacement [HTR]) | Readily available Osteoconductive Hydrophilic Patient acceptance Biologic acceptability |
Cost Nonresorbable |
| Ceramic HA (i.e. Calcitite, Osteograf D, Interpore) |
Readily available Osteoconductive Patient acceptance Biologic acceptability |
Cost Nonresorbable (HA component) |
| Ceramic HA (35%) in a resorbable medium CaSO4 (65%) (Hapset) |
Readily available Osteoconductive Patient acceptance |
Cost Nonresorbable (HA component) |
| Resorbable ceramic (B-TCP) (i.e., Augmen, Synthograf) |
Readily available Osteoconductive Acceptable to patient Biologic acceptability |
Cost Absorbability Predictability |
| Ceramic (HA) (i.e., Osteogen, OsteoGraf LD, OsteoGraf/N) |
Readily available Osteoconductive Acceptable to patient Biologic acceptability |
Cost Absorbability |
| Bioactive glass (i.e., BioGran, PerioGlas) |
Readily available Osteoconductive Acceptable to patient Biologic acceptability |
Cost Absorbability |
| Bone banks (See Appendix L for members of the American Association of Tissue Banks.) |
* Available in various forms: cortical or cancellous powder, cortical chips, monocortical or bicortical blocks, as a gel in combination with glycerol (Grafton/Osteotech), or in thin cortical sheets to be used as a membrane (Lambone/Pacific Coast Tissue Bank).
Grafting for repair, augmentation, osteosynthesis, or morphologic maintenance may be performed with autogenous or allogeneic bone, xenografts, or synthetic versions (particulate or porous solid block forms) of both resorbable and nonresorbable osteoconductive biomaterials. Table 8-2 presents the names and other significant characteristics of these grafting materials. The techniques for their use are essentially the same for all, except that some have different handling characteristics. Indications differ for the use of some of the synthetic bone materials (i.e., TCP and other resorbable substances). The clinician may be able to change both the quantity and quality of a patient’s bone by using bone-replacement materials.
Table 8-2 Guided Tissue Regenerative Membranes (GTRMs)
| Name | Material | Resorbable or Nonresorbable | Manufacturer | Advantages | Shortcomings |
|---|---|---|---|---|---|
| Gore-Tex | Expanded polytetrafluoroethylene (e-PTFE) | Nonresorbable | W.L. Gore & Associates | Proven track record Established good standard Available with titanium reinforcement variations |
Nonresorbable, requires removal surgery Exposure results in inflammation possibly less favorable results |
| TefGen-FD | Nonexpanded PTFE | Nonresorbable | Lifecore Biomedical | Some clinical studies suggest primary closure not 100% necessary Nonporous surface inhibits bacterial colonization |
Nonporous structure may result in increased exposure Nonresorbable |
| Regentex TXT-200/GBR-200 | Nonexpanded PFTE | Nonresorbable | Osteogenics Biomedical | Some clinical studies suggest primary closure not 100% necessary | Nonporous structure may result in increased exposure Nonresorbable |
| Cytoplast Ti-250 | Titanium reinforced | Nonporous surface inhibits bacterial colonization | |||
| Biobarrier AlloDerm GBR |
PFTE Acellular dermal matrix |
Nonresorbable Resorbable |
Imtec Biohorizons |
Resorbable Primary closure not 100% necessary Enhanced soft tissue quality and esthetics |
Somewhat technique sensitive |
| Bio-Mend Bio-Mend–Extend |
Bovine type I collagen | Resorbable | Sulzer Calcitek | Resorbable | Difficult to manipulate when wet |
| BioGwide | Porcine type I and type III collagen | Resorbable | Osteohealth (Approved by the FDA for use around implants) | Resorbable | Short track record |
| Vicryl mesh | Polyglactin 910 (9:1 ratio of polylactic acid to polyglycolic acid) | Resorbable | Ethicon | Resorbable Easy to position and place |
Easily collapsible into defect |
| Resolute XT | Polyglycolide and Polylactide polymers | Resorbable | W.L. Gore & Associates | Resorbable Retains form once shaped |
Stiff, difficult to bend and adapt |
| Ossix Plus | Porcine collagen | Resorbable | Orapharma | Resorbable Easy to position and place |
Must be rehydrated in saline for 5-15 min |
| Atrisorb | Poly DL–lactide in N-methyl-2-pyrolidone | Resorbable | Block | Chairside fabrication Resorbable Mildly adherent to tooth |
Short track record Learning curve Can be difficult to adapt |
| Lambone | Freeze-dried demineralized allogenic laminar bone sheets | Replaced by bone | Pacific Coast Tissue Bank | Replaced by bone Available in variable thickness |
Must be rehydrated in saline for 5-30 min Thicker pieces more difficult to adapt May not be acceptable to patient |
| Capset | Calcium sulphate | Resorbable | LifeCore | Resorbable Custom adapted at time of placement Does not require bone tacks or suturing |
Somewhat technique sensitive |
GBR, Guided bone regeneration; FDA, U.S. Food and Drug Administration.
Basic Grafting Procedures
Periodontal Defect Correction
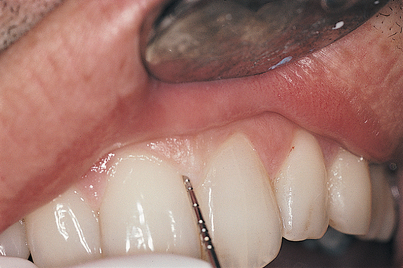
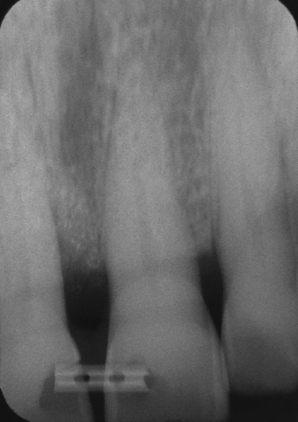
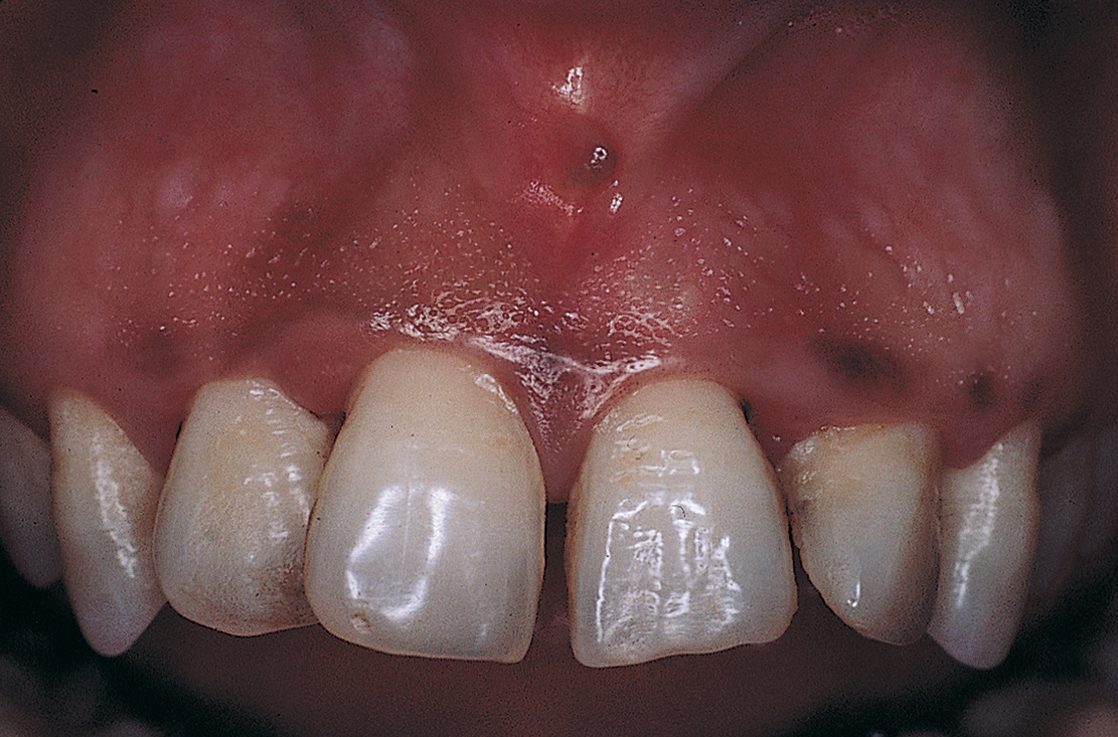
Only teeth that are or can be made clinically firm should be included in the treatment plan. If the teeth are mobile, they must be bonded with stainless steel wire or acrylic intracoronal splints or in some other fashion completely immobilized. If periodontal-endodontic involvement is a possibility, presurgical pulp canal therapy must be performed (Figs. 8-3 and 8-4).
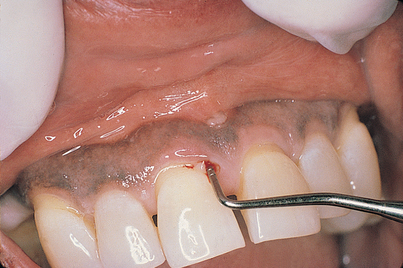
FIGURE 8-3. A thorough examination, including periodontal probing, is essential before surgical intervention.
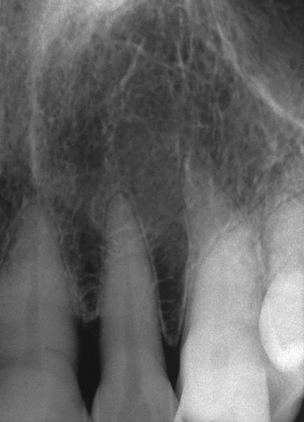
FIGURE 8-4. A radiographic survey should be done to further clarify the prognosis of the involved teeth.
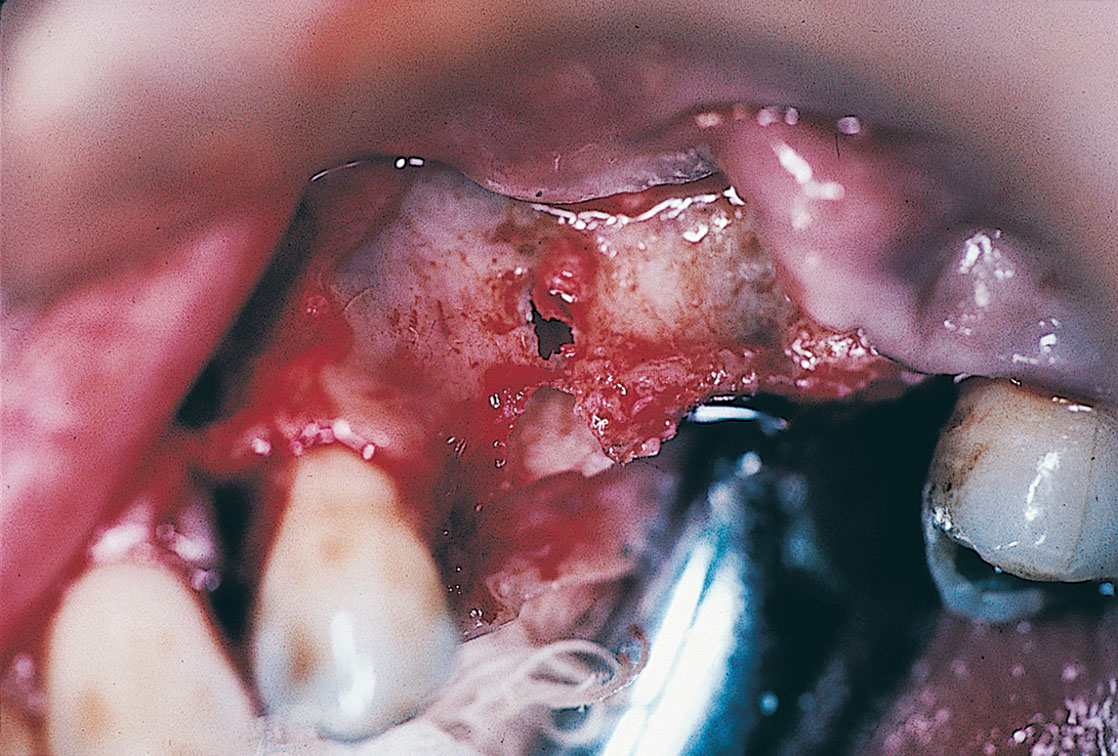
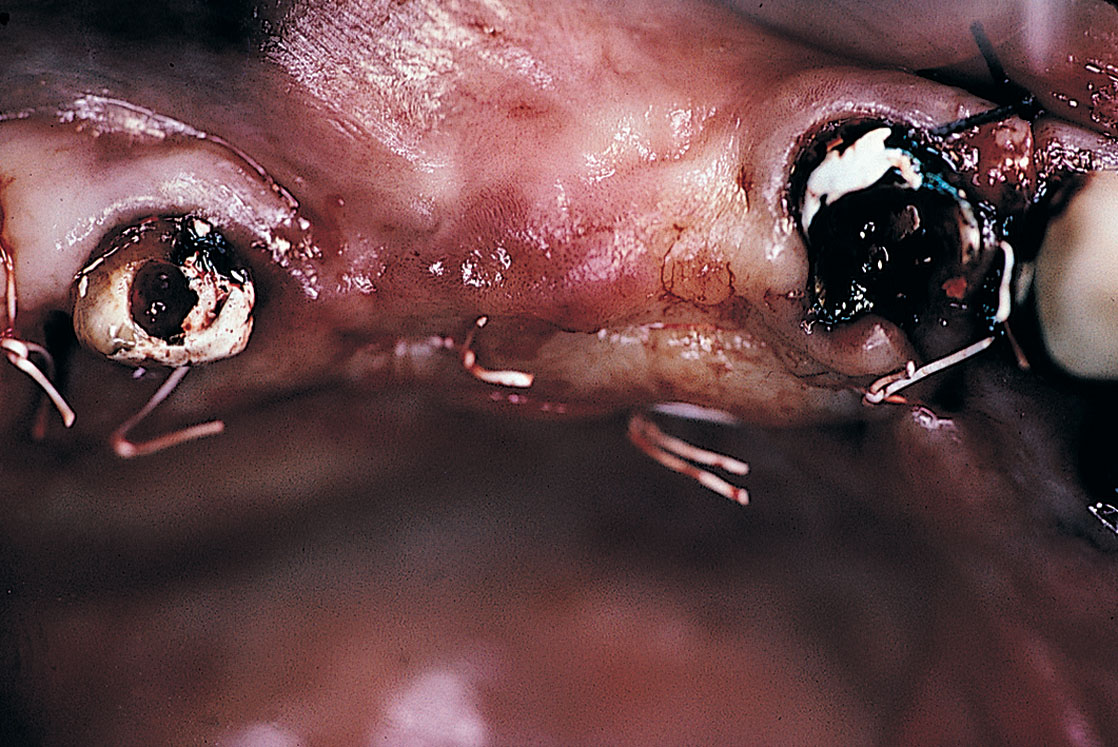
Flaps should be planned carefully, and incisions should be made at least one tooth anterior and one tooth posterior to the anticipated surgical site. Crevicular incisions should be made with a No. 12 blade using the inverted bevel design, so that involved epithelium and granulomas are left in situ, which facilitates excision. The crevicular incisions are connected with those that are vertical and/or oblique. The flaps should be widest at their vestibular bases. Papillae should never be split; rather, they should be included entirely within the flap (Fig. 8-5).
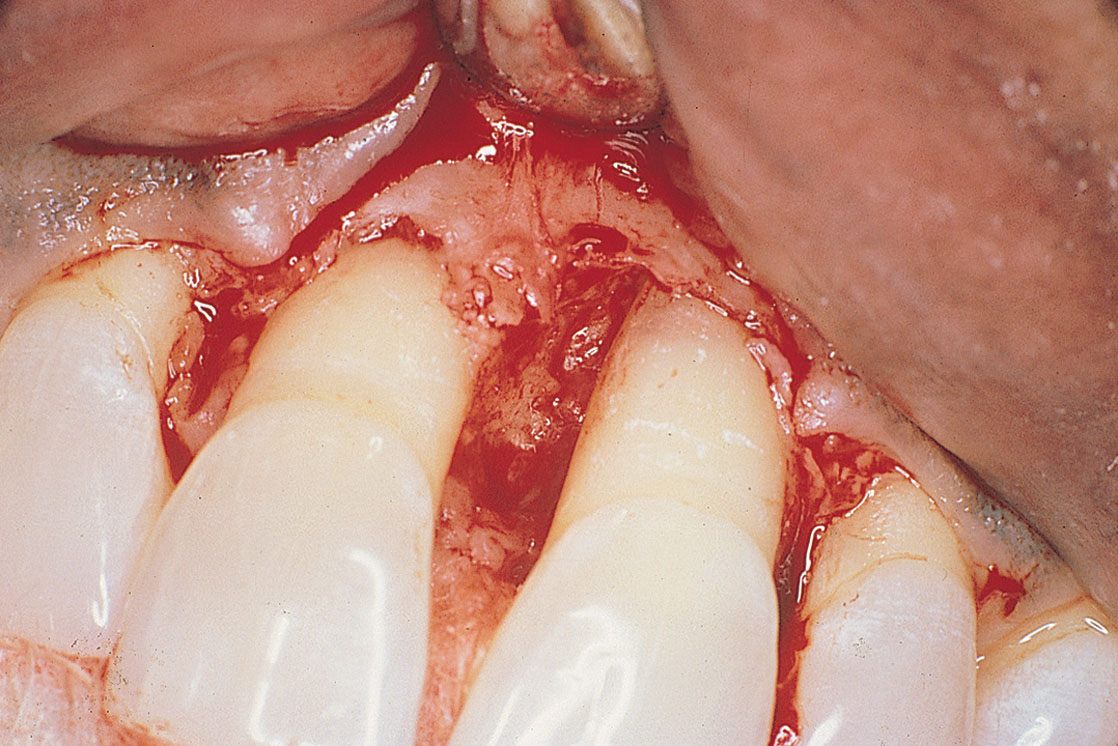
After facial and lingual flaps have been reflected, impeccable care must be taken to curette and plane all exposed root surfaces. The bone should not be blunted, ramped, or altered in any way. The higher the residual walls, the better the prognosis for osseous repair with graft materials. Cortical perforations can be made with a No. ½ round bur for additional sites for retention.
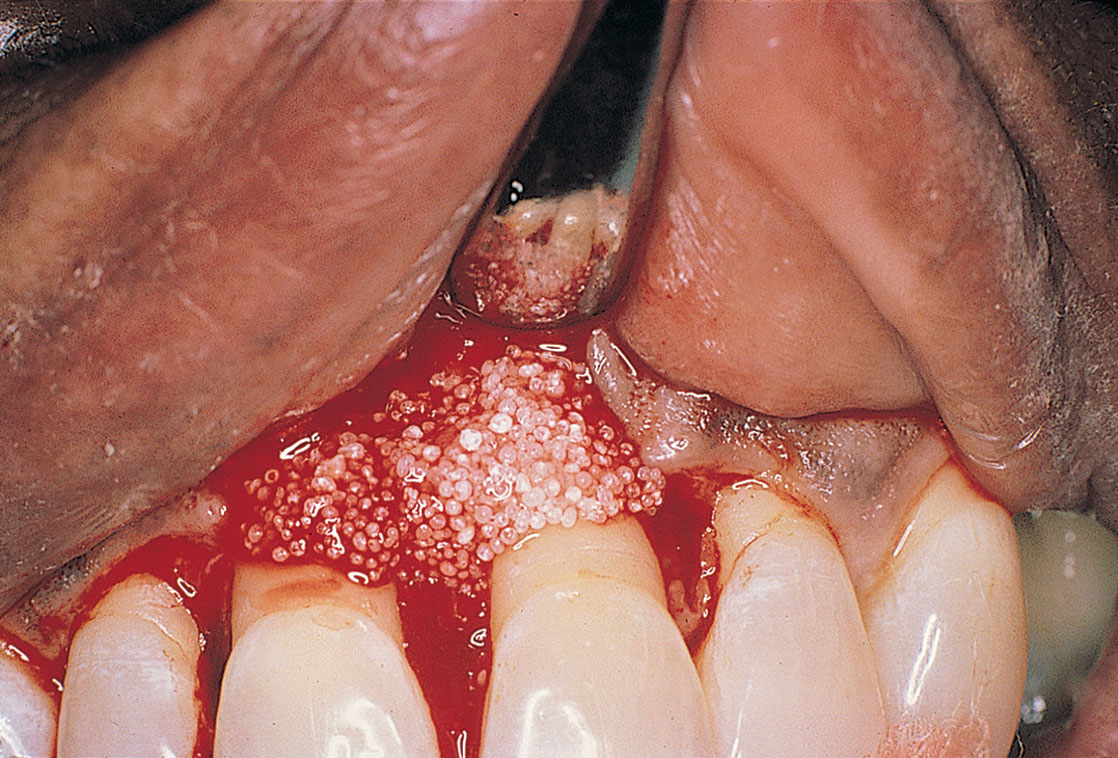
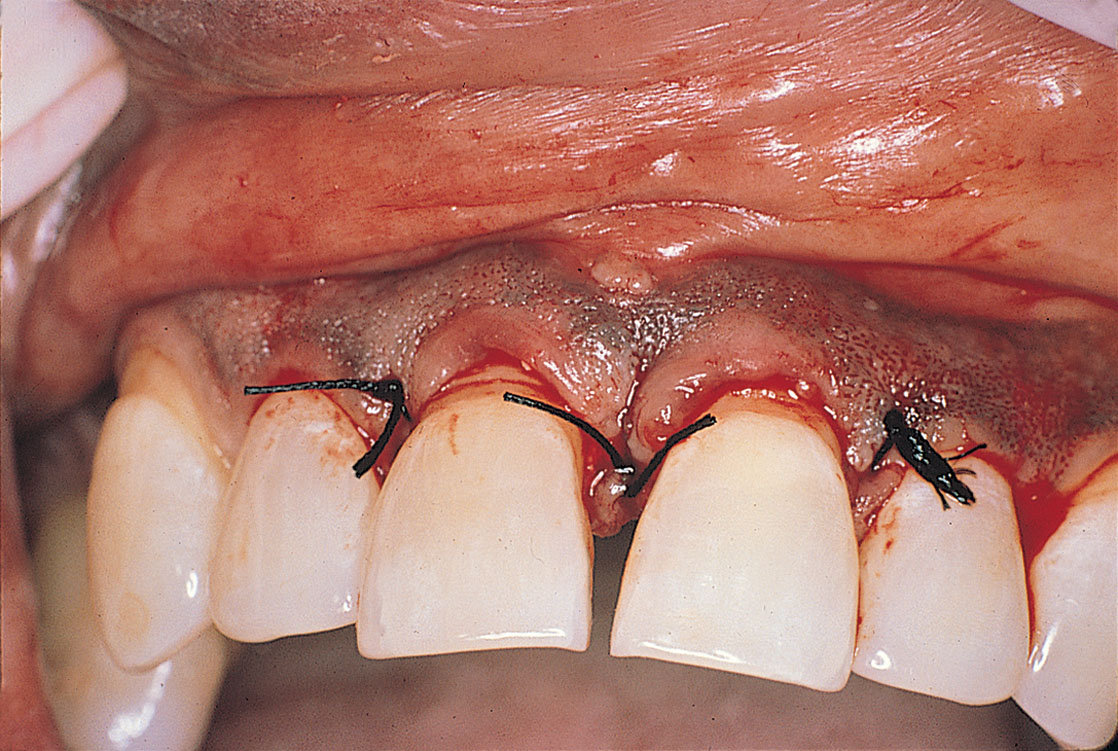
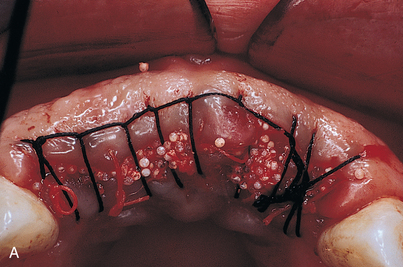
After the graft material has been placed in the furcation or against one of several (at least two) remaining bony walls and tamped with a moistened cotton applicator, firm pressure is applied until fibrin becomes incorporated into and stabilizes the particles (Fig. 8-6). Suturing should follow, using 4-0 violet-dyed polyglactic acid or glycomer on a cutting needle (see Chapter 6). Watertight closures that replace each papilla accurately are mandatory to ensure particle fixation (Figs. 8-7 and 8-8).
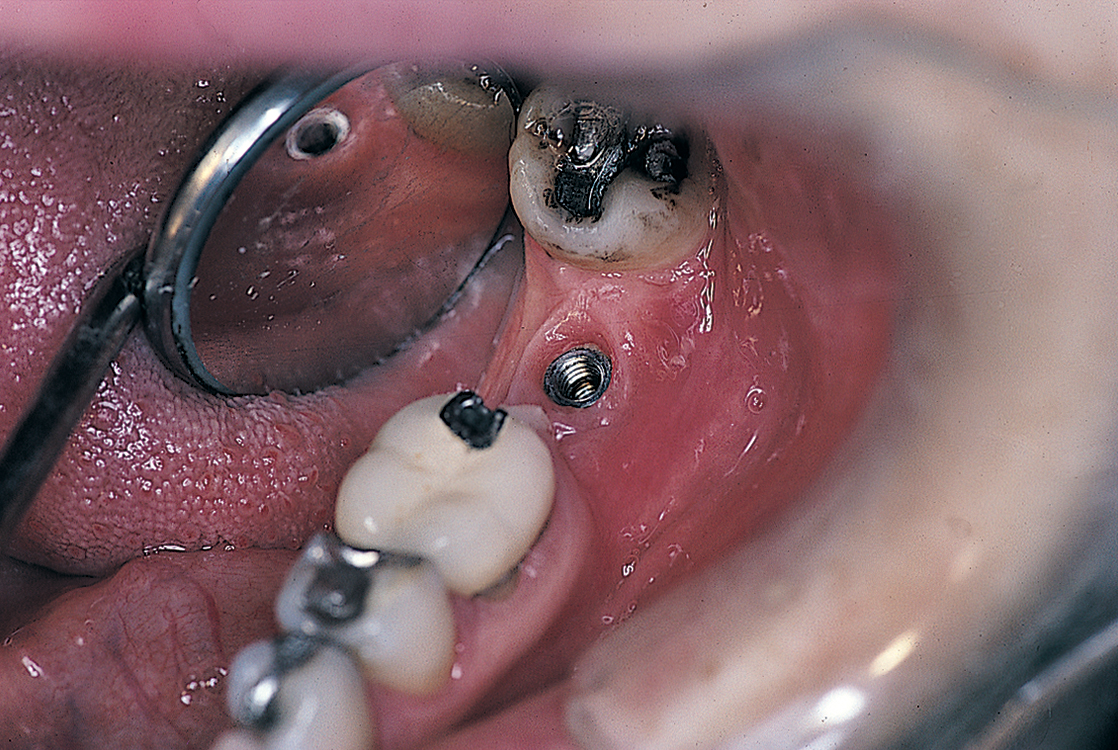
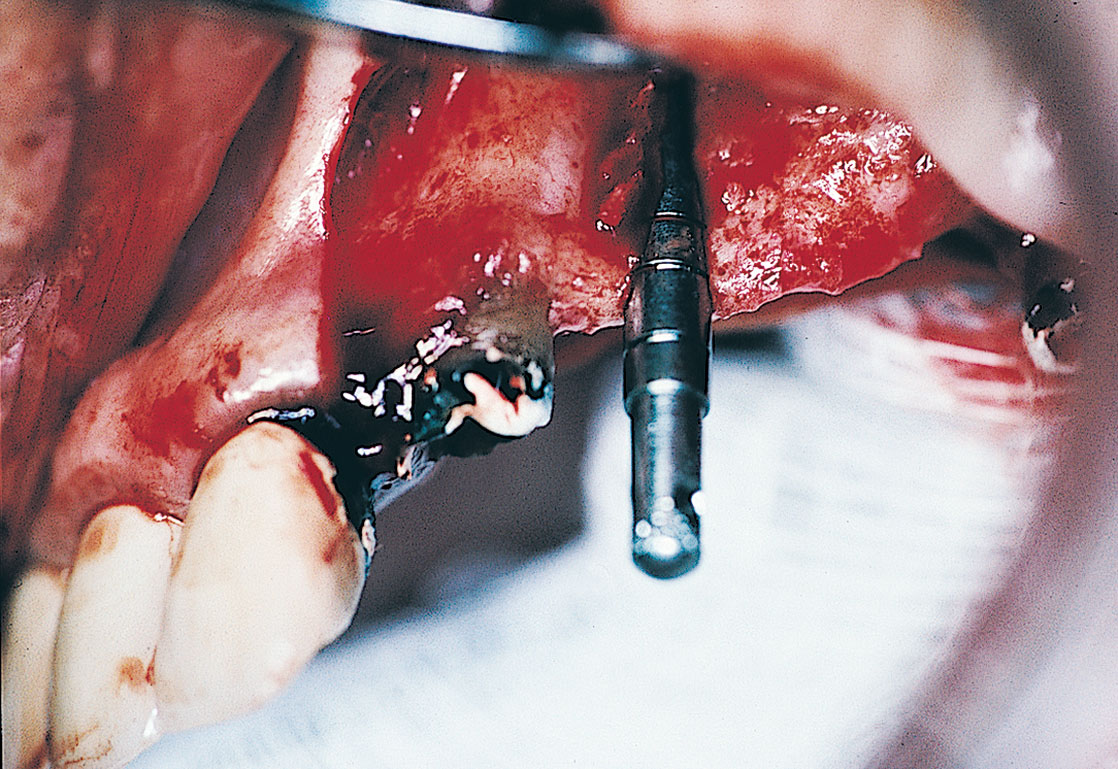
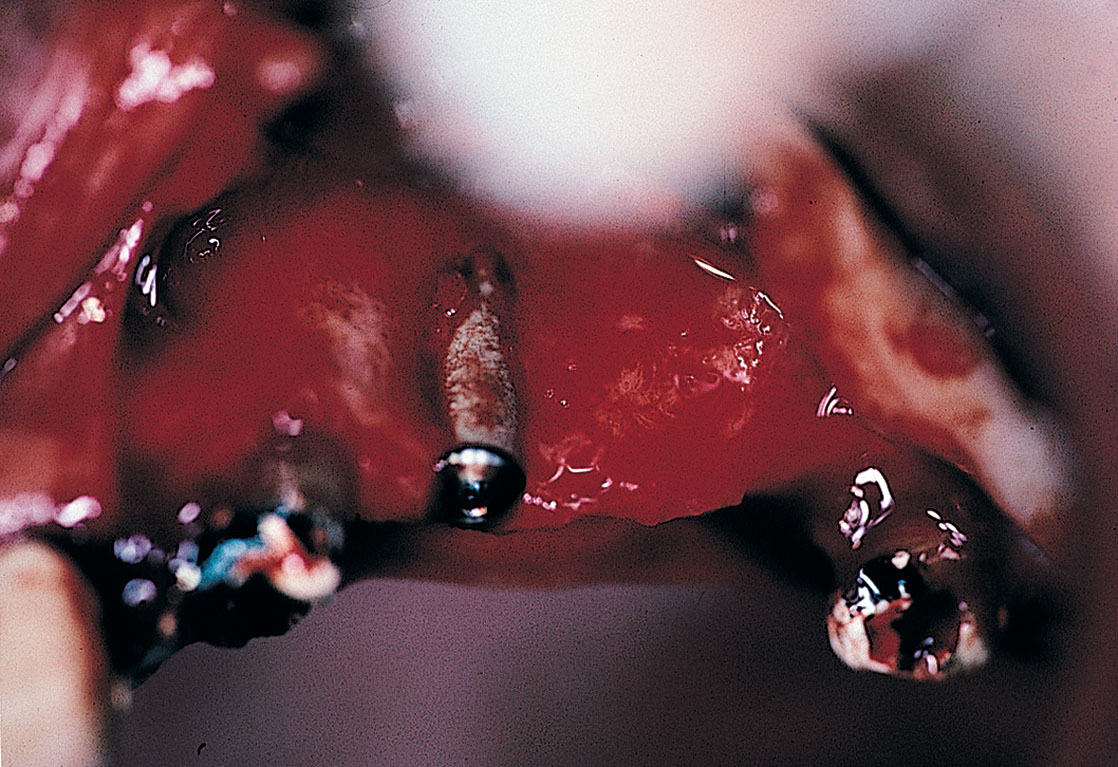
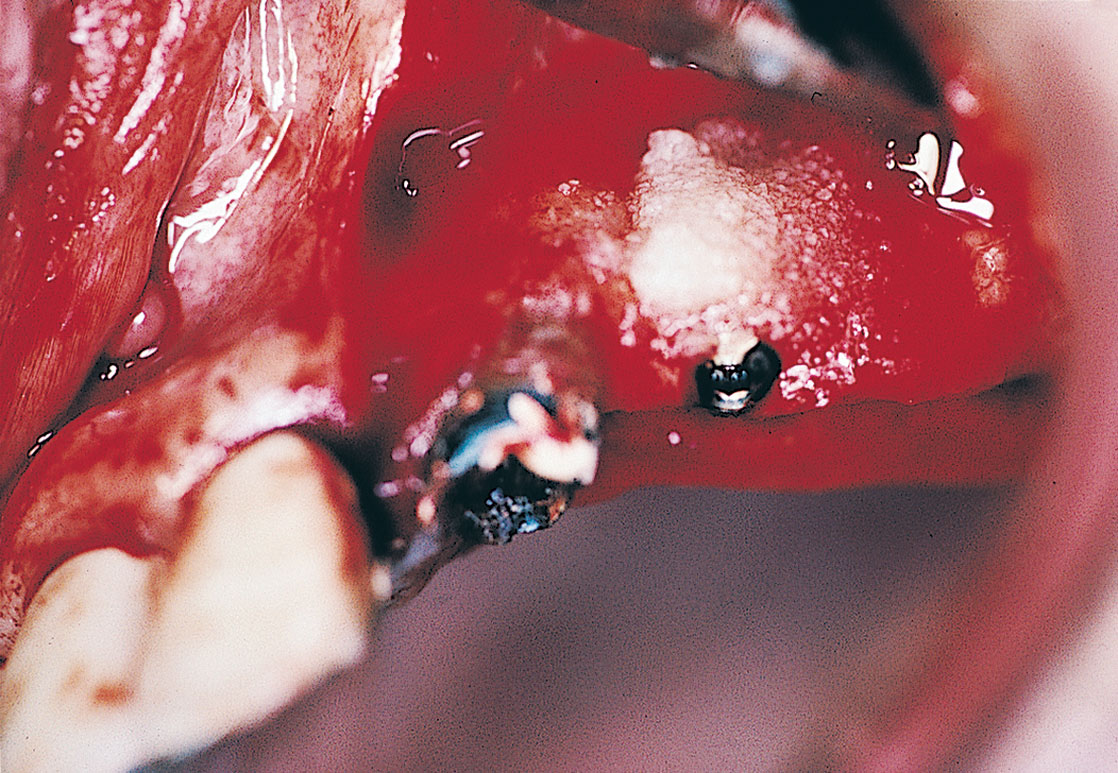
When a bony peri-implant defect is adjacent to an edentulous area, classic wedging is performed. After a full-thickness flap has been reflected, the pocket and opposing implant surface are treated as described in the section on failing implants in Chapter 28. Then, a spatula osteotome, placed at the ridge crest and 3 to 4 mm from the lesion, is tapped gently with a mallet to a depth equal to that of the pocket. The osteotome is directed inferobliquely toward the failing implant. When the osteotome reaches the depth of the defect, it is used as a lever to mobilize the new triangle of bone. The wedge is pushed against the denuded implant surface and maintained in this position by pressing some nonresorbable, 40-mesh HA particles into the donor site that supplied the triangular graft. Simple closure completes the procedure. Pocket measurements should not be attempted for at least 3 months, and even after that, they should be attempted only with great care (Fig. 8-9).
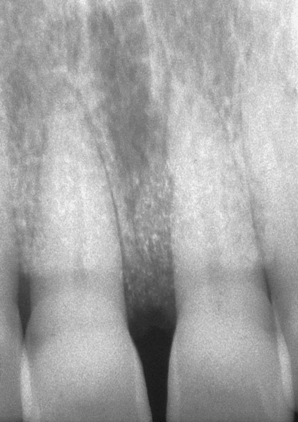
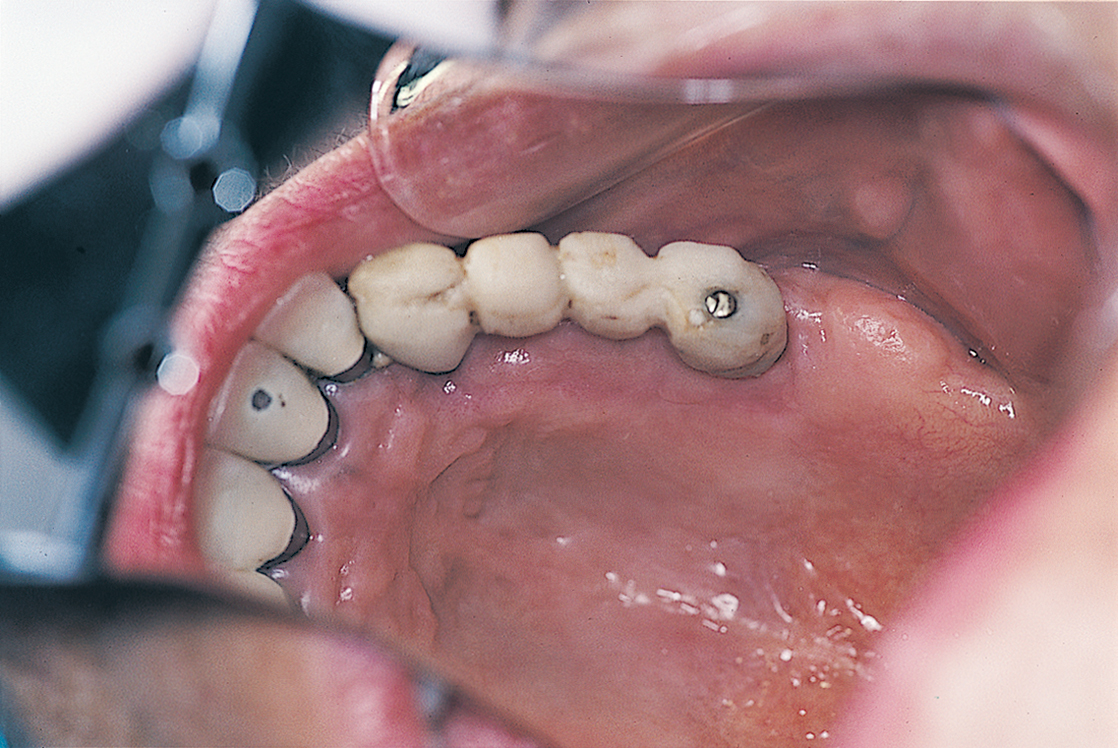
If the patient’s and practitioner’s expectations are realistic, and the home and office care regimens meet the stringent requirements of most periodontal systems, the results can be quite pleasing (Fig. 8-10). If GTRMs are used, the grafting of peri-implant and other defects mentioned in this and other chapters becomes simpler and is more successful (see Table 8-2).
Use of Resorbable and Nonresorbable Guided Tissue Regeneration Membranes
Essentially, membranes are used in the following situations:
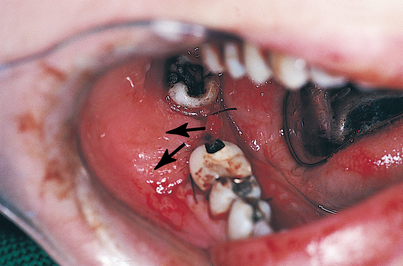
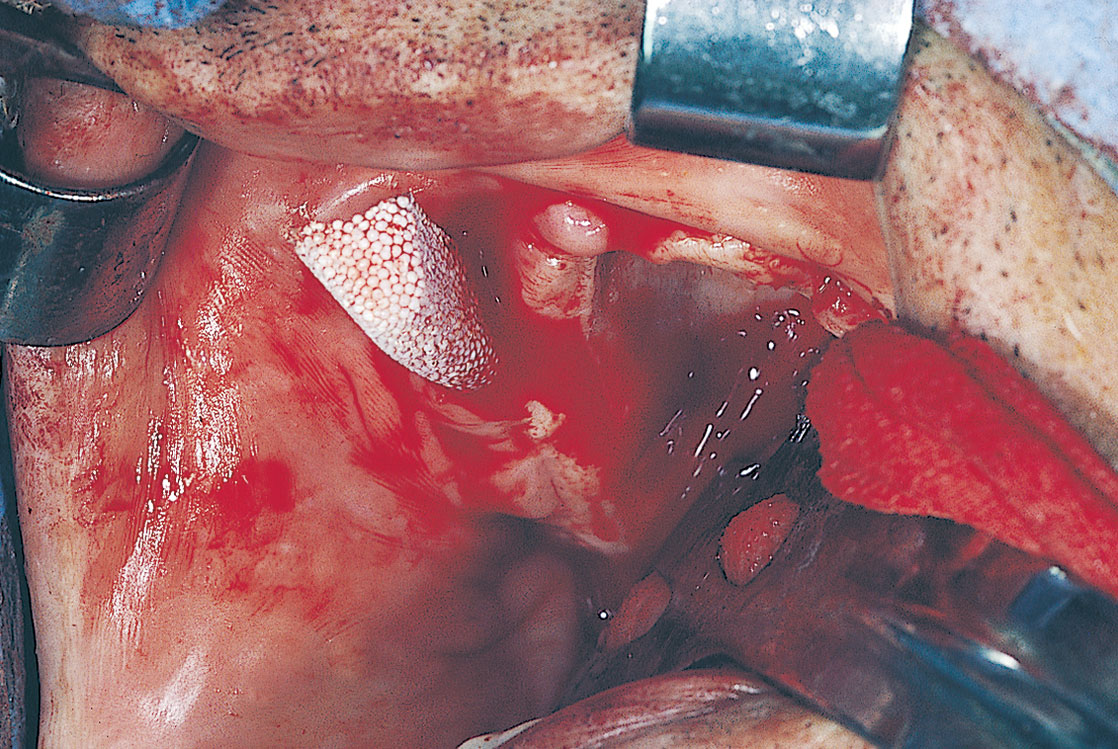
GTRMs may be applied with or without bone-grafting materials for perforations of the cortical plates, saucerization phenomena (Figs. 8-11 through 8-18), thin ridges, exposed implant cervical areas, other intraosseous defects, voids that remain after implants have been placed in immediate extraction sites, and ridge maintenance after extractions with accompanying synthetic grafting materials.
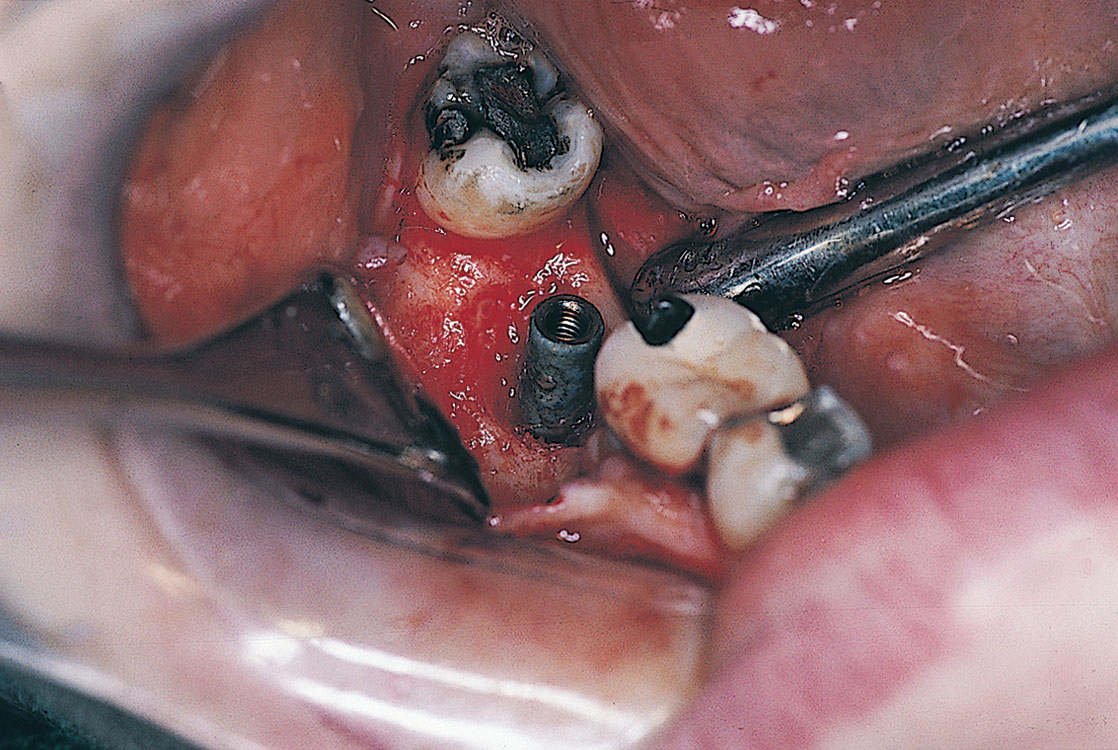
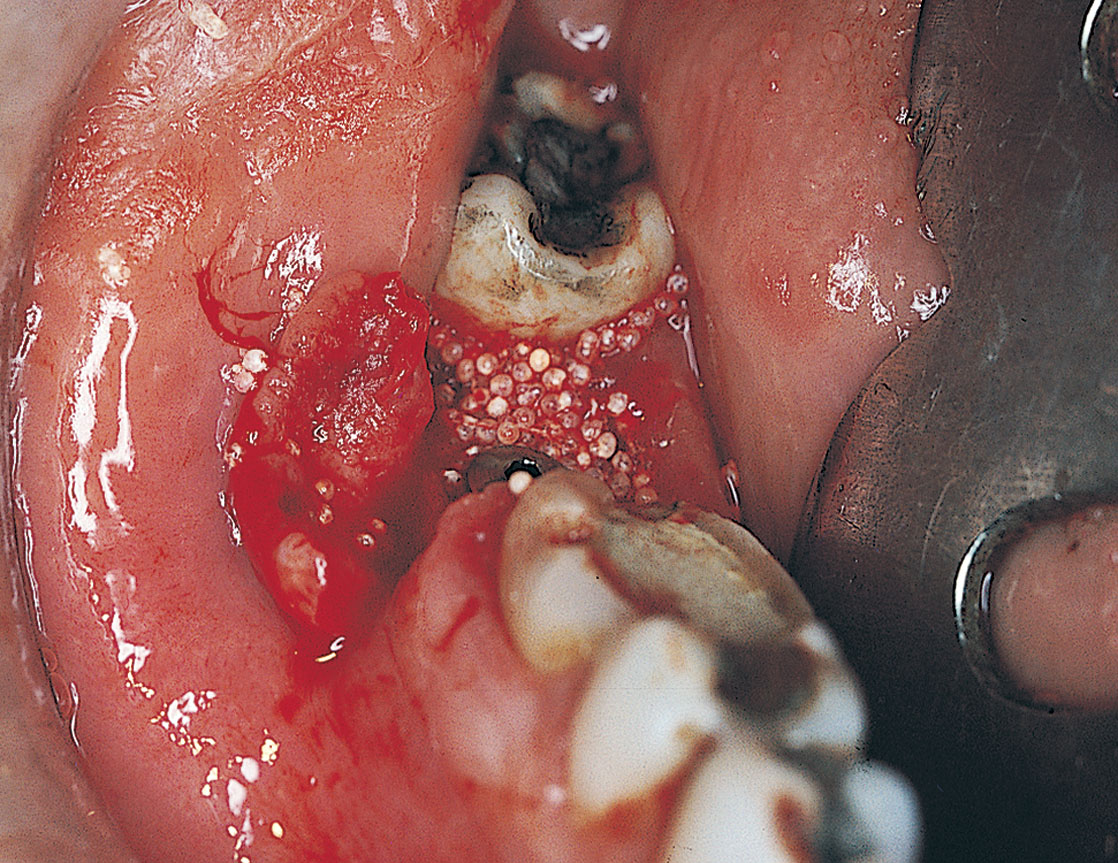
FIGURE 8-12. Before the membrane is placed, the selected bone grafting material is condensed firmly into the defect.
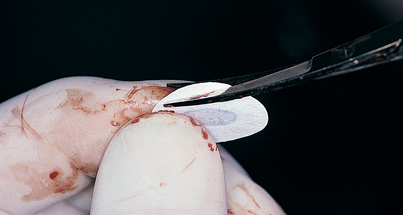
FIGURE 8-13. The membrane is tailored precisely to cover the osseous void fully and overlap the peripheral cortex by 3 mm.

Before using any graft material, the surgeon must eliminate all residual infection, treat the implant appropriately (see Chapter 28), and make sure that adequate tissue is available for primary closure with mattress sutures.
Incisions should be crestal, not S-shaped or visor type, to protect the vascularity of the flaps.
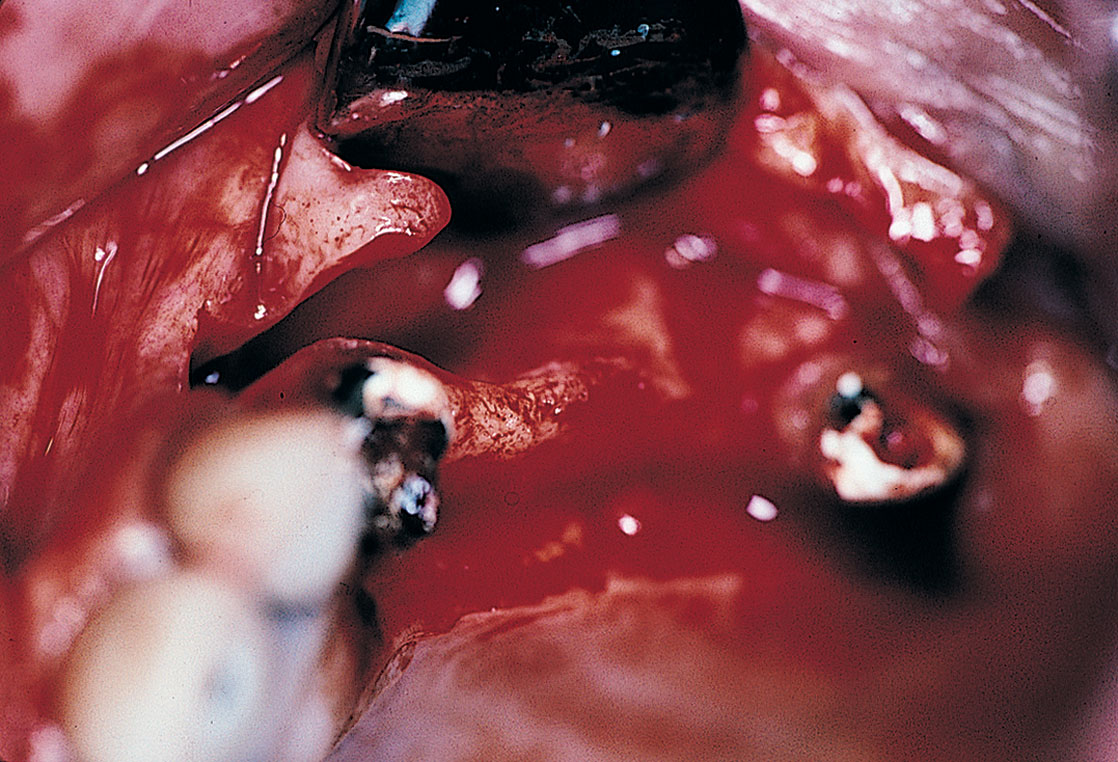
After the site has been exposed adequately (4 to 5 mm of normal bone on all sides of the defect), a membrane of the closest proper size is selected, and sharp scissors are used to trim it to fit competently over the entire area. Sharp corners must be avoided, and a 3-mm overlap must be created to cover adjacent cortex. If a natural tooth exists adjacent to the operative region, its periodontal space is circumvented. The GTRM is tailored with precision. If space beneath the membrane is required, a selected bone-grafting material is chosen and firmly tamped into position, and the membrane is then implanted (Figs. 8-19 through 8-29). If a convex configuration is required, one or several nips and tucks are made to allow an additional dimension to be formed. Fibrin should be allowed to maintain it in its new shape before closure.
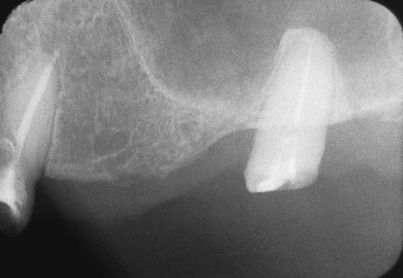
FIGURE 8-19. Preoperative radiographic assessments cannot determine the buccolingual dimension of the alveolar ridge.
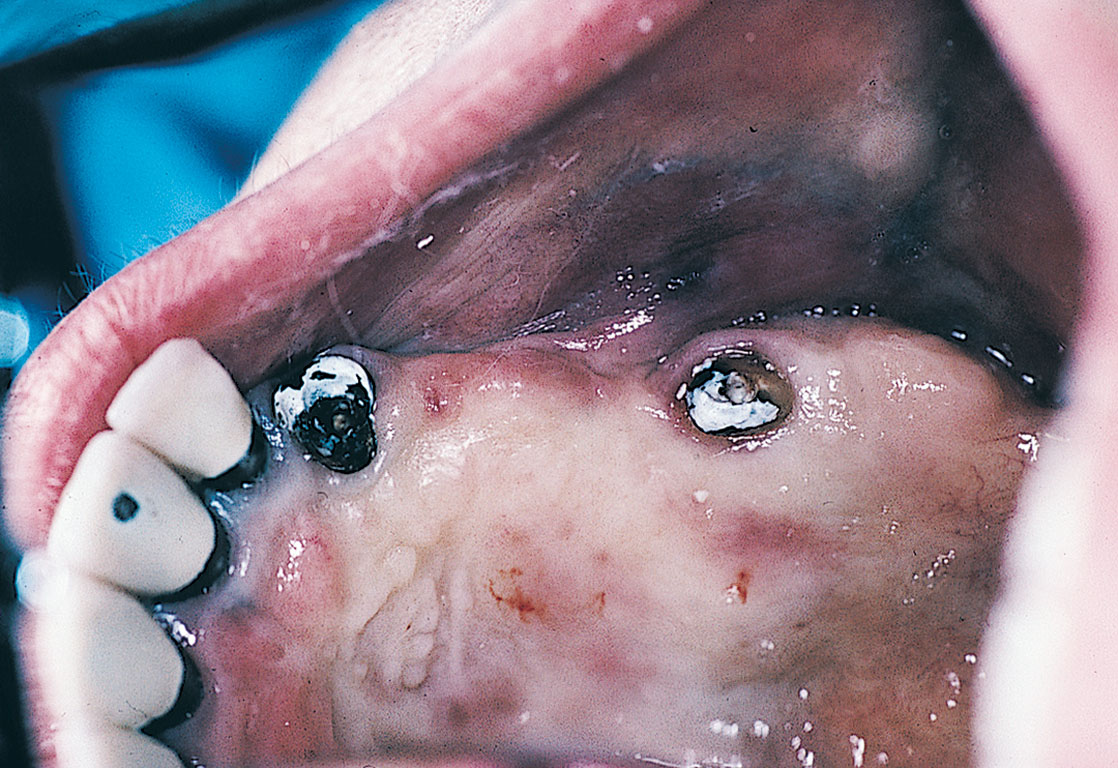
FIGURE 8-20. Clinical visual examination and bone sounding sometimes fail to define the osseous topography of the area.

Fixation of the GTRM before wound closure is essential to the ultimate success of bone-generation procedures. The peripheral margins of the membrane may be wedged gently beneath the periosteum or even sutured with an absorbable material to the periosteum at strategic peripheral locations. Small fixation tacks are available from Steri-Oss, and in most maxillae, they can be forced into the bone with finger pressure. These sharp, titanium tacks are available in a set that includes an instrument that grasps a tack’s head and carries it to the site where the membrane is to be stabilized. The mandible, which has a denser cortex, usually does not yield to the sharp point of the tack unless a preliminary bur hole starts the process (the bur is supplied in the kit), followed by a few light mallet taps applied to the end of the seating instrument (Figs. 8-30 through 8-35). Additional tack and screw systems are supplied by Straumann, 3i, Ace Surgical, and others.
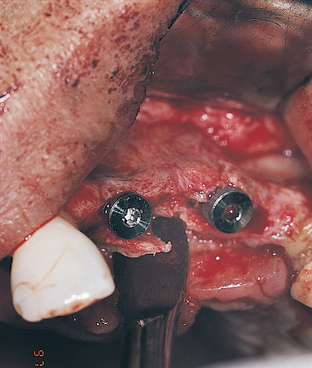
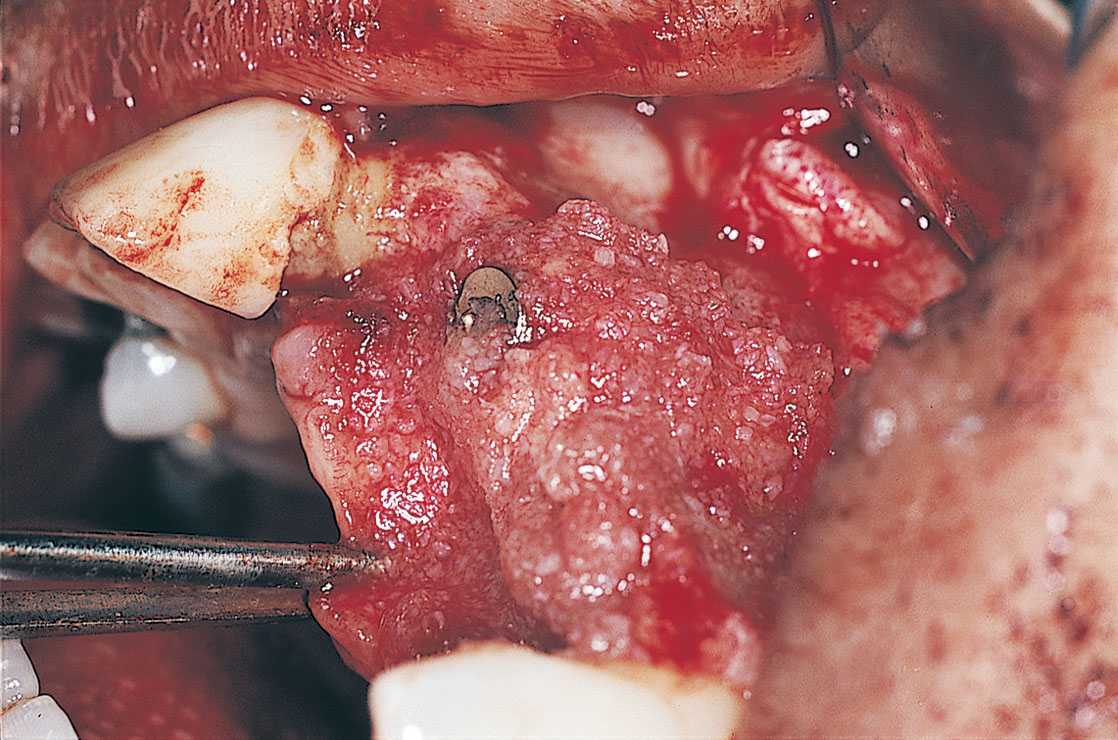
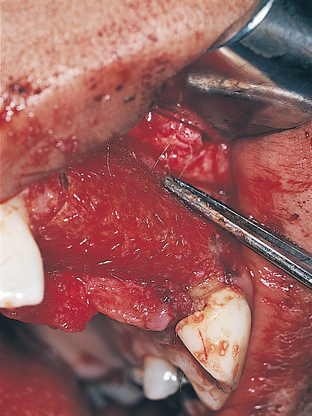
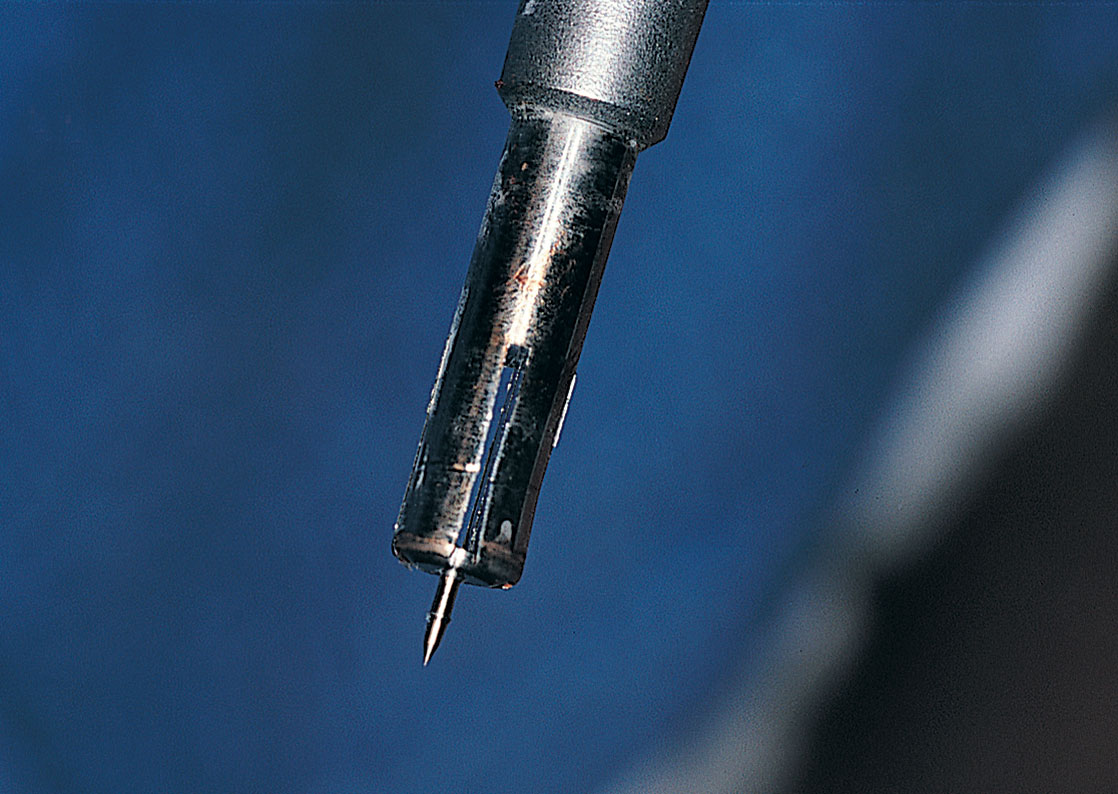
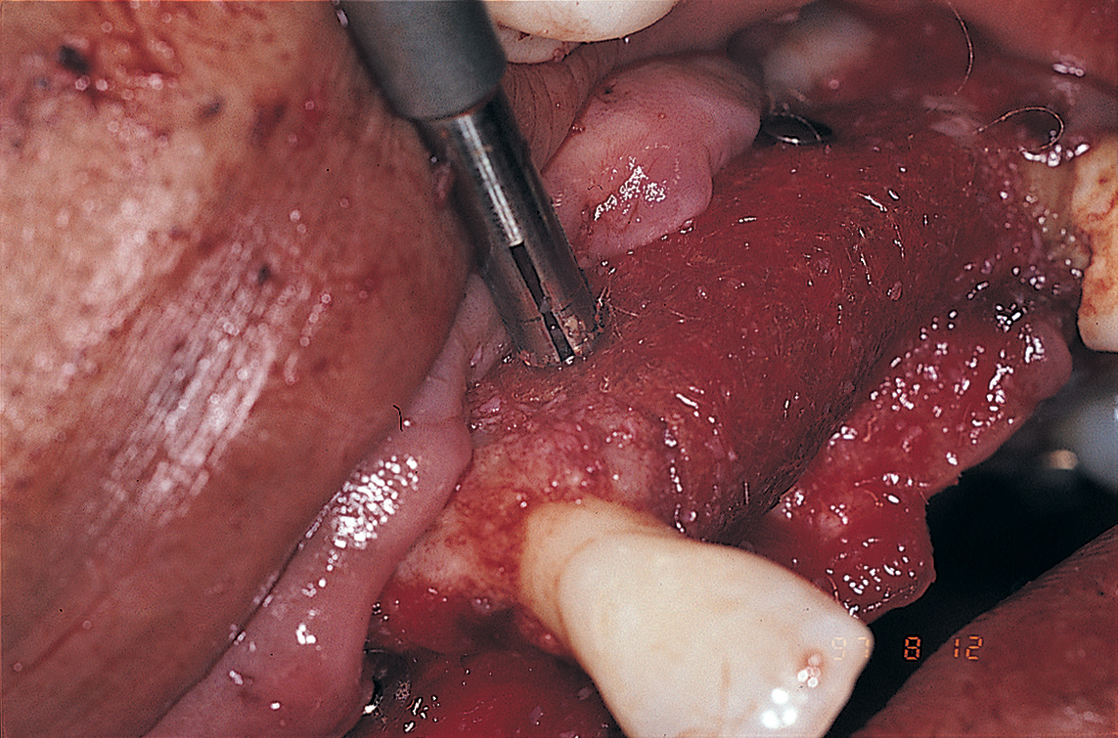
FIGURE 8-34. The delivery instrument applies pressure through the membrane into the underlying bone, forcing the tack into place.
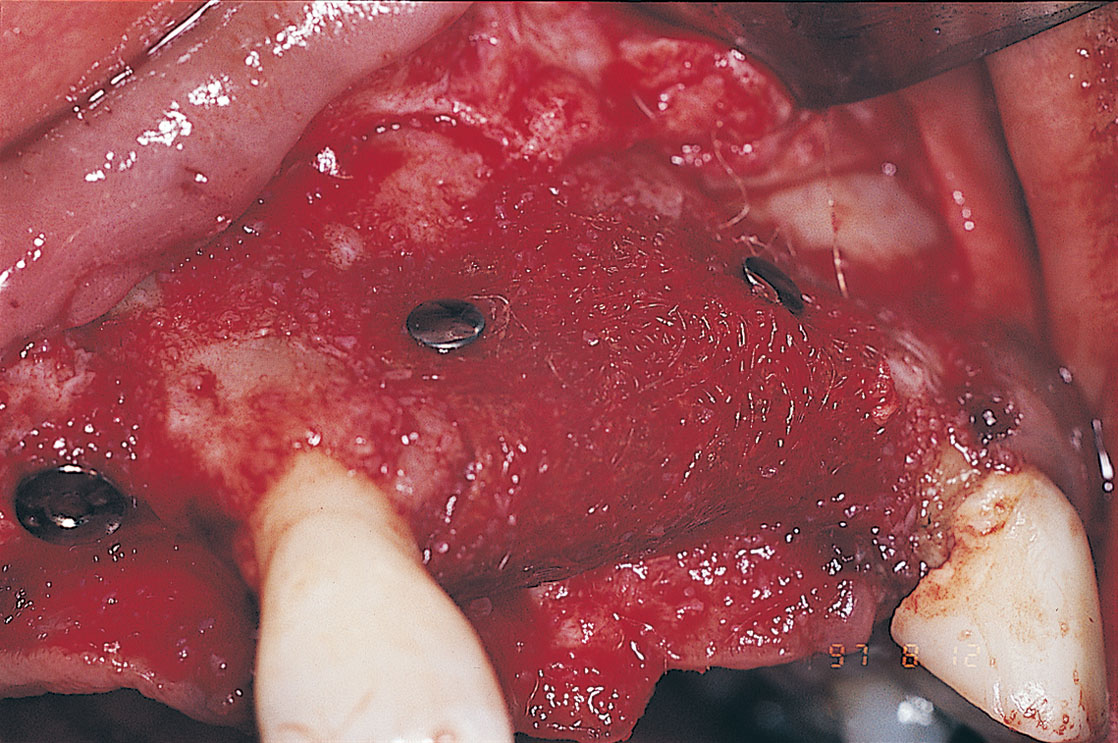
FIGURE 8-35. After the membrane has been fixed with tacks placed in strategic locations, suturing is performed.
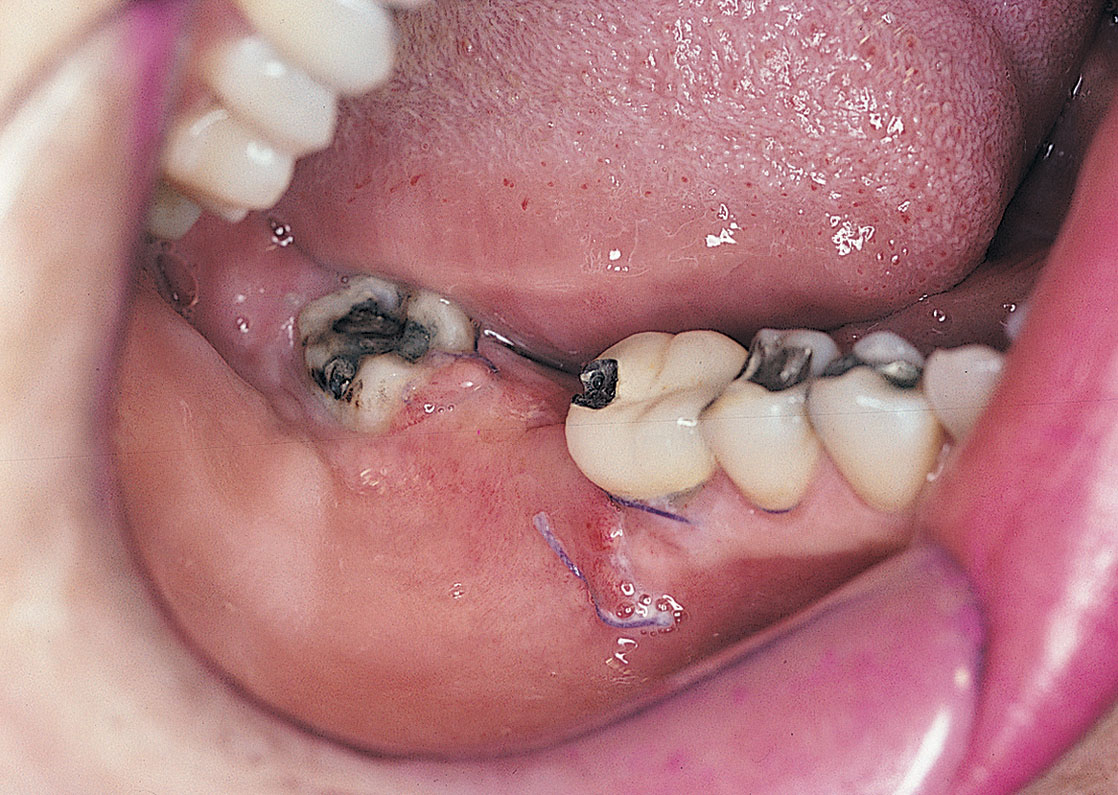
If the repair area is pericervical and the ailing implant has a healing screw, a hole is cut in the membrane with a diameter that is only large enough to allow entry of the threaded portion of the screw. After the graft material has been placed, the GTRM is positioned poncho fashion, and the cover screw is tightened to anchor it firmly (Figs. 8-36 and 8-37).
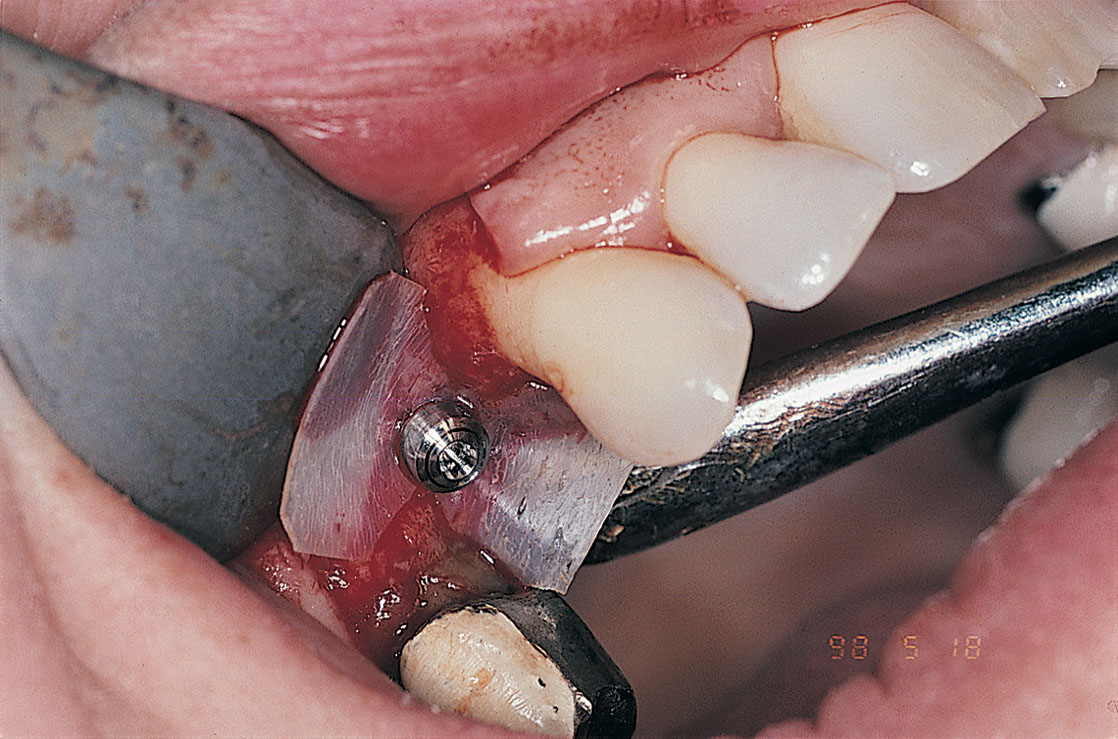
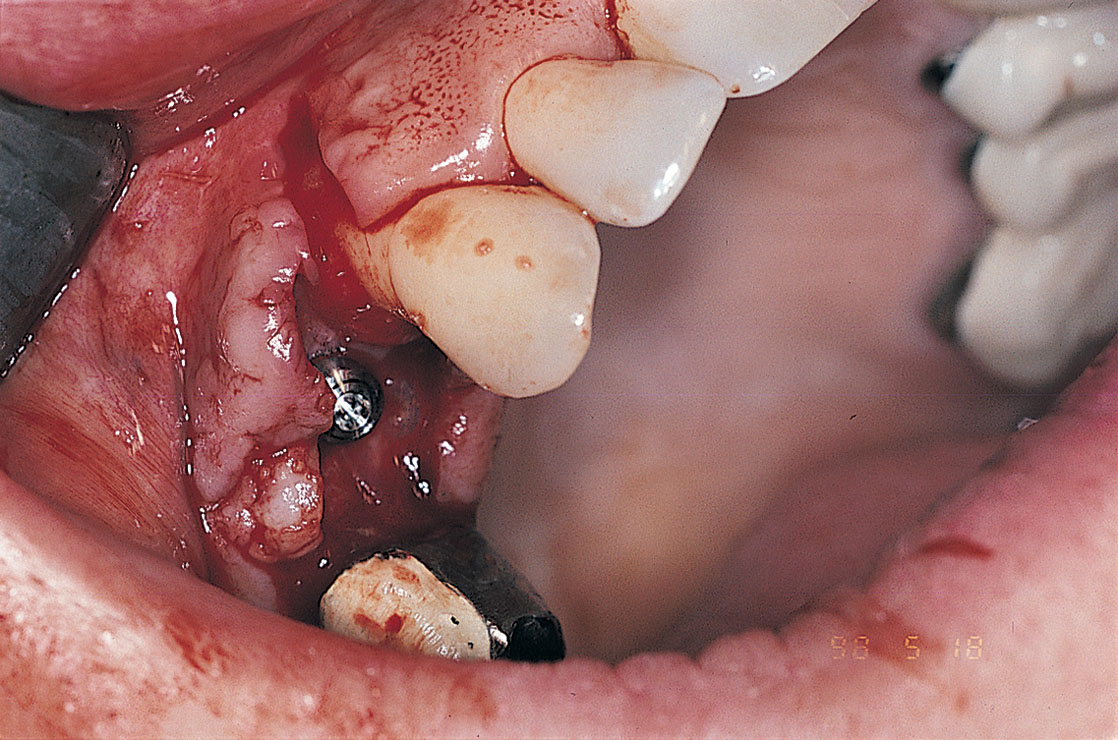
FIGURE 8-37. After the membrane (in this case, laminar bone) has been fastened firmly in place, the wound is sutured.
Closure is done with polyglactic sutures using the horizontal mattress technique. Care must be taken to ensure that the membrane does not become wrinkled, that it is firmly fixed, and that its rounded margins extend well beyond the defect on the cortical bone. The overlying flaps should not be sutured under tension (see chapters 6 and 7), and an absolute primary closure must be achieved (Figs. 8-38 through 8-42).
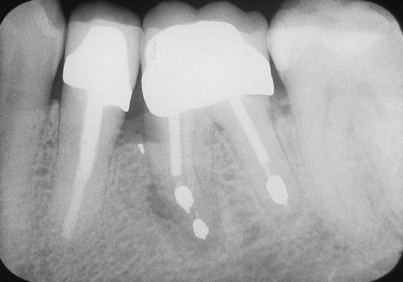
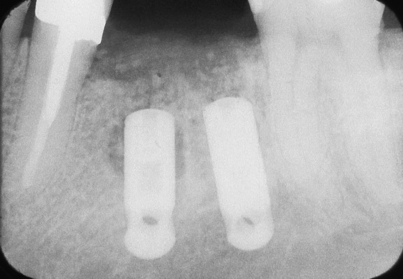
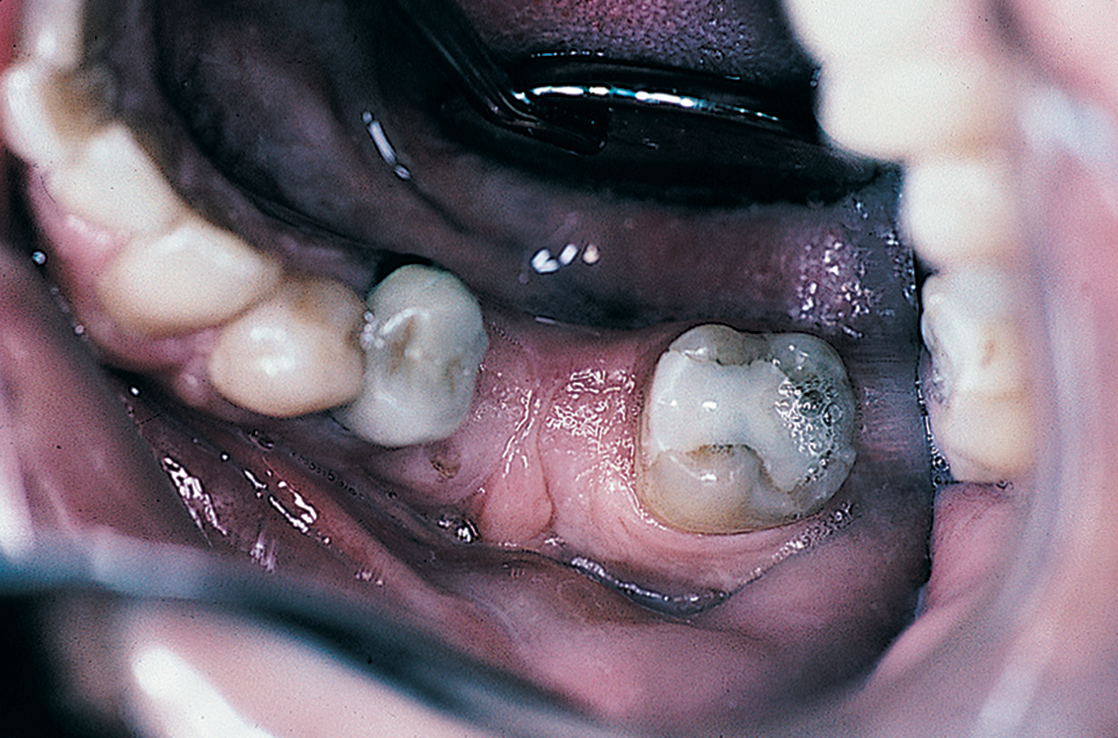
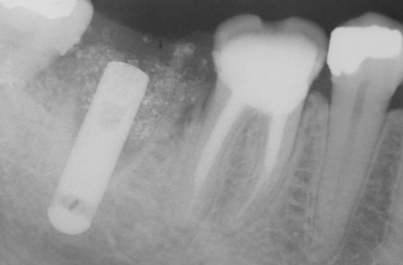
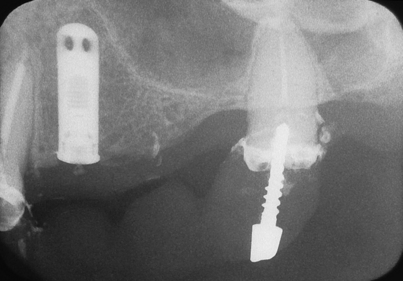
FIGURE 8-41. The grafting results appear satisfactory in a standardized radiograph. It is important to note that two implants should be used to replace molars whenever possible (see Chapter 22).
If the membrane becomes exposed because of a dehiscent suture line, the prognosis becomes less positive; however, the membrane’s continued presence should be encouraged by gentle Peridex irrigation and debridement. The patient should be taught to practice this on a daily basis between professional visits. Bone regeneration may take place successfully despite the wound’s loss of integrity.
Ridge Maintenance
Maintenance procedures may be more immediately and tangibly valuable to a patient in two circumstances: after mandibular third molar extraction and after molar hemisection procedures. In the latter case, endodontic therapy must be performed on the planned residual root before sectioning. In both cases, grafting prevents the potential hazards of significant bone loss to adjacent teeth and spares a predictable array of periodontal complications. In each situation, the technique of placing particulate graft material and membrane at a deficit site is performed by completing the extraction with preservation of as much bone as possible. Sectioning molars makes this goal easier to achieve. The vacated sites are debrided thoroughly, all granulomas and epithelia are removed, and fresh bleeding is encouraged. The 20-mesh graft material (650 to 850 μm in diameter) is introduced by syringe or periosteal elevator and tamped firmly to eliminate spaces. Then, after overlapped bone is covered with a membrane, the procedure is completed with primary closure. If tissue is inadequate, interdigitation of facial and lingual papillae often solves the problem.
IMPORTANT NOTE
Next, the extractions, hemisections, or impaction removals are performed in the usual manner, with care taken to preserve as much of the bony socket as possible (Figs. 8-43 and 8-44).

FIGURE 8-43. Existing bone is preserved through surgical extraction after full-thickness mucoperiosteal flaps have been elevated.
The operative sites are inspected carefully. All forms of follicles, cysts, and granulomas are eliminated by sharp dissection with a No. 12 or No. 15 blade (described in Chapter 6); this is followed by aggressive application of periodontal and surgical curettes.
When clean, bony beds are evident, the flaps’ ability to close primarily over the entire operative site must be confirmed. If the flaps do not come together anatomically, an attempt should be made to slide the facial and lingual flaps one-quarter tooth in opposite directions from one another. This often allows the papillae to interdigitate into a sawtooth relationship. Bone is valuable and should not be removed to allow the flaps to close. The buccolingual plates are necessary for long-term maintenance of ridge width and height. The graft materials alone cannot supply the area with bone, nor will the achieved level result in a dimension greater than the highest level of bone. If all else fails, the surgeon must use the undermining technique to achieve primary closure (see Chapter 7). When primary coverage capabilities have been assured or created, the assistant should retract the flaps to allow irrigation, debridement, and hemostasis.
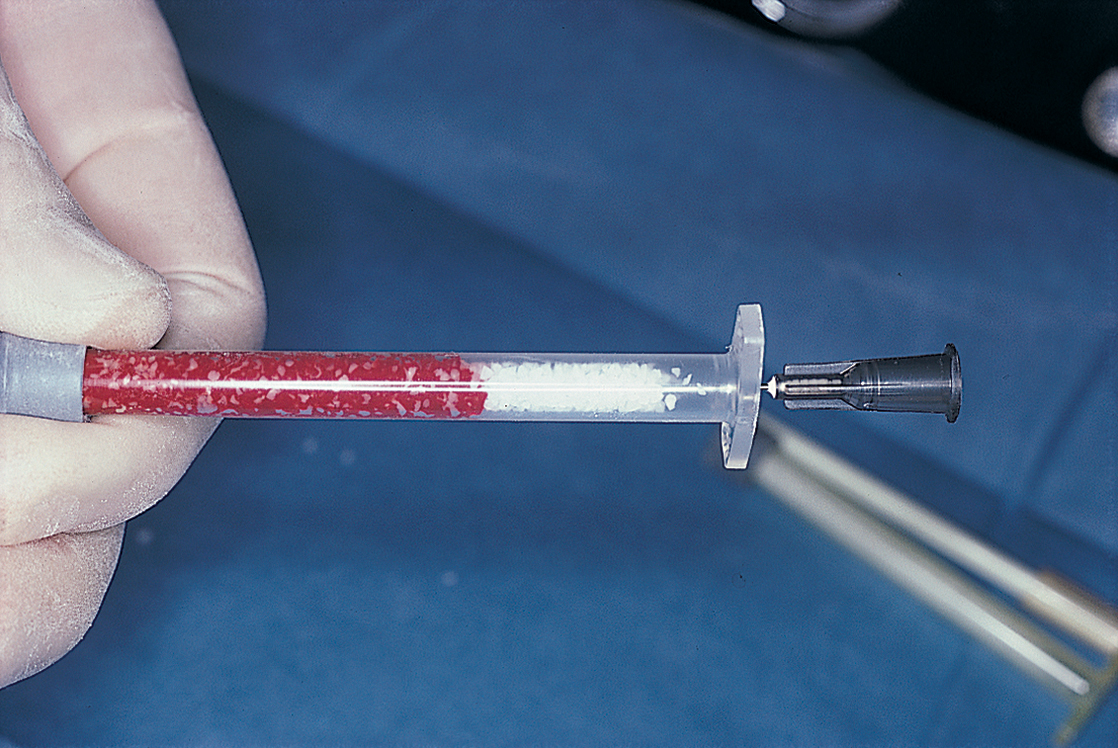
Depending on the size of the defect, a special syringe or amalgam carrier may be used to deliver the graft materials (Fig. 8-45). If the plan is to use a particle-loaded syringe, moisture is added to the material while it is still in the barrel. A nonvasoconstrictive local anesthetic solution, sterile saline, or the patient’s blood can be used for this purpose. Blood derived from bone marrow appears to offer greater possibilities of osteogenesis than peripheral blood. In addition, it is easier and more convenient to aspirate blood with a 3-mL syringe (without a needle) from a bony wound than from a phlebotomy.
A simple method of moistening the graft material is to place the chosen diluent in a sterile dappen dish and add the particles of graft material. Then, an amalgam carrier or the blade of a periosteal elevator is used to carry the mixture to the host site, where it can be tamped firmly into the defect (Fig. 8-46). In an alternative method of wetting the particles, the plunger of the syringe with the graft particles is withdrawn almost to the breach of the barrel; then, while the syringe with the graft particles is held in one hand, the blood or fluid has been withdrawn and stored in a separate syringe, the blood or fluid then is injected with a fine needle that has been inserted directly into the syringe with the particles (Fig. 8-47).
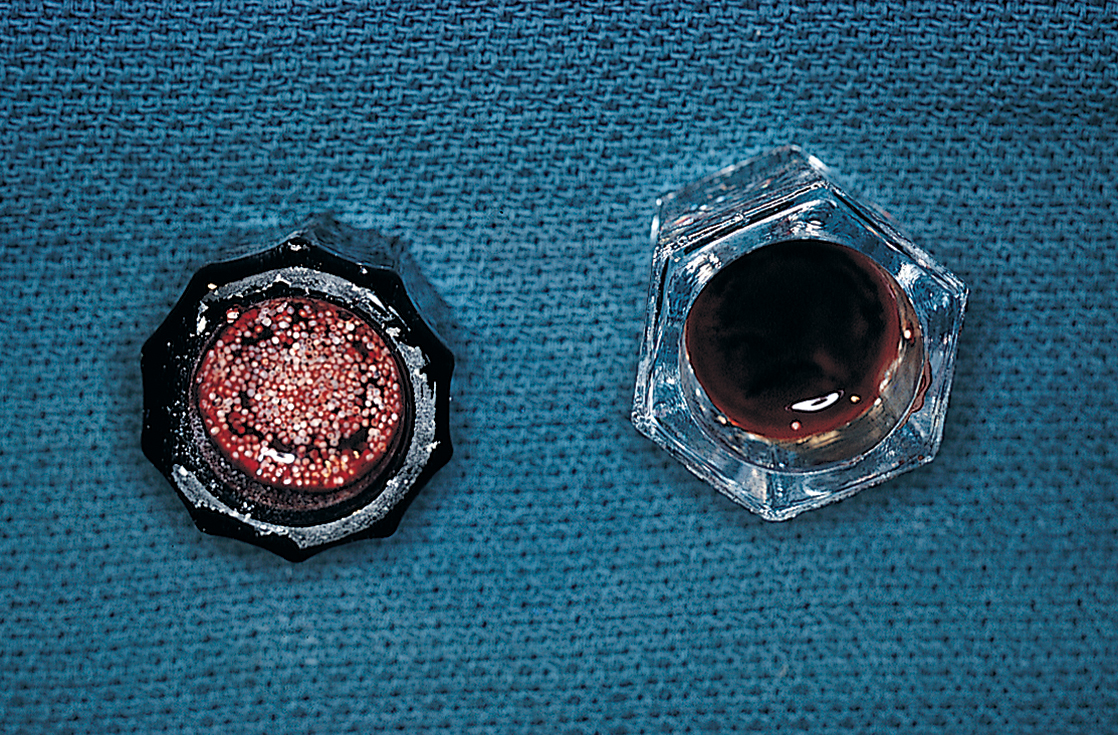
FIGURE 8-46. The patient’s blood is drawn, preferably from an intraosseous site, and mixed with the graft material.
The syringe or carrier remains untouched for 2 to 3 minutes. Then, gently but firmly, a slurry of particles is introduced into each well-controlled, well-visualized defect, to a level just to the highest point of bone. The particles are tamped with a moistened cotton applicator to condense them. The surgeon must confirm that blood has impregnated the entire mass. Closure is best accomplished with a continuous box-lock technique using 4-0 dyed polyglactic suture. Stable hemostasis is confirmed before the patient is dismissed (Fig. 8-48, A and B).

Prosthodontic work should wait until at least 12 weeks have elapsed. If endosteal implants are to be placed in these ridges, 6 months are allowed for osseous maturation (Fig. 8-49). Also, if endosteal implants are planned for the grafted sites, nonresorbable HA cannot be used, because it prevents precise, effective drilling for implant placement. Instead, the surgeon should use a resorbable ceramic (TCP, osteogen), an allograft (DFDB), a xenograft (Bio-Oss), an alloplast (hard tissue replacement [HTR]) or, preferably, autogenous bone from a nearby tuberosity.
Ridge Augmentation
Even if a ridge has not been maintained with grafting materials at the time of extractions and is found to be resorbed, it can be augmented with a natural or synthetic biomaterial. Flat, atrophied, or knife-edged ridges can be treated with a variety of resorbable and nonbiodegradable materials (see Table 8-1). These materials are available in two forms, particulate (syringe loaded) and porous block. They can be inserted either by a “closed” technique (i.e., tunneling) or an “open” technique (incision, flap creation, and flap reflection). Each approach has its advocates, and both forms have their proponents.
Tunneling Technique
The following steps are used if a closed procedure is chosen for the mandible.
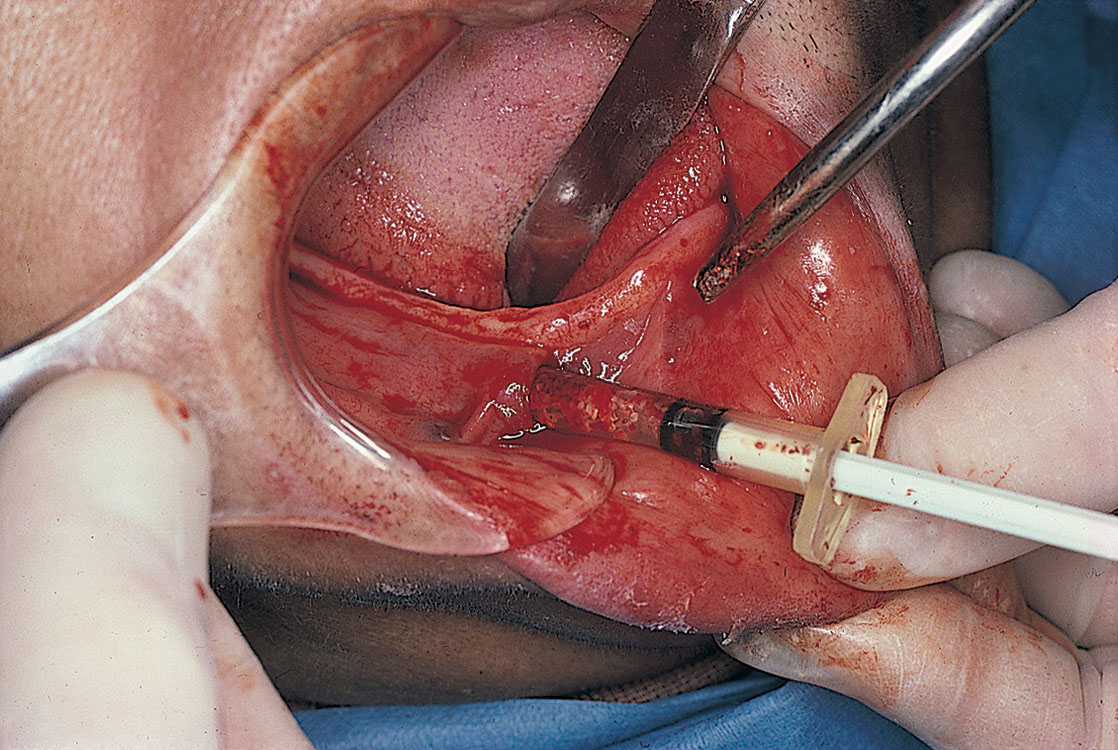
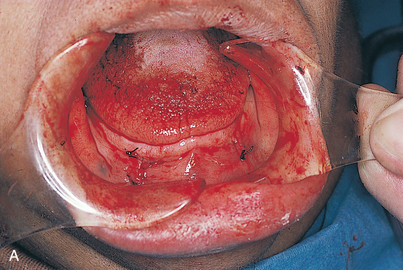
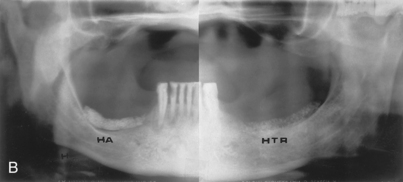
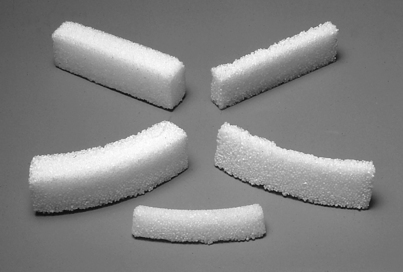
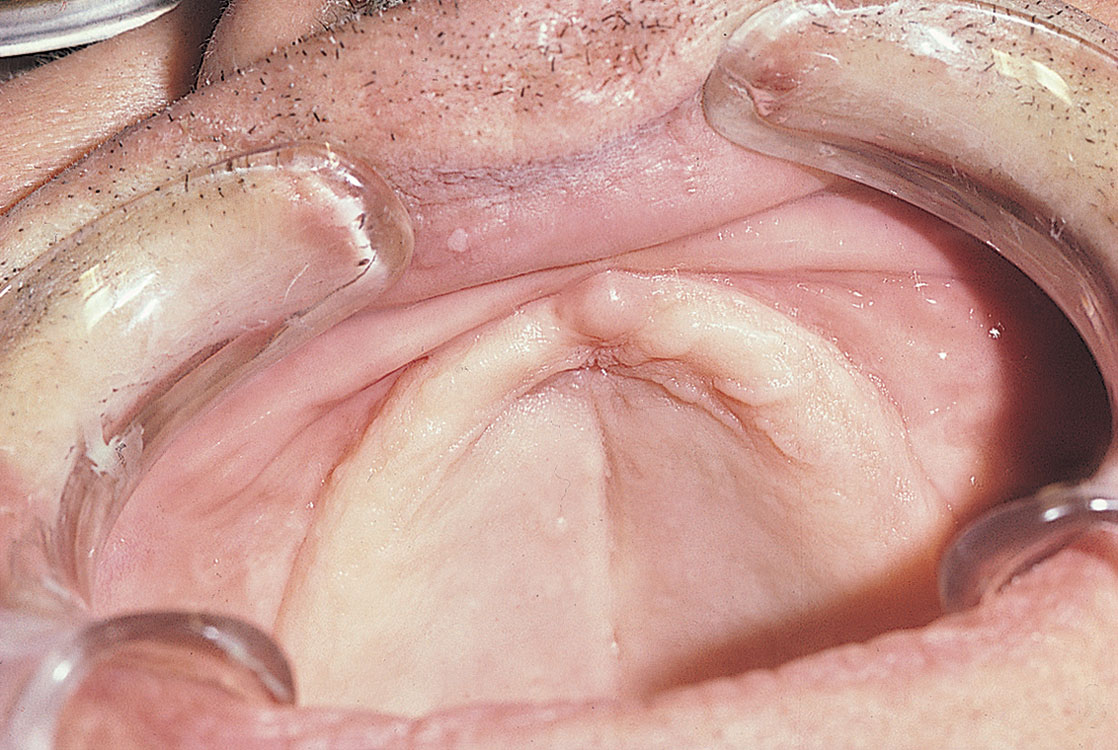
FIGURE 8-56. These maxillae are severely atrophied. The palate is flat, and the tuberosities are nonexistent.

Stay updated, free dental videos. Join our Telegram channel
VIDEdental - Online dental courses


