Delivering Dental Care
Learning Outcomes
On completion of this chapter, the student will be able to achieve the following objectives:
• Pronounce, define, and spell the Key Terms.
• Describe how to prepare the dental treatment area for a patient’s arrival.
• Discuss the importance of preparing a dental treatment room for a procedure.
• Describe how the operator is positioned during treatment.
• Describe how the assistant is positioned during treatment.
• Explain instrument transfer.
• Specify three grasps used by the operator.
• Identify five areas in which the assistant must have competency when practicing expanded functions.
Performance Outcomes
On completion of this chapter, the student will be able to meet competency standards in the following skills:
• Demonstrate admitting and seating of the patient.
• Demonstrate instrument transfer using a selection of instruments.
• Demonstrate the proper use of a dental mirror.
• Demonstrate the correct grasp and use of hand instruments.
• Transfer instruments using the single-handed technique.
Electronic Resources
 Additional information related to content in Chapter 33 can be found on the companion Evolve Web site.
• Labeling Exercises: Identify the Zones of the Clock Concept
• Procedure Sequencing Exercises
• Tray Setup Drag-and-Drop Exercises
• WebLinks
 and the Multimedia Procedures DVD
Key Terms
Delegate To authorize or entrust another person to perform a specific skill or procedure.
Direct supervision Level of supervision in which the dentist is physically present when the auxiliary performs delegated functions.
Expanded function Specific intraoral function delegated to an auxiliary that requires advanced skill and training.
Four-handed dentistry Process by which the operator and the assistant work together to perform clinical procedures in an ergonomically structured environment.
Fulcrum (FUL-krum) Finger rest used when one holds an instrument or handpiece for a specified time.
Grasp The correct way for an instrument or handpiece to be held.
Indirect supervision Overseeing an assistant’s work by working in the immediate area.
Indirect vision Viewing an object with the use of a mirror.
Operating zones Concept by which the face of a clock is used to position the dental team, equipment, and supplies.
Making sure the manner in which dental care is provided is one of the most important responsibilities of the dental team. For a typical day to run smoothly and for the best patient care to be provided, the business assistant, clinical assistant, dental hygienist, and dentist must follow a specific routine.
With advance preparation in reviewing the patient record, with knowledge of the upcoming procedure, and by being ready with the needed supplies and equipment, the dental healthcare professional can prevent the daily routine of clinical care from being hectic and can ensure that the flow of patient care is maintained throughout the day. Failure to meet these standards can result in loss of production for the dentist, inconvenience or discomfort for the patient, and unnecessary stress for everyone.
Knowing Your Patients
Once a patient enters the reception area, it is essential that his or her presence be acknowledged immediately. One of the best ways to know your patients and to be better prepared for the day ahead is to have a brief meeting or review of the day before your patients arrive. Topics that should be discussed among the dental team during this meeting include:
Reviewing the Patient Record
Several sections of a patient record are reviewed at each patient visit. The business staff will discuss any changes in the patient’s personal information, such as address or phone number change, and make corrections as needed. The clinical staff will discuss any medical alerts or changes in medical status and update the health history form. The clinical assistant refers to progress notes for the planned treatment of the day.
Preparing the Treatment Area
A treatment room preparation checklist should be completed before the patient is seated:
• Is the treatment room clean, disinfected, and ready for the next patient?
• Are the patient’s record, radiographs, and laboratory case in place?
• Are the appropriate sterile preset tray and other supplies in place and ready for use?
• Is the dental chair positioned to allow seating of the patient?
Greeting and Seating the Patient
As the clinical assistant, you will enter the reception area to greet and escort your patient to the designated clinical area. Address the patient using his or her title (Mr., Mrs., or Ms.) and last name. Remember that patients must be greeted in a courteous way. When you call to your patients, make sure to establish eye contact, smile, and introduce yourself. Procedure 33-1 reviews admitting and seating of the patient.
PROCEDURE 33-1
Admitting and Seating of the Patient
Procedural Steps
2 Place the patient’s personal items, such as a jacket or a handbag, in a safe place away from the procedure.
Note: Always keep personal items in patient’s view for safe keeping.
3 Initiate conversation with the patient.
Purpose: Chatting about things other than the treatment may help the patient feel more comfortable and relaxed.
4 Ask if the patient has any questions that you can answer about treatment for the day. If you do not know the answer, say so and offer to discuss this with the dentist.
Purpose: Patients frequently ask the assistant questions about treatment that they are reluctant to ask the dentist. Your willingness to answer these questions helps to reassure the patient.
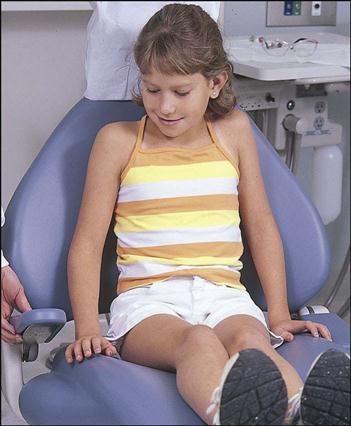
5 Ask the patient to sit on the side of the dental chair and then to swing his or her legs onto the base of the chair.
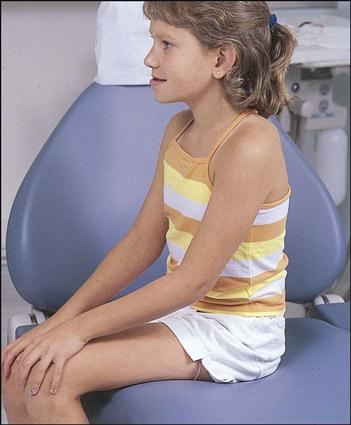
6 Lower or slide the chair arm into position.
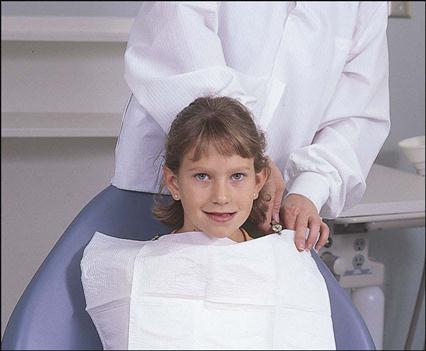
7 Place the disposable patient napkin over the patient’s chest, and clasp the corners using a napkin chain.
8 Inform the patient before you adjust the chair. Make adjustments slowly until the patient and the chair are in proper position for the planned procedure.
Note: Remember that the most common position for dental procedures is the supine position.
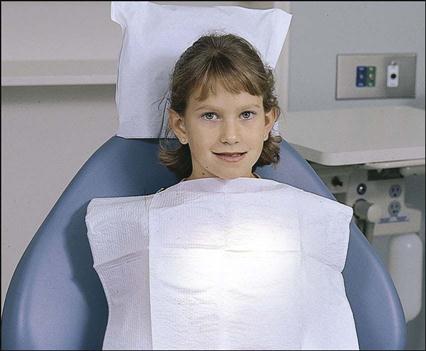
9 Position the operating light over the patient’s chest, and turn it on.
10 Review once again that all treatment room preparations are organized and set out.
11 Wash hands, and put on personal protective equipment.
12 You are now ready to position yourself and begin the procedure.
Team Dentistry
Team dentistry, also referred to as four-handed dentistry, is a concept that describes the way the dentist and the dental assistant work together to perform clinical procedures in an ergonomically structured environment. The main goal of this concept is to deliver the best and most effective care to patients by increasing productivity and reducing fatigue and stress during the completion of dental procedures.
Team dentistry is a standard of performance that has been taught to dental students and dental-assisting students over the past 40 years. Basic goals of this type of coordination include the following:
• To use ergonomically correct dental equipment
• To use preset trays during dental procedures
• To minimize stress and fatigue during performance of dental procedures by ensuring specific, ergonomically correct positioning of the patient, dentist, and assistant (see Chapter 25)
• To follow the principles of motion economy during the transfer of instruments and dental materials
• To delegate expanded functions of practice as legally defined within the state

Principles of Team Positioning
Correct positioning of the dental team within the clinical area is essential. The dentist and the dental assistant should develop positioning habits that allow access to and visualization of all areas of the oral cavity, while maintaining a position that provides optimal comfort and support (Fig. 33-1).

Whenever the dentist and the assistant must stretch to reach for an instrument or gain access to an area of the mouth, stress is placed on the body. If this occurs daily, the accumulated strain contributes to lower back pain, circulatory problems, and muscle aches and pain. (Refer to Chapter 25 for more information on ergonomics.)
Positioning the Patient
Once the patient has been escorted to the treatment area and seated, he or she is then lowered to the supine position. The patient is asked to slide up in the chair until the top of the head is even with the top of the headrest. The operator then asks the patient to turn his or her head to the right or the left to allow easier access to a specific area of the mouth.
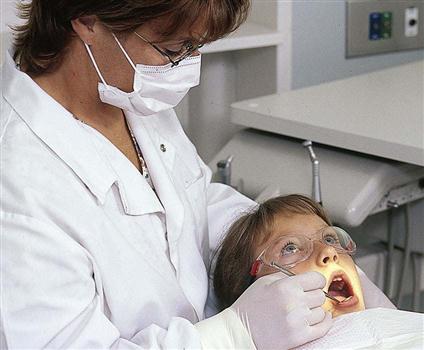
The operator makes final adjustments to the chair to establish proper working distance. The distance between the patient’s face and the operator’s face should be approximately 12 to 14 inches (Fig. 33-2). When working in the mandibular area, the back of the chair is raised to a slightly more upright position for better visualization.
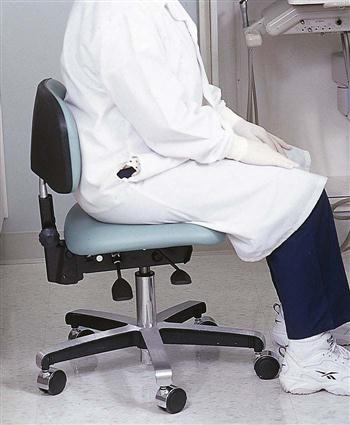
Positioning the Operator
Access and visualization are the most essential qualities for the operator. Chapter 32 describes the unique features of the operator’s stool. The positioning of the operator on the stool is important for ensuring comfort and support (Fig. 33-3).
Stay updated, free dental videos. Join our Telegram channel
VIDEdental - Online dental courses


