Processing of Radiographic Films


Manual Processing of Films
Darkroom
Ideal requirements
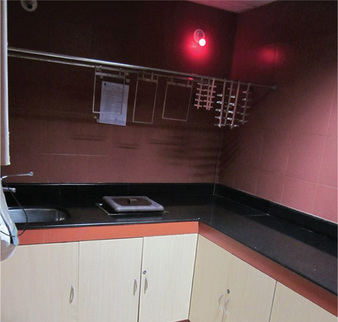
1. Darkroom should be spacious enough to permit at least one person to work comfortably and should measure at least 4 X 5 feet in dimension (Figure 1).
2. An ideal darkroom should have a doorless maze pattern (Figure 2A) or a conch shell design (Figure 2B) to prevent entry of light into working area.
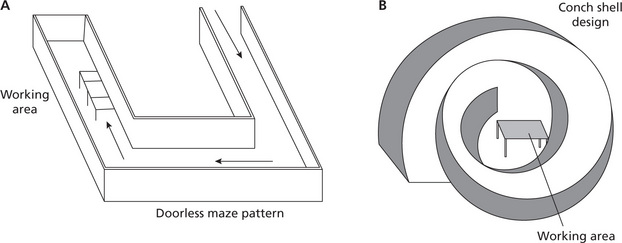
Figure 2 (A) Illustration showing the doorless maze pattern of a darkroom. (B) Conch shell design for the darkroom. Courtesy: Dr Jaideep Shekhar
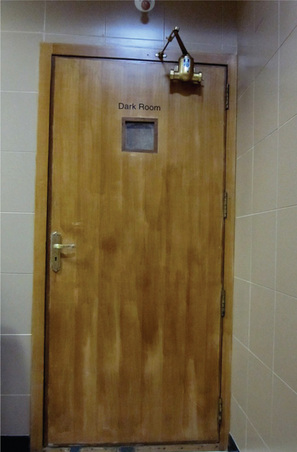
3. In the event of having a door it should be light tight and should have provisions for locking to prevent accidental opening of the door, which might unnecessarily expose the image receptors to visible light (Figure 3).
Darkroom infrastructure (Figure 4)
An ideal darkroom should contain the following:
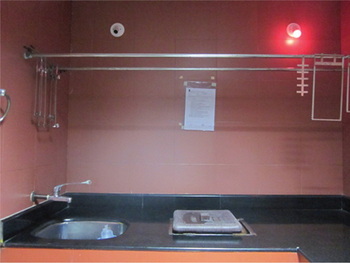
Figure 4 Photograph showing the contents of the darkroom such as the processing tanks, wash basin, drying racks, film holders and safe light
Processing tank
Commercially available tanks comprise of a large master tank and two smaller removable inserts (for the developer and fixer solution) which are placed within the master tank that contains water (Figure 5A). Many of the commercially available master tanks measure 8 X 10 inches and the smaller tanks hold about 9 liters of the fixer and developer solution.
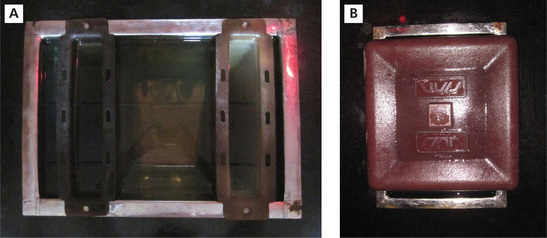
Figure 5 (A) Master tank with water and containing the developer and fixer solution tanks. (B) Master tank covered with a lid when not in use
The master tank holds either running water or water stored at room temperature. The temperature of the water in the master tank will help regulate the temperature of the developer and fixer. The water contained in the master tank is also used for rinsing the film during processing. A lid should always be placed over the tank to minimize the oxidation of the processing solutions by atmospheric oxygen and evaporation (Figure 5B).
Safe light and visible light illumination
Visible light illumination can be in the form of ceiling or wall mounted light source (Figure 6A). However, care should be taken to ensure that these tube lights are switched off during loading the films into cassettes or while processing the films. However, the visible lights may be switched on once the films are placed in the fixer tank.
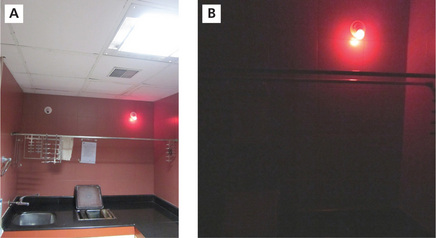
Figure 6 (A) Photograph showing the visible light mounted on the ceiling. (B) 15 W safe light in the orange-red spectrum of light
The safe light should ideally be 15 W bulb in the orange-red-yellow spectrum of light (Figure 5B) as these colors have the longest wavelength and low penetrating power (X-rays are highly sensitive to blue and green colors). A red GBX-2 filter may be placed over the safe light.
One or two safe lights may be used based on the size of the darkroom. One safe light over the processing tanks (ideally on the right hand side or the fixer solution side of the tank) and one over the working area (place where the films are loaded). The safe lights should ideally be placed 4 feet above the working area and processing tanks (Figure 6B).
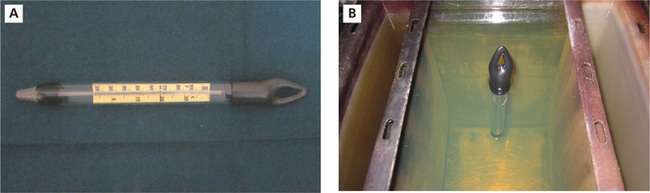
Floating thermometer and stop clock
A floating thermometer (Figure 7A) and stop clock are used for the time-temperature method of processing films. The thermometer helps to assess the temperature of the processing solutions so that the duration for which the film should be developed is known. The thermometer is left floating in the water in the master tank prior to the processing (Figure 7B). Alcohol containing thermometer is preferred as mercury containing thermometers may contaminate the processing solutions in the event of a breakage. The stop clock helps to set the exact time for the developing procedure.
Drying racks and film hangers
Drying racks should strategically be located above the washing area in the darkroom. Once the films are removed from film hangers after drying, the empty hangers should be thoroughly rinsed and left to hang dry over the drying racks (Figure 8).
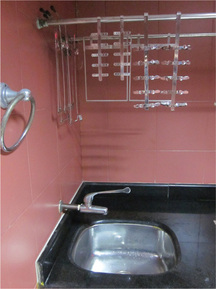
Presence of any remnant fixer solution remaining on the hangers may result in faulty radiographs in the form of light spots. Water droplets on the hangers may produce watermarks on the films, which might obscure diagnostic details in the radiographic image.
Stay updated, free dental videos. Join our Telegram channel
VIDEdental - Online dental courses


