3
Surgical Guide and Diagnostic Stent
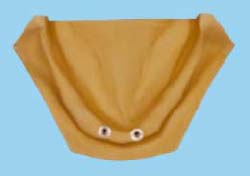
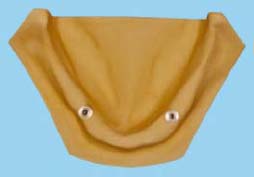
Some clinicians think that the use of a surgical guide for overdenture candidates is unnecessary. Improper implant arrangement in overdenture patients, however, can compromise the design of the attachment assembly and retention of the prosthesis and lead to difficulty in fabrication of the prosthesis and difficulty in maintaining good oral hygiene around the implants and attachment assembly (Figures 3.1 and 3.2).
Because implant treatment is prosthetic driven, the restorative dentist should make and design the surgical guide, and the guide should dictate the position of the implants based on the planned attachment assembly.
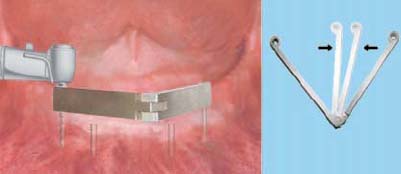
However, when placing two implants and two stud attachments in the anterior mandible, the use of the surgical guide can be replaced by utilizing a paralleling device (Figure 3.3).
If the overdenture design includes a bar attachment assembly, the use of a surgical guide is required, because the length of the bar and its sagittal relationship with the alveolar ridge have a direct effect on the mechanical properties of the attachment assembly, as well as the long term prognosis of the treatment.
When the patient’s treatment requires a rigid, non-resilient, fixed detachable overdenture (hybrid prosthesis), the use of an accurate surgical guide is necessary. In this situation, the distribution of the implants will determine the anterior posterior distance (AP distance) and ultimately the amount of the distal cantilever.
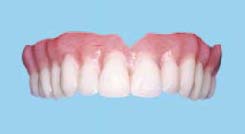
The surgical guide is made of acrylic and usually is the duplicate of the patient’s transitional denture (Figures 3.4 and 3.5).
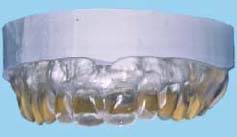
Avoid duplicating a poorly made existing denture. As a general rule, the transitional denture should meet all of the requirements for setting up an accurate denture.
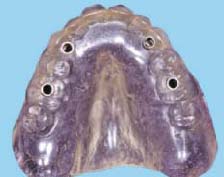
Mark the location of the implants on the surgical guide and then use a milling machine to drill parallel holes through the acrylic (Figures 3.6, 3.7, and 3.8).


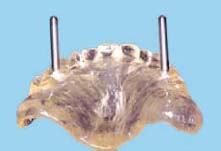
A 3mm pilot is recommended for drilling holes in the acrylic, so that when the surgeon starts preparation of the osteotomy with a 2mm pilot drill, the drill does not come in contact with the acrylic. The pilot should go through the holes passively. Otherwise, any contact between the pilot and acrylic would drive acrylic particles into the osteotomy. The ideal situation is to use 2.5mm or 3mm titanium or stainless cylinders and insert them inside of the surgical guide (Figure 3.9). These cylinders allow the surgeon to pass the pilot drill through the metal sleeves instead of the acrylic holes. These cylinders should be installed in the acrylic with proper trajectories.
CLASSIFICATION OF SURGICAL GUIDES
Surgical guides are classified based on their relationship with the underlying tissues, as described in the following sections.
Gingiva Supported
Typically the surgical guide should be utilized before raising the flap since the elevated flap prevents accurate fitting of the surgical guide. This type of surgical guide is an ideal choice for the biopsy punch (flapless surgery) surgical technique as well as the flap surgery with minimum reflection (Figure 3.10/>
Stay updated, free dental videos. Join our Telegram channel
VIDEdental - Online dental courses


