CHAPTER 24 Implant Prosthodontics: Fixed and Fixed-Detachable Prosthesis Design and Fabrication
PROSTHESIS SUPPORT REQUIREMENTS
The surgeon must give special consideration to oral hygiene when planning a low-rise prosthesis (see Chapter 29). The patient’s manual dexterity plays an important role in the amount of home care that can be done, and the practitioner must consider this factor when selecting the type and design of the superstructure.
The UCLA abutment (with or without a metal collar), zirconium abutments, and similar custom-cast abutments should be used when reorientation, reangulation, or esthetic demands require that no metallic implant, collar, or transepithelial abutment (TEA) material be seen at the gingival margin. If, for example, less than 1 mm of gingival tissue overlies the implant, when the implant is uncovered, the standard TEA (1 mm or more in height) places the margin of the restoration supragingivally. In such cases, a specially designed abutment is attached to the implant, solving the cosmetic problem (Fig. 24-1).
PREPARATORY PHASES
Staging
Submergible (Two-Stage) Implants
Abutments (TEAs) for submergible implants are designed to be attached after integration has taken place. Implants are allowed to integrate for 4 to 6 months after surgery, depending on their location. If desirable, existing or new removable or fixed prostheses are used during this period; the surgeon should opt for a design that spares the operative sites from contact. If this is not possible, the ridge laps over the implant sites are relieved and relined with a soft material. (Chapter 20 presents the details of temporization.) Once the integration period has been completed, each implant is ready to receive its TEA. (The proper selection and methods of attachment of abutments are presented in Chapter 22.)
Provisional Prostheses
After the TEAs have been placed, they require a temporary prosthesis. This protects the abutment heads, provides the patient with a more stable interim prosthesis, and adds comfort. It also establishes esthetics, tooth form, and occlusal stability. The temporary prosthesis sometimes is referred to as a provisional prosthesis. Detailed instructions on the selection, conversion, and fabrication of interim prostheses are presented in Chapter 20.
IMPRESSION MAKING
Fixed Cementable Prostheses
Single-Stage Implants
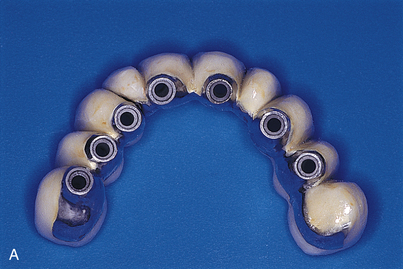
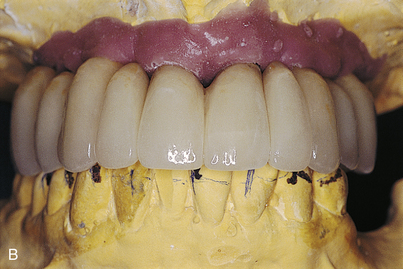
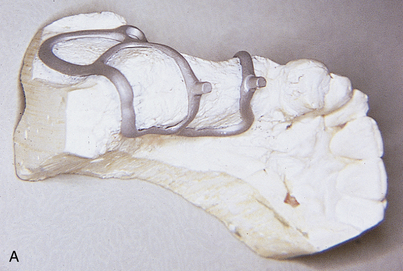
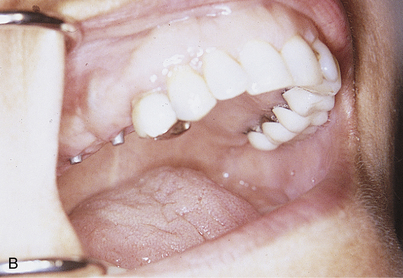
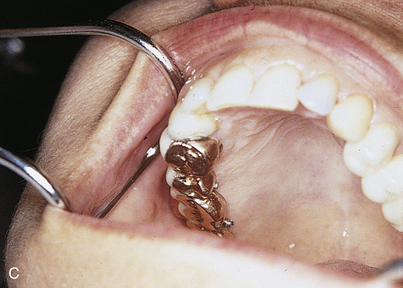
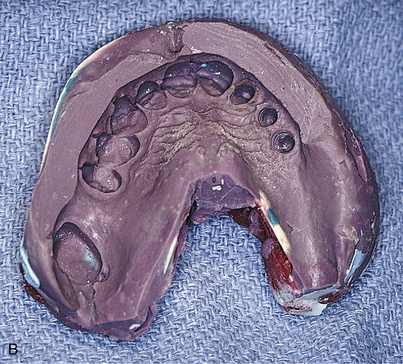
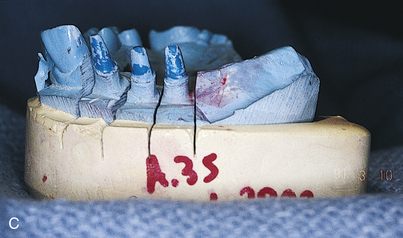
In single-stage implants (e.g., blade, subperiosteal, and Zimmer’s one-piece root form implants), the abutments are attached. A working or master cast is created so that a final prosthesis can be fabricated. To make this cast and its dies, an impression of the abutments is made using any comfortable technique. First, alginate is used in a stock tray. A cast is poured, and a custom resin impression tray is prepared. Any conventional technique can be used, with judicious application of gingival retraction cord around teeth and, if necessary, around implants. Elastomeric impression materials are recommended. All dies are poured in epoxy resin for strength (Figs. 24-2 and 24-3).
Two-Stage Implants
Threaded Abutments: One-Piece (Without Collars)
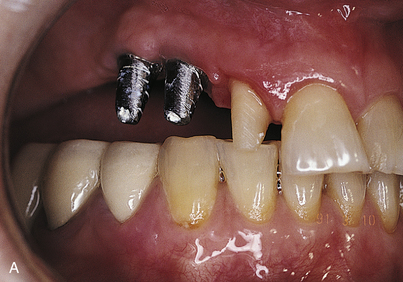
If the alignment of the TEAs is acceptable after initial placement, each is scored with a ¼-inch round bur at the gingival margins. This level is important to record in areas of esthetic concern. The TEAs are numbered with the same bur, returned to the mouth, and packed with retraction cord. An impression is then made in the conventional manner.
The scoring shows the laboratory where to end the restorations, or the laboratory can shorten the margins and return the abutments for a new master impression. One of these strategies is necessary, because this device has no shoulders or finishing lines to indicate where the crowns must terminate. The laboratory should pour the impression in epoxy resin and then proceed with fabrication of the superstructure (Fig. 24-4).
After the abutments have been tightened securely to the implants and complete seating has been confirmed radiographically, the appropriate transfer copings are screwed to the abutments. As an alternative, direct impressions of the implants can be made. This requires acquisition and placement of abutment analogs for each implant. Impressions are made with either a closed or an open top tray, depending on the design of the transfer device. The procedure for doing this is as follows (Fig. 24-5):
Stay updated, free dental videos. Join our Telegram channel
VIDEdental - Online dental courses


