Instruments, Handpieces, and Accessories
Learning Objectives
1 Pronounce, define, and spell the Key Terms.
2 Identify hand instruments used for the examination of a tooth, and state their use.
3 Identify hand instruments used for the preparation of a tooth, and state their use.
4 Identify hand instruments used for the restoration of a tooth, and state their use.
5 Discuss the purpose of rotary instruments and their importance in restorative dentistry.
6 Identify dental handpieces by speed and/or type, and state their use.
7 Identify dental burs by basic shapes, materials, and number series.
Key Terms
Burs
Friction-Grip
Handpiece
Instruments
Latch-type
Manipulated
Rotary
Torque
This chapter is designed to provide you with an overview of the dental hand instruments, handpieces, and accessories frequently used in restorative dentistry. Having knowledge of this equipment allows the dental assistant to prepare tray setups for a procedure, anticipate the transfer of instruments, and maintain inventory. Many of the skills required of assistants are based on their ability to identify and understand the uses of this equipment.
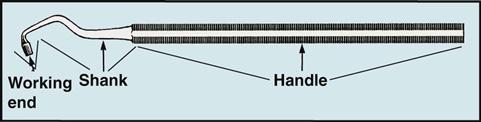
Hand Instruments
Dental hand instruments are named so because they are held and manipulated by the hand. (Manipulated is the manner in which an instrument is managed and used skillfully.) Each hand instrument has a specific purpose and is used for a specific technique. As you learn to identify new instruments, it is important to understand that manufacturers of instruments will design several styles of the same instrument to accommodate personal preferences.
Hand Instrument Design
Each hand instrument is made up of three parts. See Table 19-1 to review these parts.
TABLE 19-1
< ?comst?>
 |
|
| Parts | Function |
| Handle | Portion of the instrument where the operator grasps or holds the instrument. Designed in various shapes, sizes, and textures to accommodate handling the instrument. |
| Shank | Portion of the instrument that connects the handle and the working end. May contain bends and angles to allow the operator better accessibility. |
| Working end | Portion of the instrument with a specific function. This end can have a point, blade, or nib for use on the tooth structure or soft tissue. |
< ?comen?>< ?comst1?>
< ?comst1?>
< ?comen1?>
Types of Hand Instruments
Hand instruments are designed for and used in all types of dental procedures. The types of instruments discussed in this chapter are used for restorative procedures. These types of instruments are used in the setup for amalgam and composite resin procedures.
Restorative instruments can be assigned to one of four categories.
1 Examination instruments allow the dentist to examine the health status of the teeth and oral cavity (Table 19-2).
See Procedure 19-1: Identifying Examination Instruments.
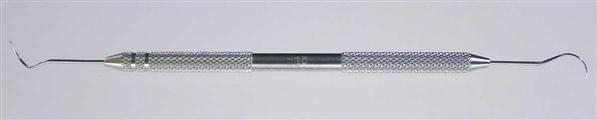
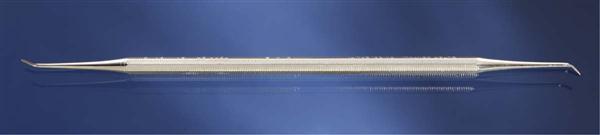
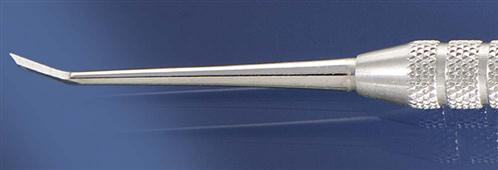
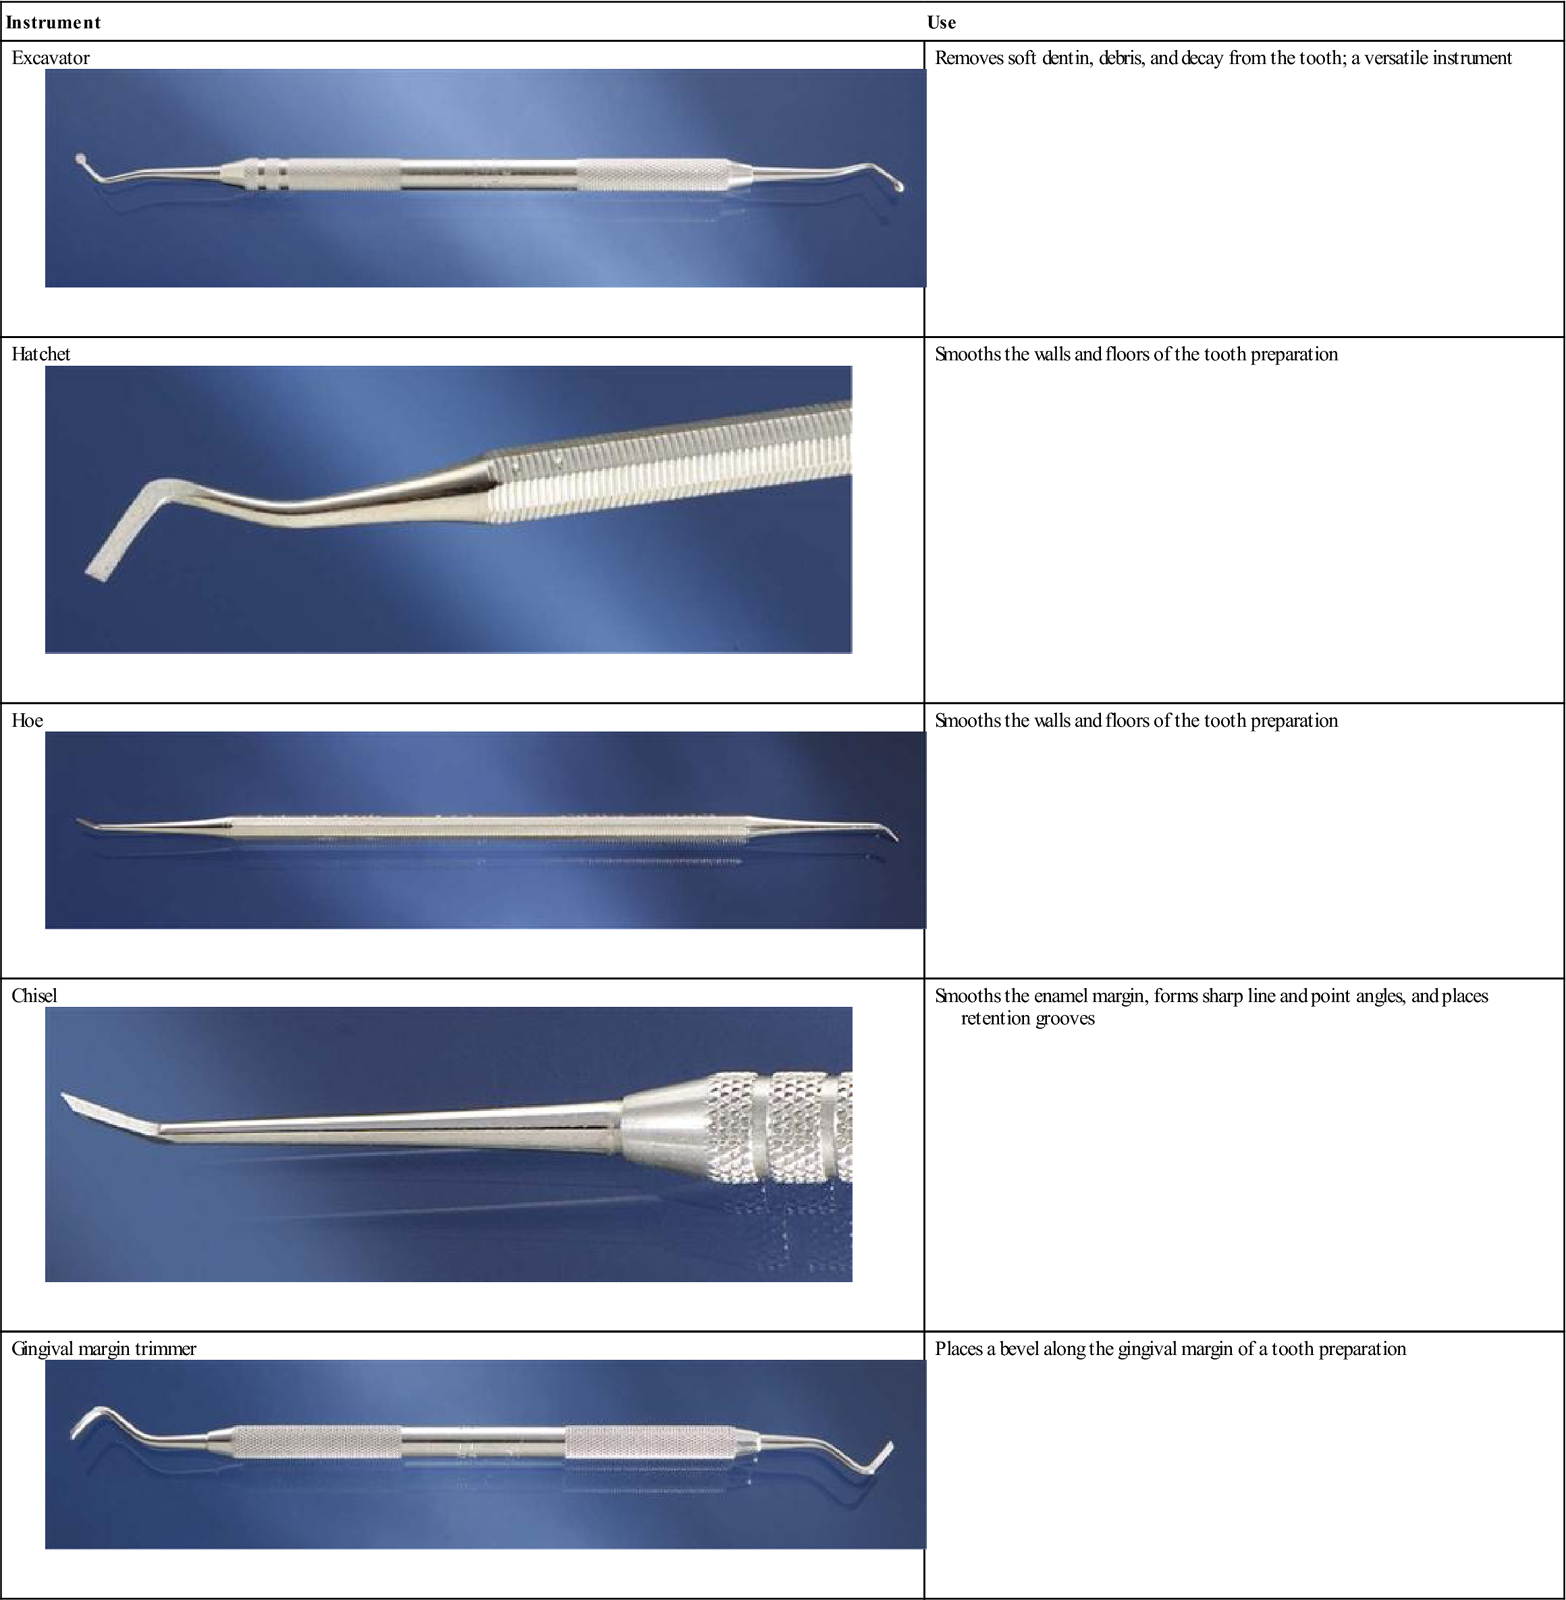
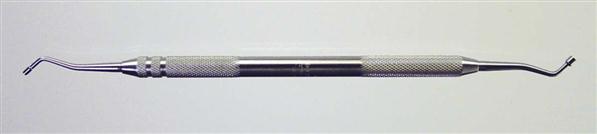
2 Tooth preparation instruments allow the dentist to manually remove decay and to smooth, finish, and prepare the tooth structure to be restored back to its normal function (Table 19-3).
See Procedure 19-2: Identifying Hand (Manual) Cutting Instruments.
3 Restorative instruments allow the dentist to place, condense, and carve the dental material to the original anatomy of the tooth structure (Table 19-4).
See Procedure 19-3: Identifying Restorative Instruments.
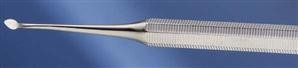
4 Accessory instruments are the multipurpose instruments added to the setup of many procedures. These types of instruments are used in preparing the setup, carrying things to the mouth, or in the application or placement of the dental material easier (Table 19-5).
See Procedure 19-4: Identifying Accessory Instruments and Items.
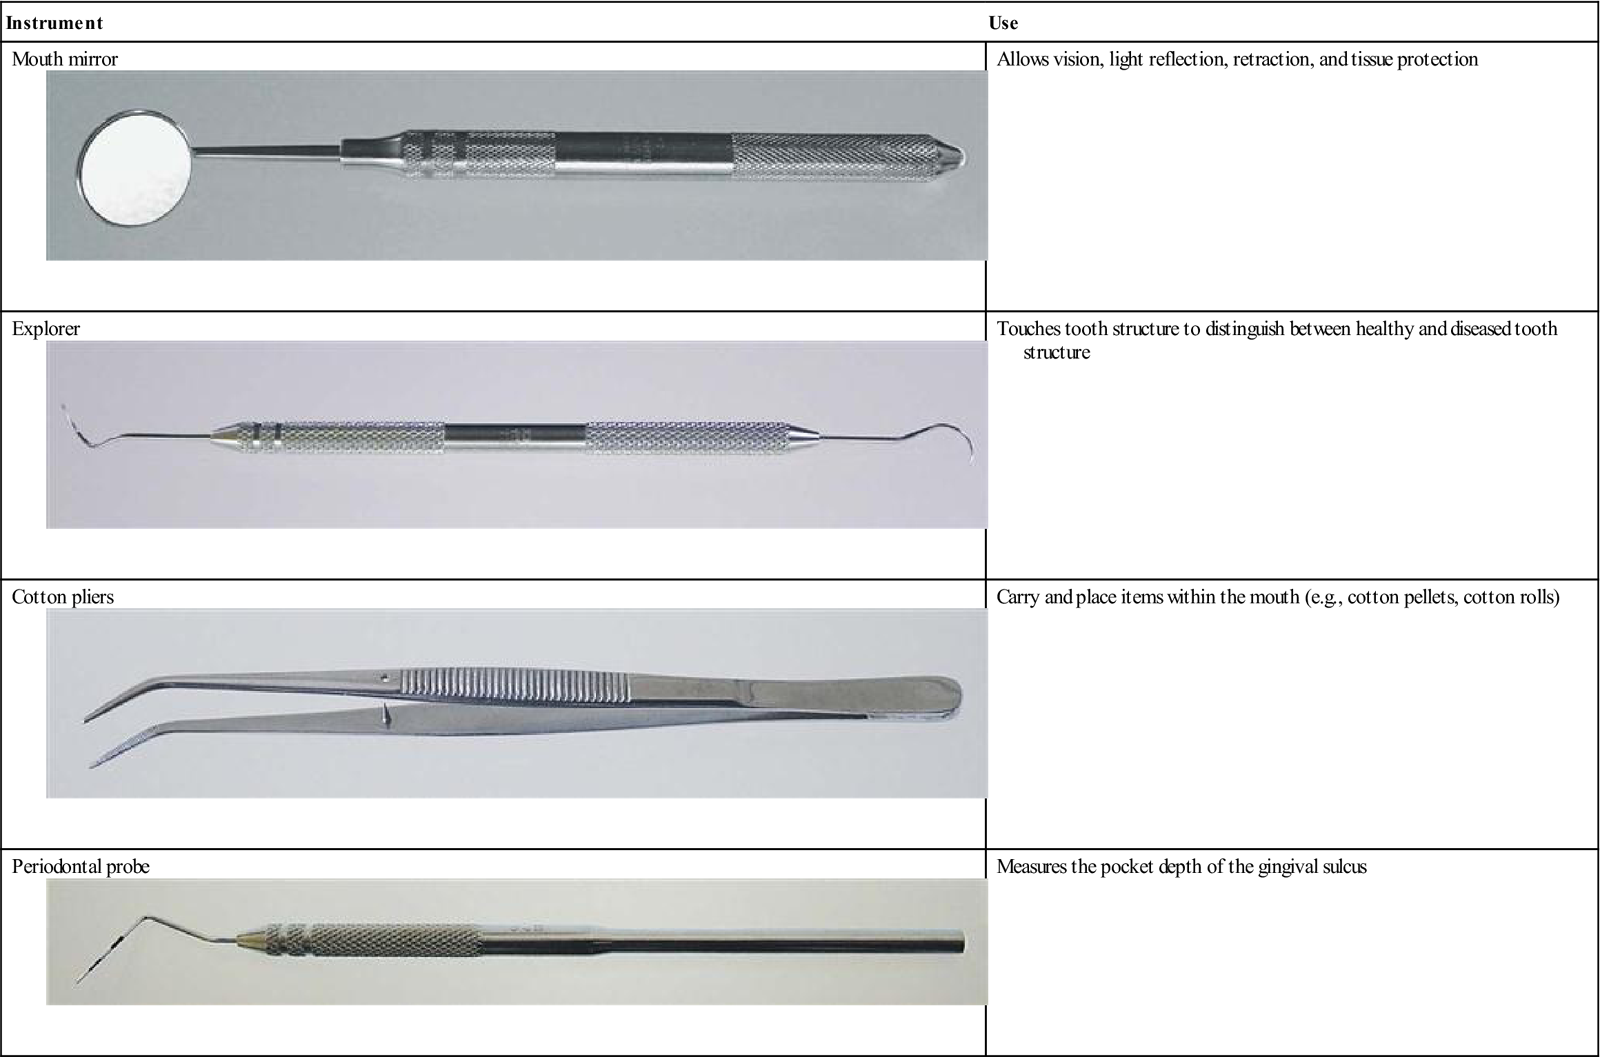
TABLE 19-2
< ?comst?>
| Instrument | Use |
Mouth mirror
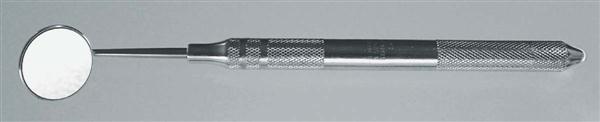 |
Allows vision, light reflection, retraction, and tissue protection |
Explorer
 |
Touches tooth structure to distinguish between healthy and diseased tooth structure |
Cotton pliers
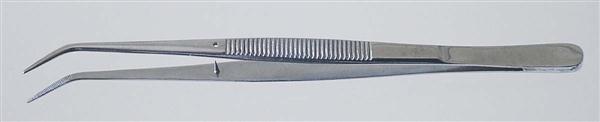 |
Carry and place items within the mouth (e.g., cotton pellets, cotton rolls) |
Periodontal probe
 |
Measures the pocket depth of the gingival sulcus |
< ?comen?>< ?comst1?>
< ?comst1?>
< ?comen1?>
Images from Boyd LRB: Dental instruments: a pocket guide, ed 4, St Louis, 2012, Saunders.
TABLE 19-3
< ?comst?>
| Instrument | Use |
Excavator
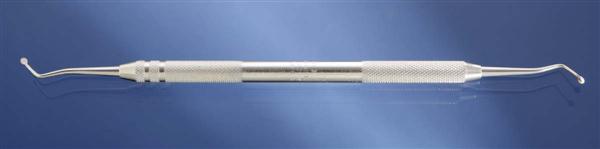 |
Removes soft dentin, debris, and decay from the tooth; a versatile instrument |
Hatchet
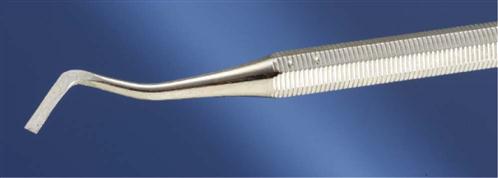 |
Smooths the walls and floors of the tooth preparation |
Hoe
 |
Smooths the walls and floors of the tooth preparation |
Chisel
 |
Smooths the enamel margin, forms sharp line and point angles, and places retention grooves |
Gingival margin trimmer
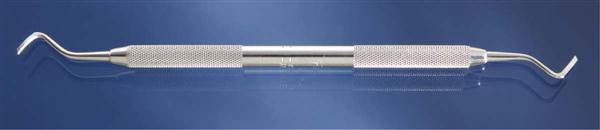 |
Places a bevel along the gingival margin of a tooth preparation |
< ?comen?>< ?comst1?>
< ?comst1?>
< ?comen1?>
Images from Boyd LRB: Dental instruments: a pocket guide, ed 4, St Louis, 2012, Saunders.
TABLE 19-4
< ?comst?>
| Instrument | Use |
Amalgam carrier
 |
Used to carry amalgam to the prepared tooth |
Amalgam condenser
 |
Condenses amalgam into the tooth preparation |
Discoid-cleoid carver
 |
Carves the amalgam on the occlusal surface to create a normal anatomic appearance |
Hollenback carver
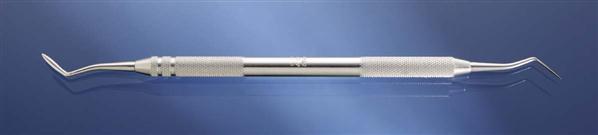 |
Carves the amalgam at the proximal surfaces to create a normal anatomic appearance |
Burnisher
 |
Smooths and burnishes the amalgam before the material hardens |
Composite instrument
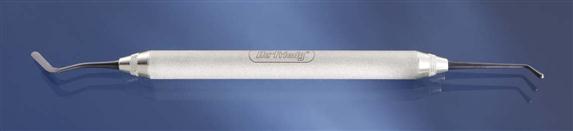 |
Carries and helps adapt the composite resin material to the tooth preparation |
< ?comen?>< ?comst1?>
< ?comst1?>
< ?comen1?>
Images from Boyd LRB: Dental instruments: a pocket guide, ed 4, St Louis, 2012, Saunders.
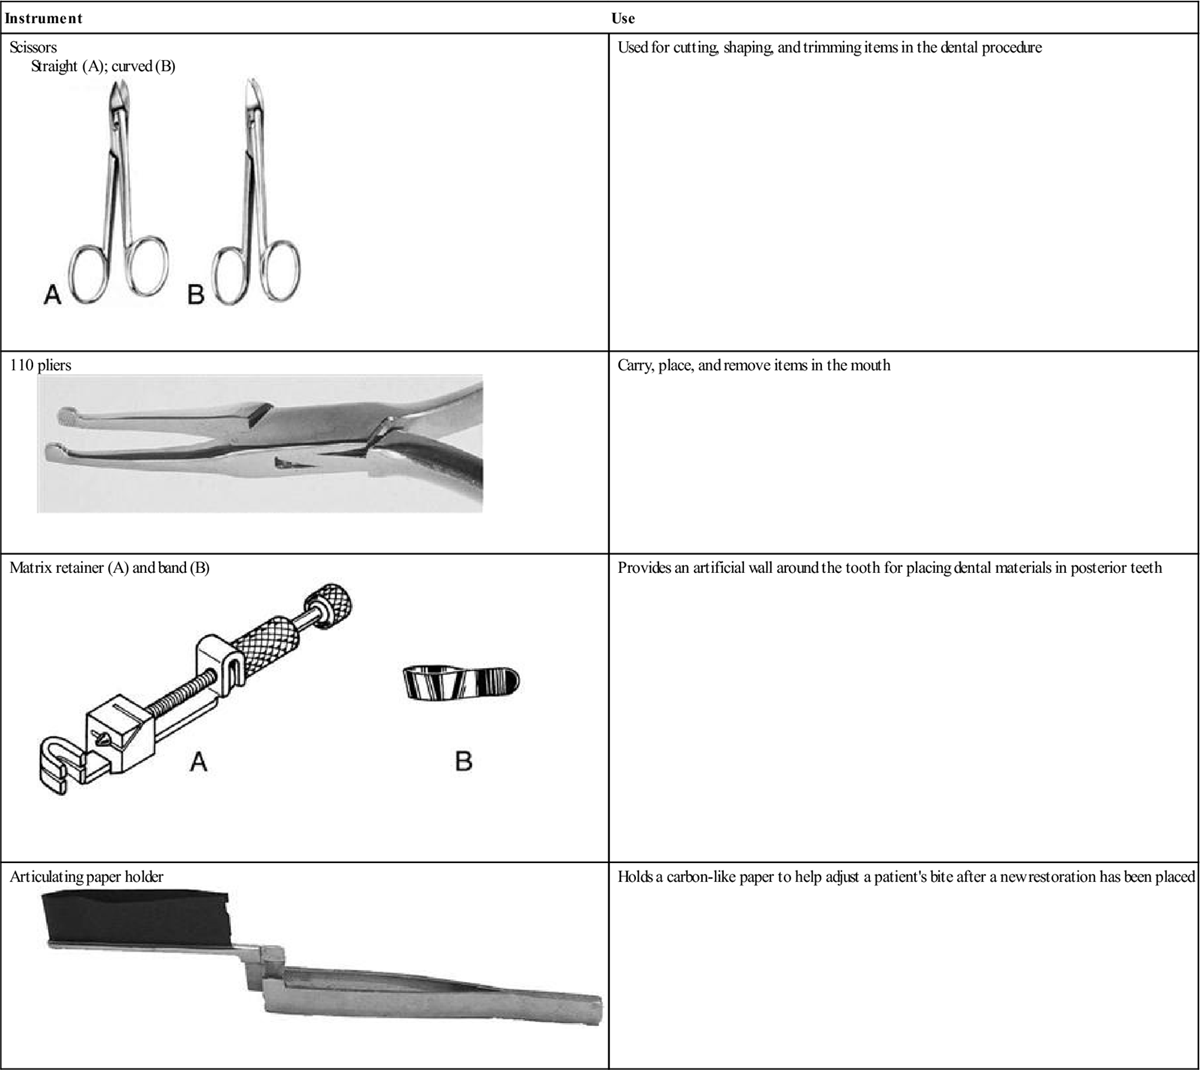
| Instrument | Use |
| Scissors Straight (A); curved (B) 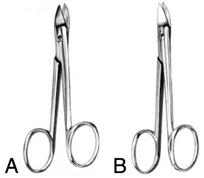 |
Used for cutting, shaping, and trimming items in the dental procedure |
110 pliers
 |
Carry, place, and remove items in the mouth |
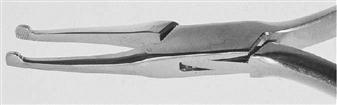
Matrix retainer (A) and band (B)
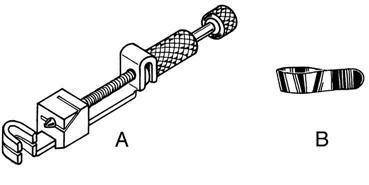 |
Provides an artificial wall around the tooth for placing dental materials in posterior teeth |
Articulating paper holder
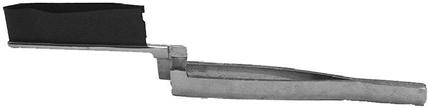 |
Holds a carbon-like paper to help adjust a patient’s bite after a new restoration has been placed |
< ?comen?>< ?comst1?>
< ?comst1?>
< ?comen1?>
Figures of scissors and matrix retainer and band courtesy Hu-Friedy, Chicago, Illinois.
Instrument Setup and Care
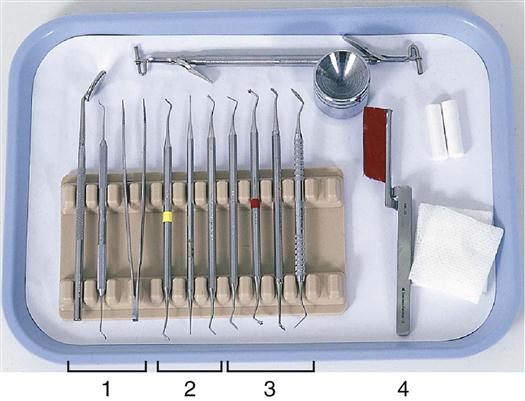
Having everything prior to beginning a procedure helps by saving time and creating a team approach to the procedure. Instruments must be handled with care and organized according to the procedure and their uses (Box 19-1).
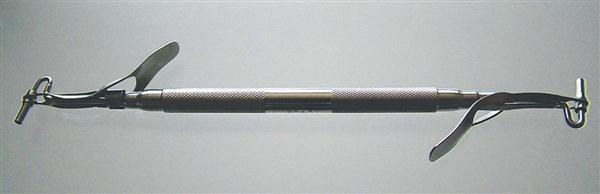
A tray is set up in sequential order from left to right, starting with examination instruments and followed by hand cutting instruments, restorative instruments, and finally, accessory items. The rationale for this sequencing is based on how instruments are transferred and used throughout a dental procedure. Remember, as the clinical assistant, you will be using the left hand for transfer of instruments. Therefore, the most frequently used instruments will be closer to the dentist for ready availability (Figure 19-1).
Rotary Instruments
Rotary instruments include the dental handpiece and revolving mechanisms (which include cutting and finishing burs, polishing tips and points, and abrasive discs and stones) that fit into the handpiece. The combination of the two is a miniature representation of a power tool. Even though many patients identify the handpiece as “the drill,” you will want to educate your patients differently to make it sound less threatening.
The handpiece provides power and rotary motion, whereas the dental bur, which is held securely in the handpiece, does the actual cutting or polishing. Handpieces and burs have a variety of uses in restorative dentistry (Box 19-2). The two most commonly used types of handpieces are the low-speed handpiece and the high-speed handpiece.
Low-Speed Handpiece
The low-speed handpiece is often referred to as the straight handpiece because of its straight-line design (Figure 19-2). This handpiece operates at speeds up to 25,000 revolutions per minute (rpm) and is used for finishing, polishing, and contouring procedures. On occasion, the low-speed handpiece is used for decay removal and fine finishing of the cavity preparation.

Stay updated, free dental videos. Join our Telegram channel
VIDEdental - Online dental courses


