Chapter 17
How to Make a Splint
How Do You Make a Stabilisation Splint?
Upper and lower models of the patient’s dental arches are cast from alginate impressions using Die-stone.
Facebow Registration
This relates the upper model of the dental arch to the hinges of the articulator in the same spatial relationship as exists between the maxillary teeth and the TMJs. This helps to determine that, during construction of the splint, any opening or closing of the semi-adjustable articulator occurs along the same arc as in the mouth
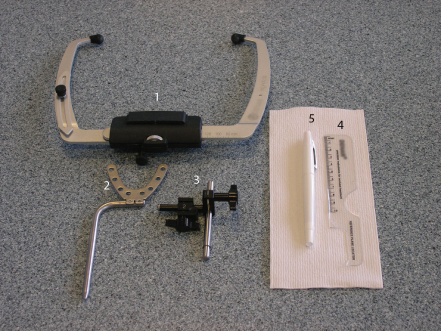
Armamentarium (Figure 17.1)
- Earbow
- Bitefork and vertical transfer jig assembly
- Reference plane locator
- Marker pen
- Rigid bite registration material or beauty wax.
Figure 17.1 Earbow and accessories needed for facebow registration: (1) Slidematic U-shape earbow; (2) dentate bitefork; (3) transfer jig; (4) reference plane locator; (5) marker pen.
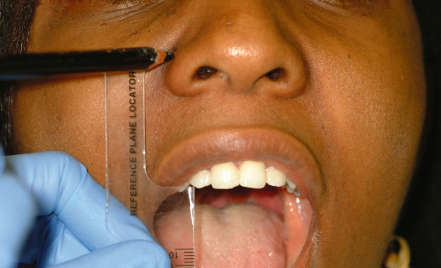
Locating and Marking a Reference Point on the Patient’s Face
An anterior reference point, along with the other two posterior points, needs to be established first for an accurate facebow record. The position of the anterior reference point is measured 43 mm from the incisal edge of the central or lateral incisor, toward the inner corner of the eye. The notched-out area of the ‘reference plane locator’ is used to make this measurement. Mark the anterior reference point on the patient’s face using a marker (Figure 17.2).
Figure 17.2 Marking the anterior reference point.
Taking the Facebow Registration (Assembling the Earbow on the Patient)
Load the upper surface of the bitefork with two thicknesses of beauty wax.
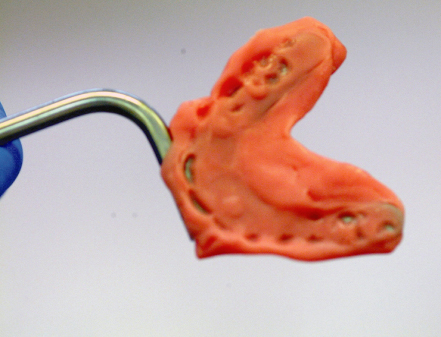
Soften the wax to a very soft consistency in warm water or over an open flame. With the bitefork arm projecting to the patient’s right, place it on to the patient’s upper teeth, aligning midline to obtain a light indexing impression of the maxillary teeth. Stabilise this by instructing the patient to hold it steady using the thumbs. Let the material harden before proceeding (Figures 17.3 and 17.4).
Figure 17.3 The bitefork is placed on to patient’s upper teeth and stabilised by patient’s thumbs.
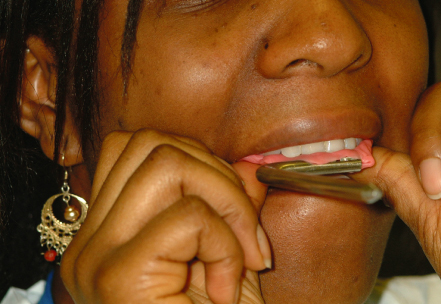
Figure 17.4 Light indexing impression of the maxillary teeth on the bite fork.
Loosen the centre wheel on the earbow and loosen the finger screws on the transfer jig.
Slide the transfer jig onto the bitefork arm and guide the earbow into the patient’s ears with their help. Pull the earbow together and tighten the centre wheel, ensuring even placement in both ear canals (Figure 17.5).
Figure 17.5 The earbow is guided into the patient’s ears.
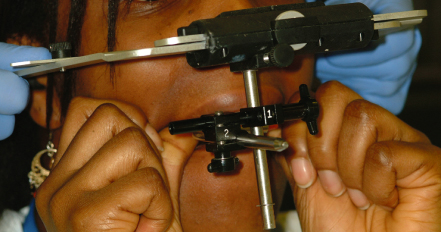
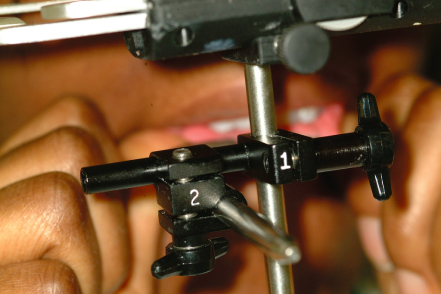
Raise or lower the bow so that the pointer aligns with the anterior reference point on the patient’s face. You can also look through a slot in the bow to verify this. Engage the transfer jig in the earbow and tighten finger screws 1 and 2 on the transfer jig, being careful not to torque the earbow.
Always ensure that the numbers ‘1’ and ‘2’ are the correct way up and facing you (Figure 17.6).
Figure 17.6 The pointer is aligned with anterior reference point on the patient’s face.
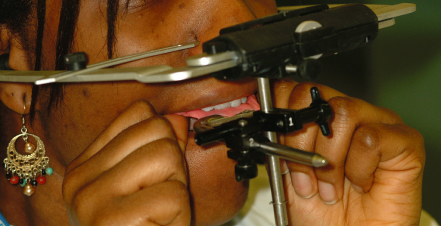
Have the patient stand and, looking at the patient from the front, verify that the bow is horizontal to the horizon and the patient’s pupils. Adjust as necessary and retighten finger screws 1 and 2 as necessary (Figure 17.7).
Figure 17.7 Finger screws 1 and 2 are securely tightened before removing the earbow.
Loosen the centre screw on the earbow; slide open and remove the entire earbow assembly, transfer jig and bitefork from the patient (Figure 17.8).
Figure 17.8 The earbow assembly, transfer jig and bitefork are removed from patient.
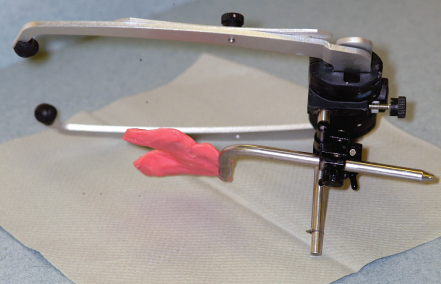
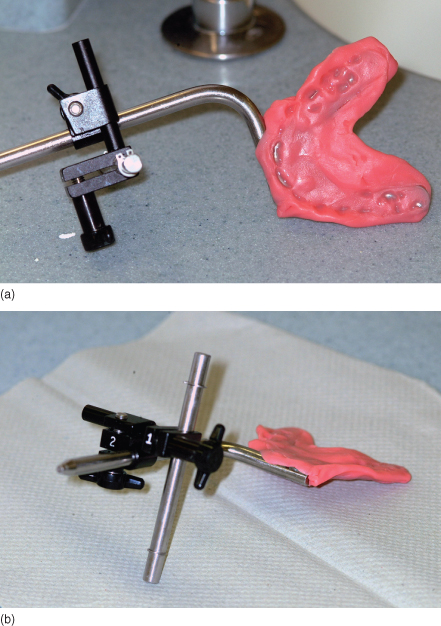
Detach the earbow from the transfer jig assembly. Carefully tighten finger screws 1 and 2, making sure not to torque or change the transfer jig assembly (Figure 17.9).
Figure 17.9 (a) Transfer jig after detachment from the earbow; (b) screws 1 and 2 should be tightened before transferring to the laboratory.
Disinfect the transfer jig assembly and send it to the laboratory for mounting.
Centric Relation />
Stay updated, free dental videos. Join our Telegram channel
VIDEdental - Online dental courses


